How to Set up Pop-Up Campaigns
Learn how to set up pop up campaigns on to easily collect your customer’s WhatsApp number.
Pop-up campaigns are one of the most powerful channels to capture leads, increase engagement, and drive conversions. A perfectly timed pop-up, with properly targeted messaging on the customer journey, will get users to share their WhatsApp number and kick off a chat. To make the most of your pop-up campaigns, it’s essential to have a flow in place to manage your leads and follow up with them promptly.
In this article, we will guide you through two key parts of setting up a successful pop-up campaign and flow:
- Setting up the pop-up to collect WhatsApp numbers.
- Setting up a pre-built flow in FlowHippo to trigger WhatsApp messages.
Setting you the pop-up to collect the WhatsApp numbers, follow these steps:
1. Go to ZOKO.
2. Click on Apps.
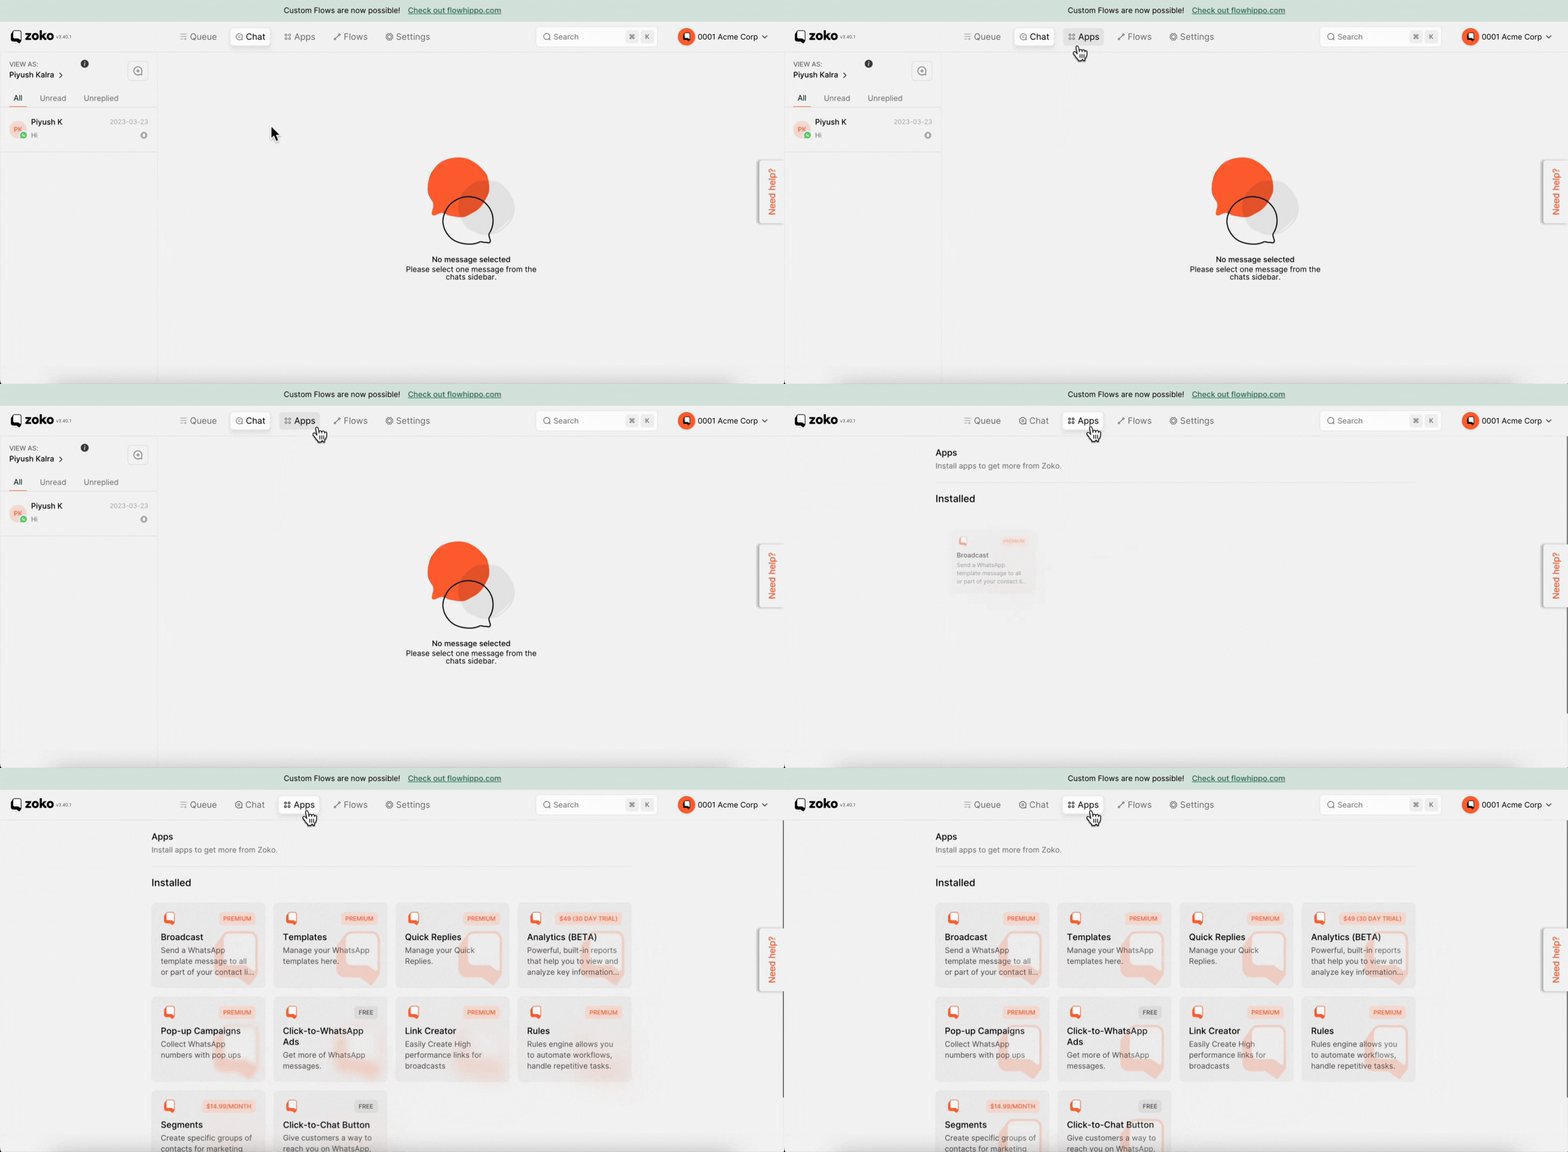
3. Click on Pop-up Campaigns.
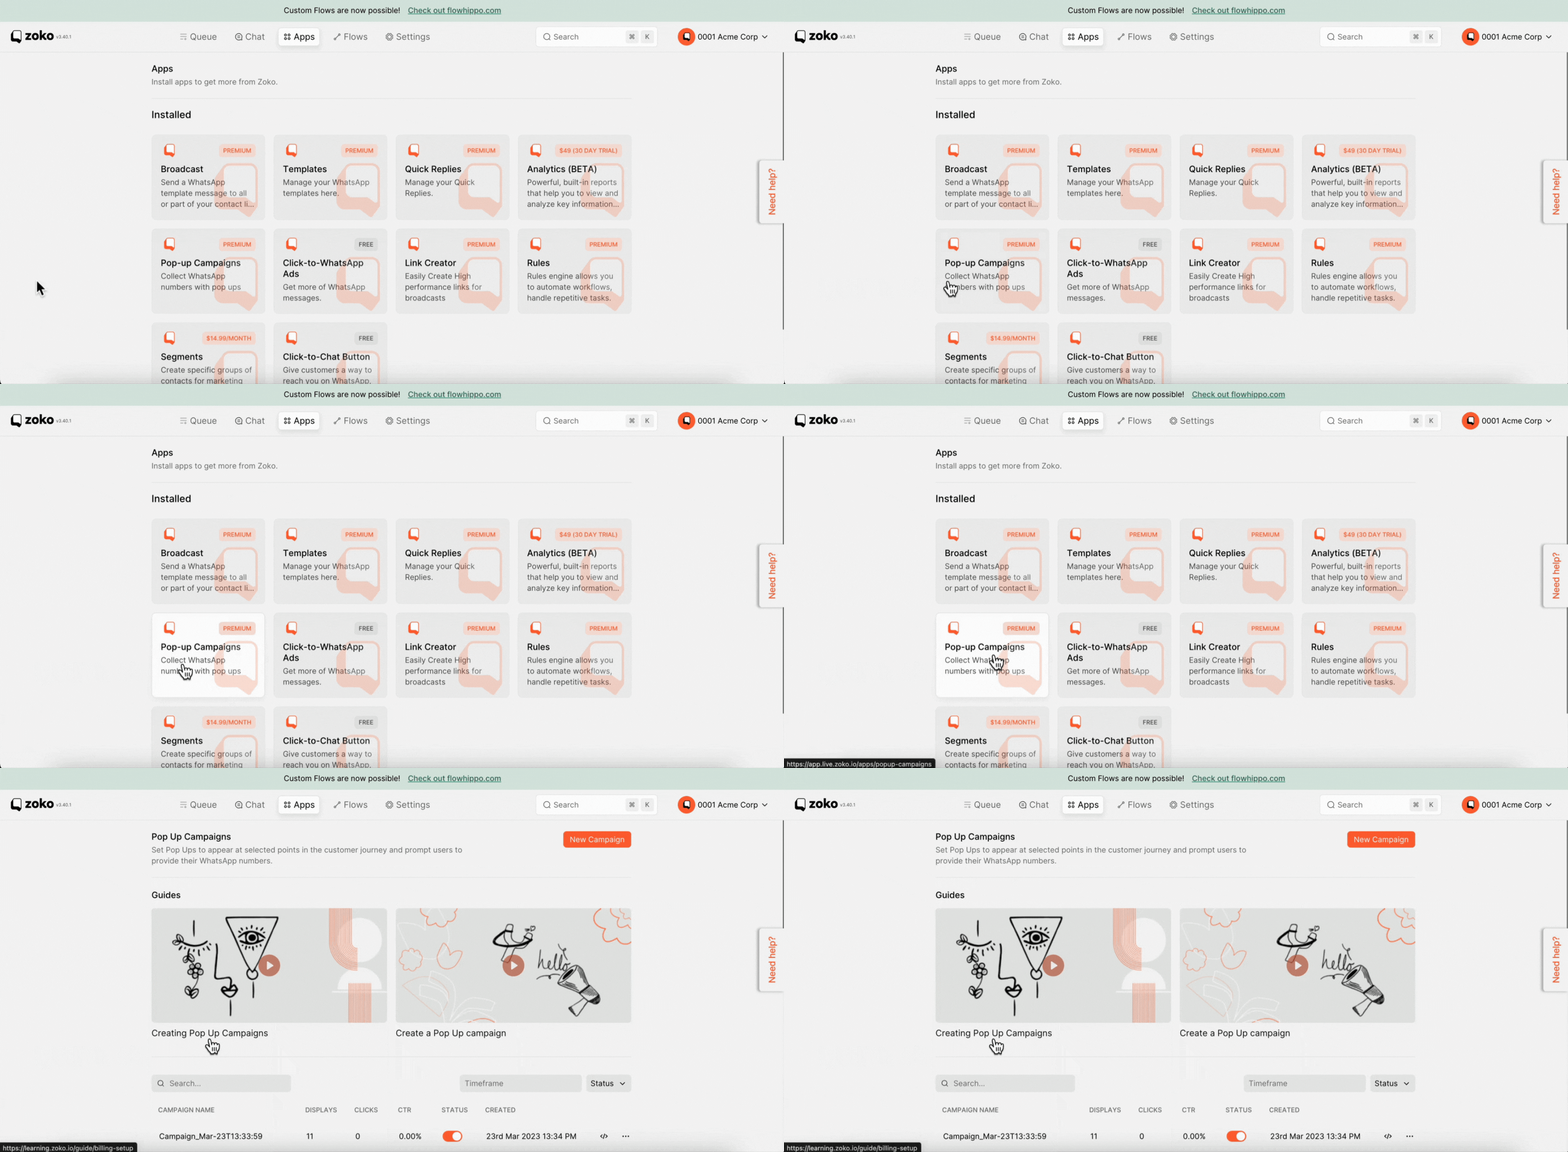
4. Click on New Campaign.

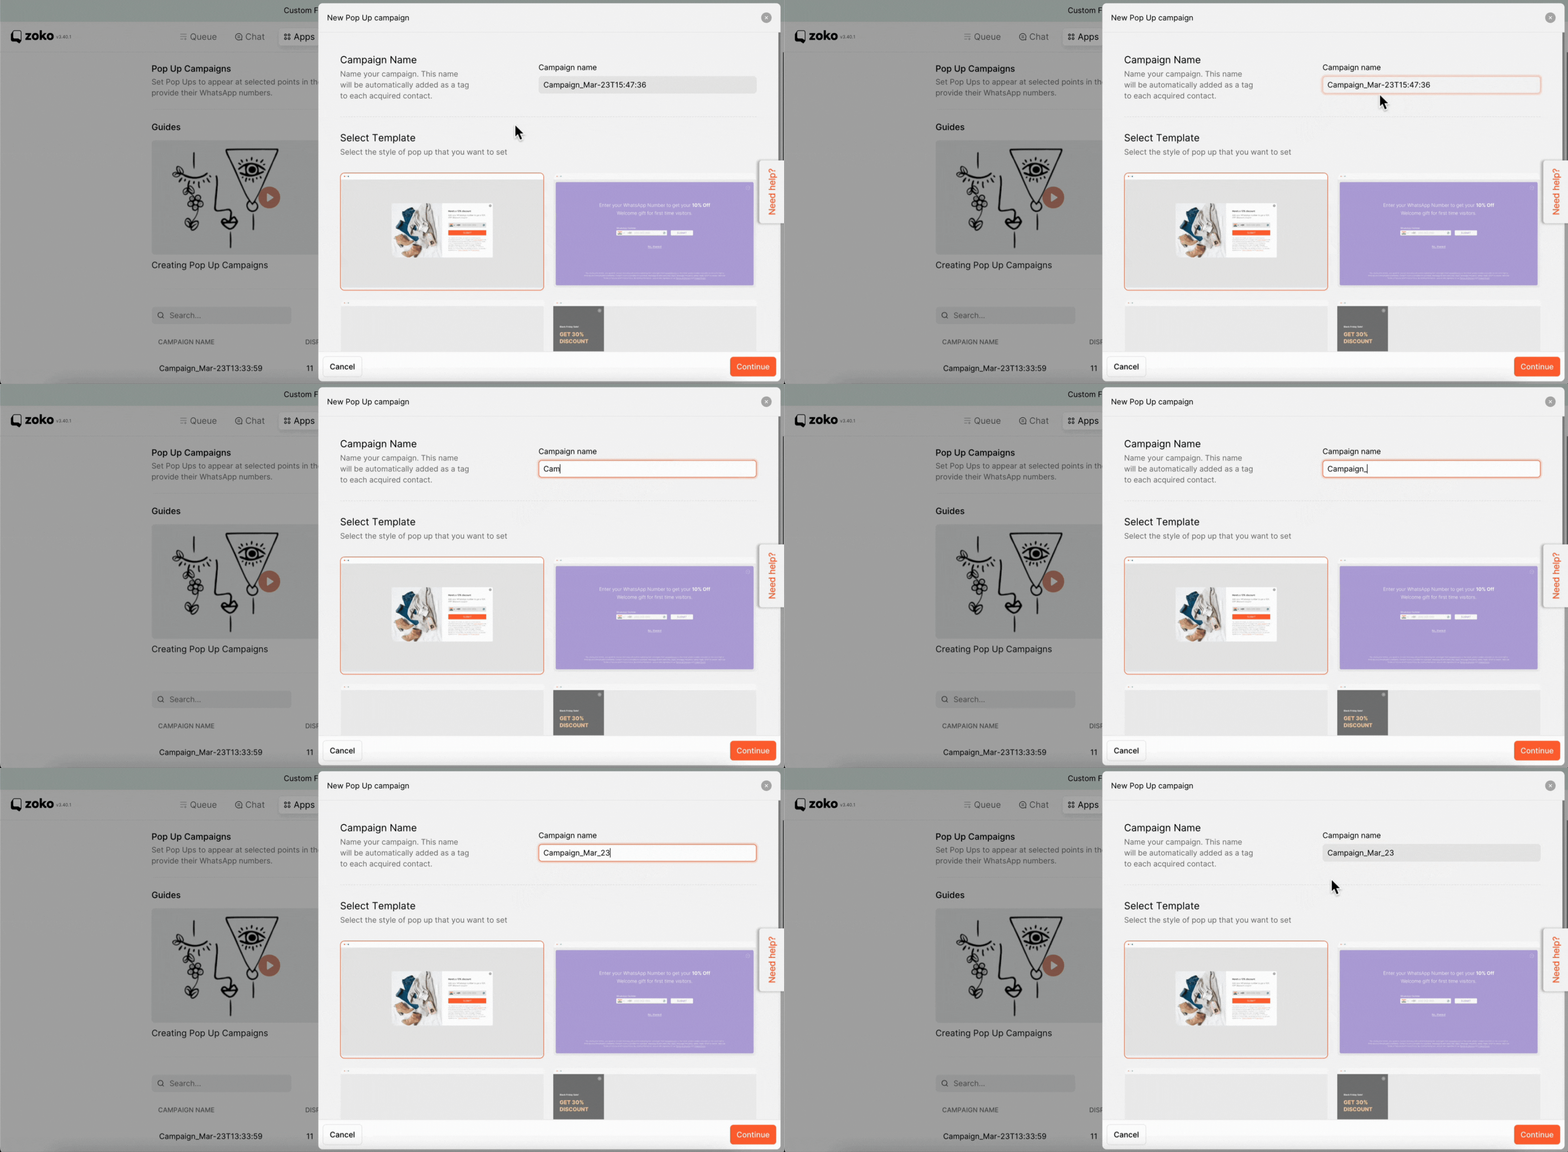
5. Type the Campaign name here. In our case, we set the name as Campaign_Mar_23.
6. Choose the Pop-up template style that you want to set.
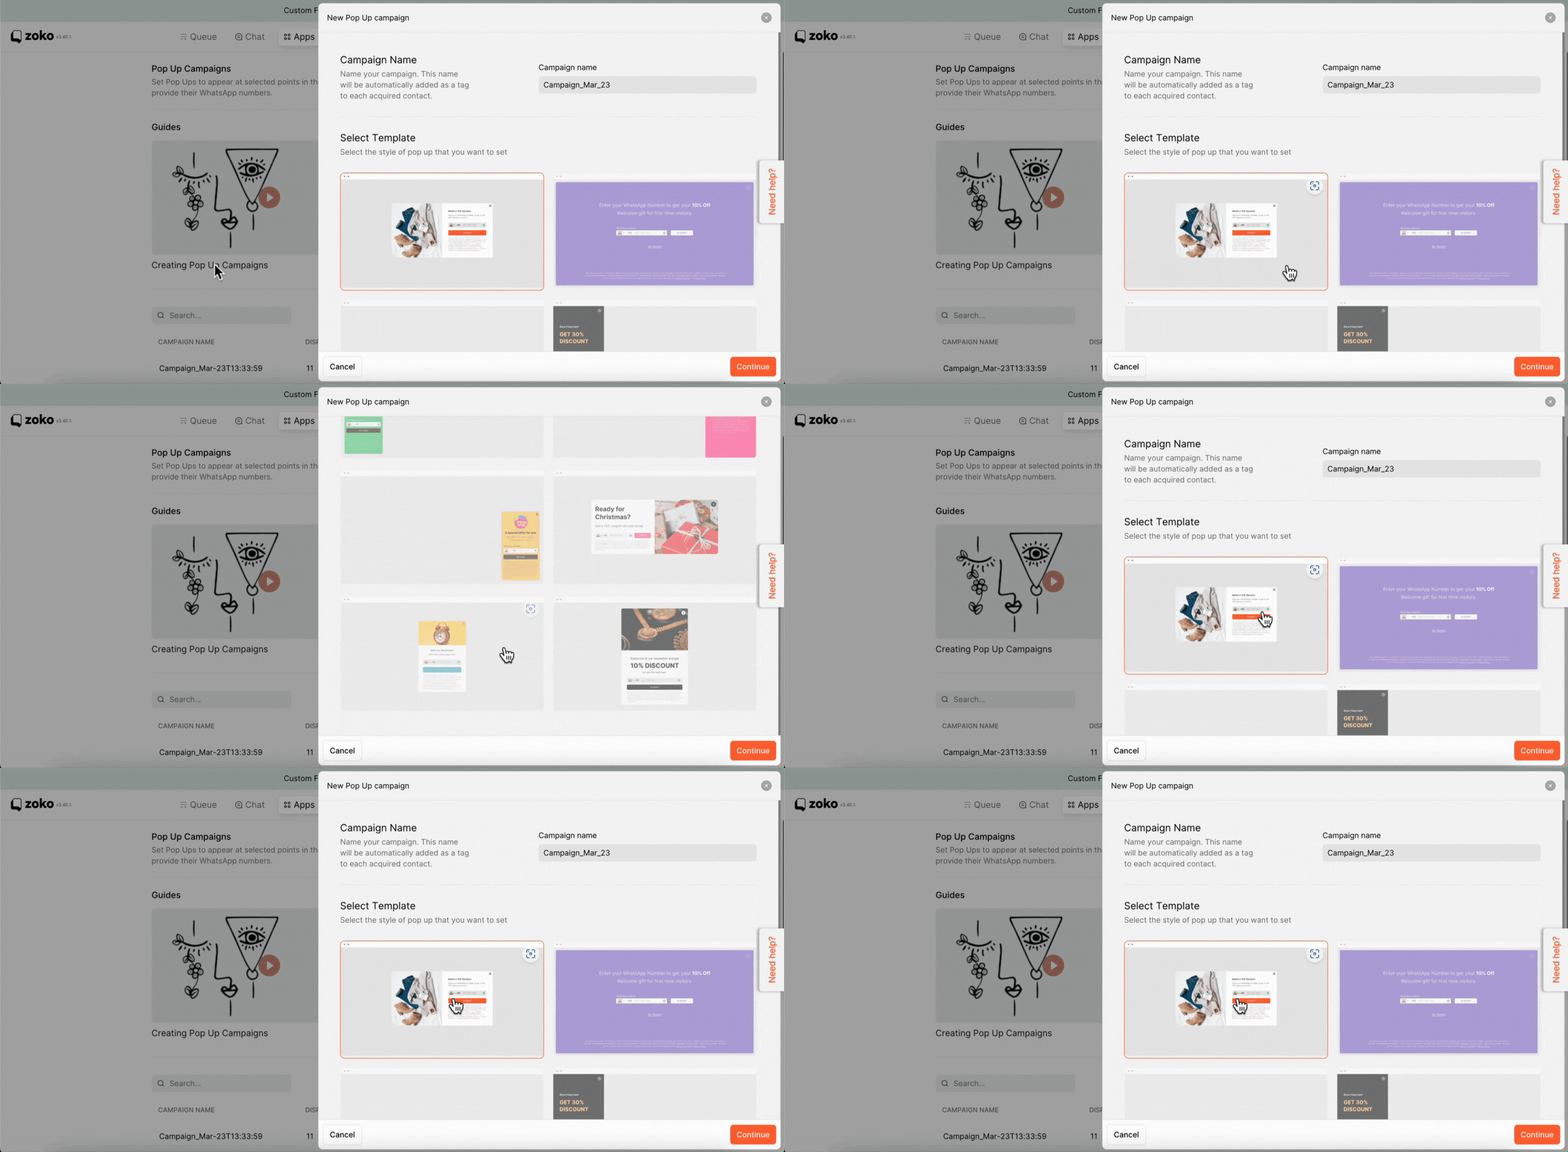
7. Click on Continue.
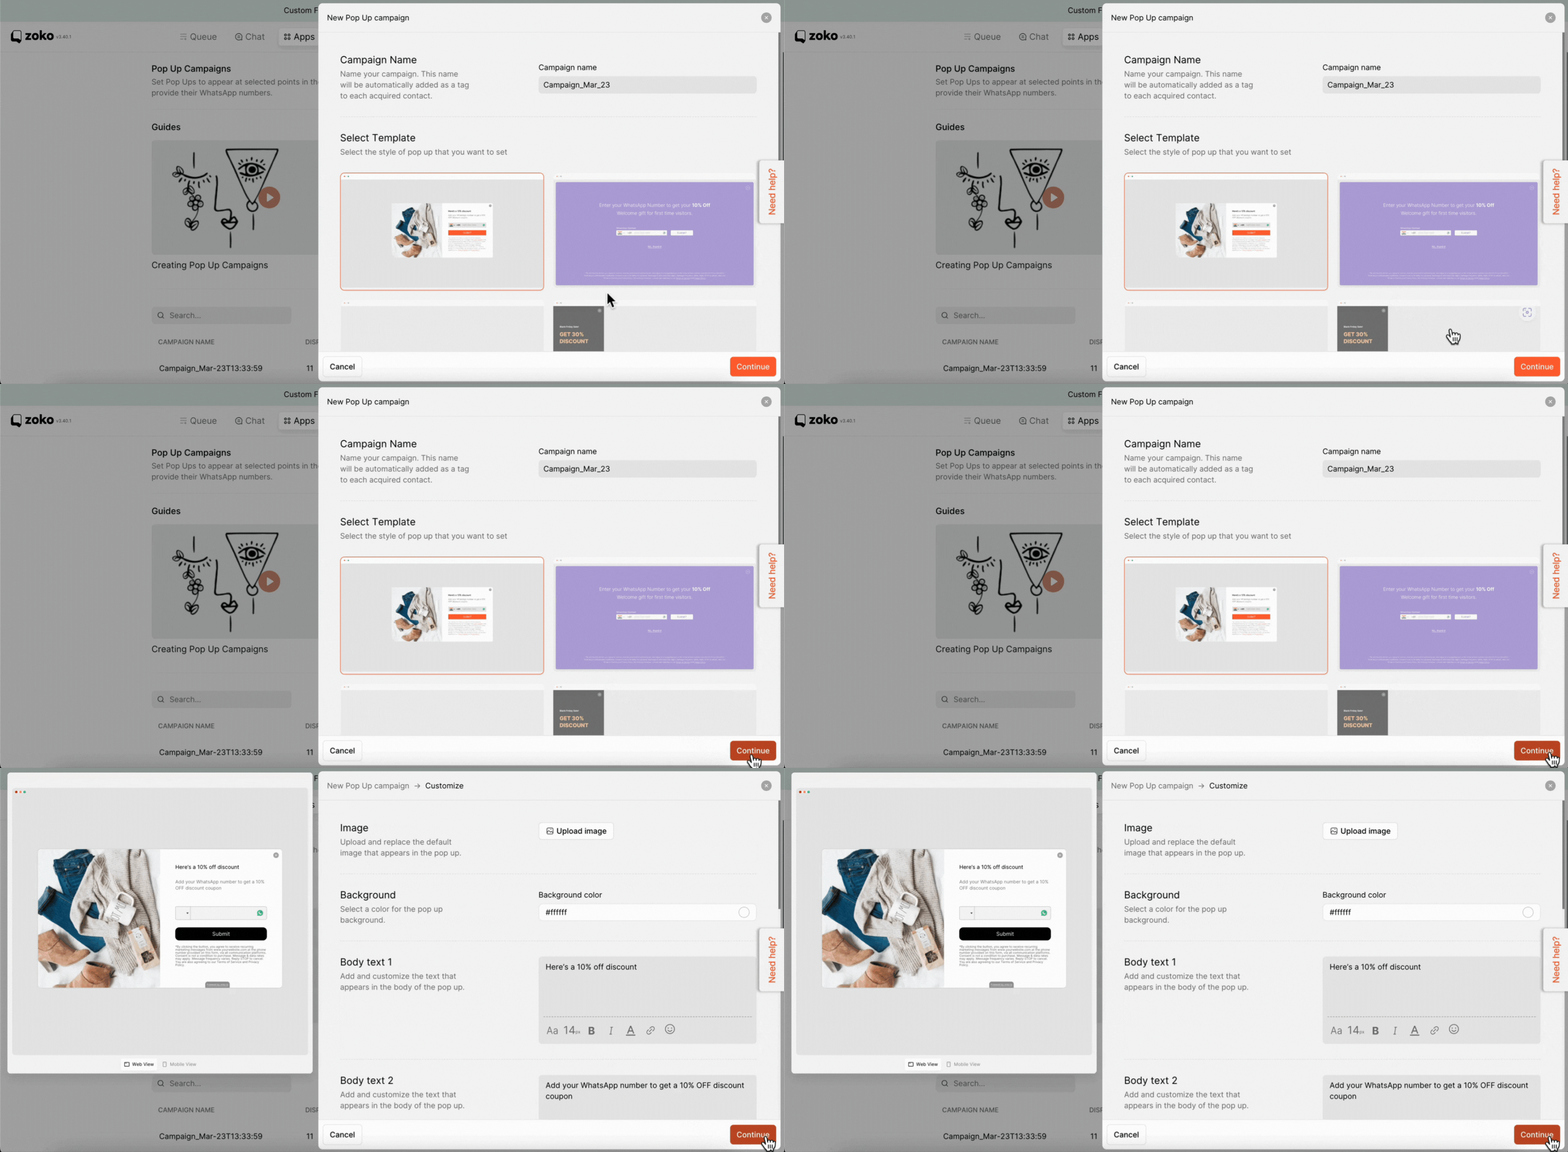
Our pop-up campaign builder is 100% customizable:
1. You can upload your own image by clicking on the Upload Image button.
Note: The upload image option will be available only if the template you selected has an image.

2. Set the background color to match your brand language by clicking on the Color field.
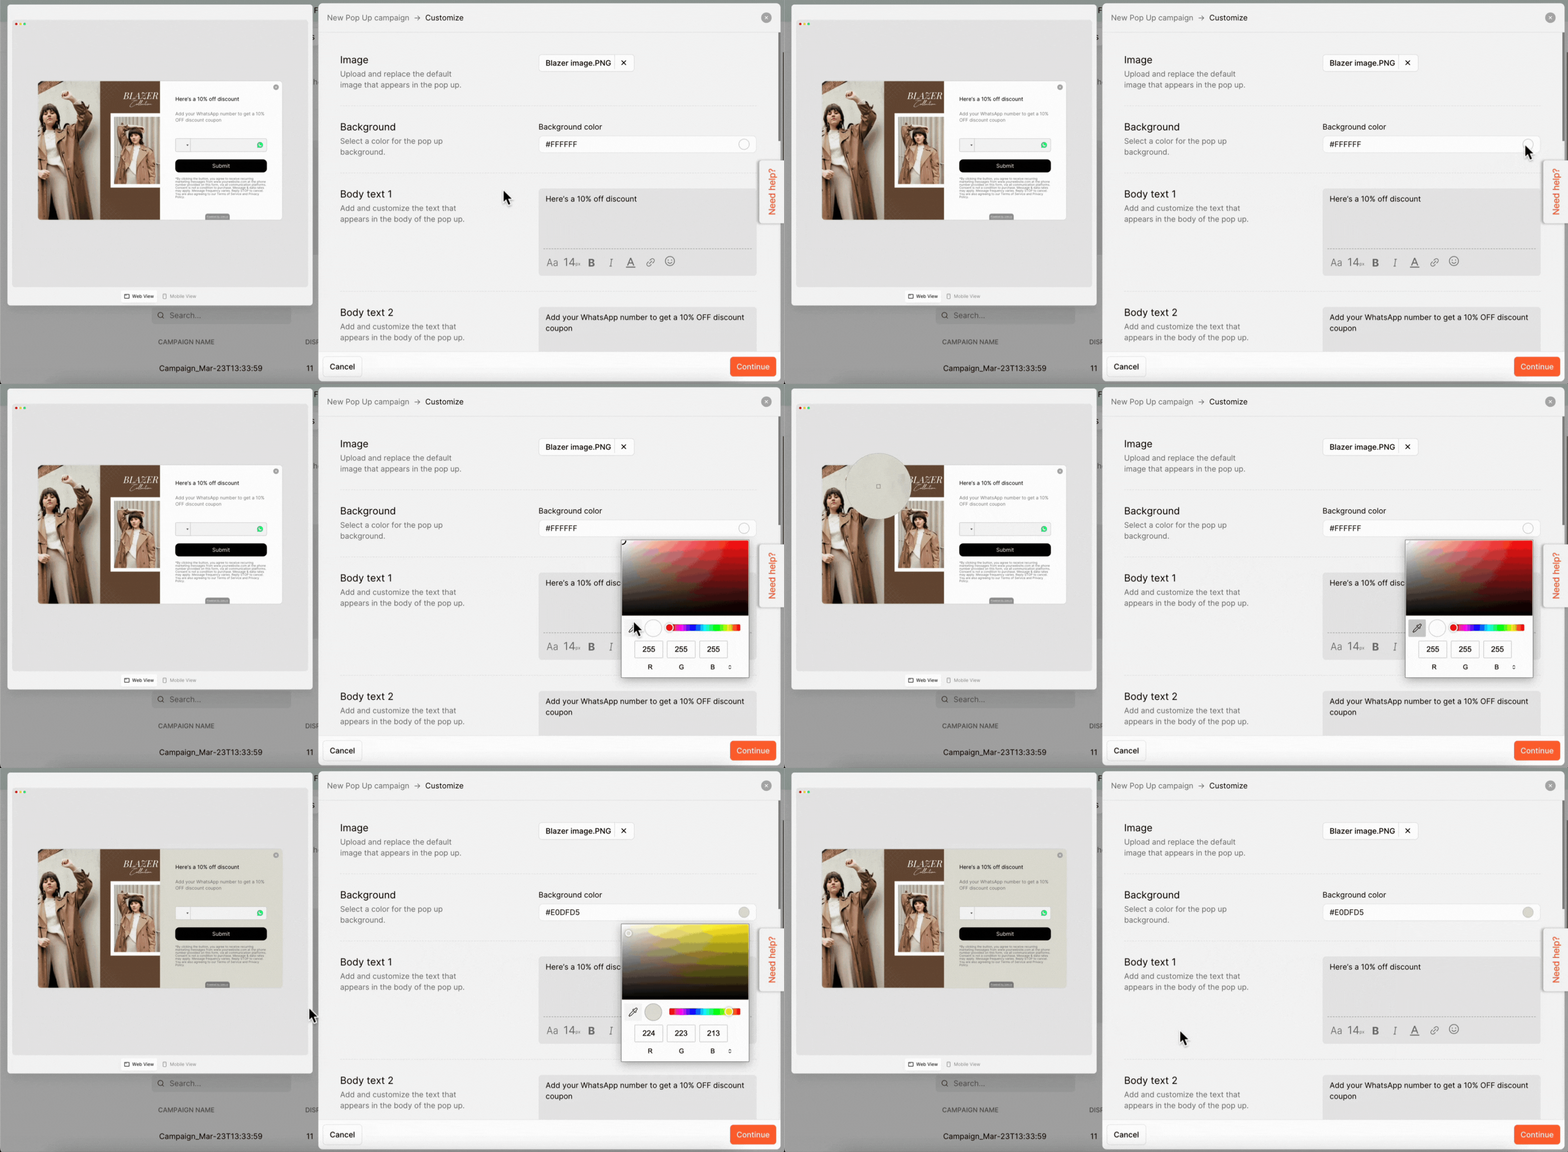
3. You can include specific text per your requirements in two body text sections. In our case, we set
Body text 1 - Here's a 20% off discount.
Body text 2 - Add your WhatApp number for a 20% discount coupon. You will receive the coupon on that WhatsApp number.
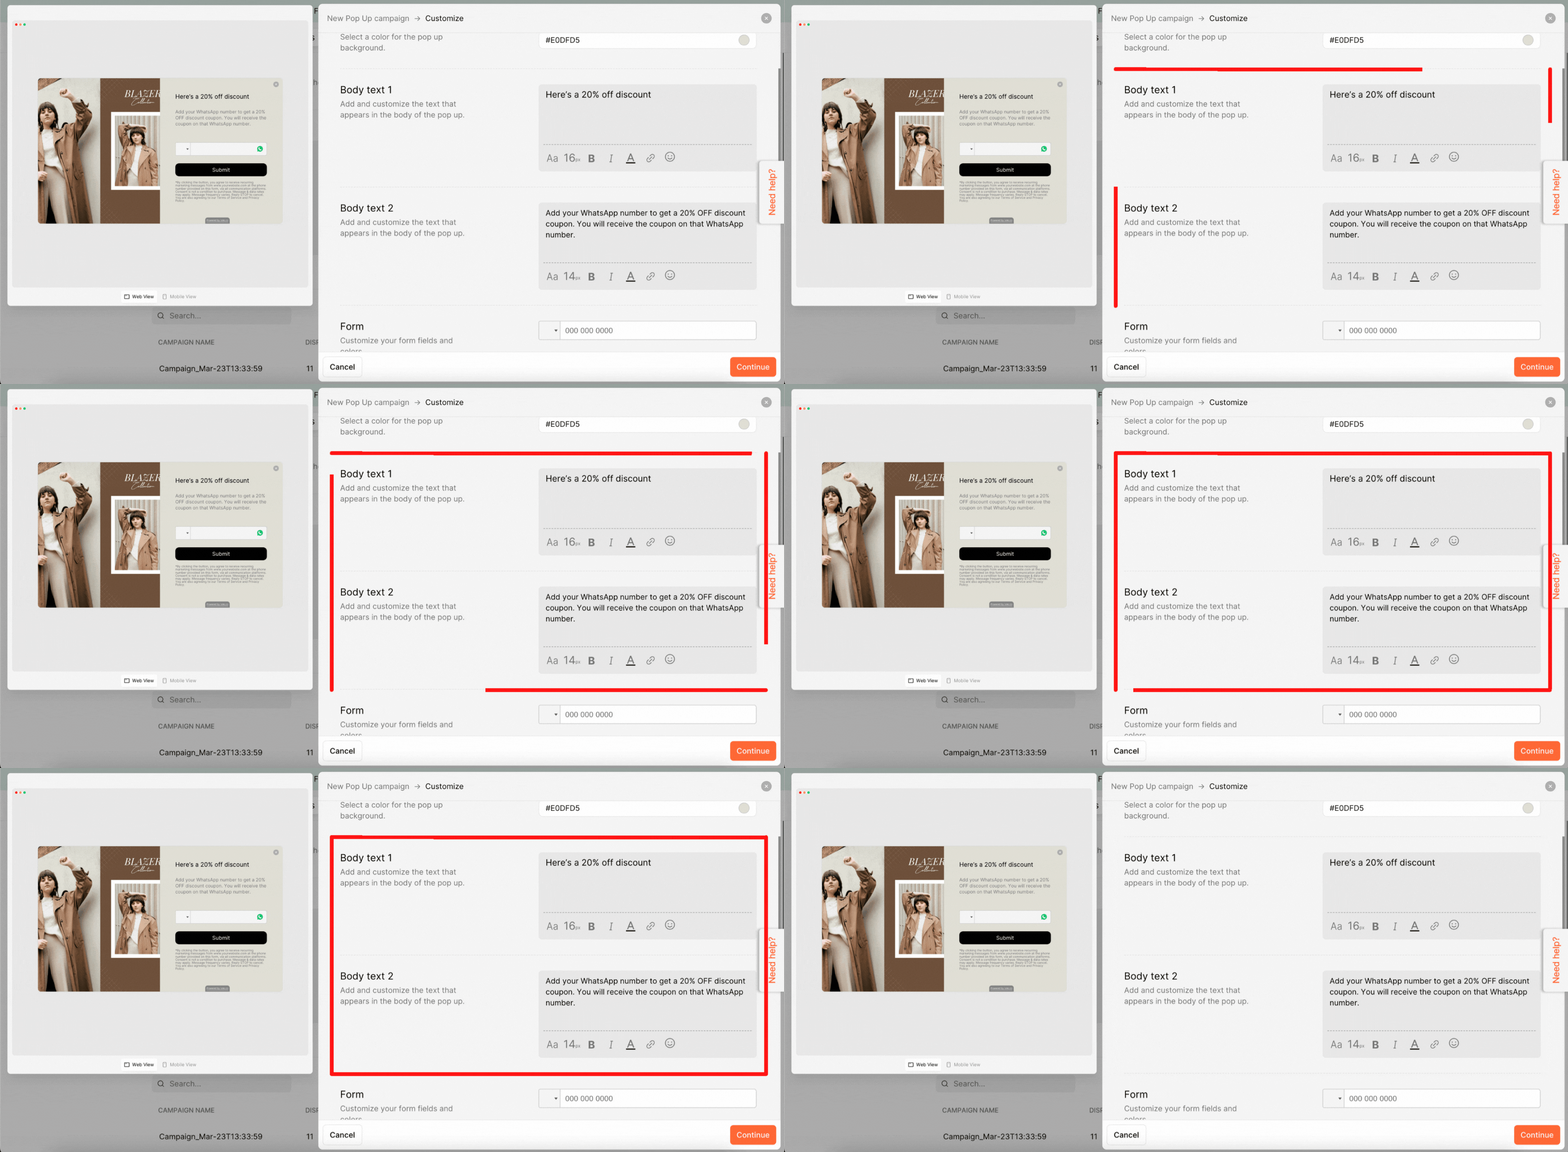
4. You can customize your form fields and colors per your requirements.

5. You can Type the legal compliance text required by your jurisdiction's laws. If you use the default content, DO NOT forget to add your website name here.
PRO TIP: You can hyperlink the text here to your legal page like this.
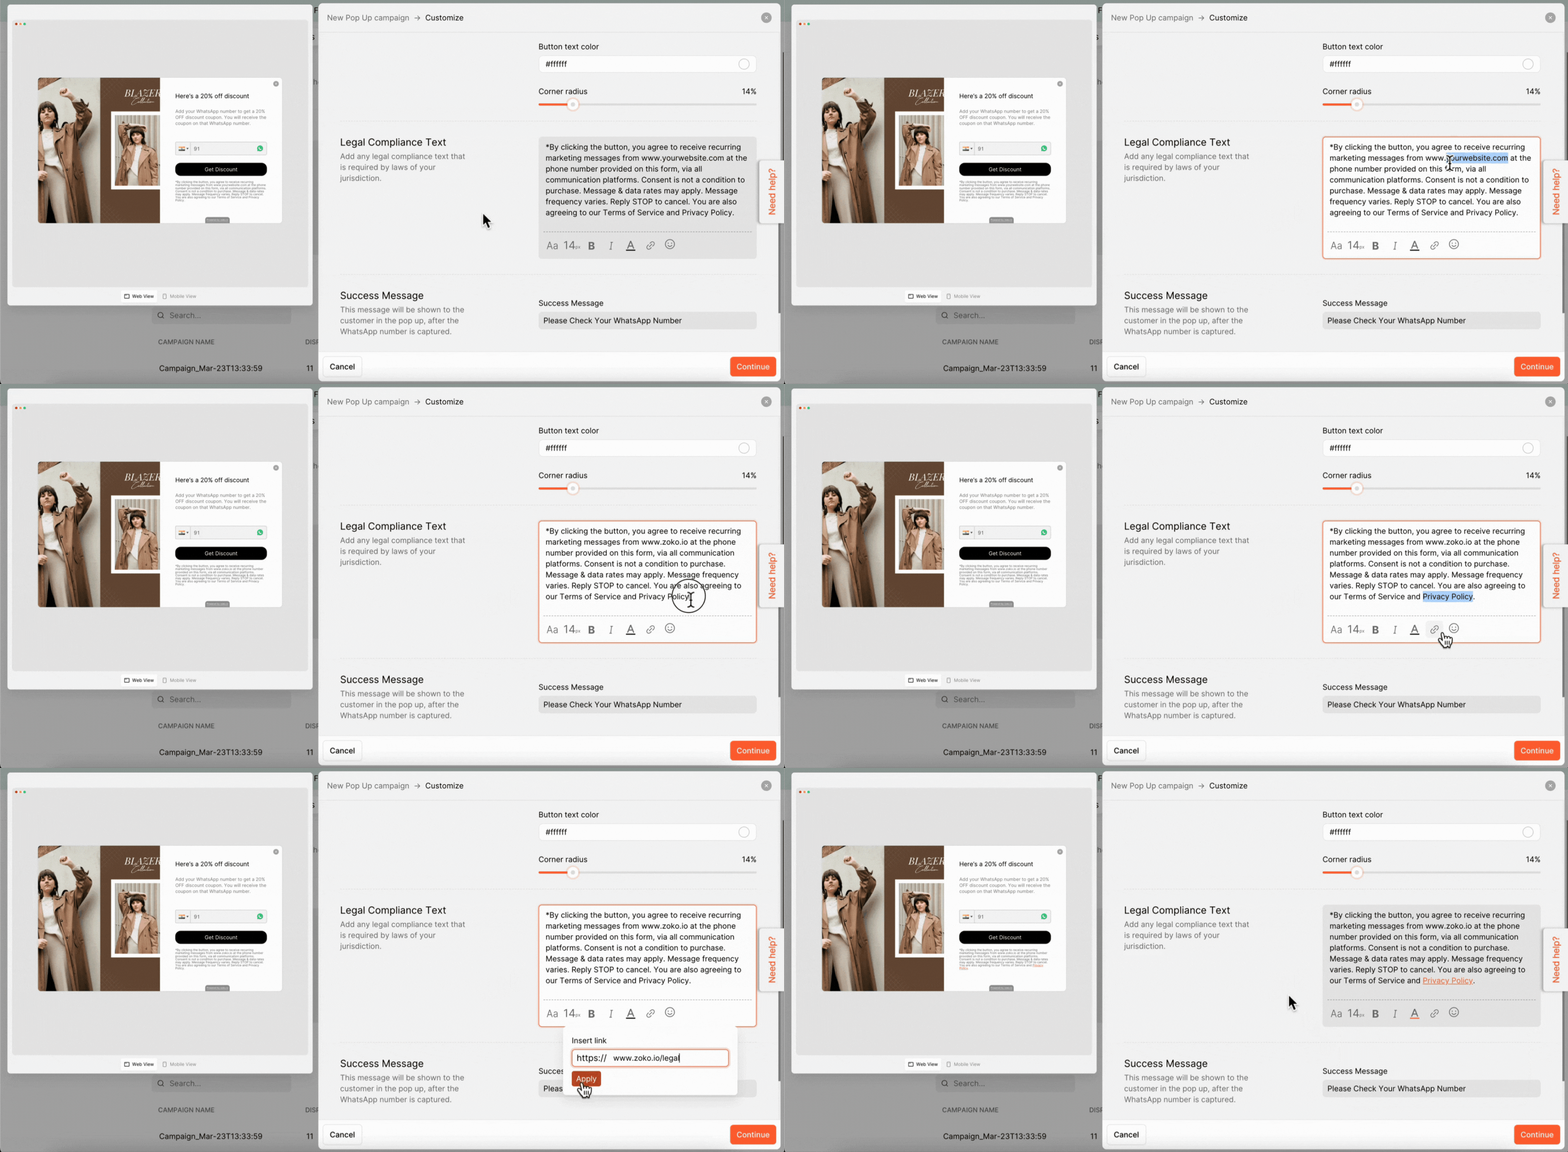
6. The success message will be displayed to the customer in the pop-up after their WhatsApp number is captured. Simply type the message into the designated field, keeping it within 35 characters. In our case, we used: "Awesome. Please check your WhatsApp for the coupon.”
PRO TIP: Build a flow on FlowHippo to send a message to the visitor as soon as the number is captured. You can even build a double opt-in flow by asking the visitor to confirm on WhatsApp. This will help you build a good WhatsApp customer base that can be used later to engage and upsell. Scroll down to see the steps on Setting up a pre-built flow in FlowHippo to trigger WhatsApp messages.
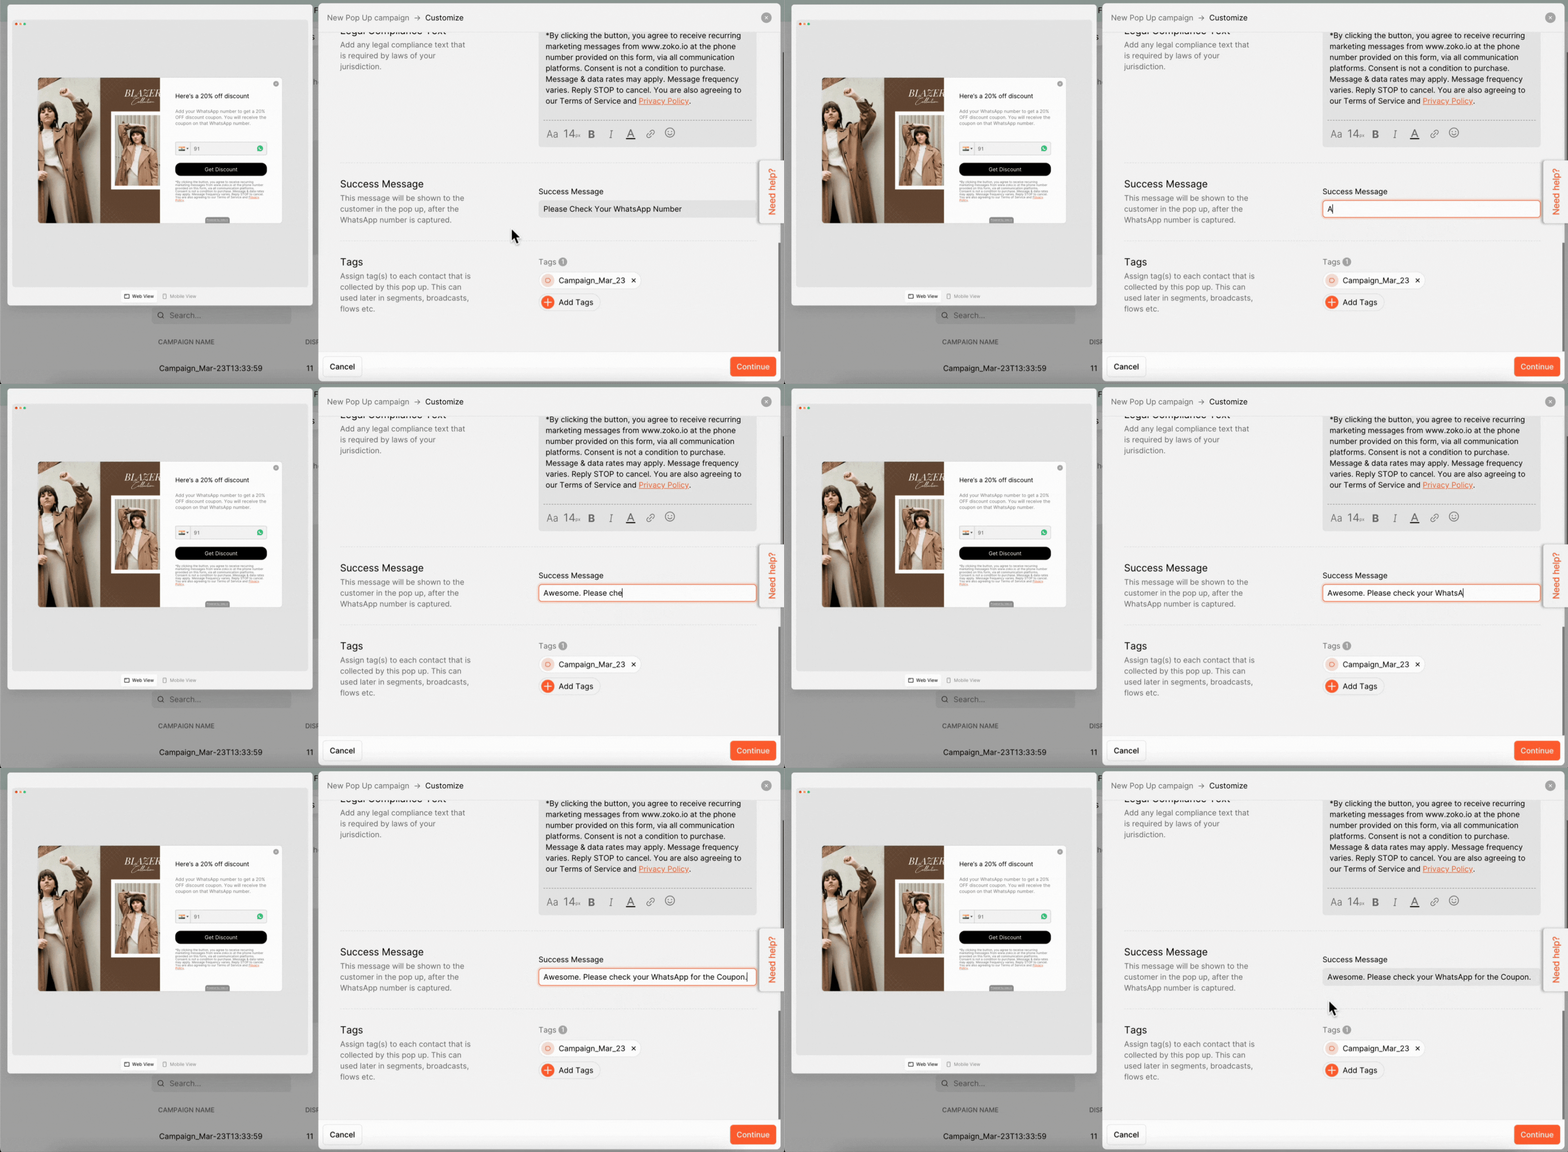
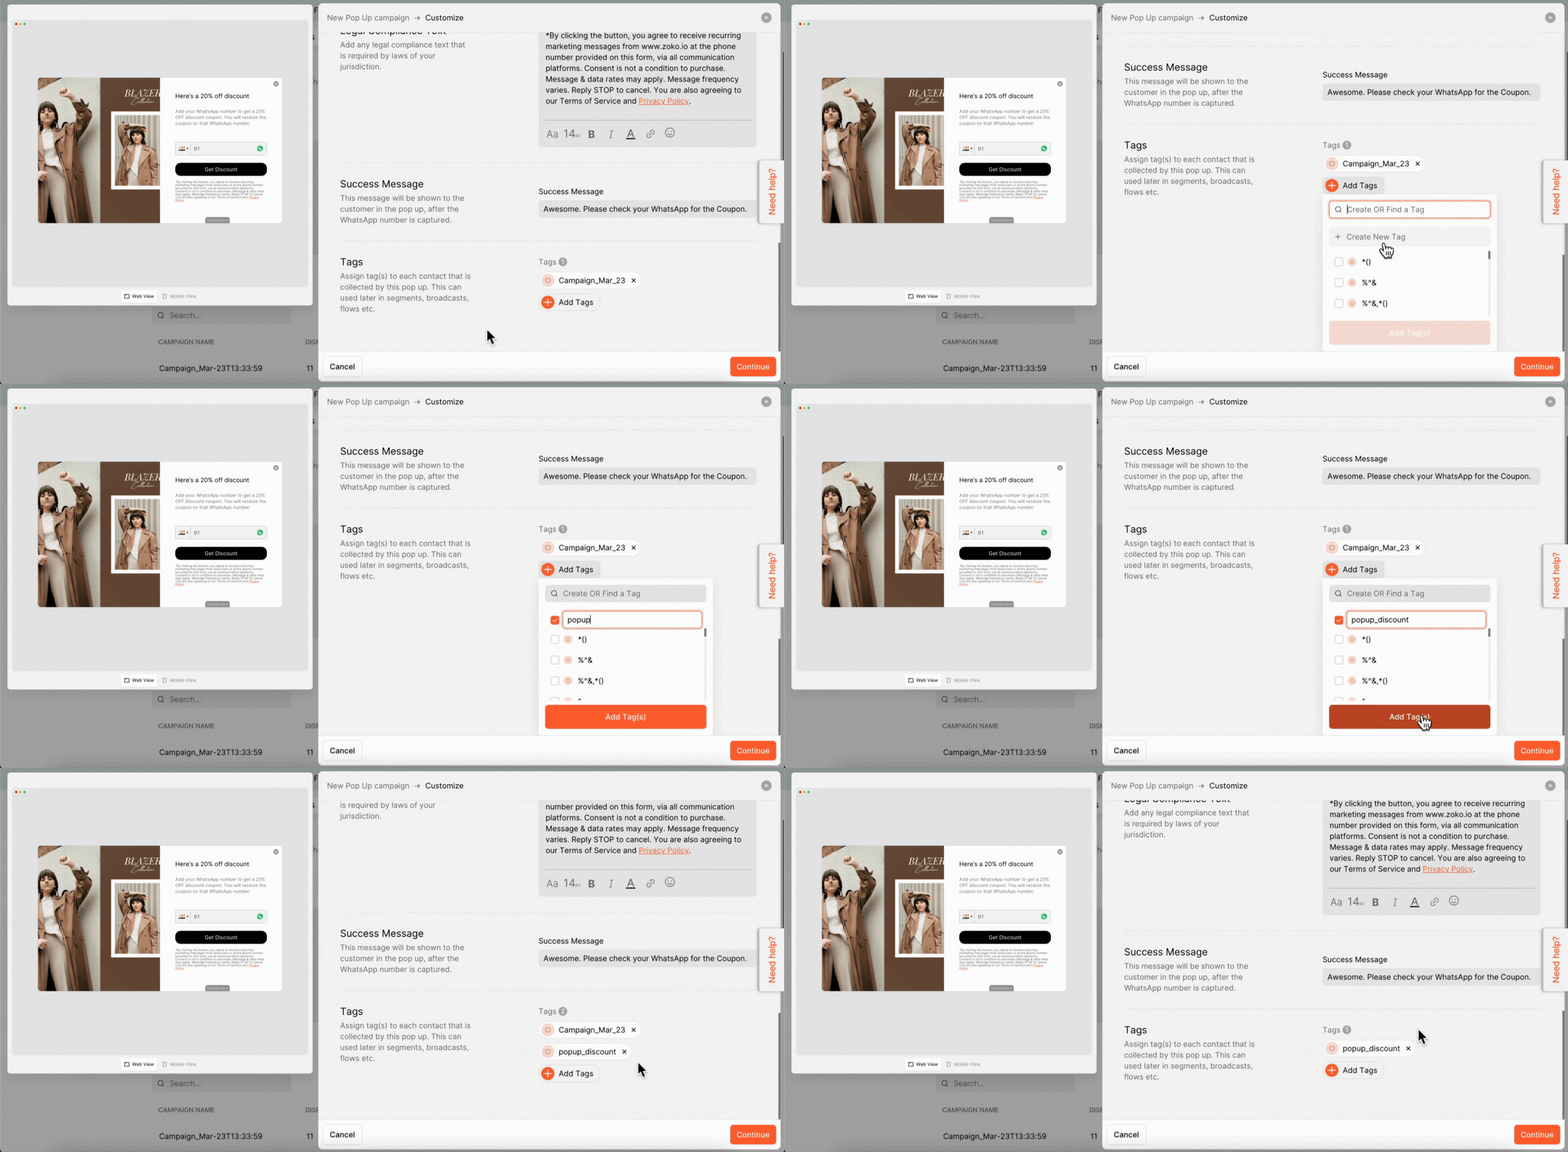
7. Next add tags by clicking on Add Tags.
PRO TIP:
(i) The tag can be added to each contact that is collected with the pop-up and you can use them later in Segments, Broadcasts, and Flows on Zoko. In our case, we added tag as popup_discount.
(ii) The campaign name will be automatically added as a tag to each acquired contact. If you do not want to add the campaign name as a tag, you can remove it.
8. Click on Continue.
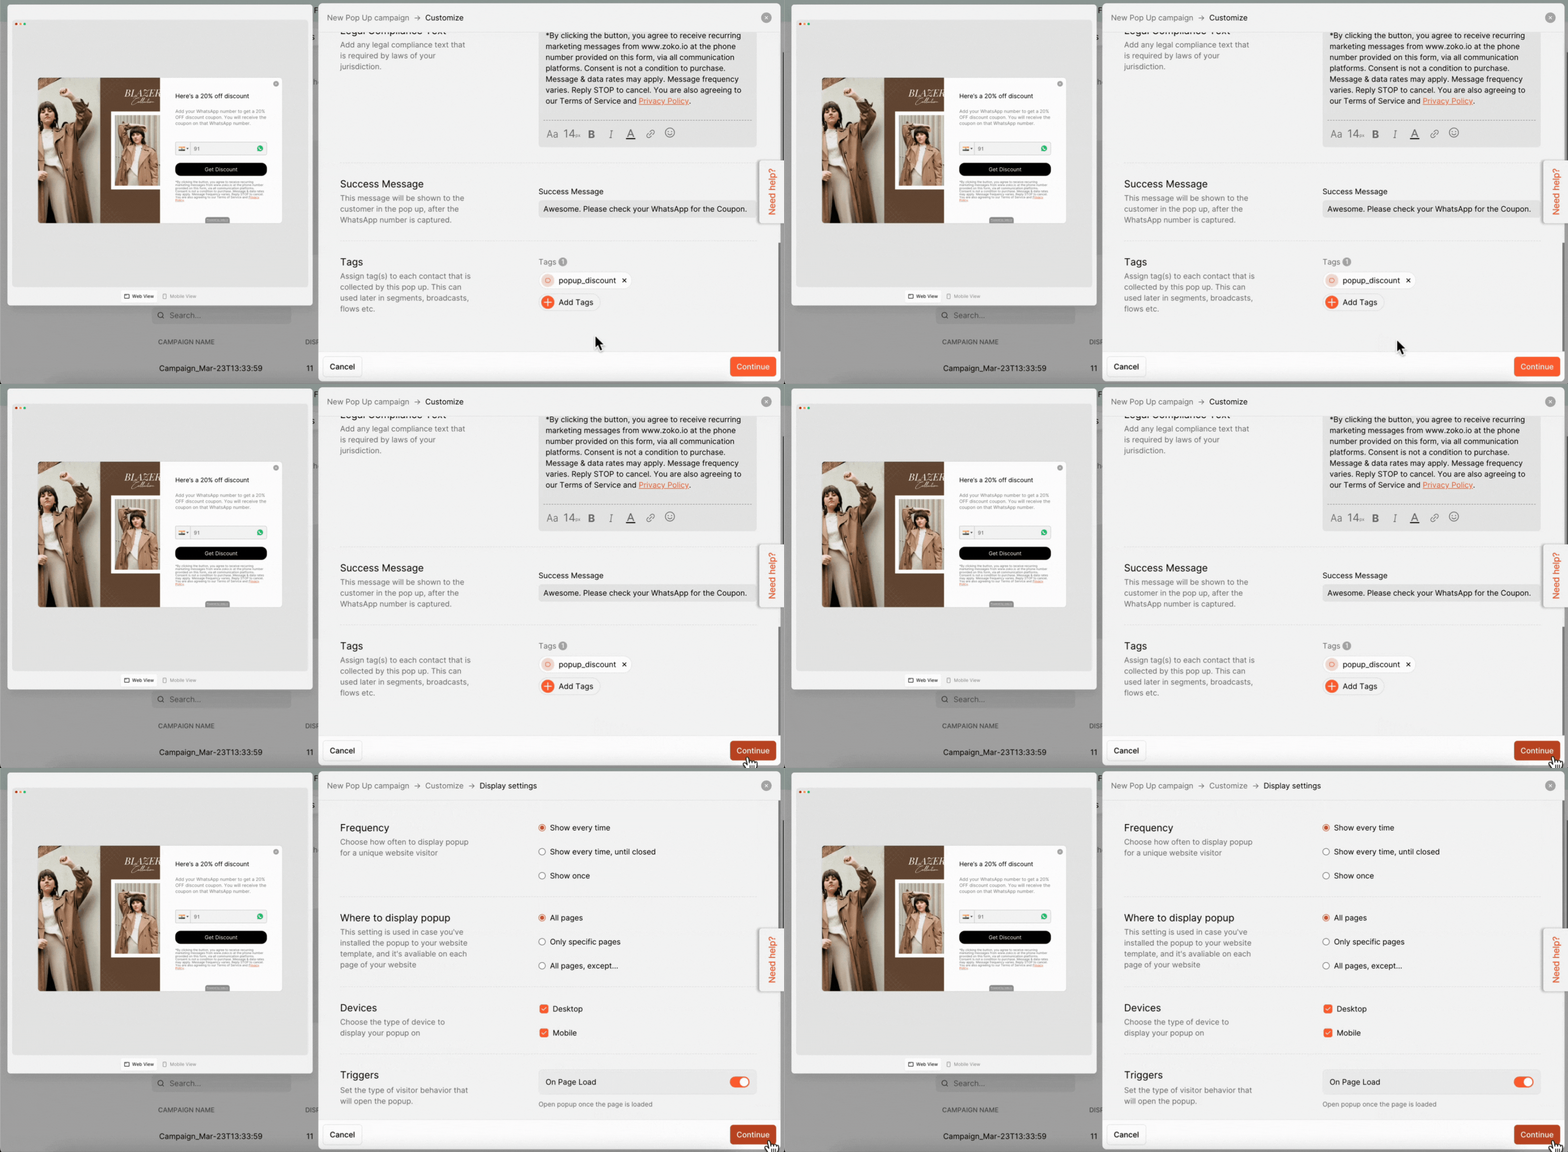
Next, we need to define the display settings of the pop-up
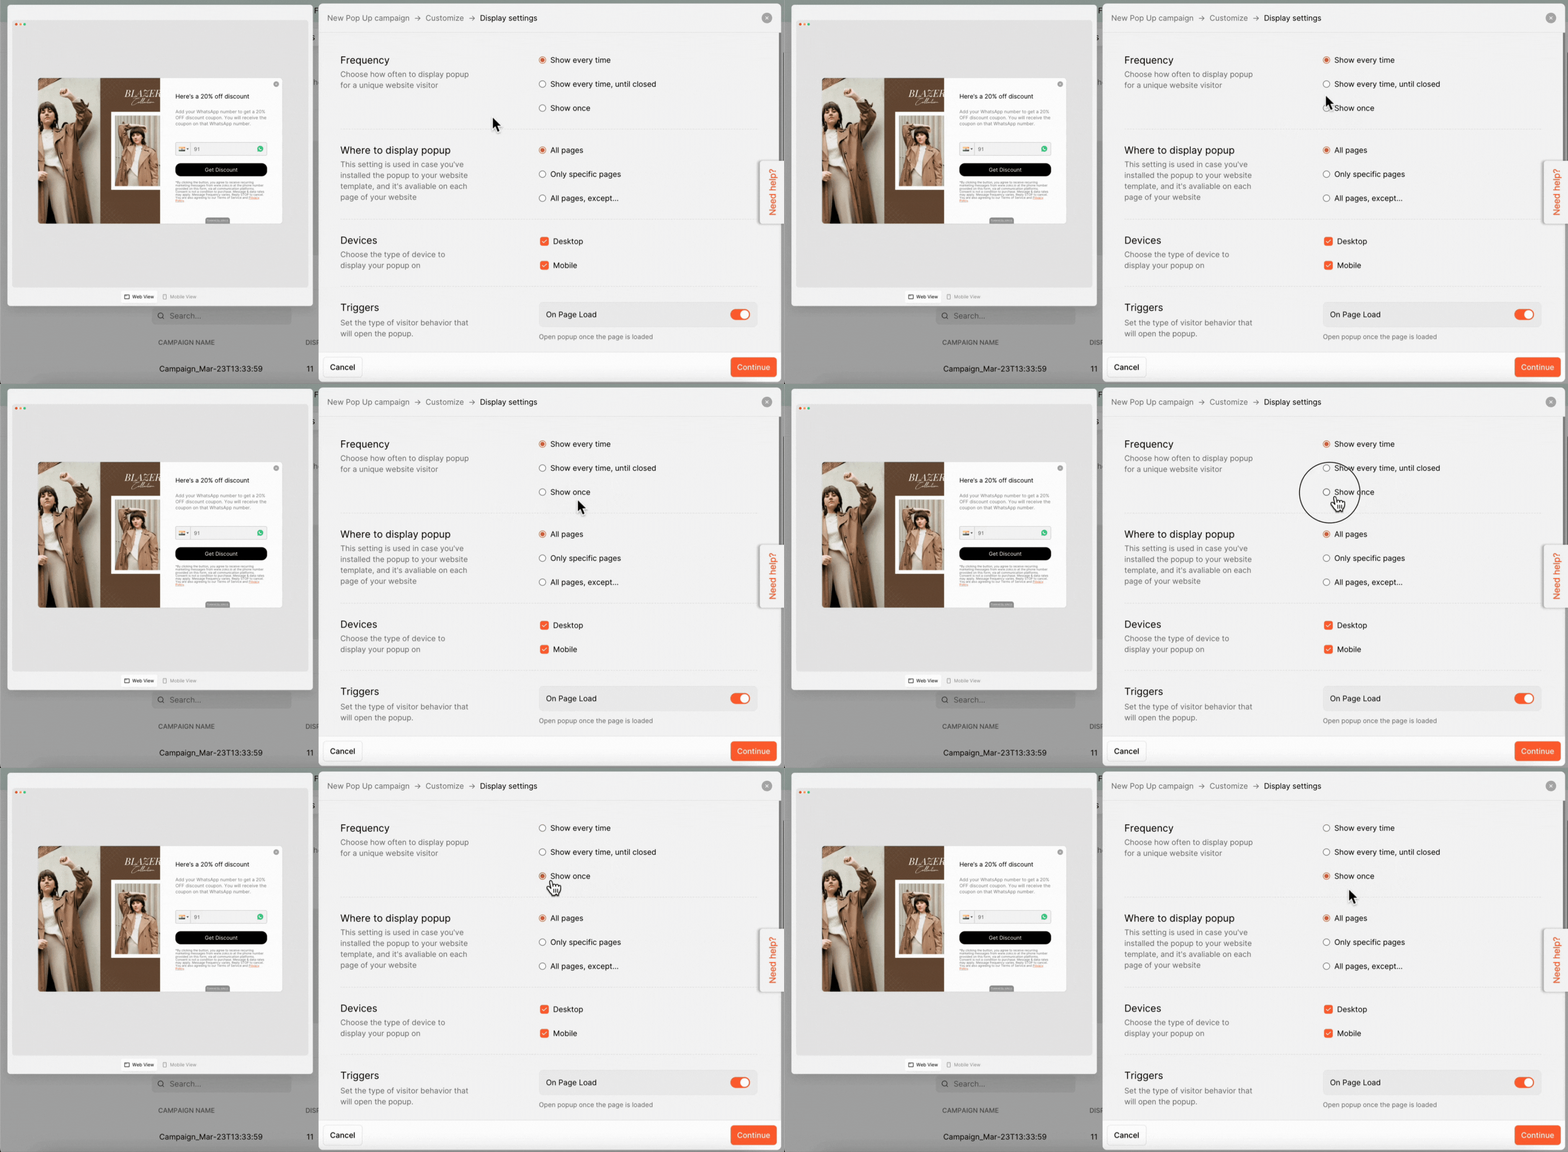
1. Choose how often you want to display the pop-up to a unique visitor. There are three options:
- Show every time: The pop-up will be displayed every time the visitor loads the page.
- Show every time, until closed: The pop-up will be displayed every time until they close it.
- Show once: The pop-up will be displayed only once.
In our case, we selected Snow Once.
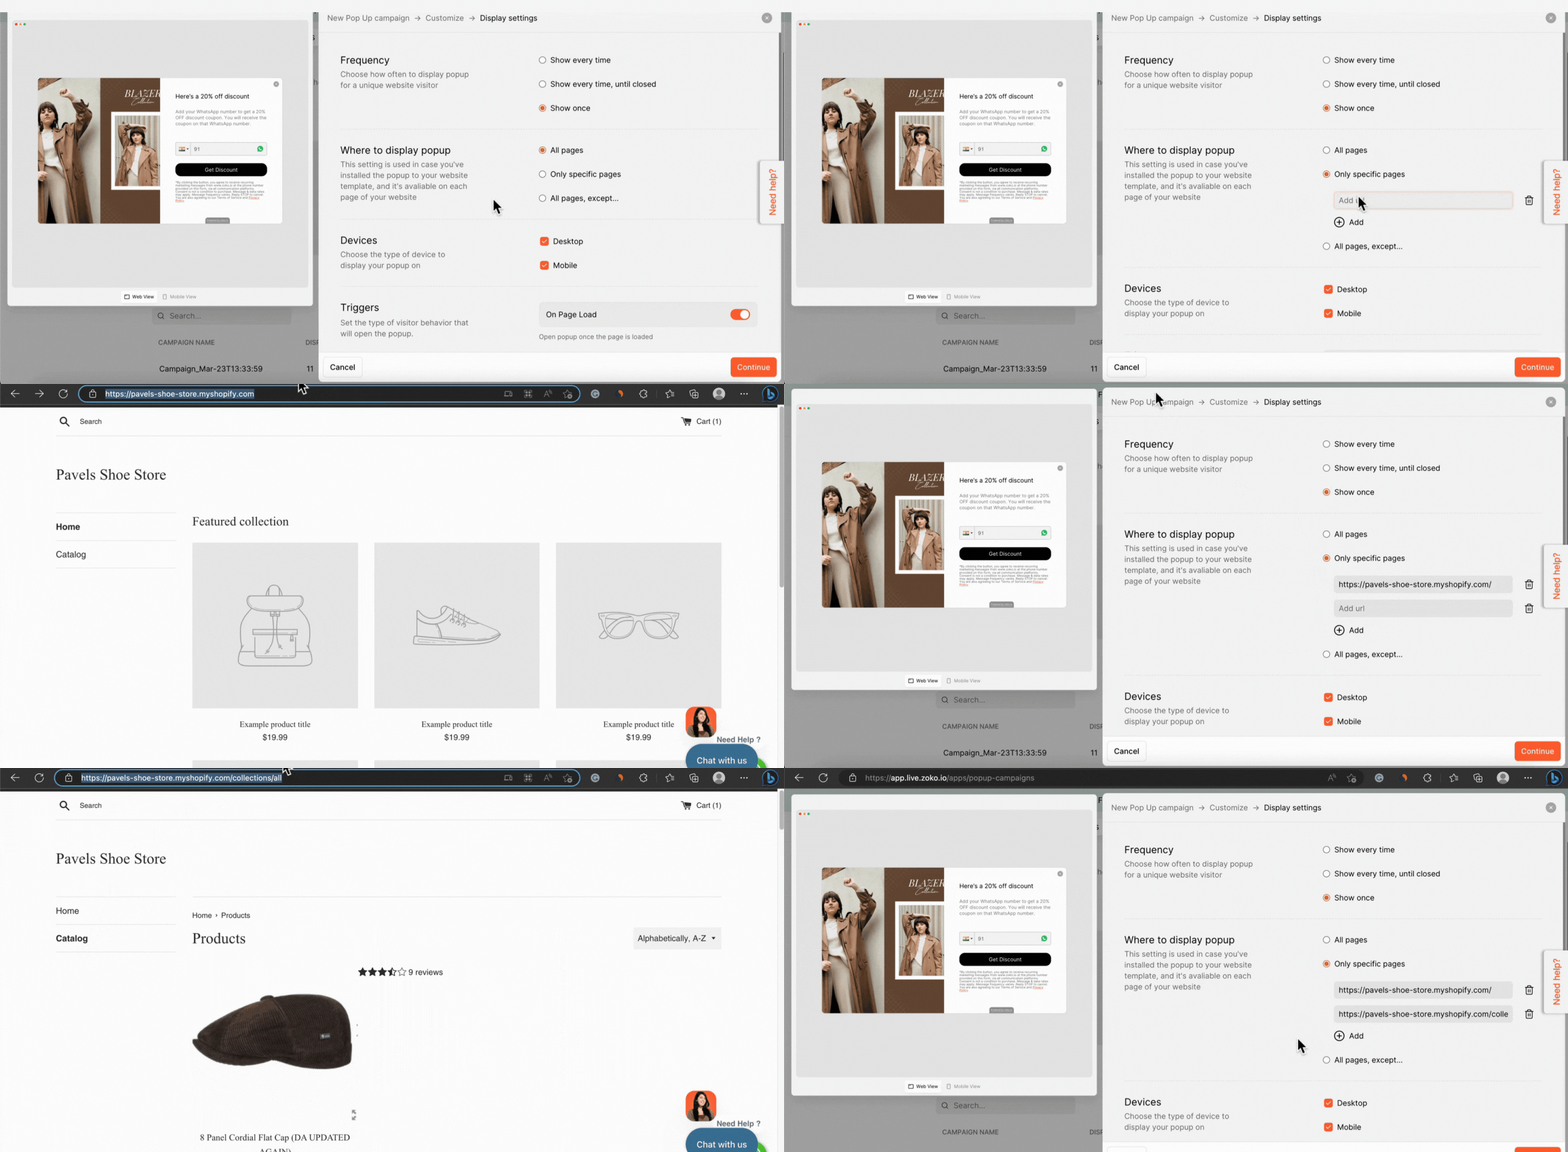
2. Now, we need to define where to display the pop-up. There are three options to choose from:
- All Pages: The pop-up will be shown on all pages of your website.
- Only Specific Pages: The pop-up will be shown on specific pages you choose. For example, if you want the pop-up to appear only on the Home Page and a catalog page, you can copy the URLs of those pages and paste them in the designated column.
- All Pages, Except: The pop-up will be shown on all pages except the ones you choose. For example, if you don't want the pop-up to appear on the catalog page, you can paste the URL of that page in the designated column. This will ensure that users see the pop-up on all pages except the catalog page.
In our case, we selected Only Specific Pages.
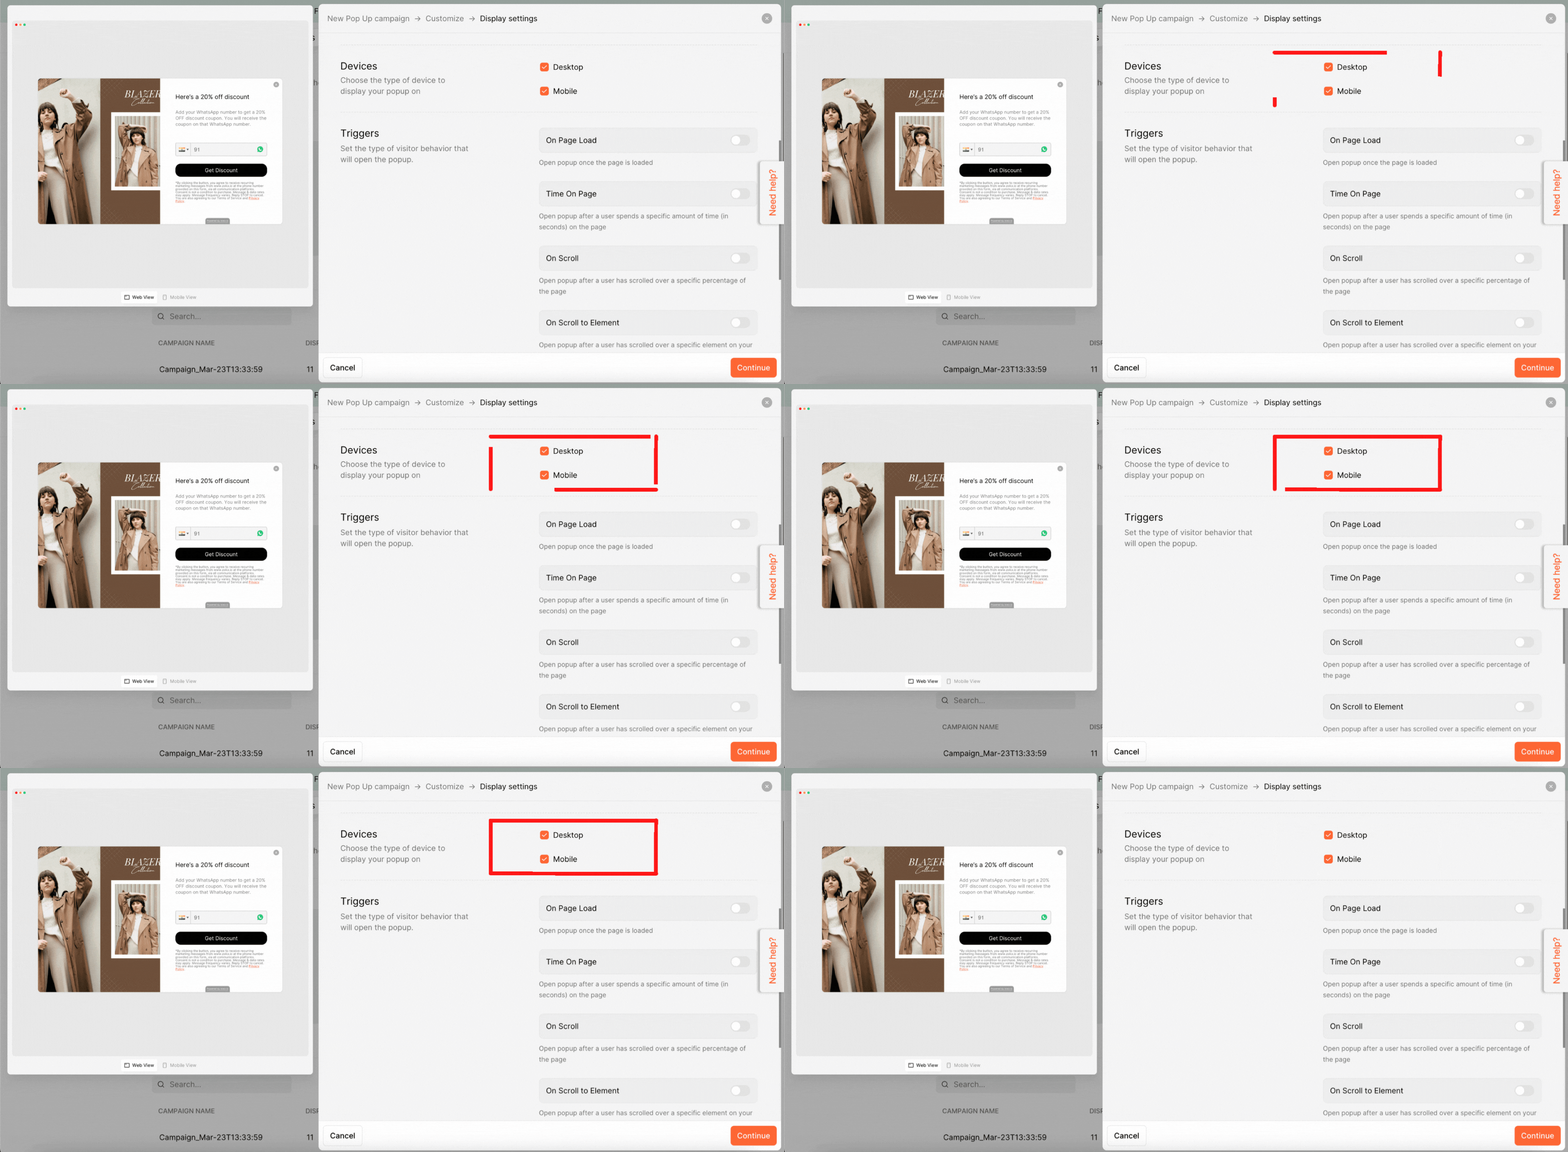
3. Next, choose the devices on which you want to display the pop-up.
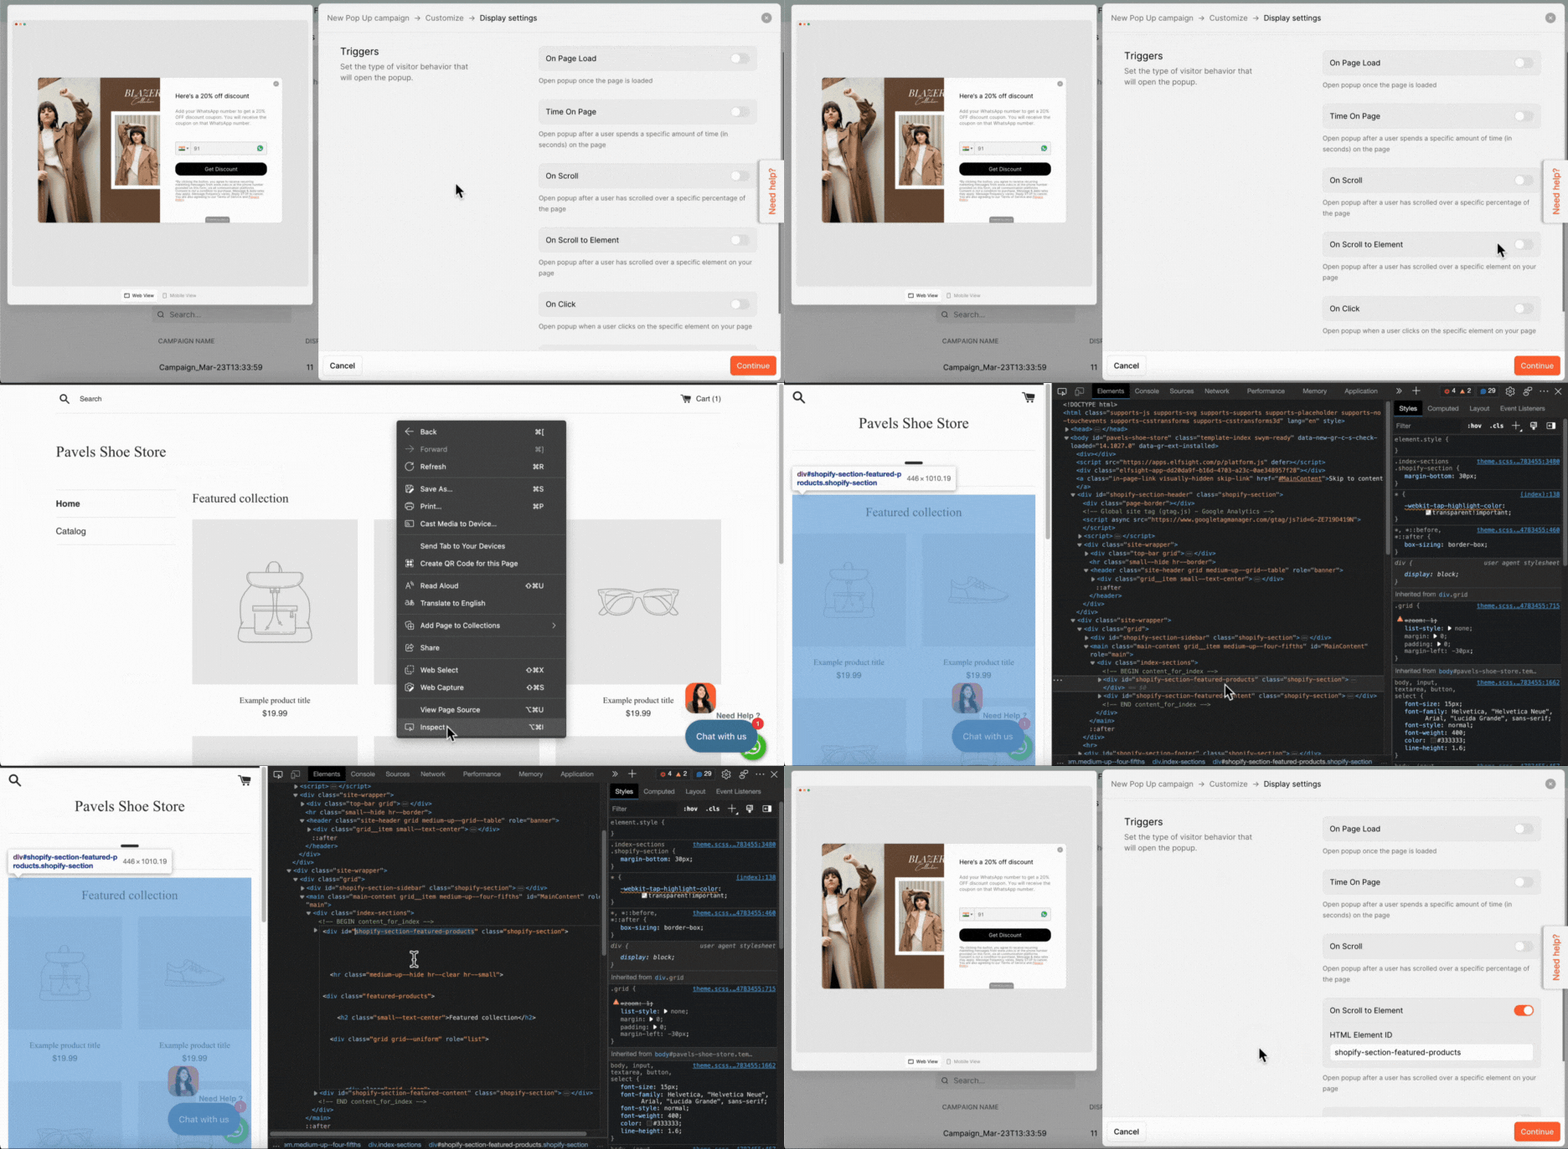
4. Now, choose the triggers that will cause the pop-up to appear. There are six options to choose from:
- On Page Load: The pop-up will open once the page is fully loaded.
- Time On Page: The pop-up will open after a specific amount of time has passed (measured in seconds) since the visitor landed on the page.
- On Scroll: The pop-up will open after the visitor scrolls down to a certain percentage of the page.
- On Scroll to Element: The pop-up will open after the visitor has scrolled to a specific element on the page. You must add the HTML element's ID to the trigger settings.
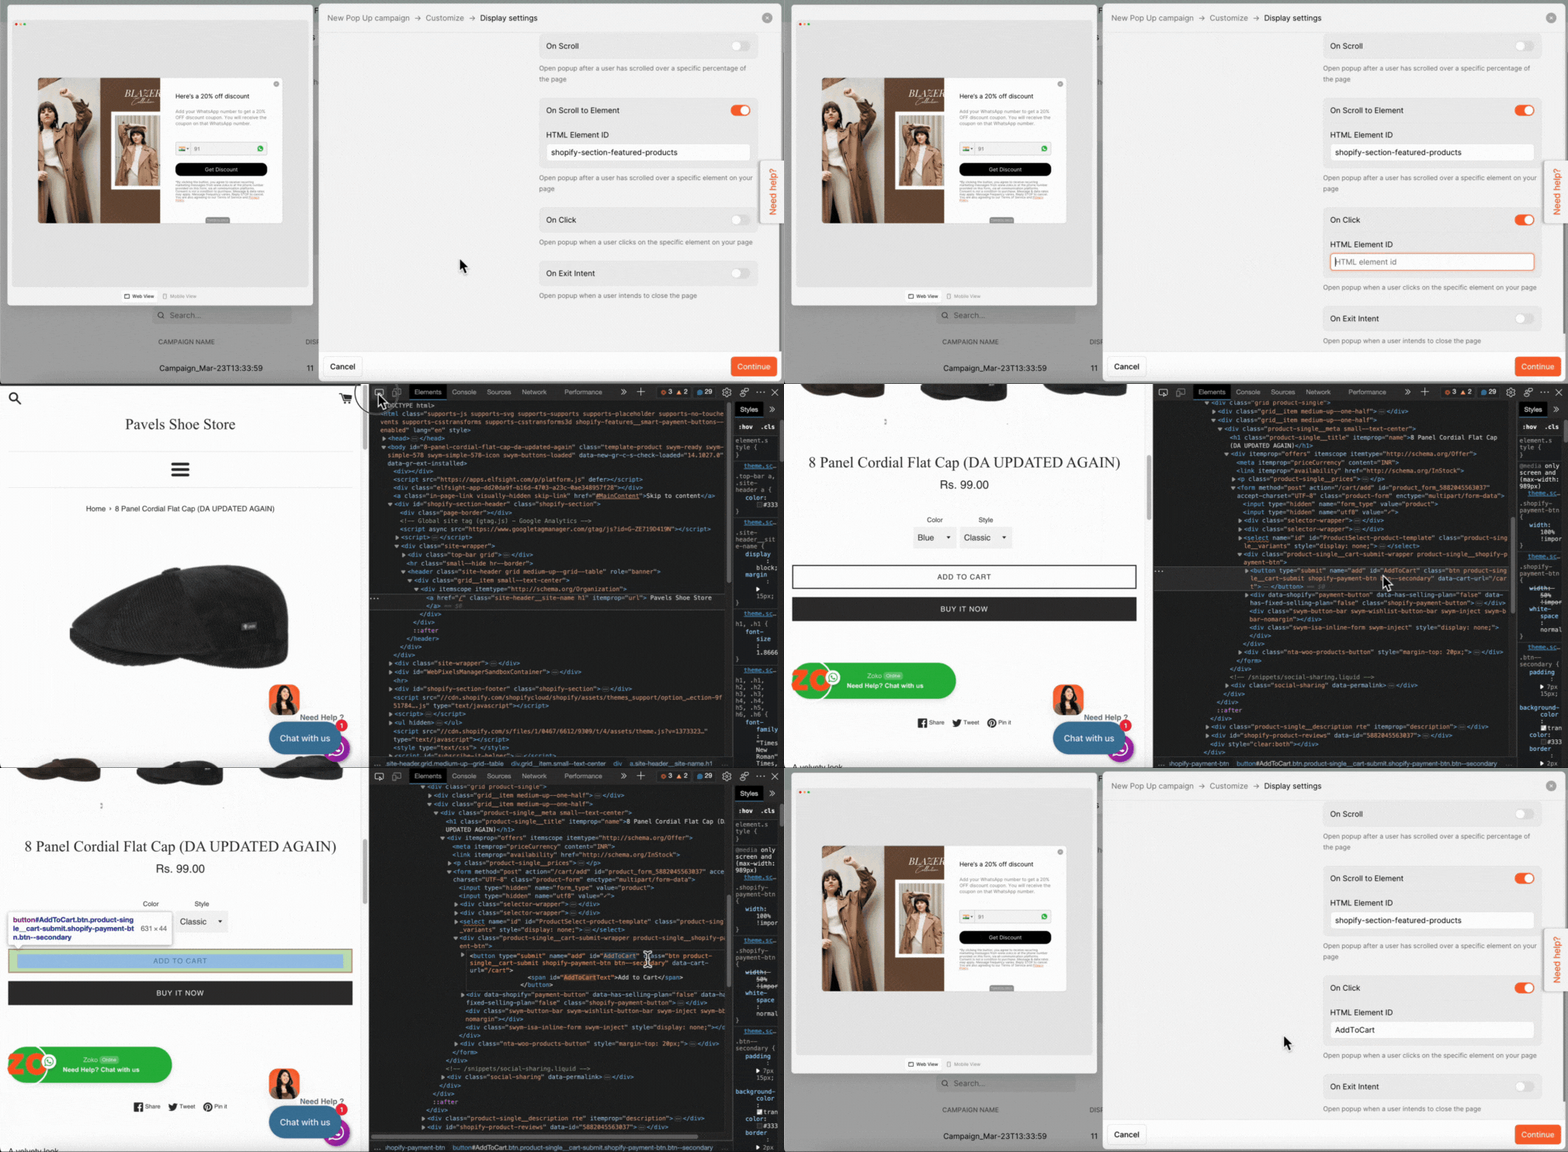
- On Click: The pop-up will open when the visitor clicks on a specific element on the page. You must add the HTML element's ID to the trigger settings.
- On Exit Intent: The pop-up will open when the visitor intends to leave the page.
In our case, we enabled the "On Scroll to Element" and "On Click" triggers and we added the HTML Element’s ID in the fields from the store.
5. Click on Continue.
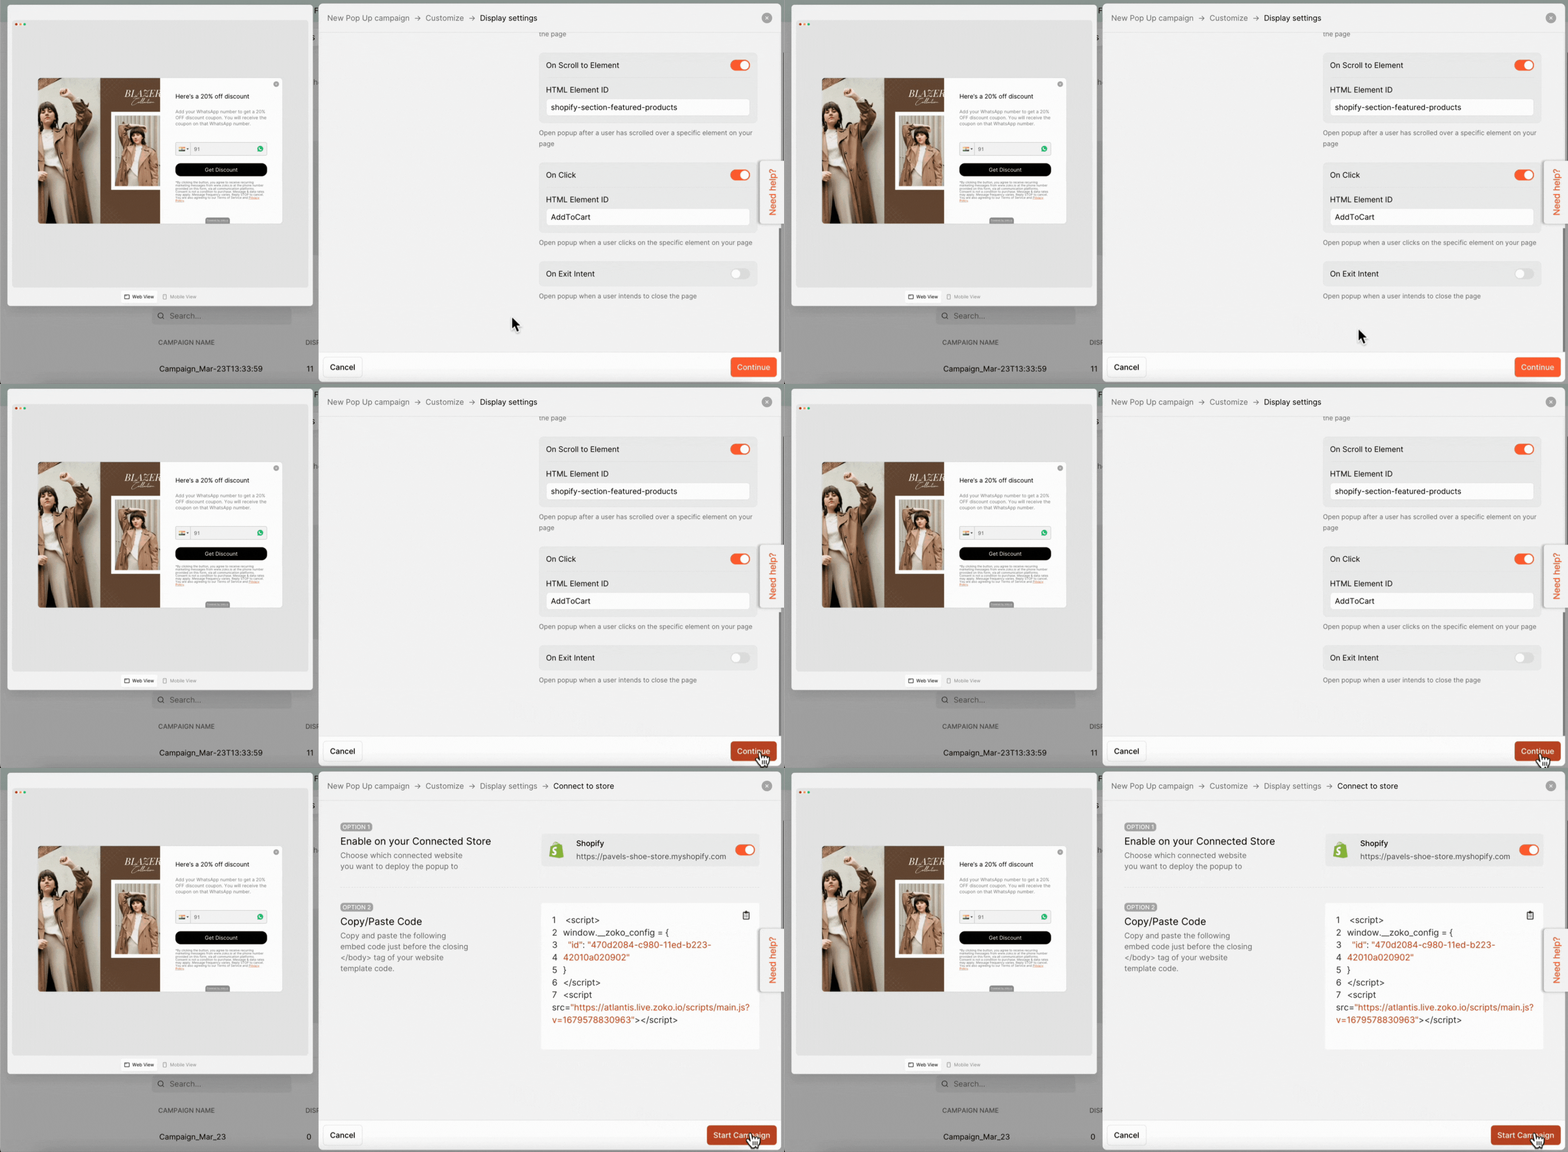
Lastly, we need to connect the pop-up to a store.
- If yours is a Shopify store, just enable the toggle.
- If yours is a non-Shopify store, copy-paste the code to your website. Refer to our article on How to Enable Pop-up Campaigns on a Non Shopify Website.
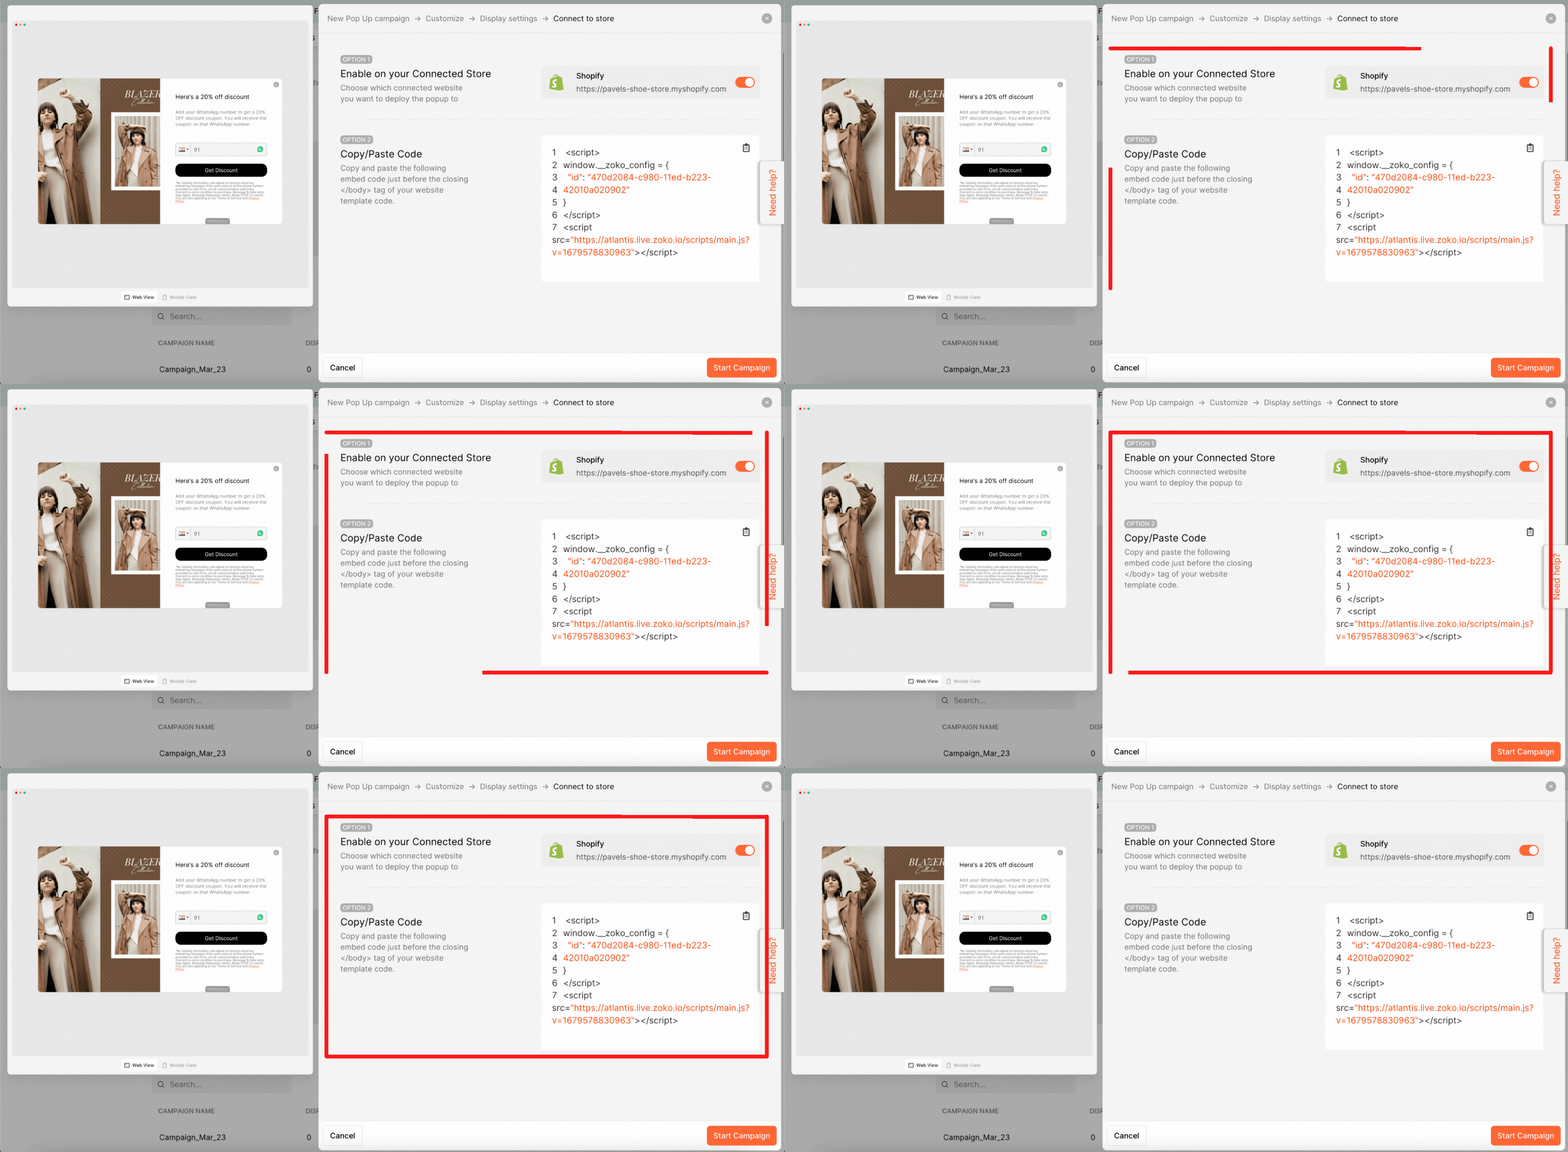
Finally, click on Start Campaign.
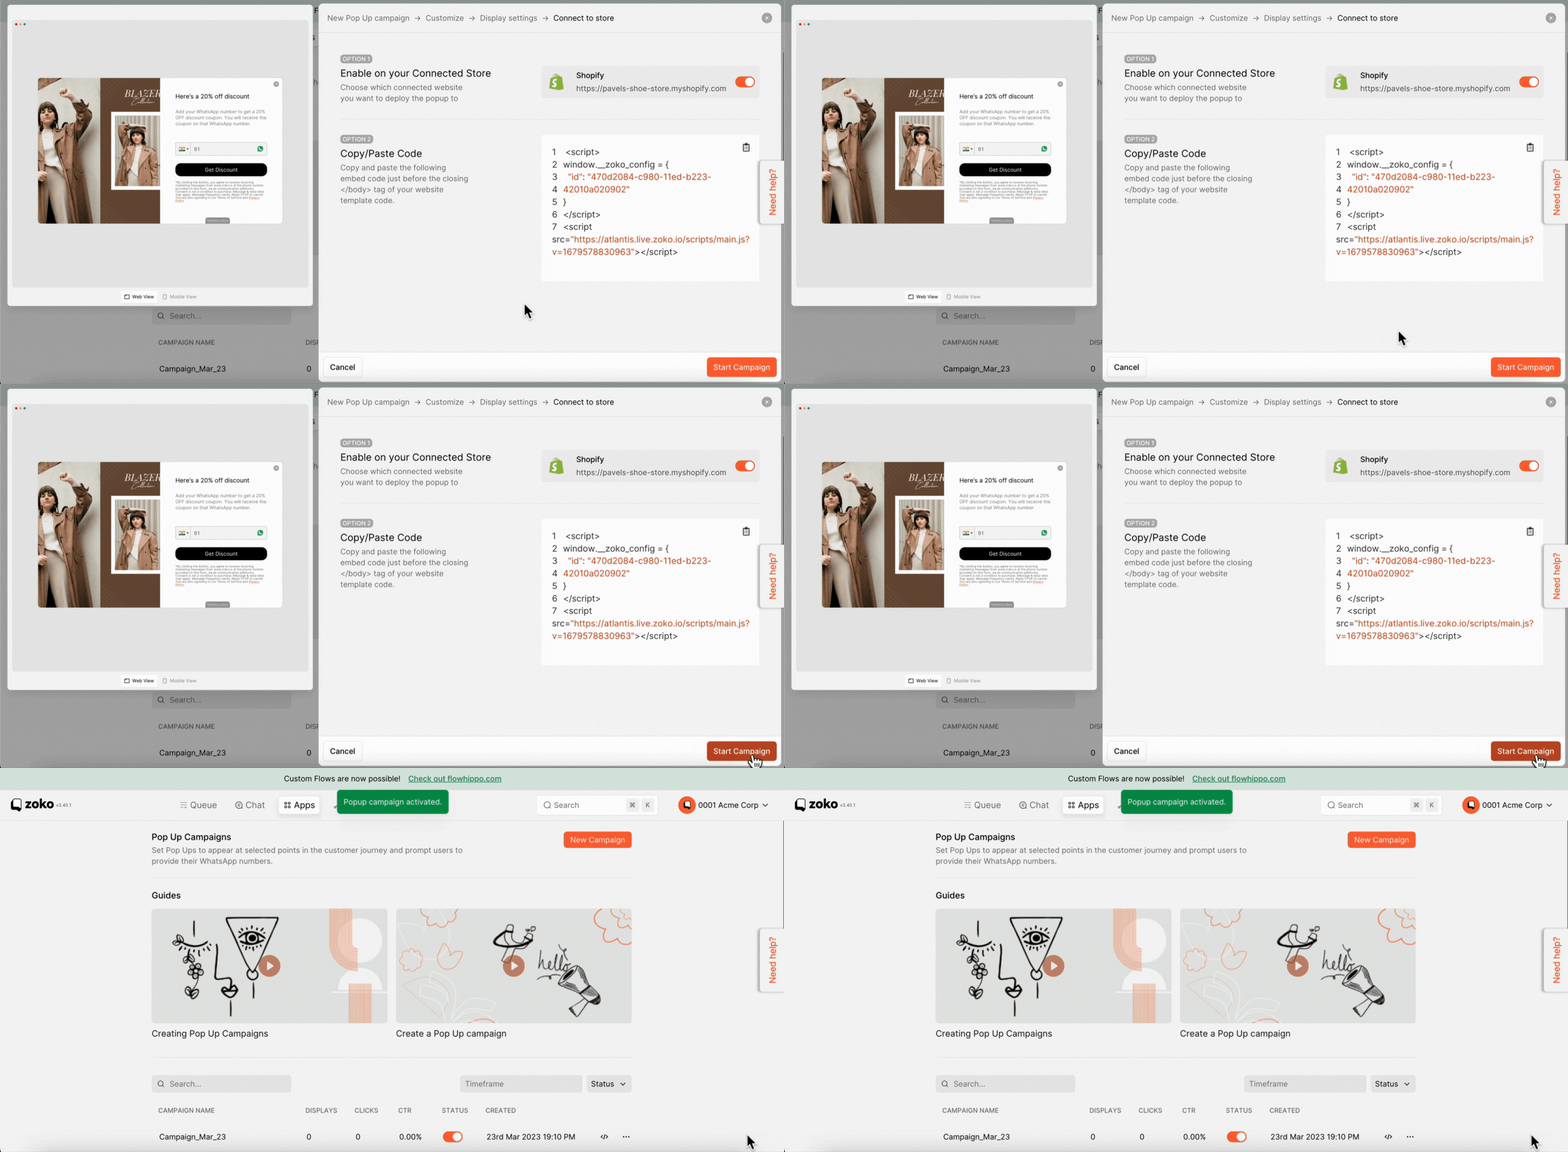
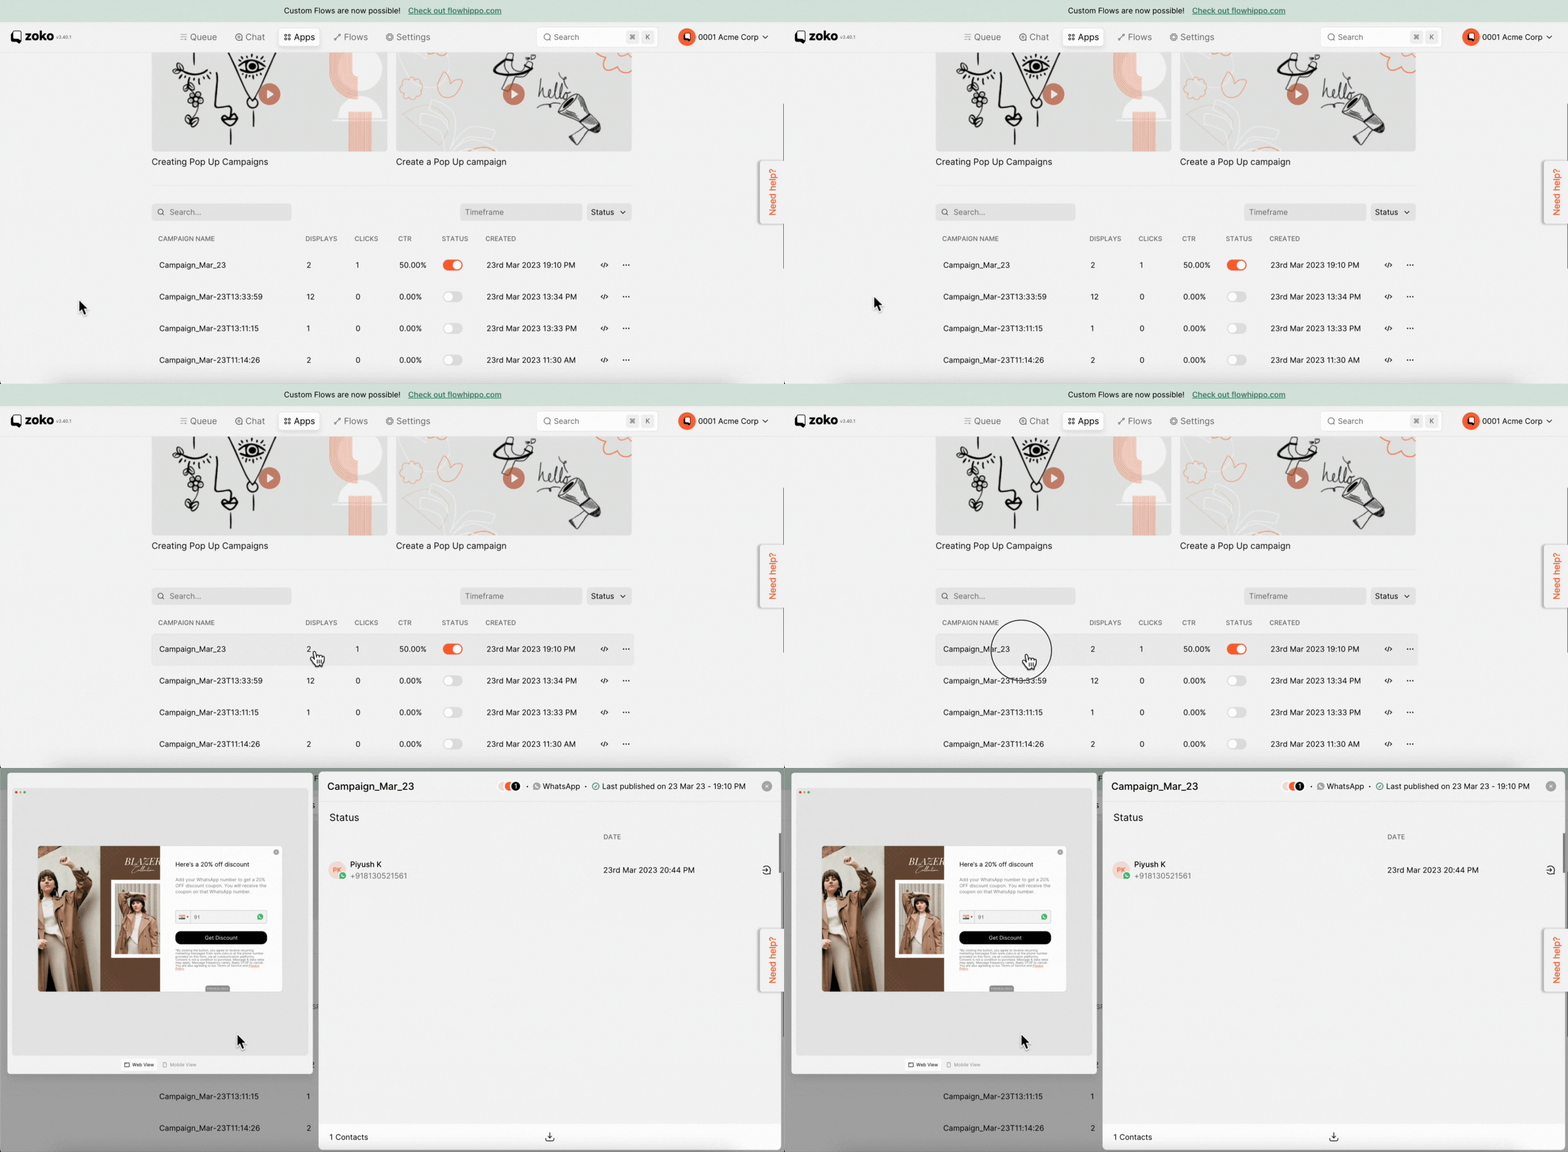
You can view the list of campaigns here. You can enable or disable a campaign by clicking on the "Status" button.
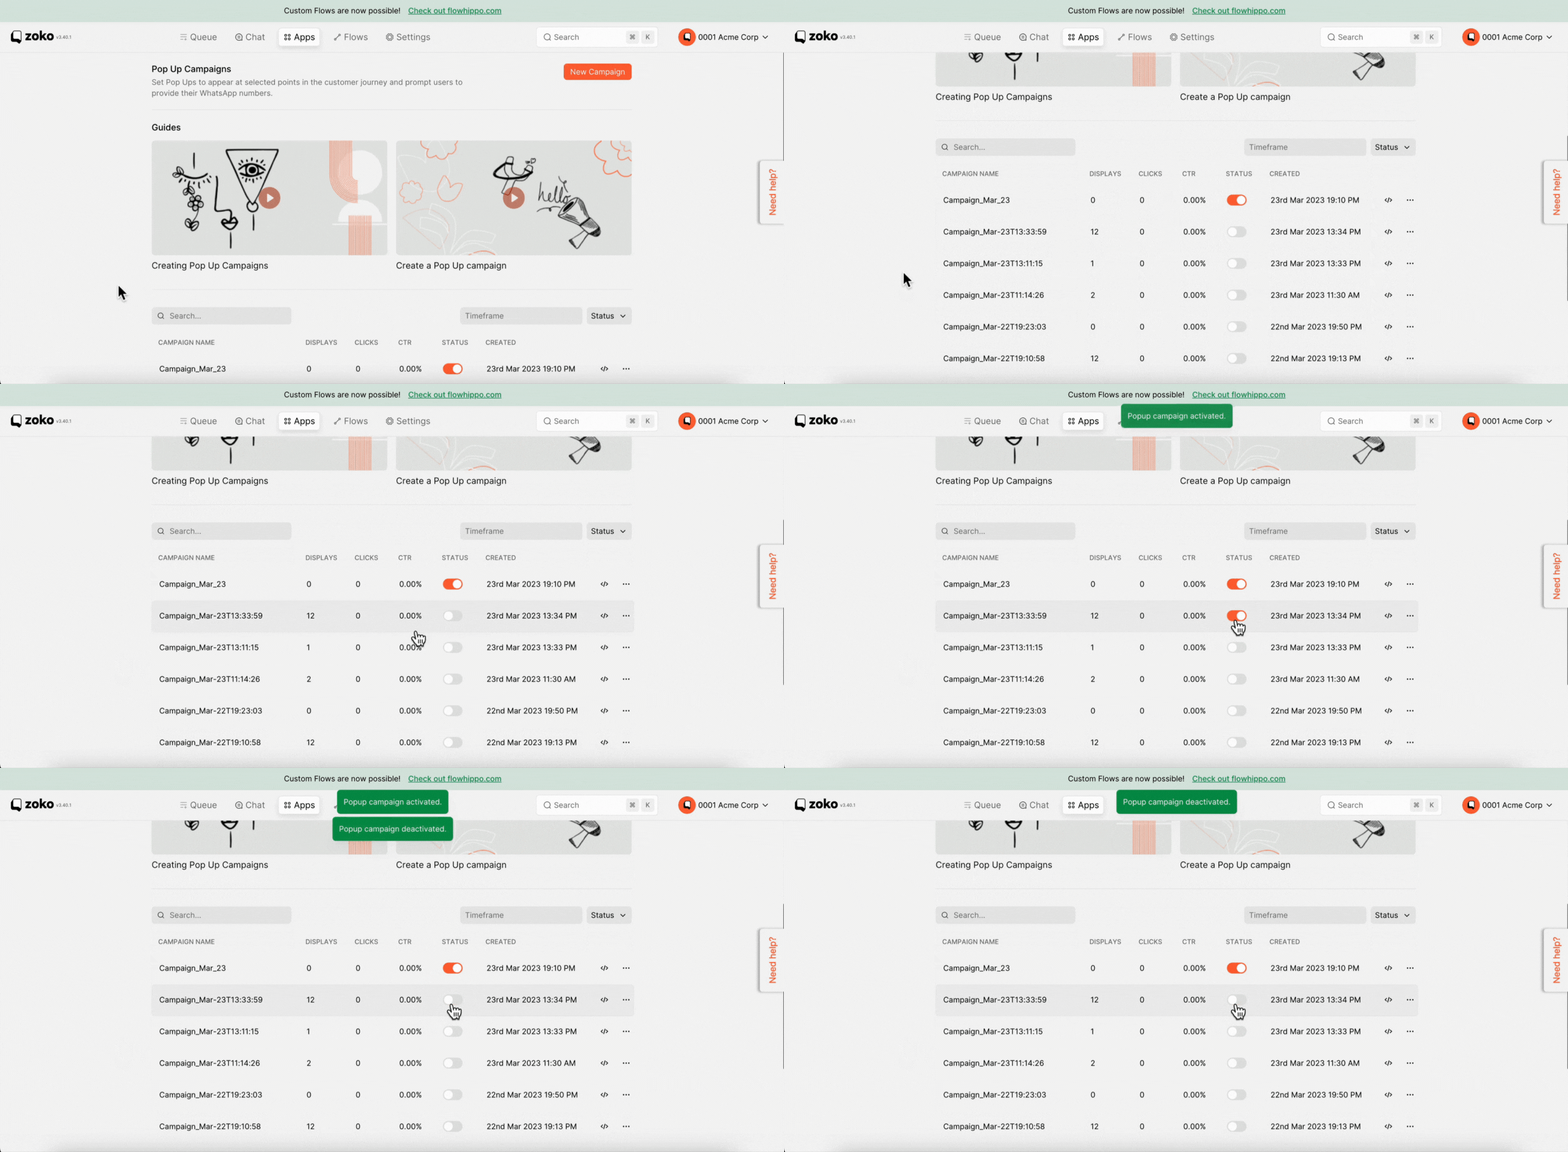
You can also see the number of customers interacting with each campaign by clicking on the Campaign to open its window.
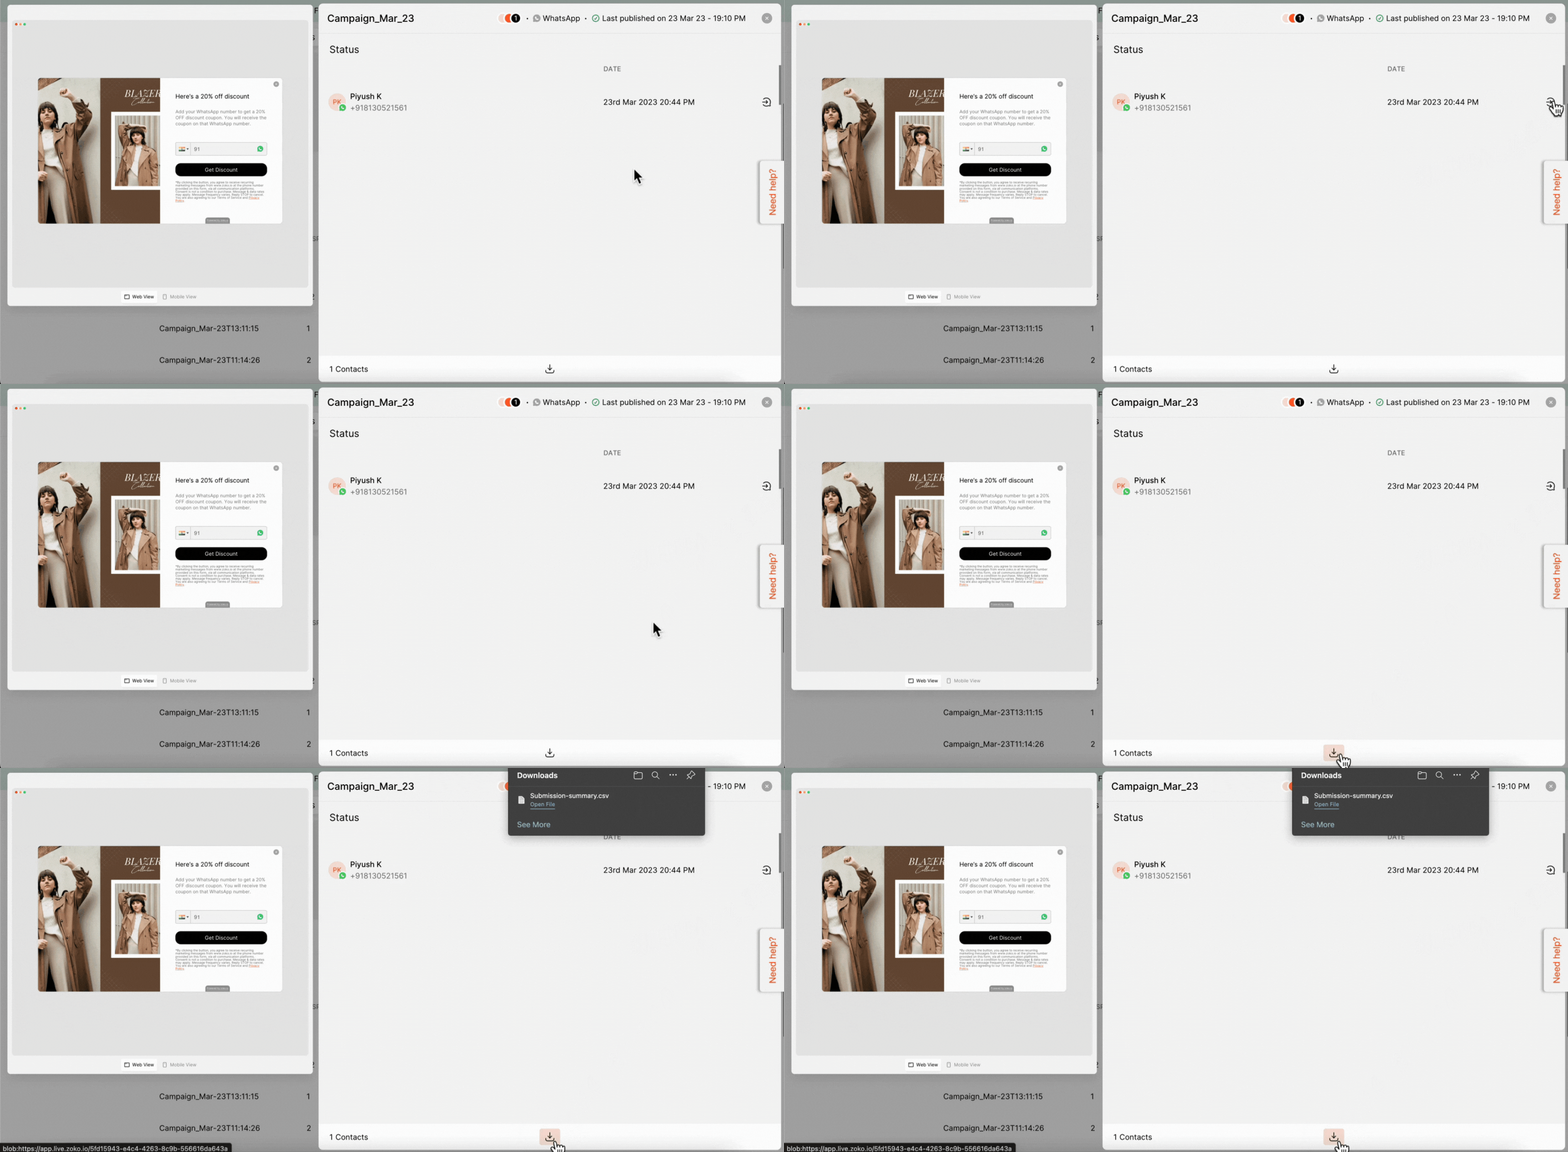
You can start a chat with customers by clicking the Go to Chat icon. You can also download the list of campaign contacts by clicking on the Download icon.
Setting up a pre-built flow in FlowHippo to trigger WhatsApp messages
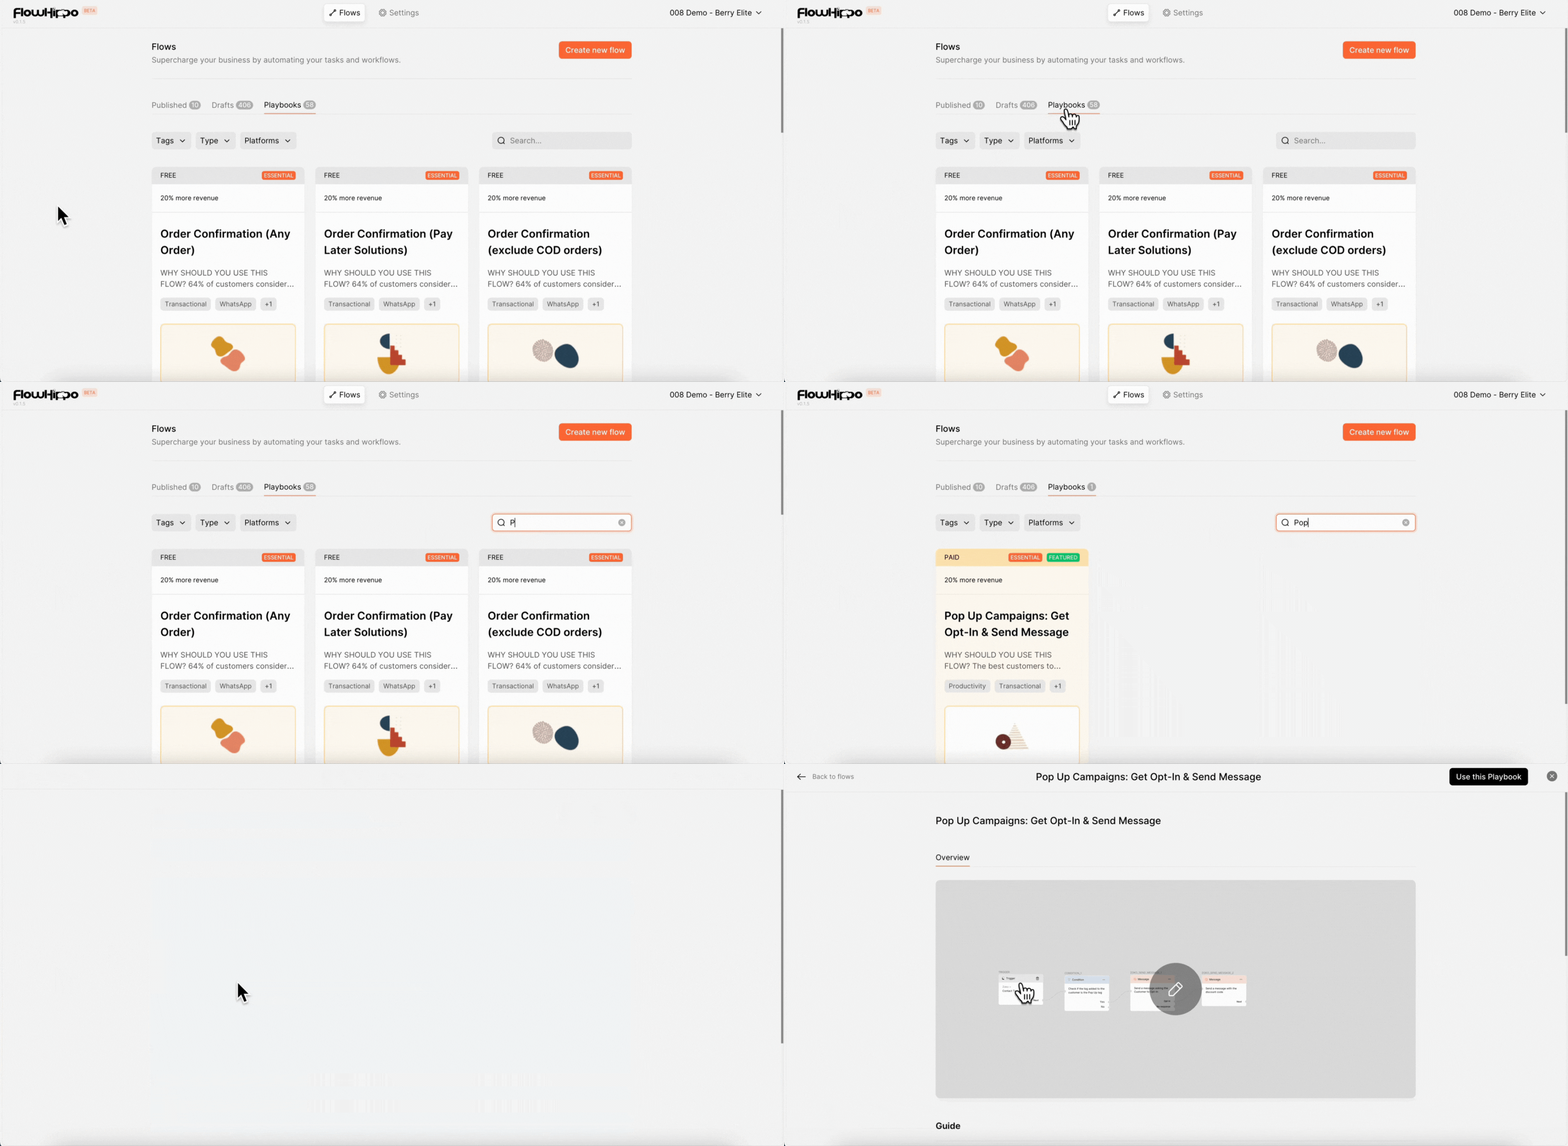
1. Go to FlowHippo.
2. Under the Playbooks, find the "Pop Up Campaigns" flow (just type the name in the search bar “Pop Up”) and click on it.
3. Click on Use this Playbook.
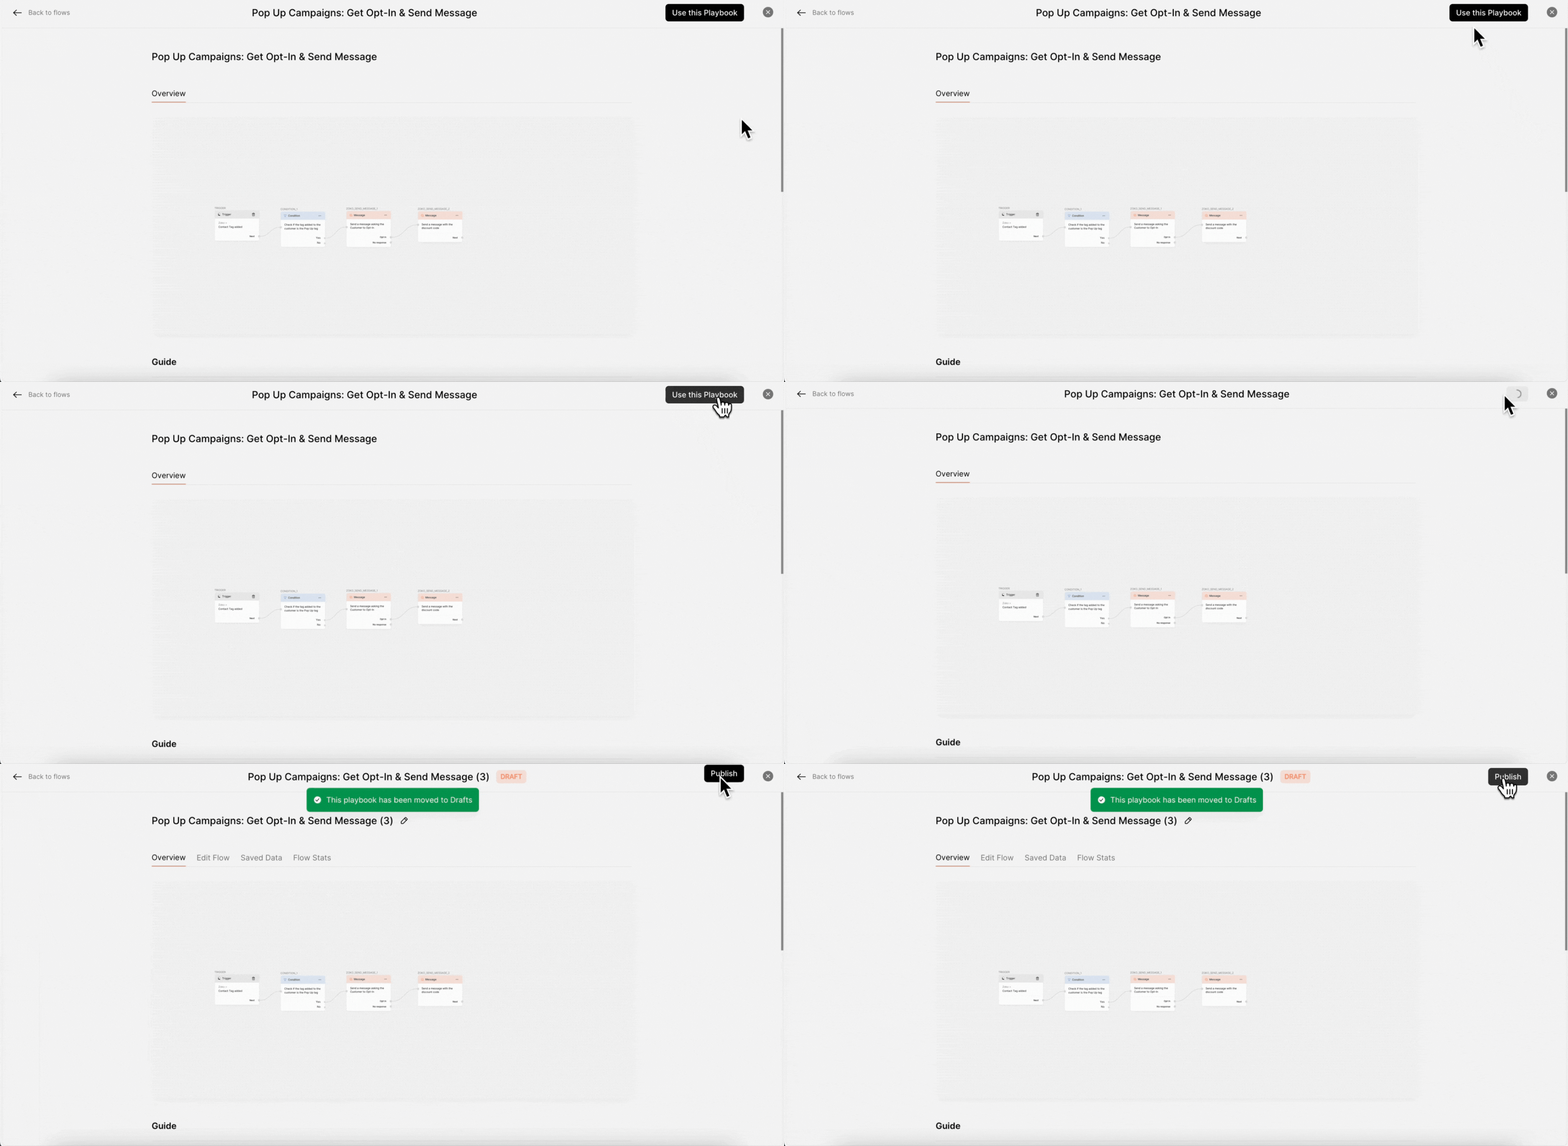
4. Click on Edit.
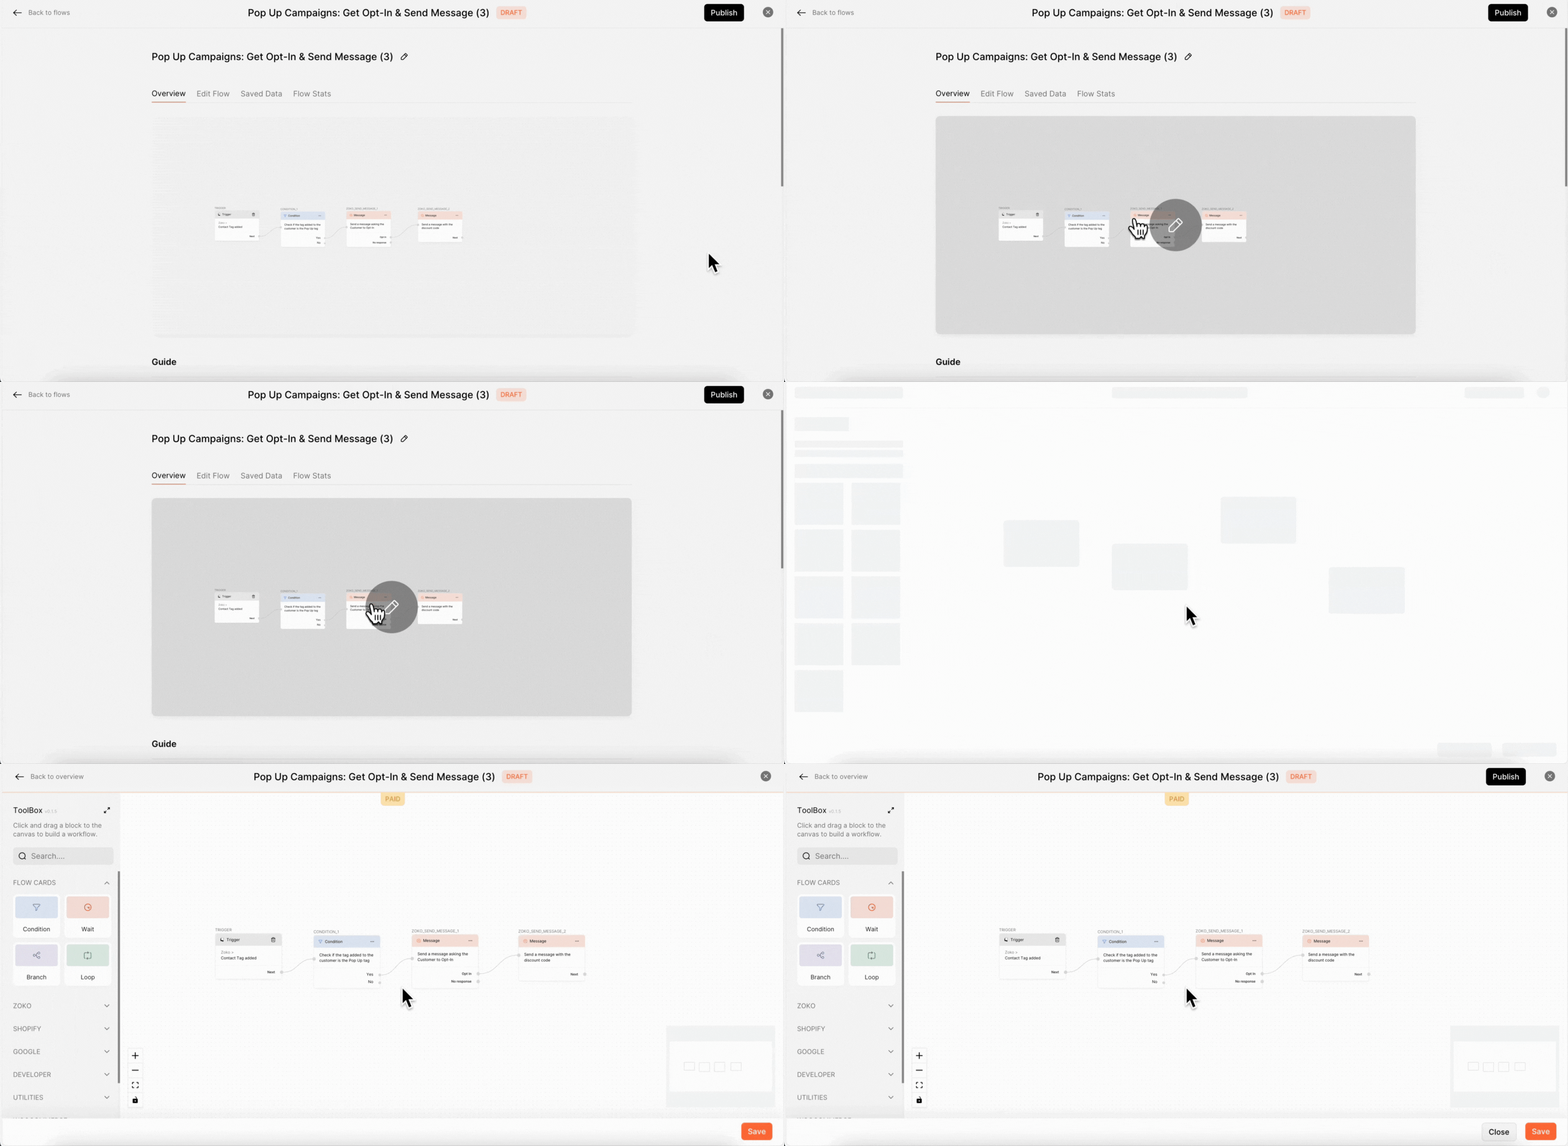
5. In the condition node, you can type the tag name that you have added on the pop-up campaign.
Important Note: You need to add the exact same tag name that you used in your pop-up campaign. Simply copy the tag name from the campaign and paste it here. If you use a different tag name, the flow will not trigger when a number is captured through your pop-up campaign.
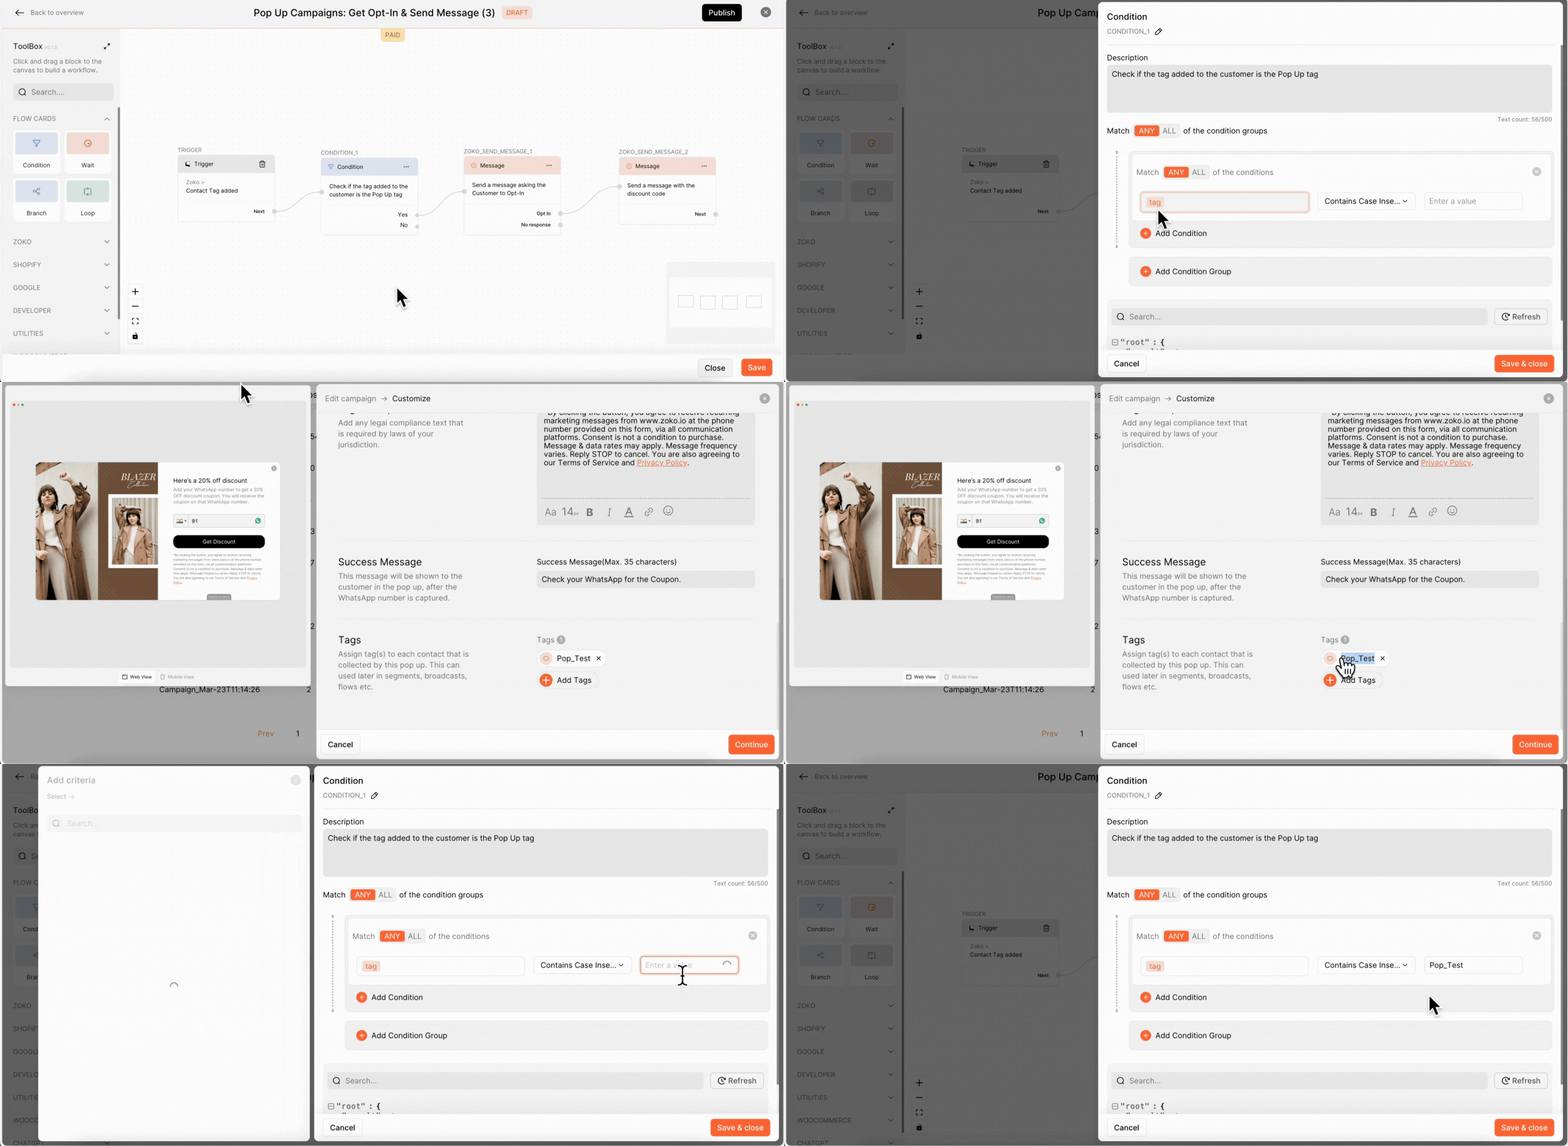
6. Click on Save & Close.
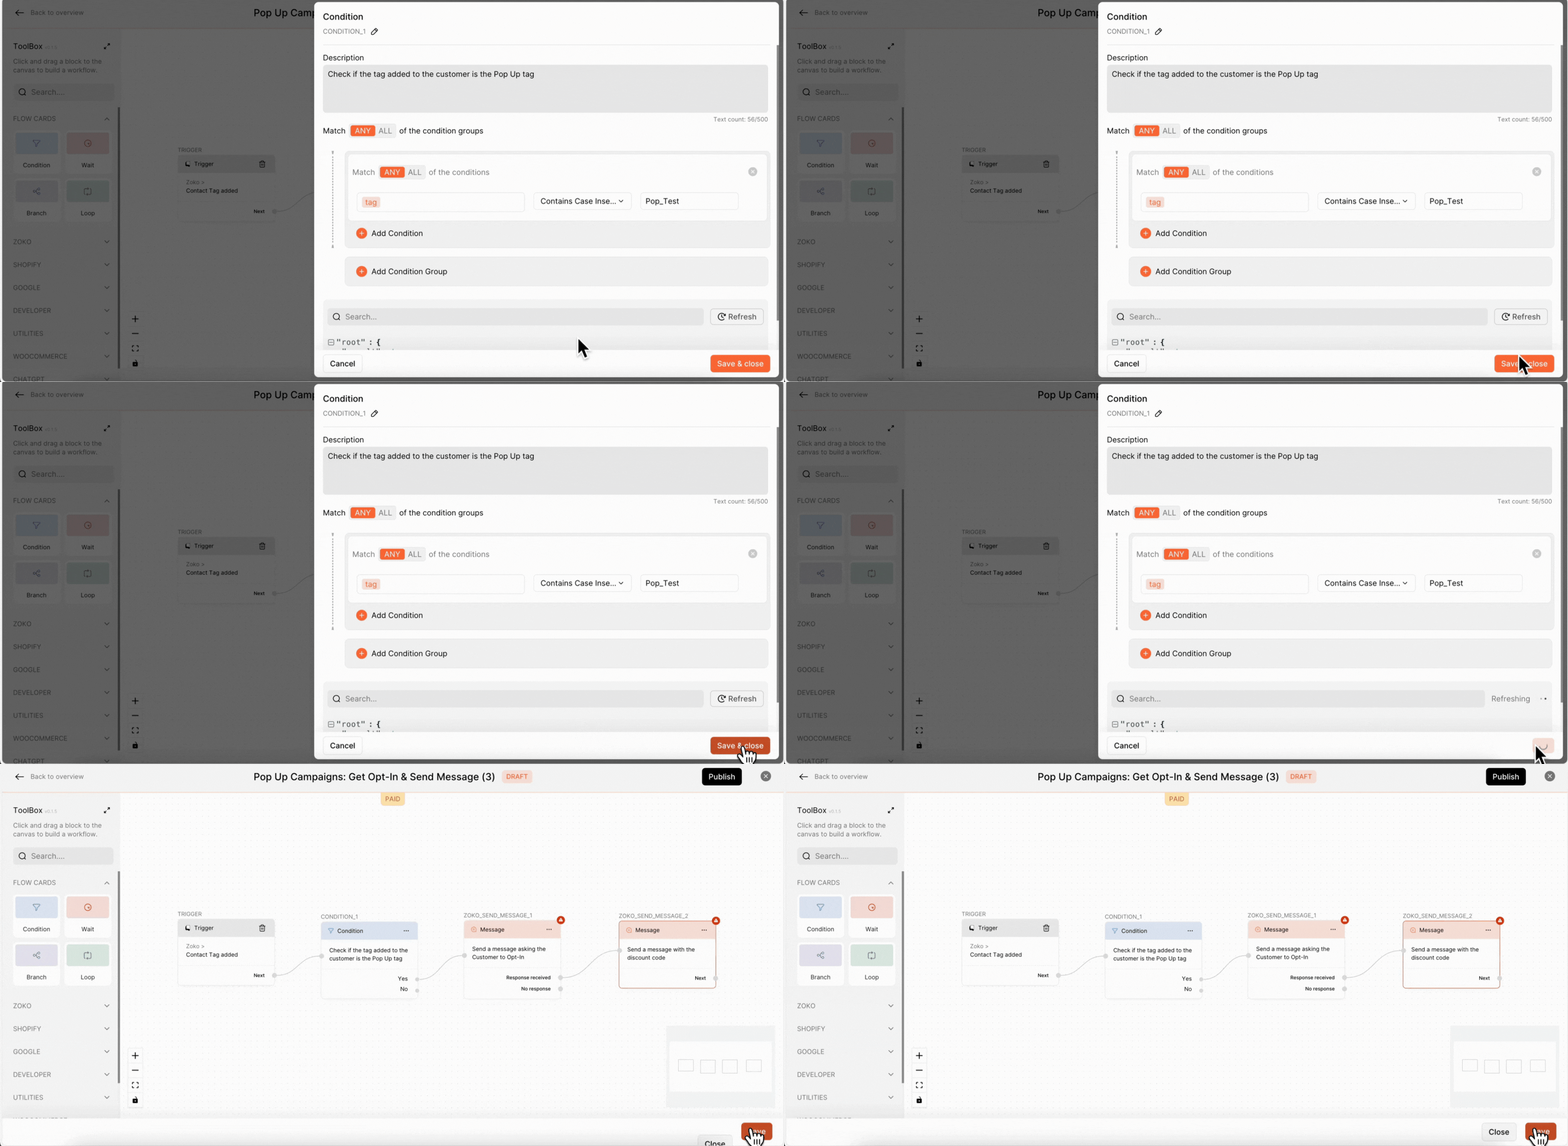
7. In the first message node, select the opt-in template and fill out the variables in the provided fields. For the first variable, if you want to mention the customer's name, choose trigger >> customer >> name.
Note: The templates will appear here once it has been created on the Zoko dashboard. If you haven’t set it up yet, please create it by following our guide on how to create a template.
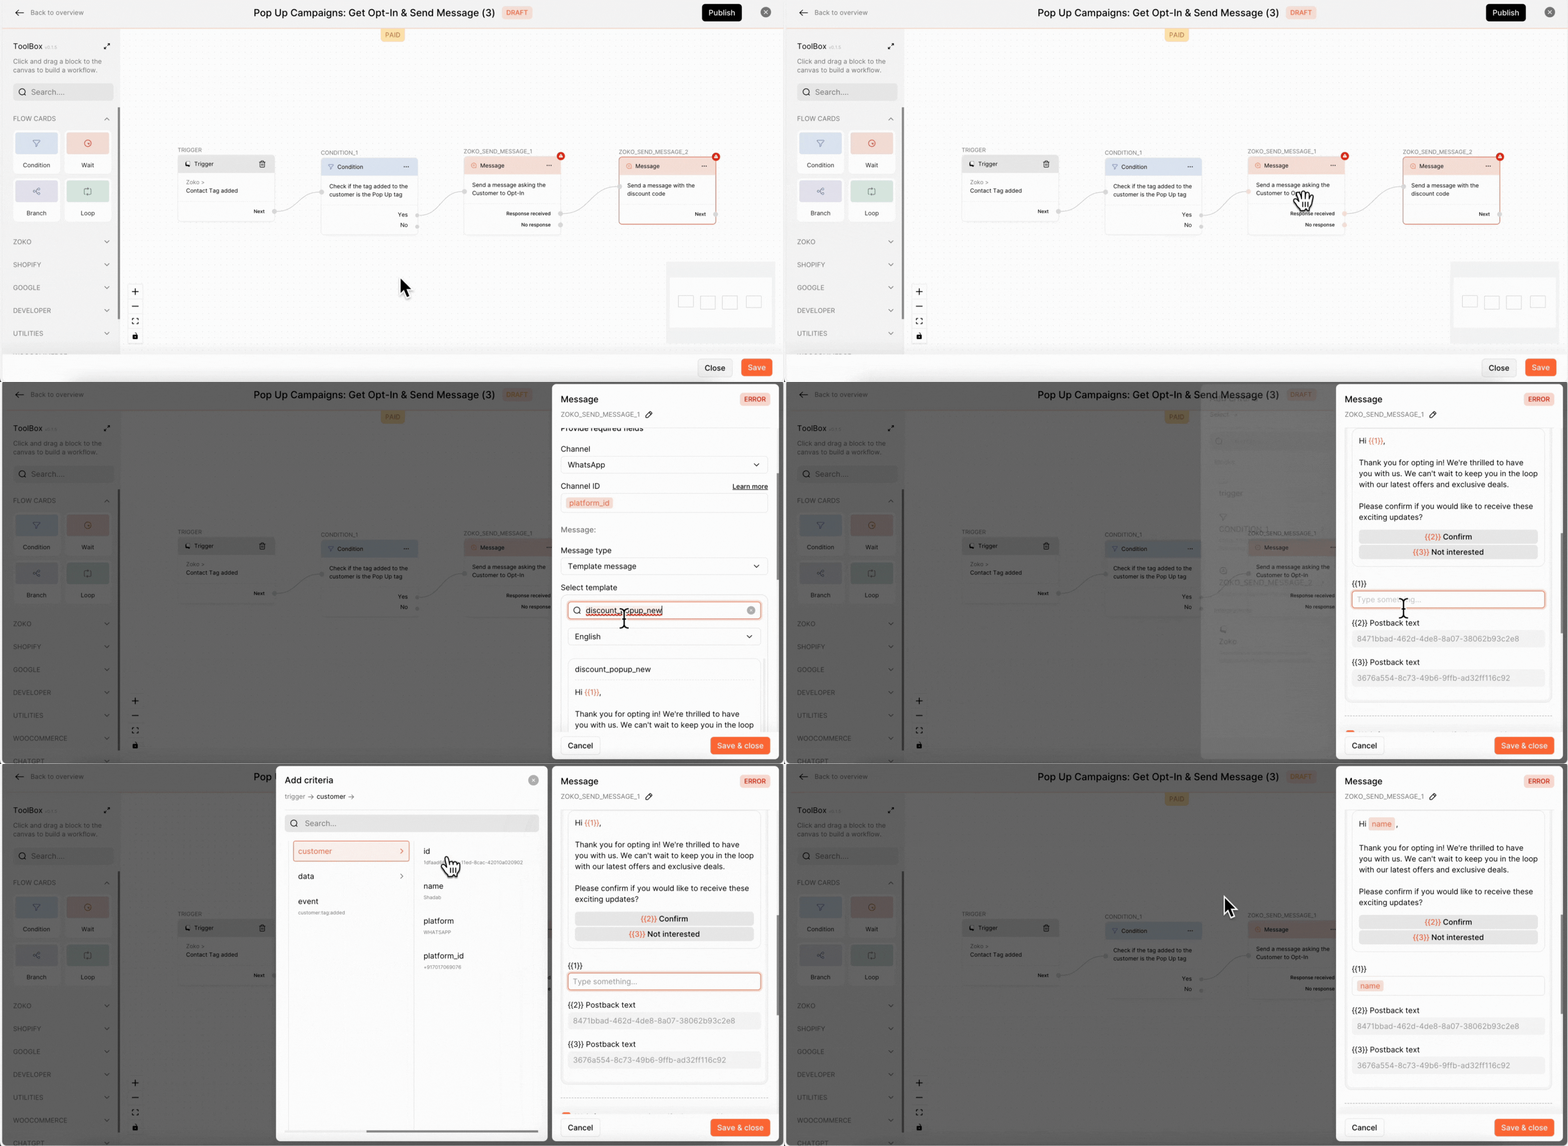
8. Click on Save & Close.
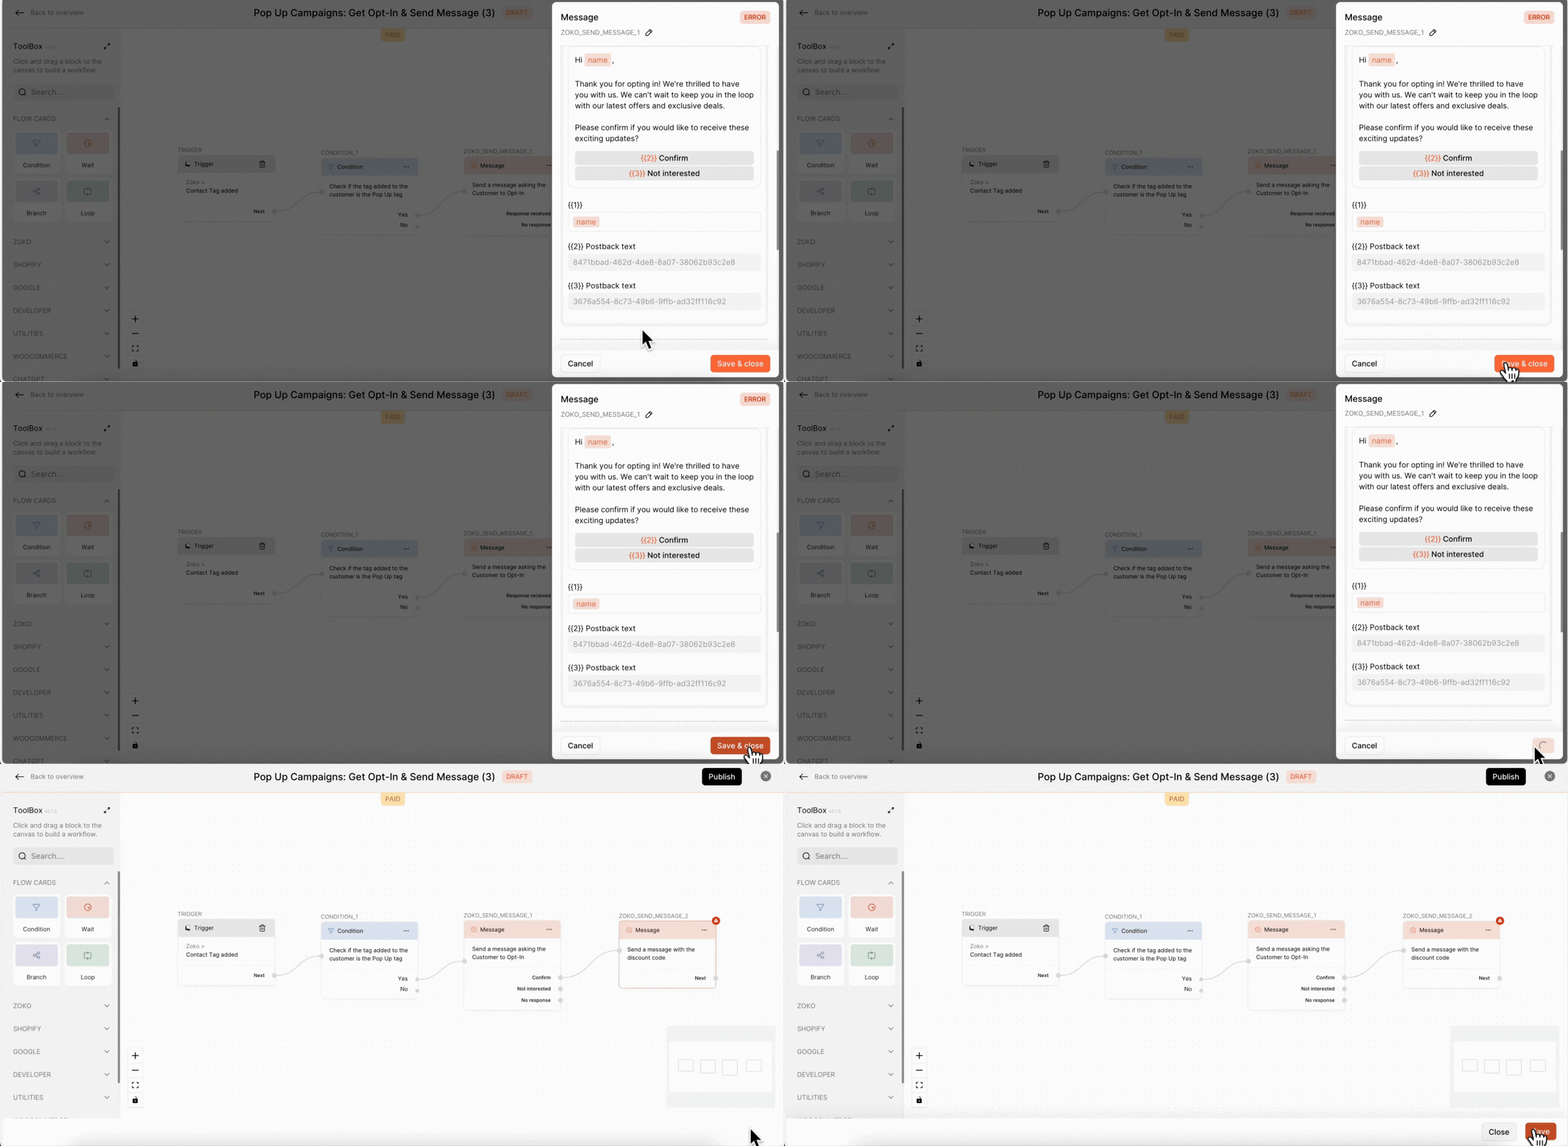
9. In the second message node, select the discount template you want to give to the customer and fill out the variables in the provided field.
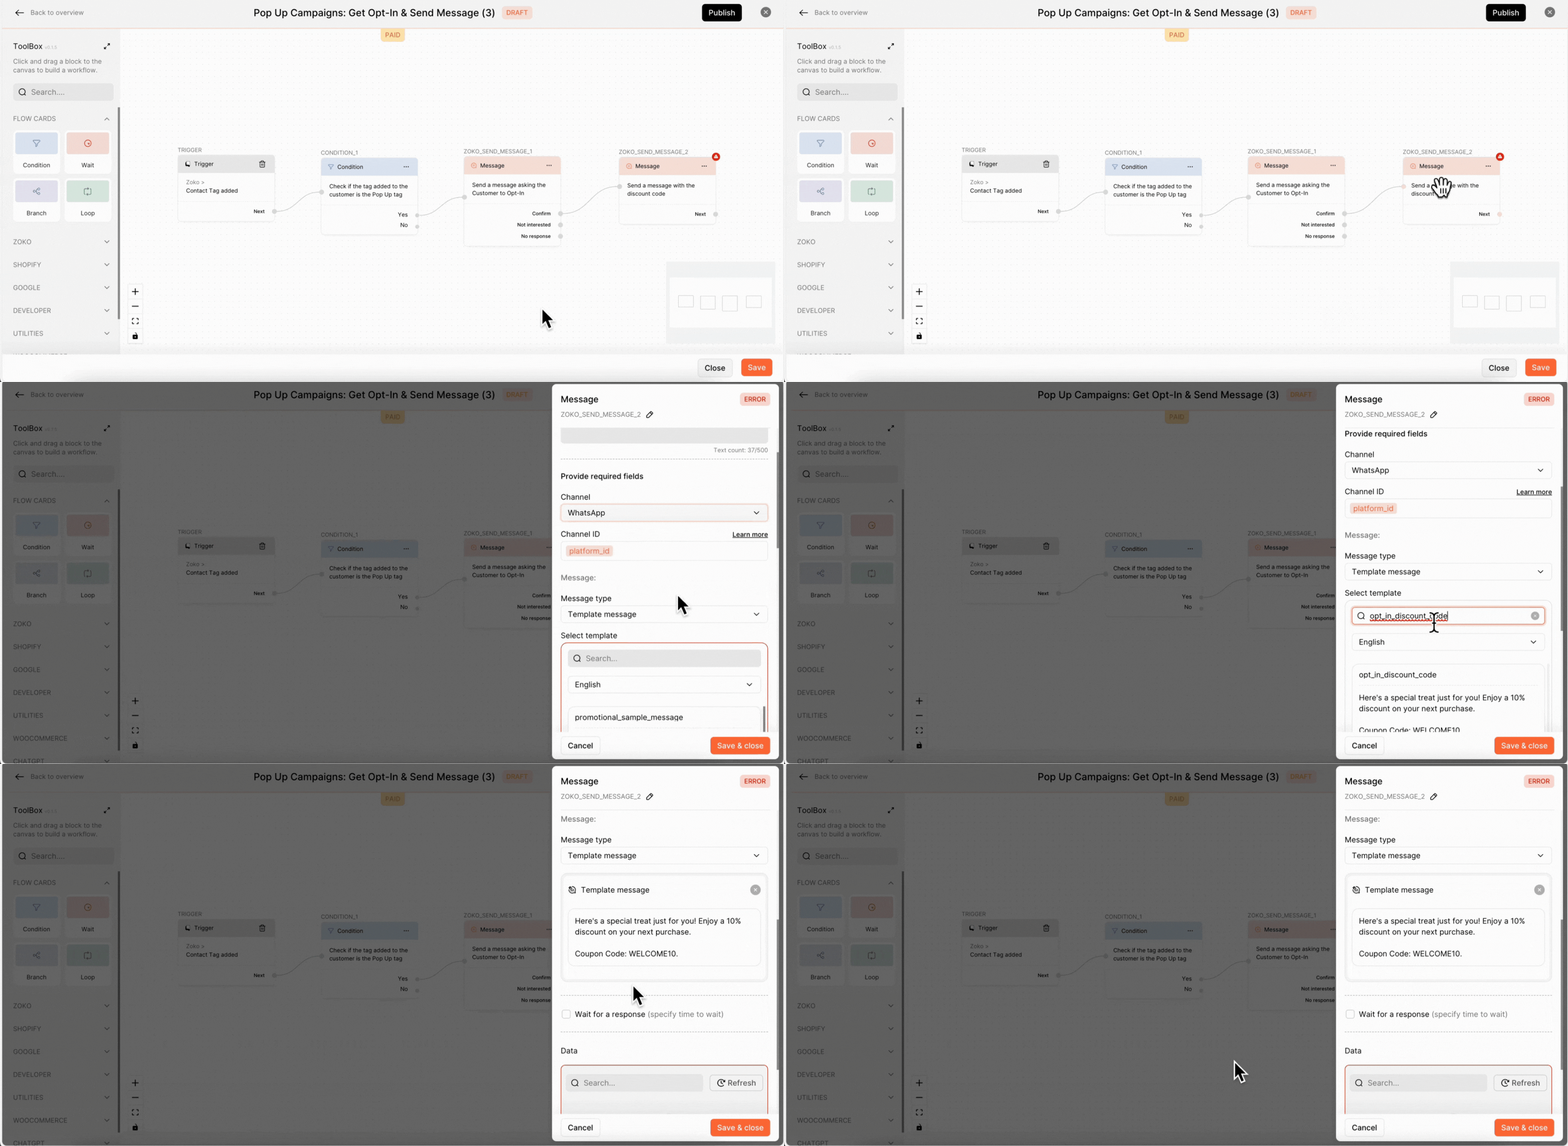
10. Click on Save & Close.
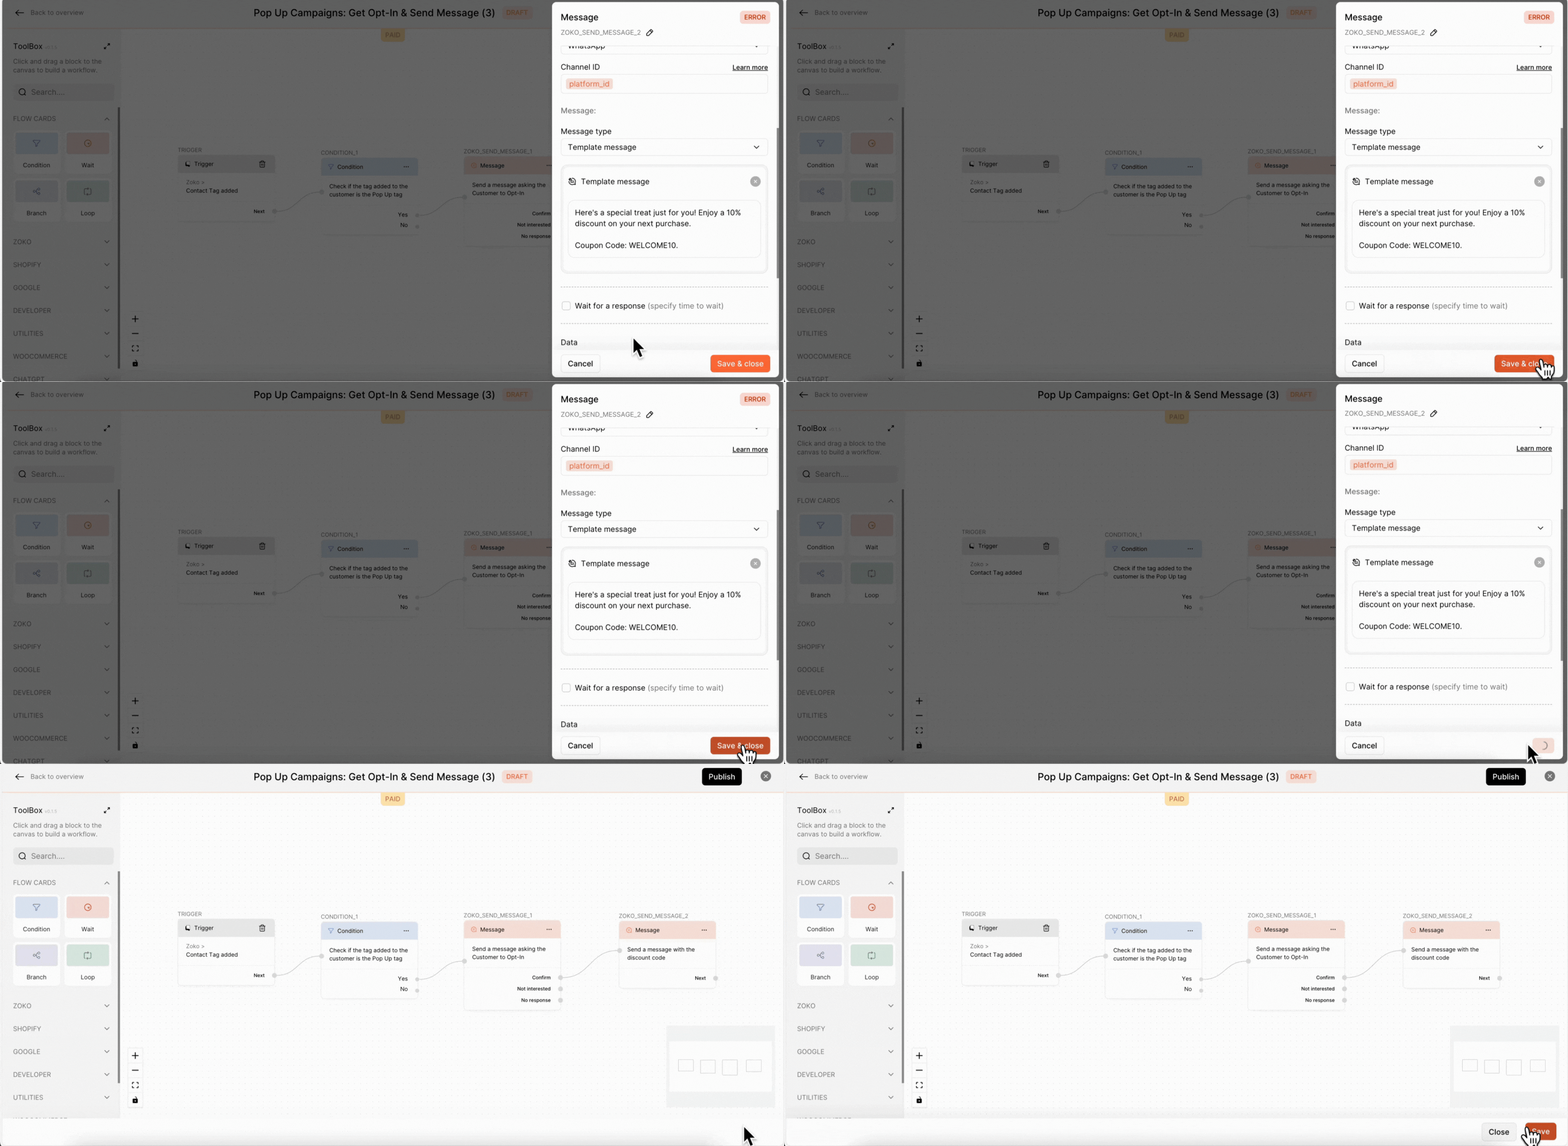
11. Click on Save and then Publish.
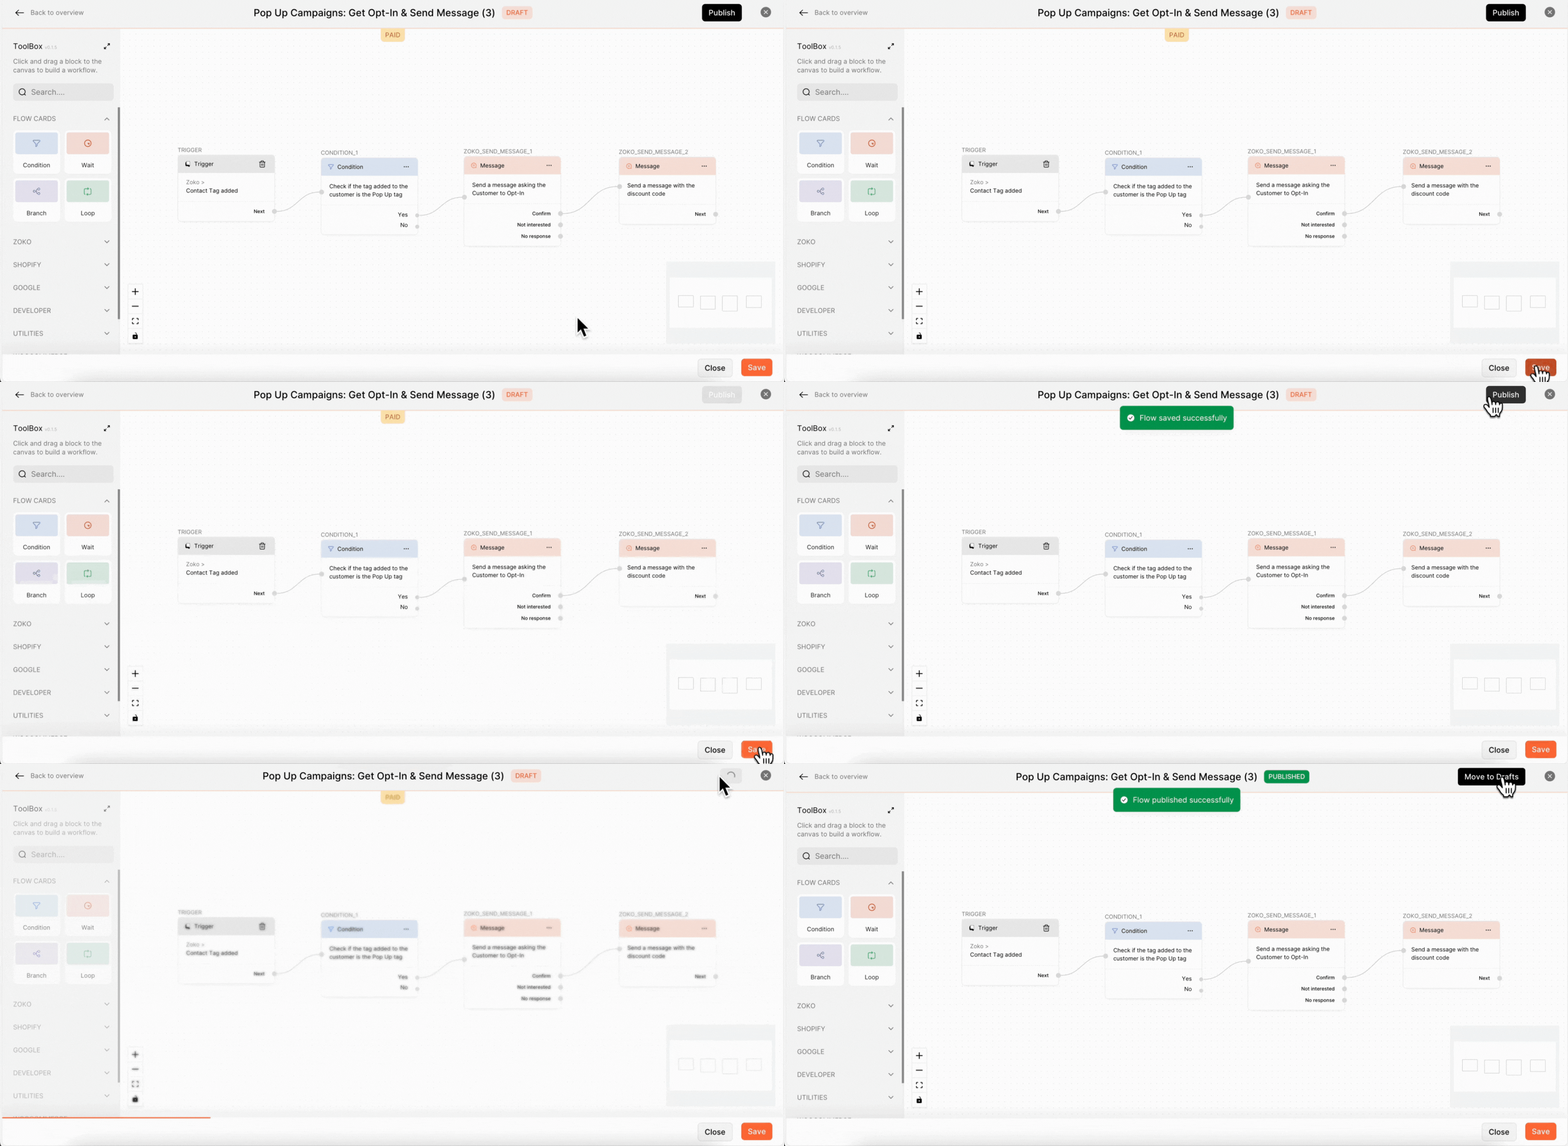
If you wish to create a custom flow from scratch, please refer to our article on How to Build a Flow for Pop-Up Campaign for detailed guidance.
Keywords: Pop-up Campaigns, Conversions, Leads, WhatsApp, Send notifications, Follow-up, FlowHippo.


.png)