How to Add Contacts on the Zoko Dashboard
Learn how to efficiently add contacts individually or in bulk on the Zoko dashboard.
Adding contacts to your Zoko dashboard is a simple process that can be done either from the Chat screen or through the settings menu. Follow these steps to seamlessly manage your contacts:
Adding Contacts from the Chat Screen:
1. Click on "Start New Chat" to access the contact page directly.
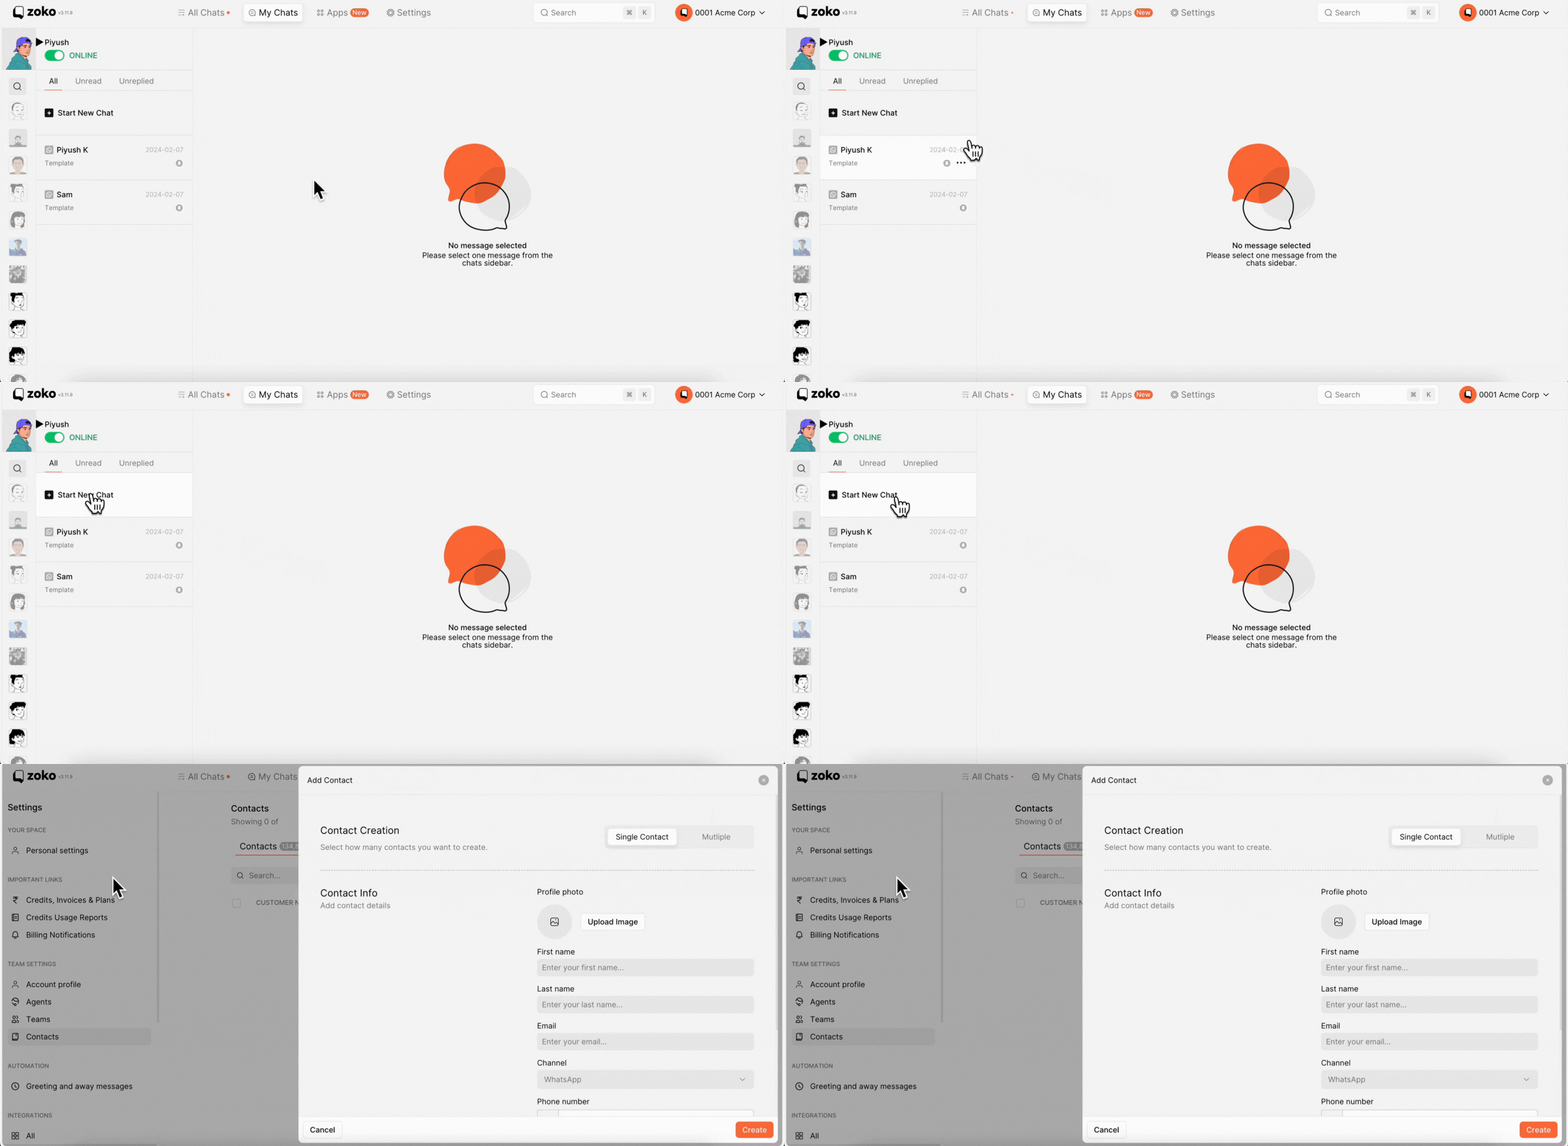
Adding Contacts from the Settings:
1. Go to the Settings.
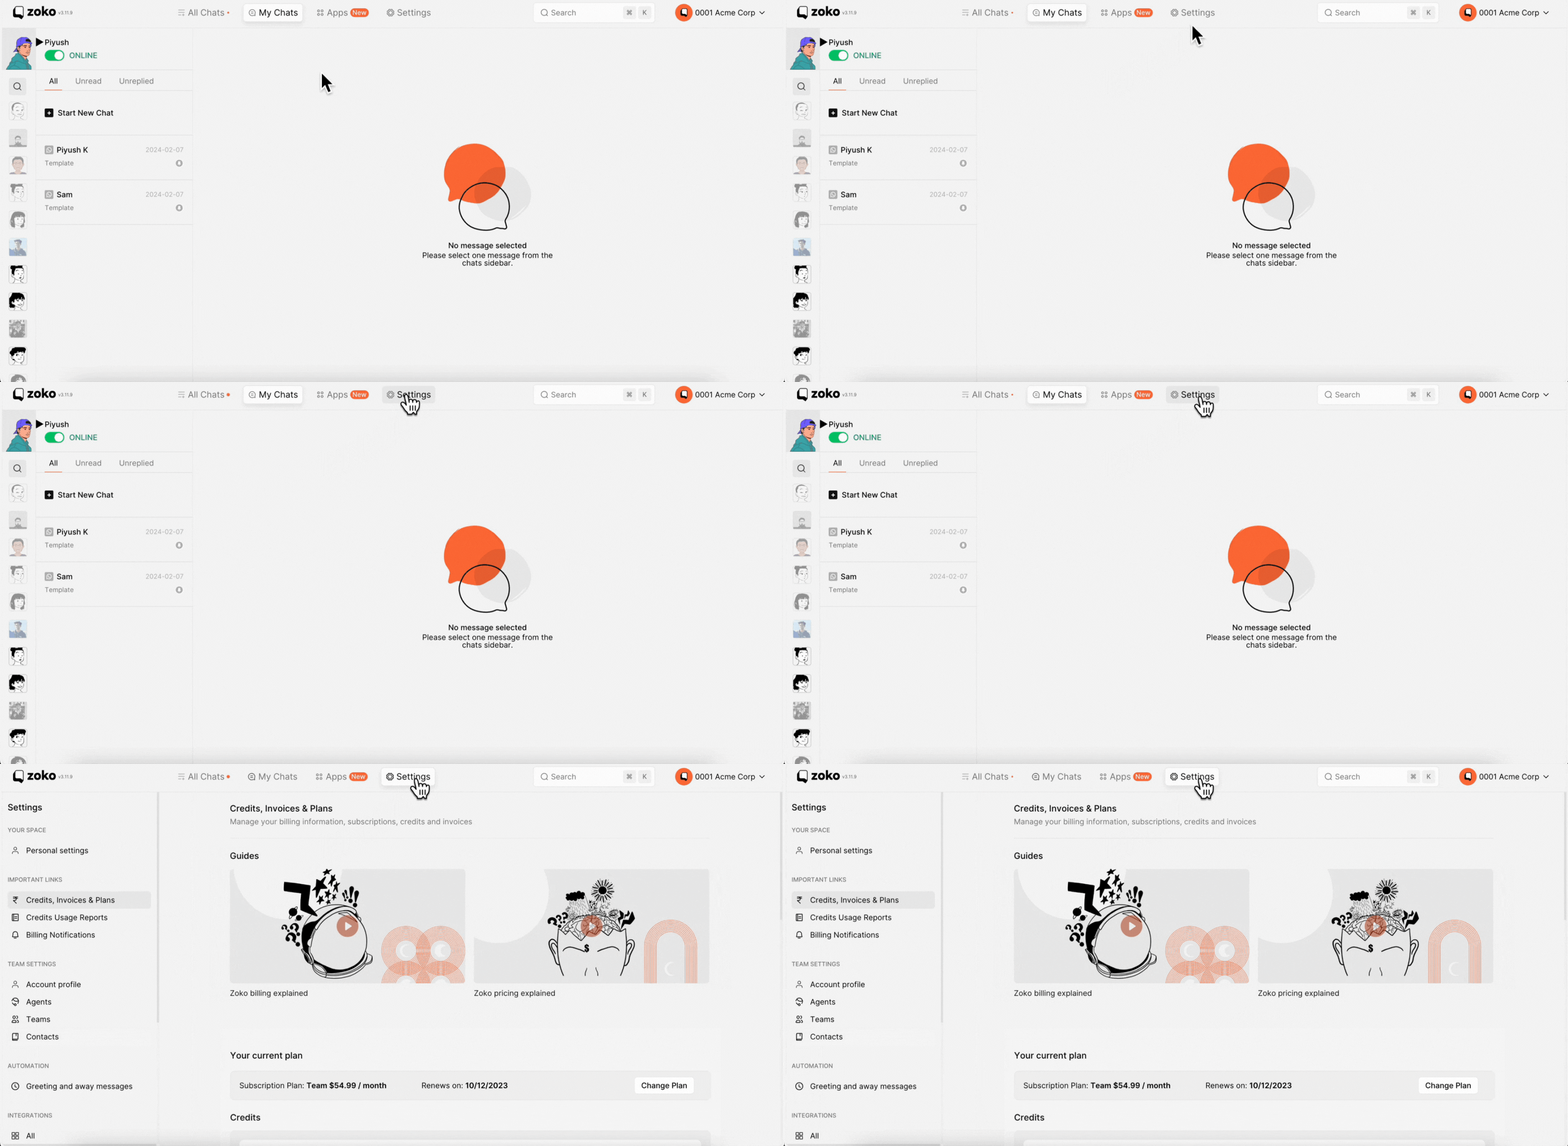
2. On the left sidebar, click on Contacts.

3. From there, click on Add Contacts, where you can choose to add contacts individually or in bulk, as described in the subsequent steps.
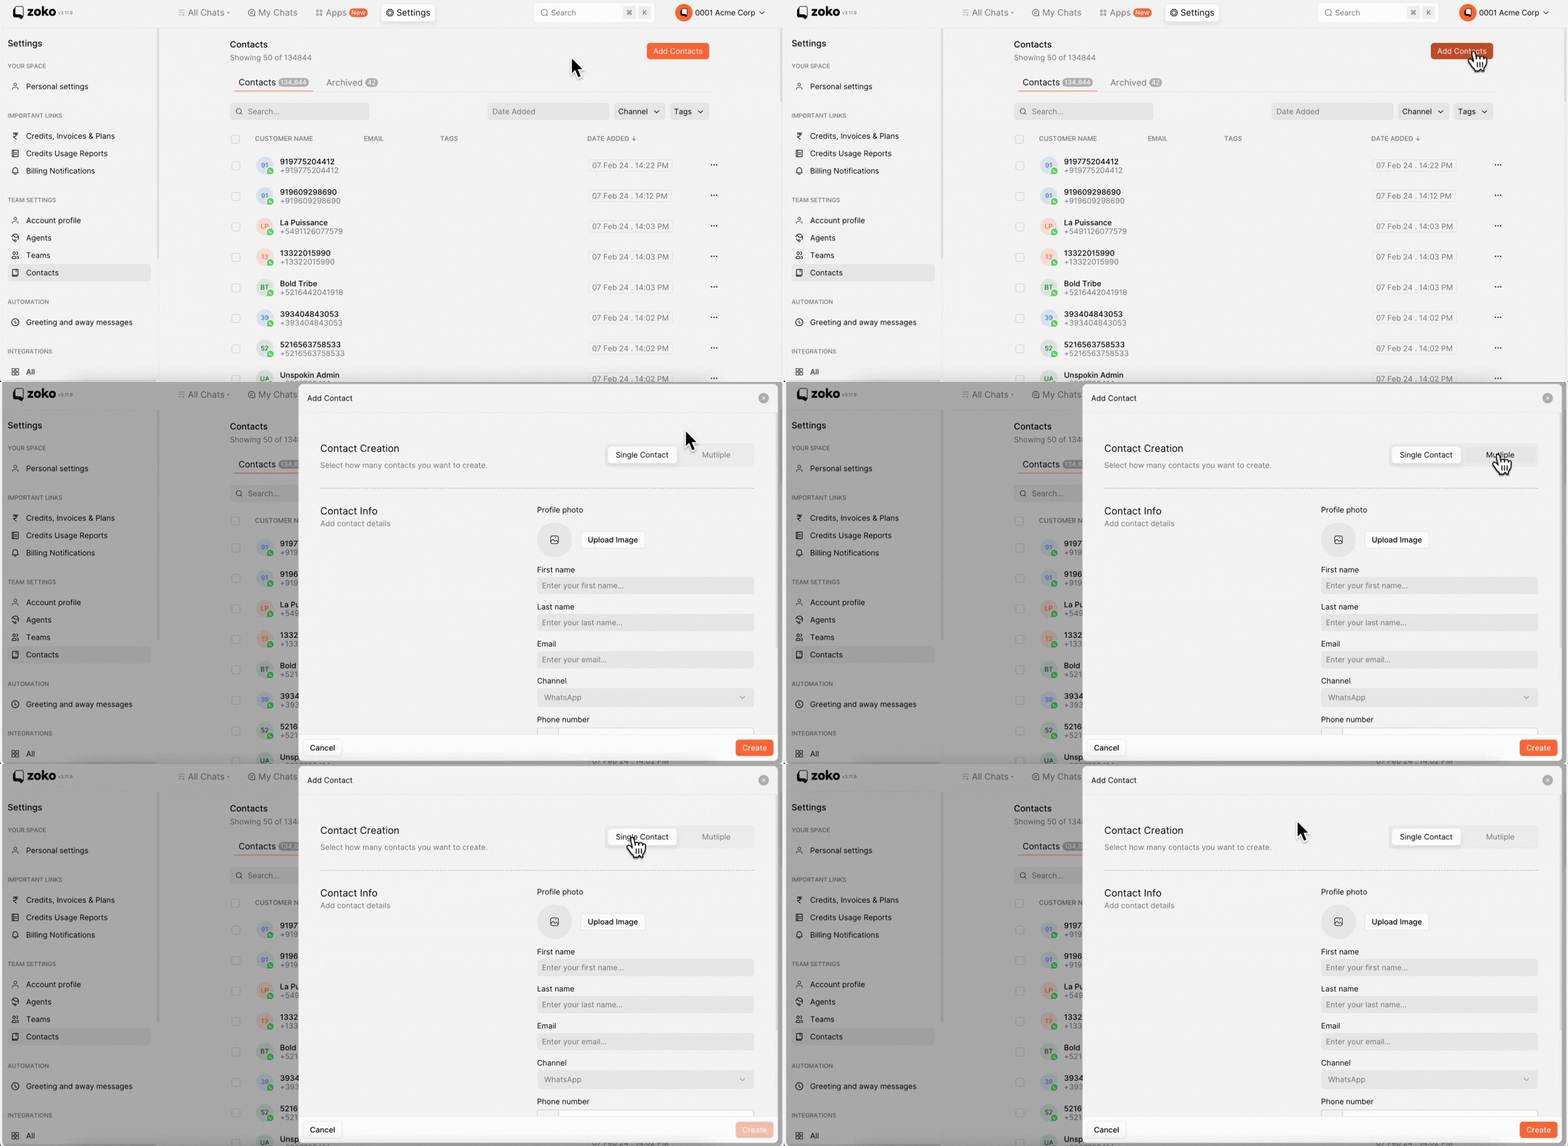
Single Contact:
1. Select the Single option.
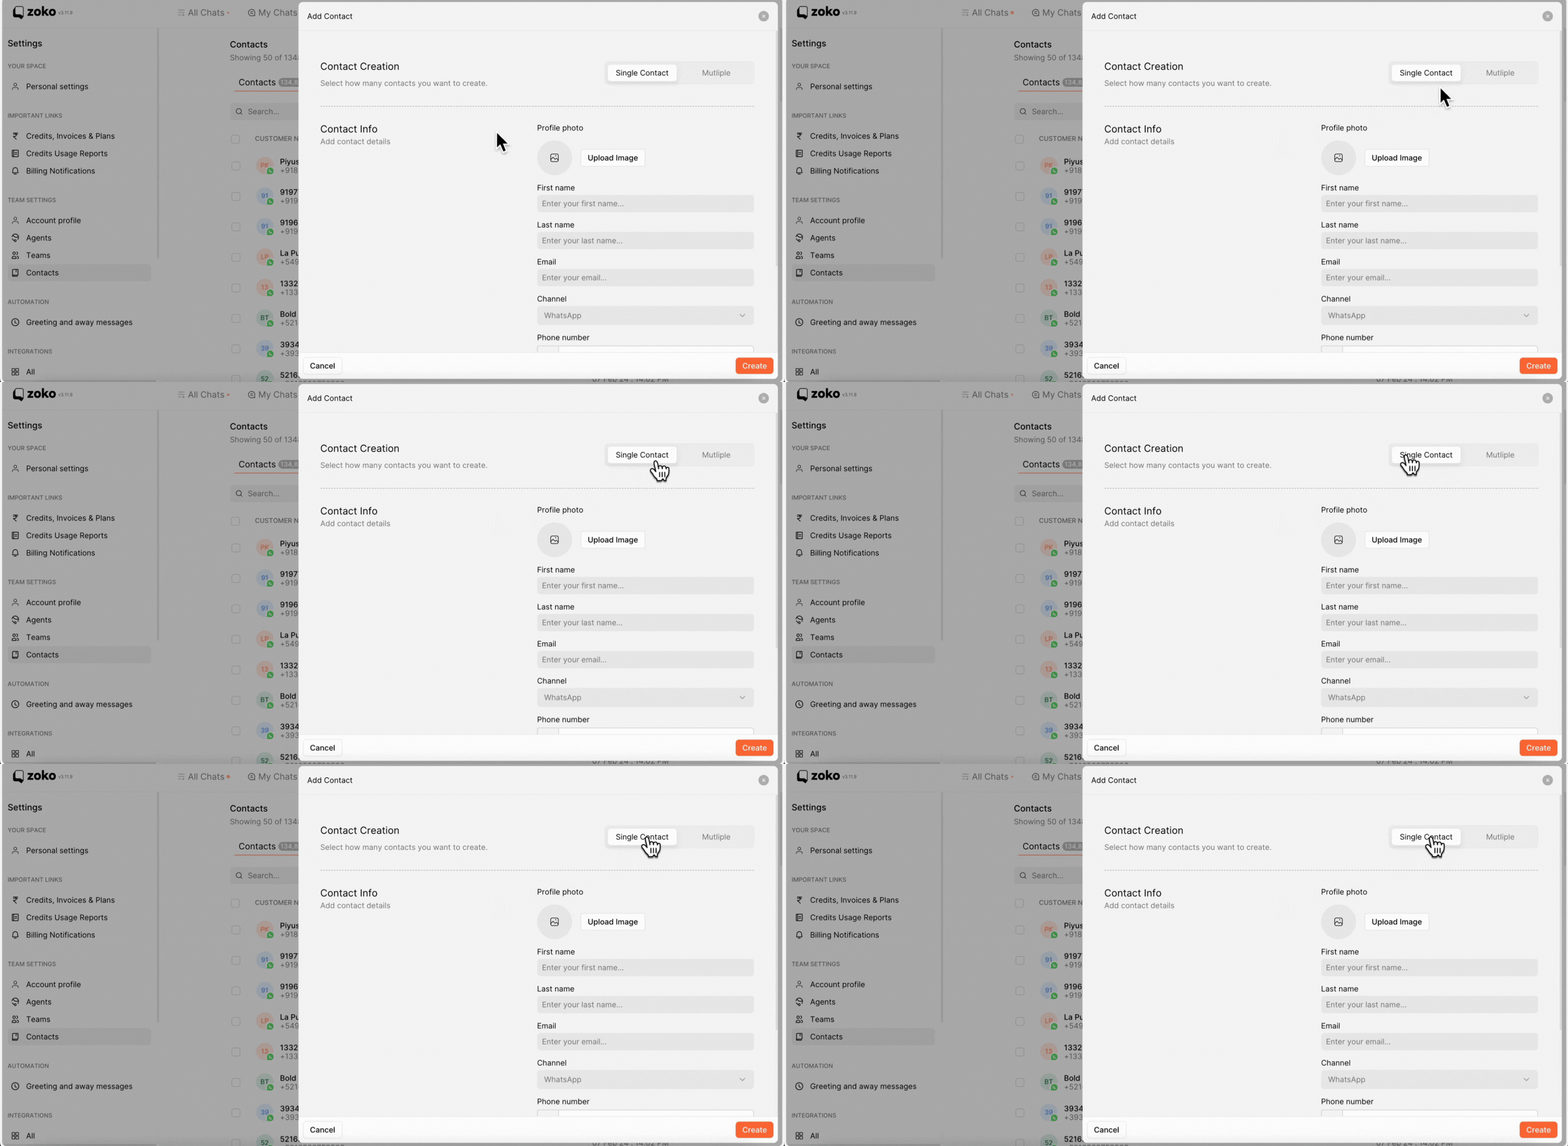
2. Fill in all the customer's details here. (Profile picture and email field are optional; you can skip these fields if you don't have them).
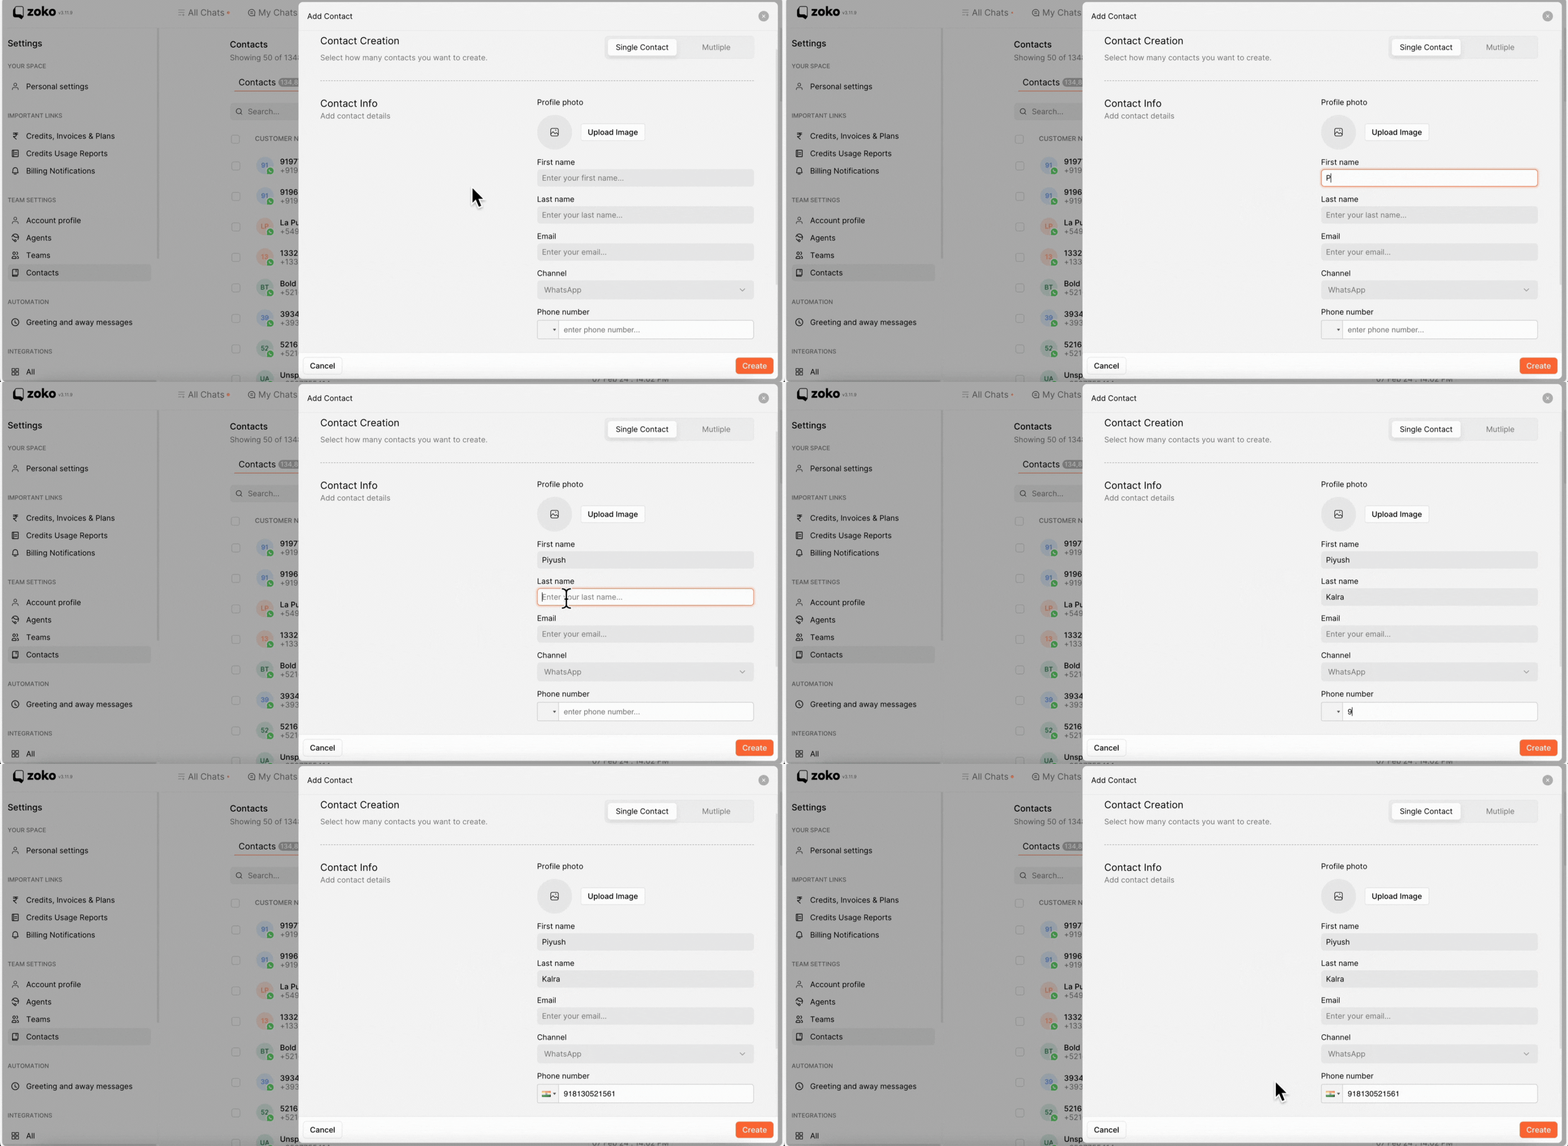
3. Optionally, add tags to categorize your contacts, such as “PREMIUM_CUSTOMER” by clicking on Add Tags and selecting them from the dropdown menu.
Note: The tags will only be visible if you have previously created them.
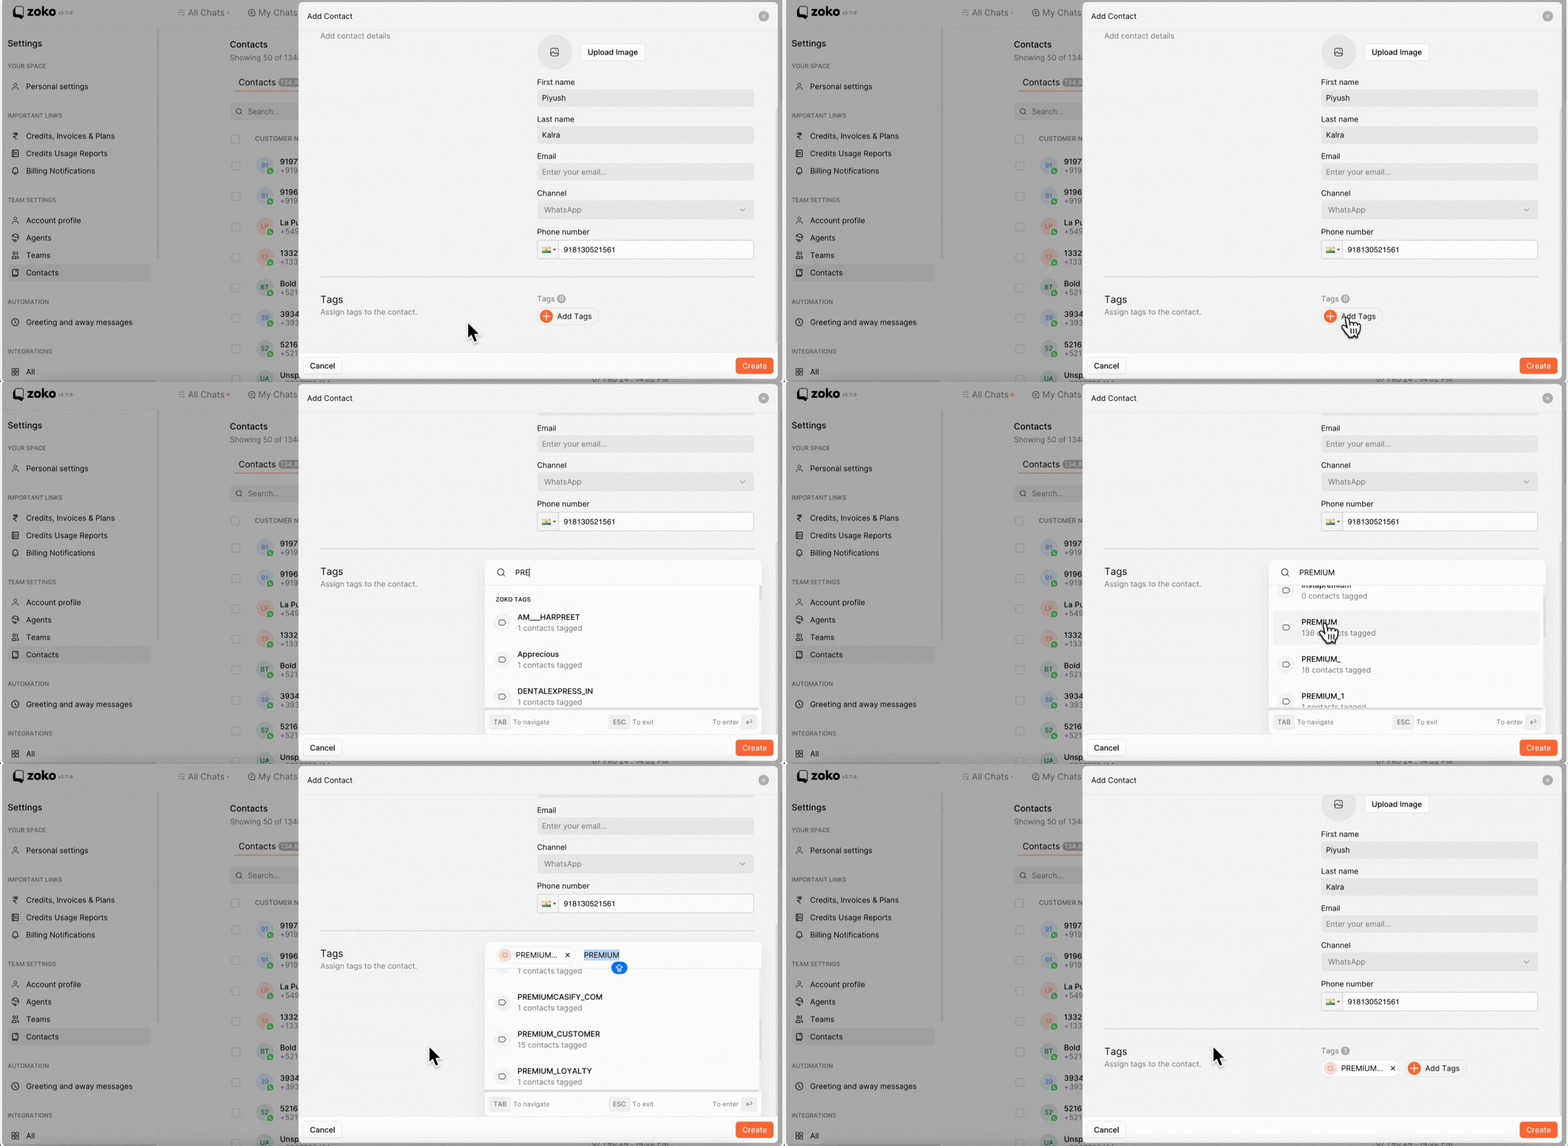
4. Click on Create to add the new contact to the dashboard.
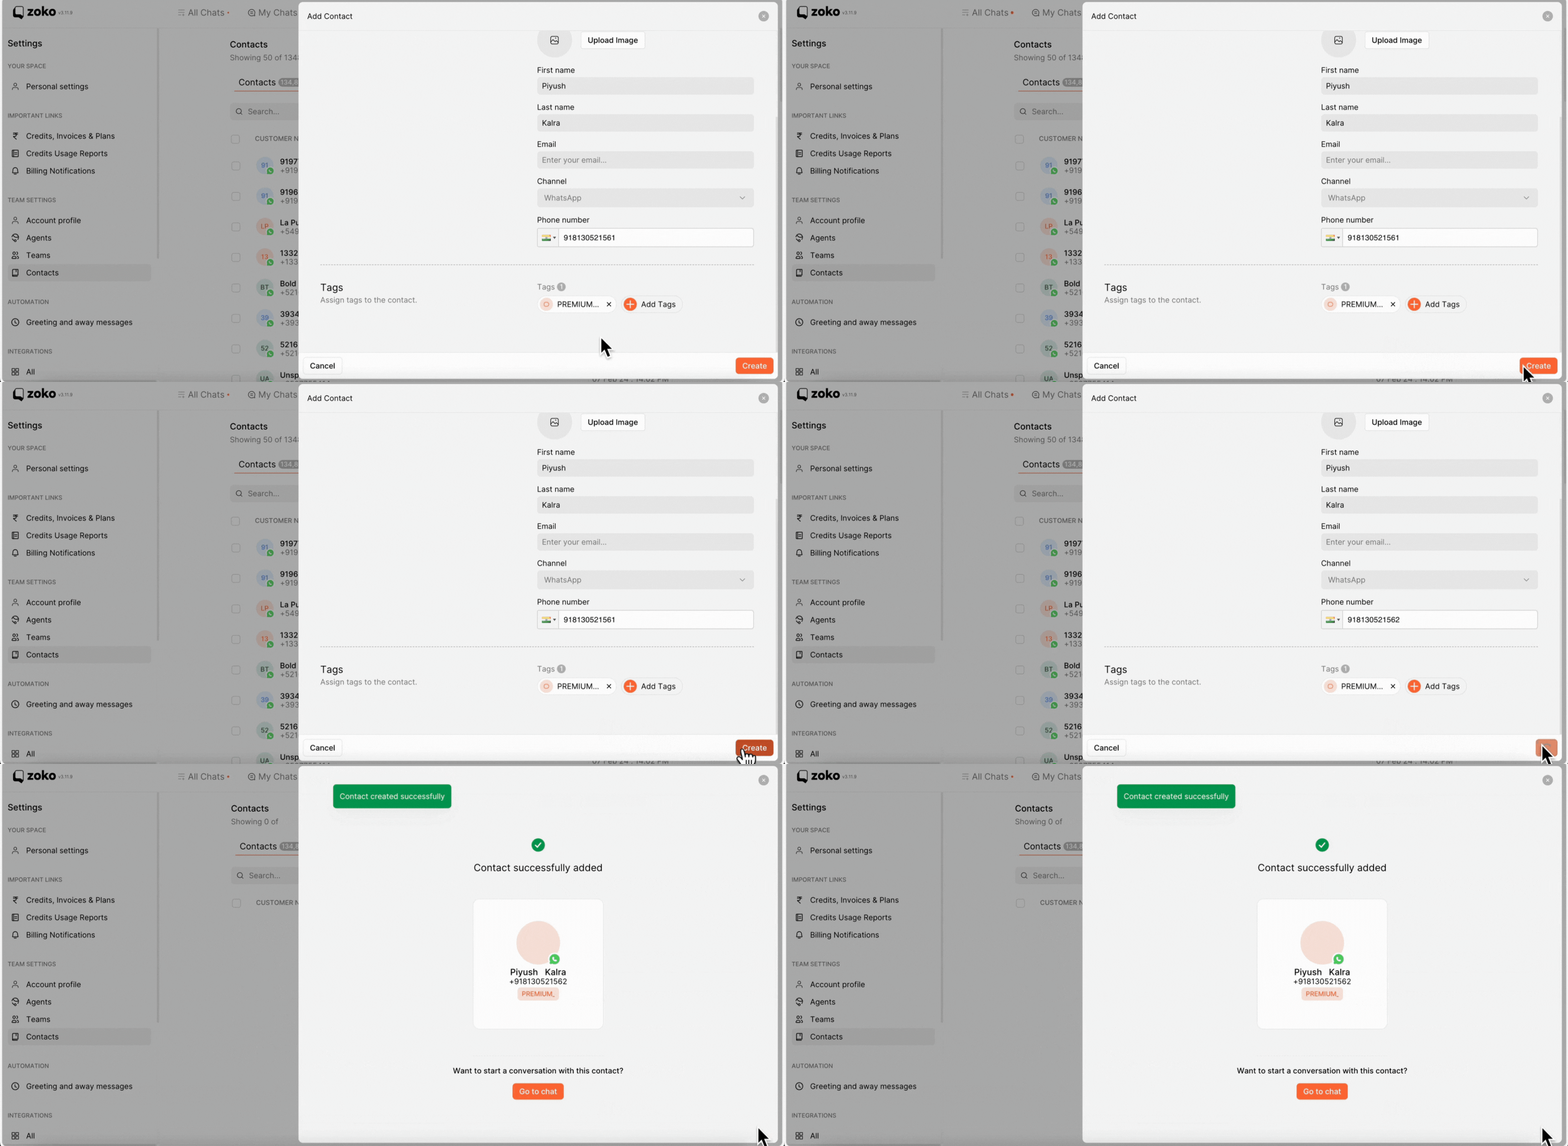
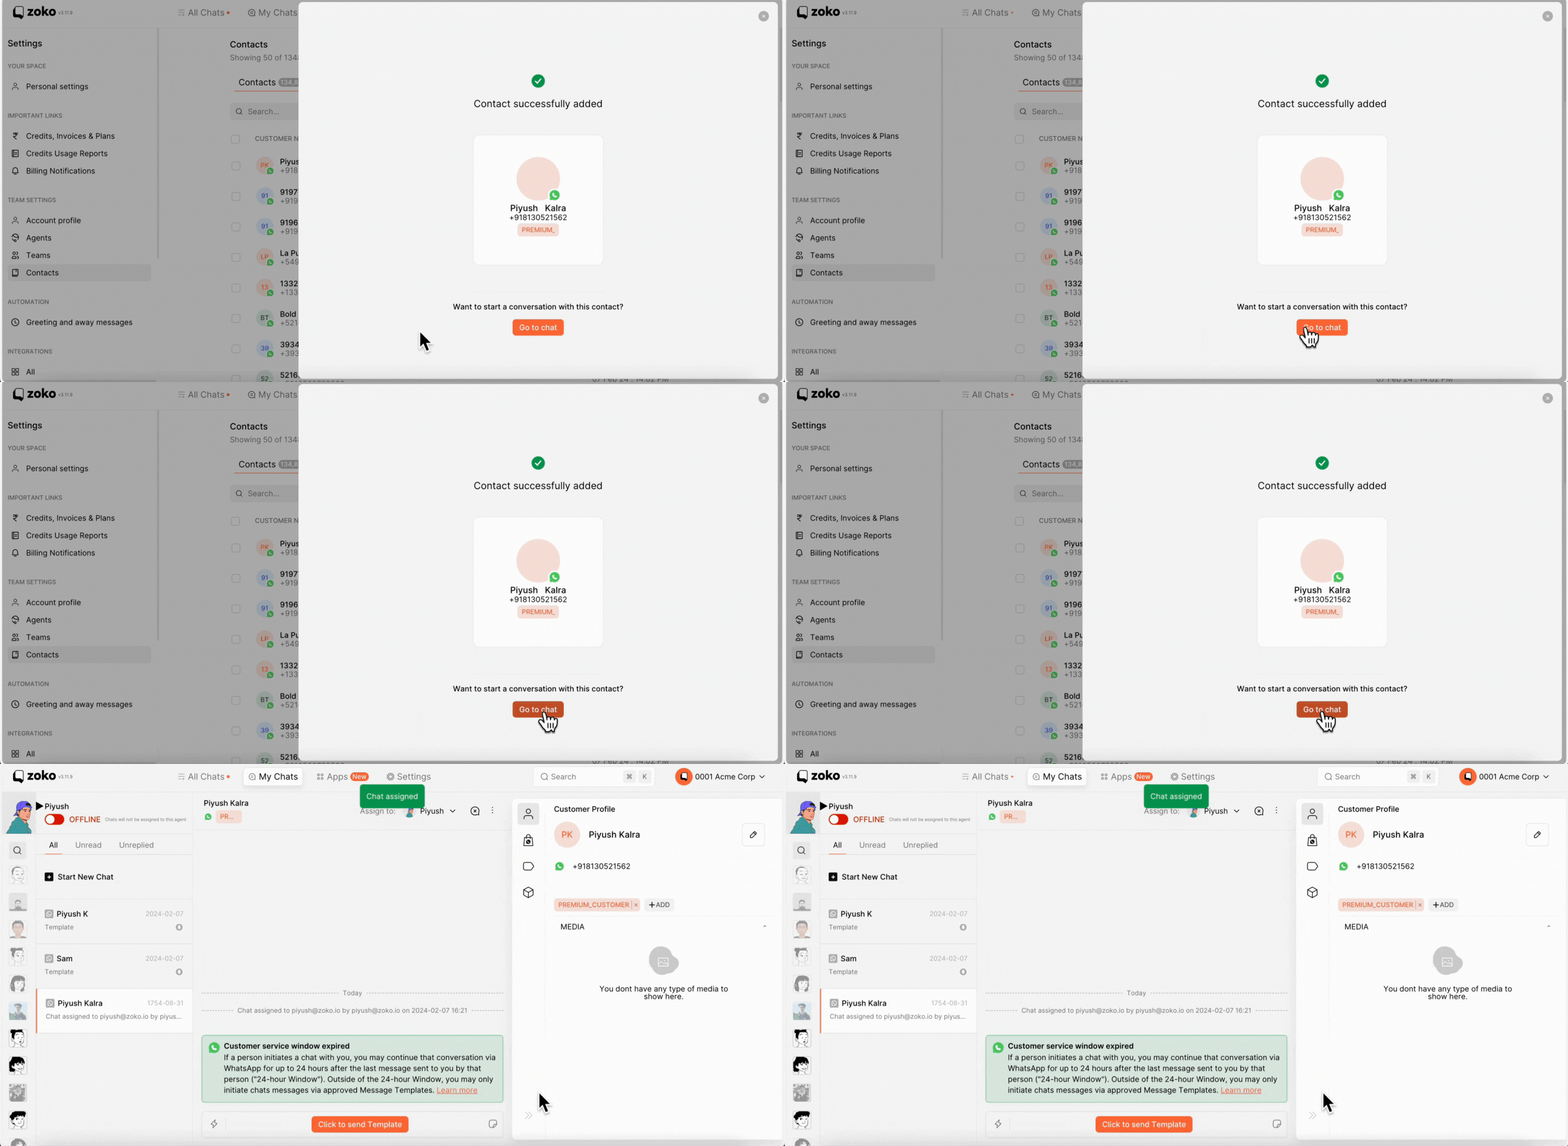
5. To initiate a chat immediately, click on Go to Chat to start conversations.
Multiple Contacts:
1. Select the Multiple option.

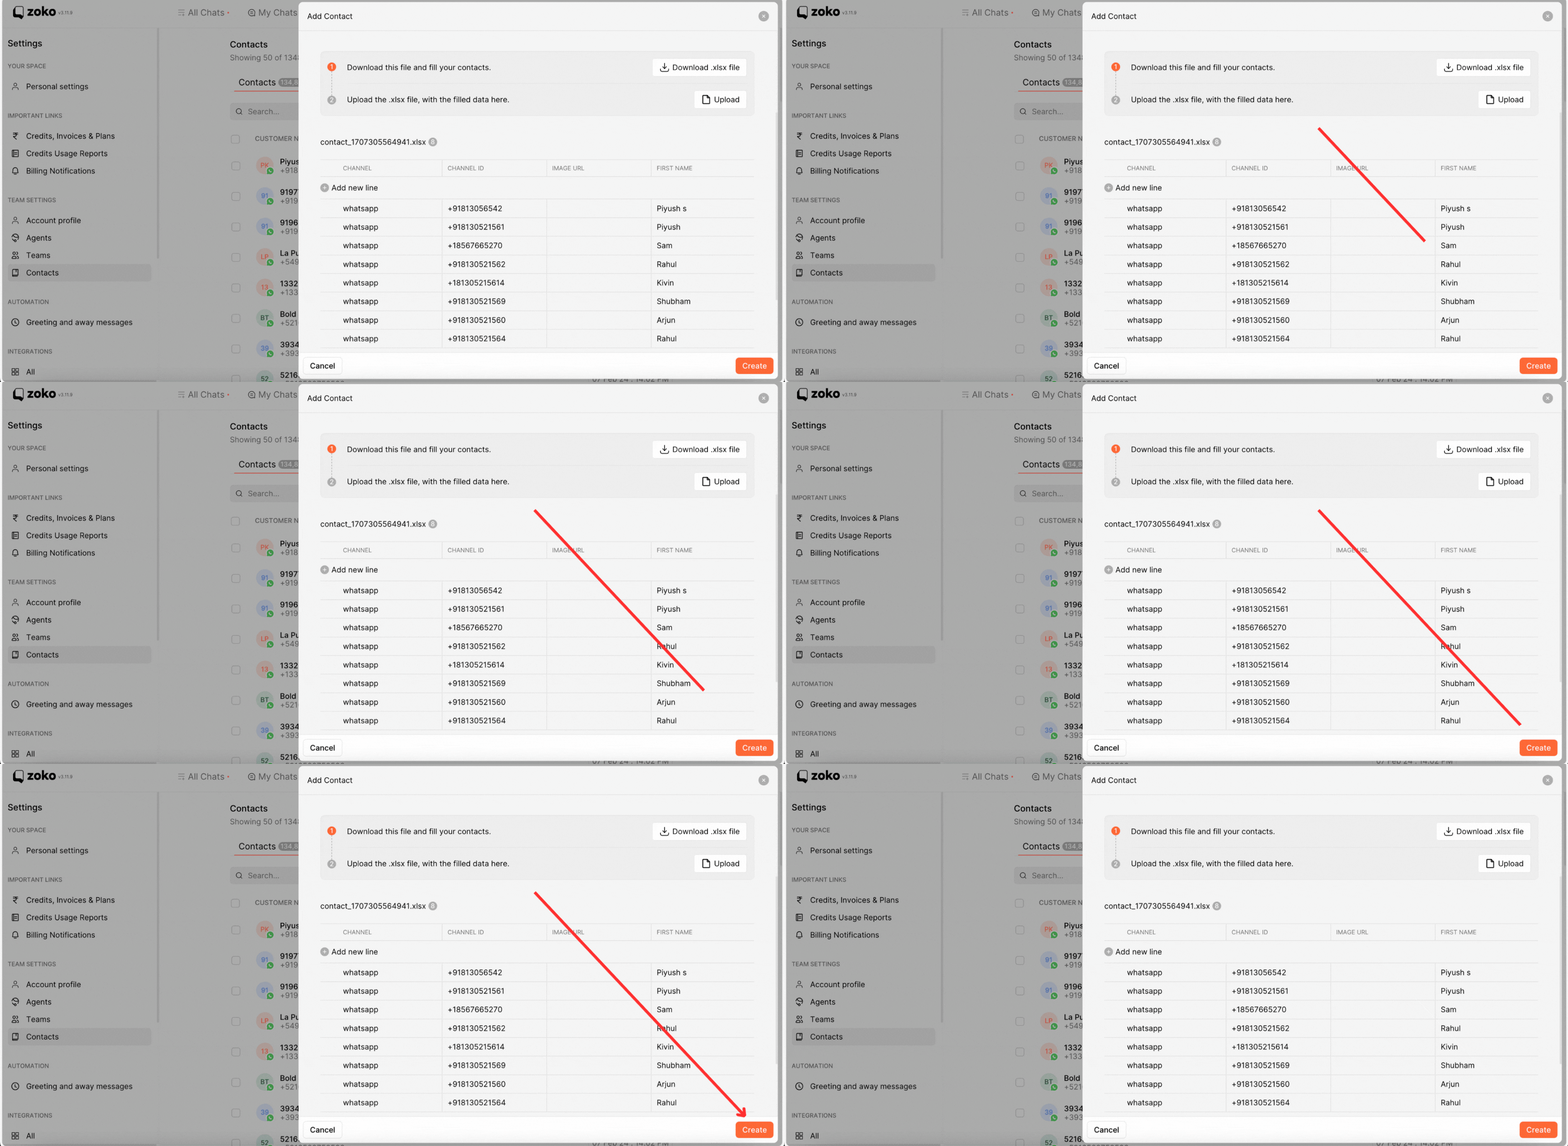
2. Download the provided xlsx file from here.
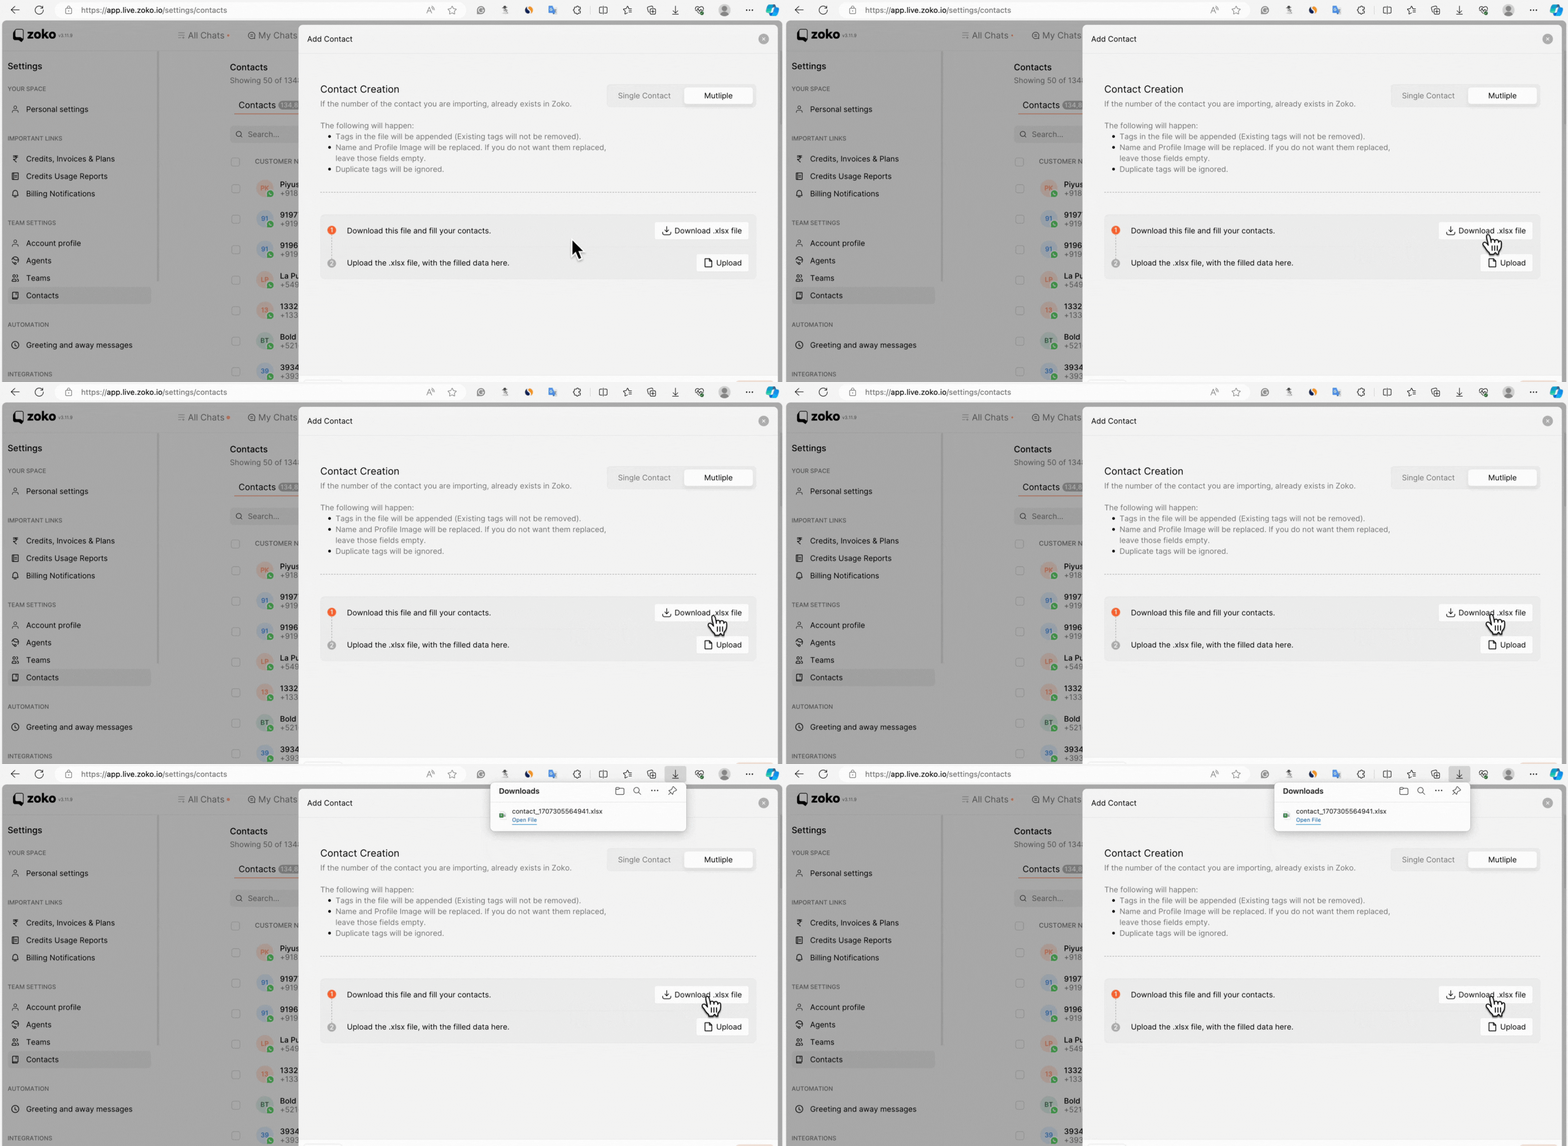
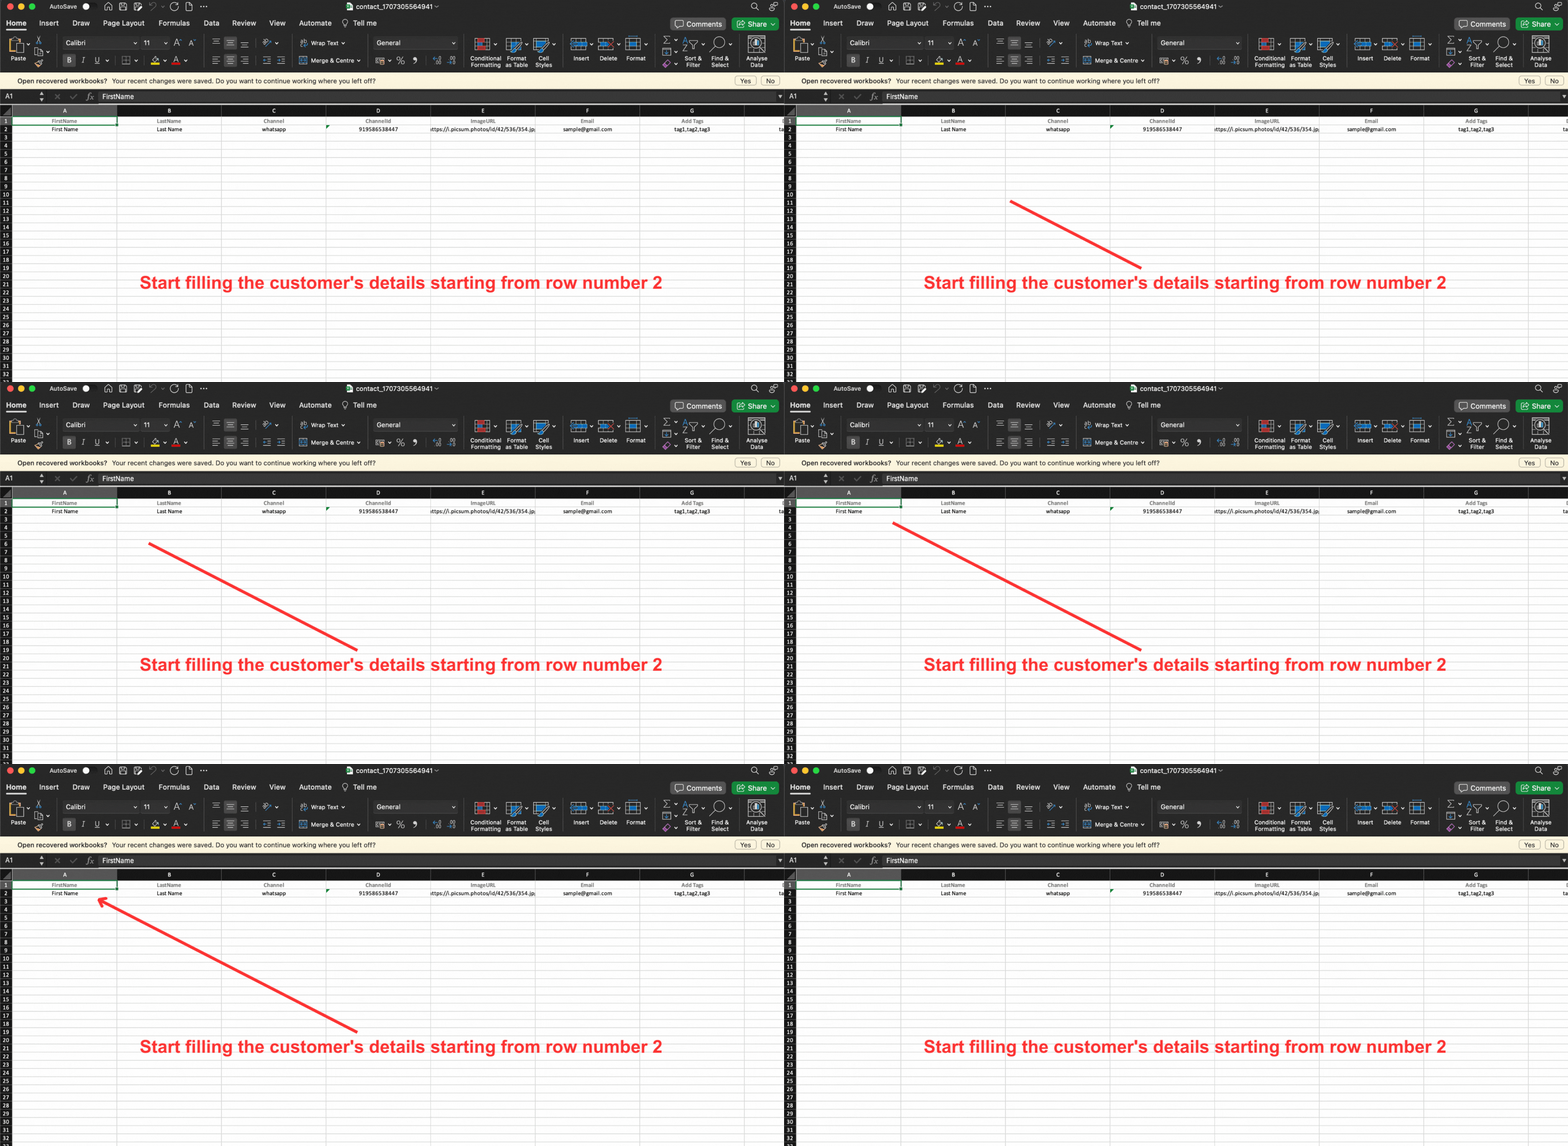
3. Fill in all details of your customers in the file.
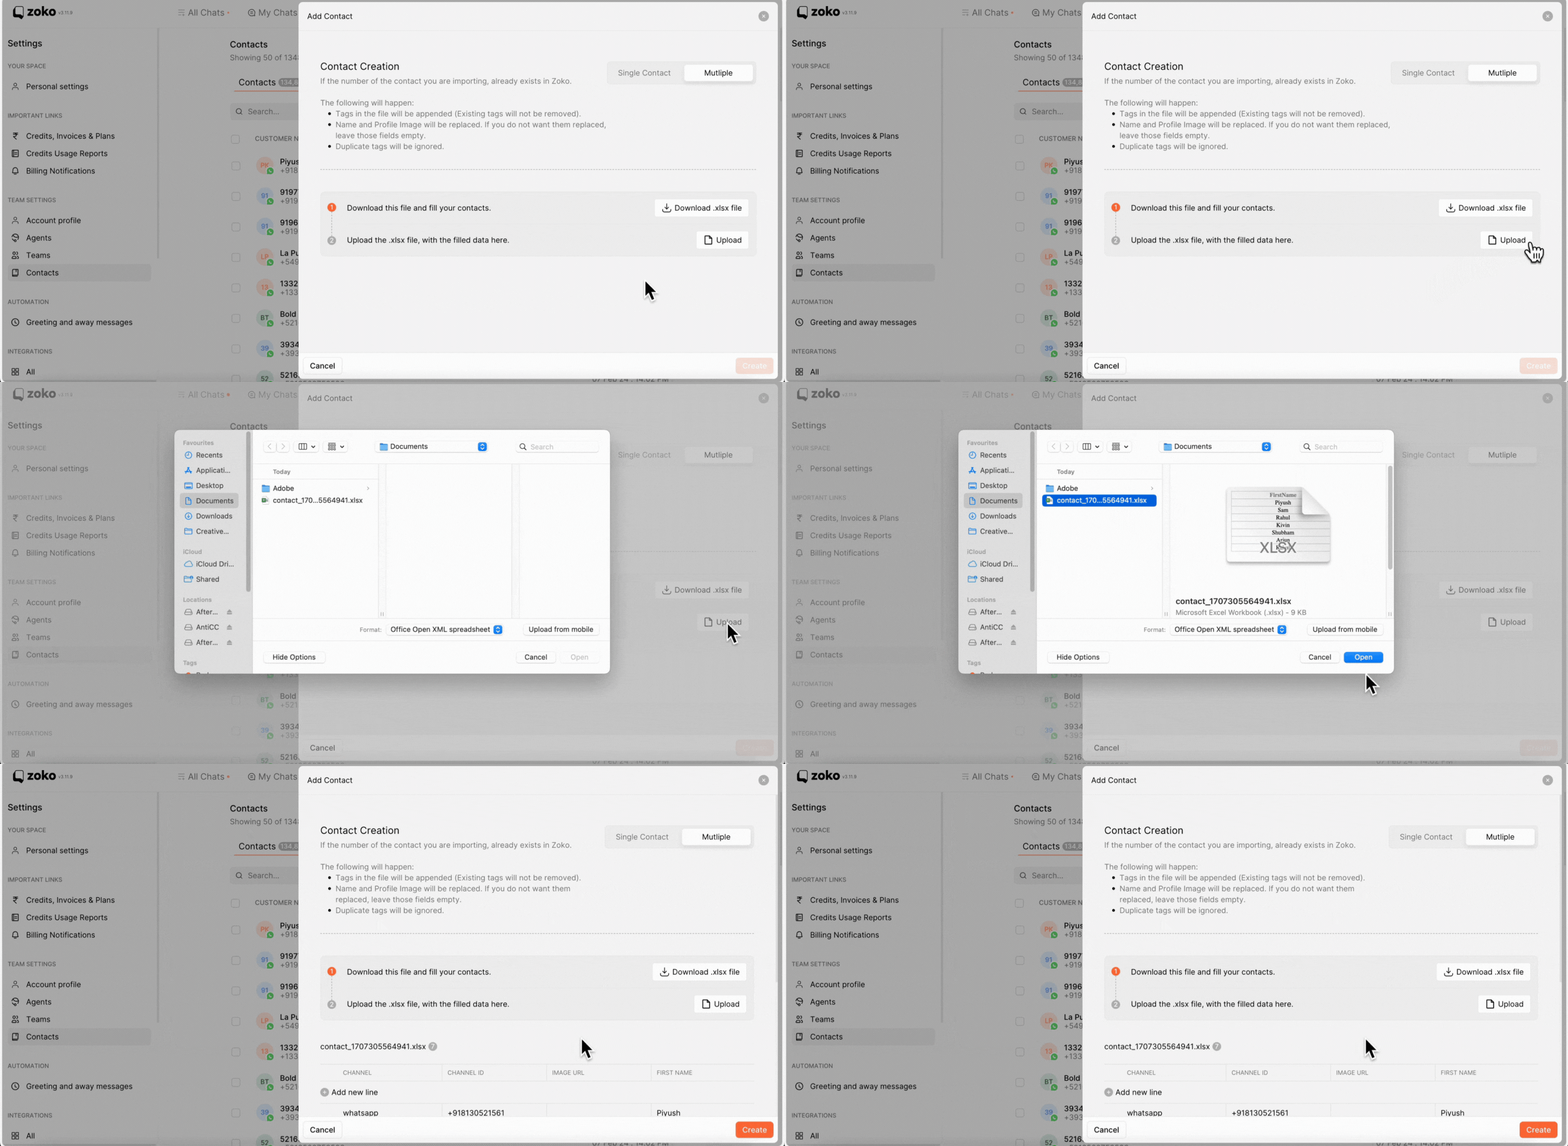
4. Once completed, upload the file to the dashboard.
Note: Once you upload this data, the following will happen: Tags in the file will be appended, meaning existing tags will not be removed. If you are only adding tags to an existing contact, the name and profile image will be replaced with whatever you have entered in these fields. If you do not want them replaced, leave those fields empty. Duplicate tags will be ignored.
5. If you missed a contact in the xlsx file, you can add it directly by clicking on the Add New Line button and filling in the contact's details.
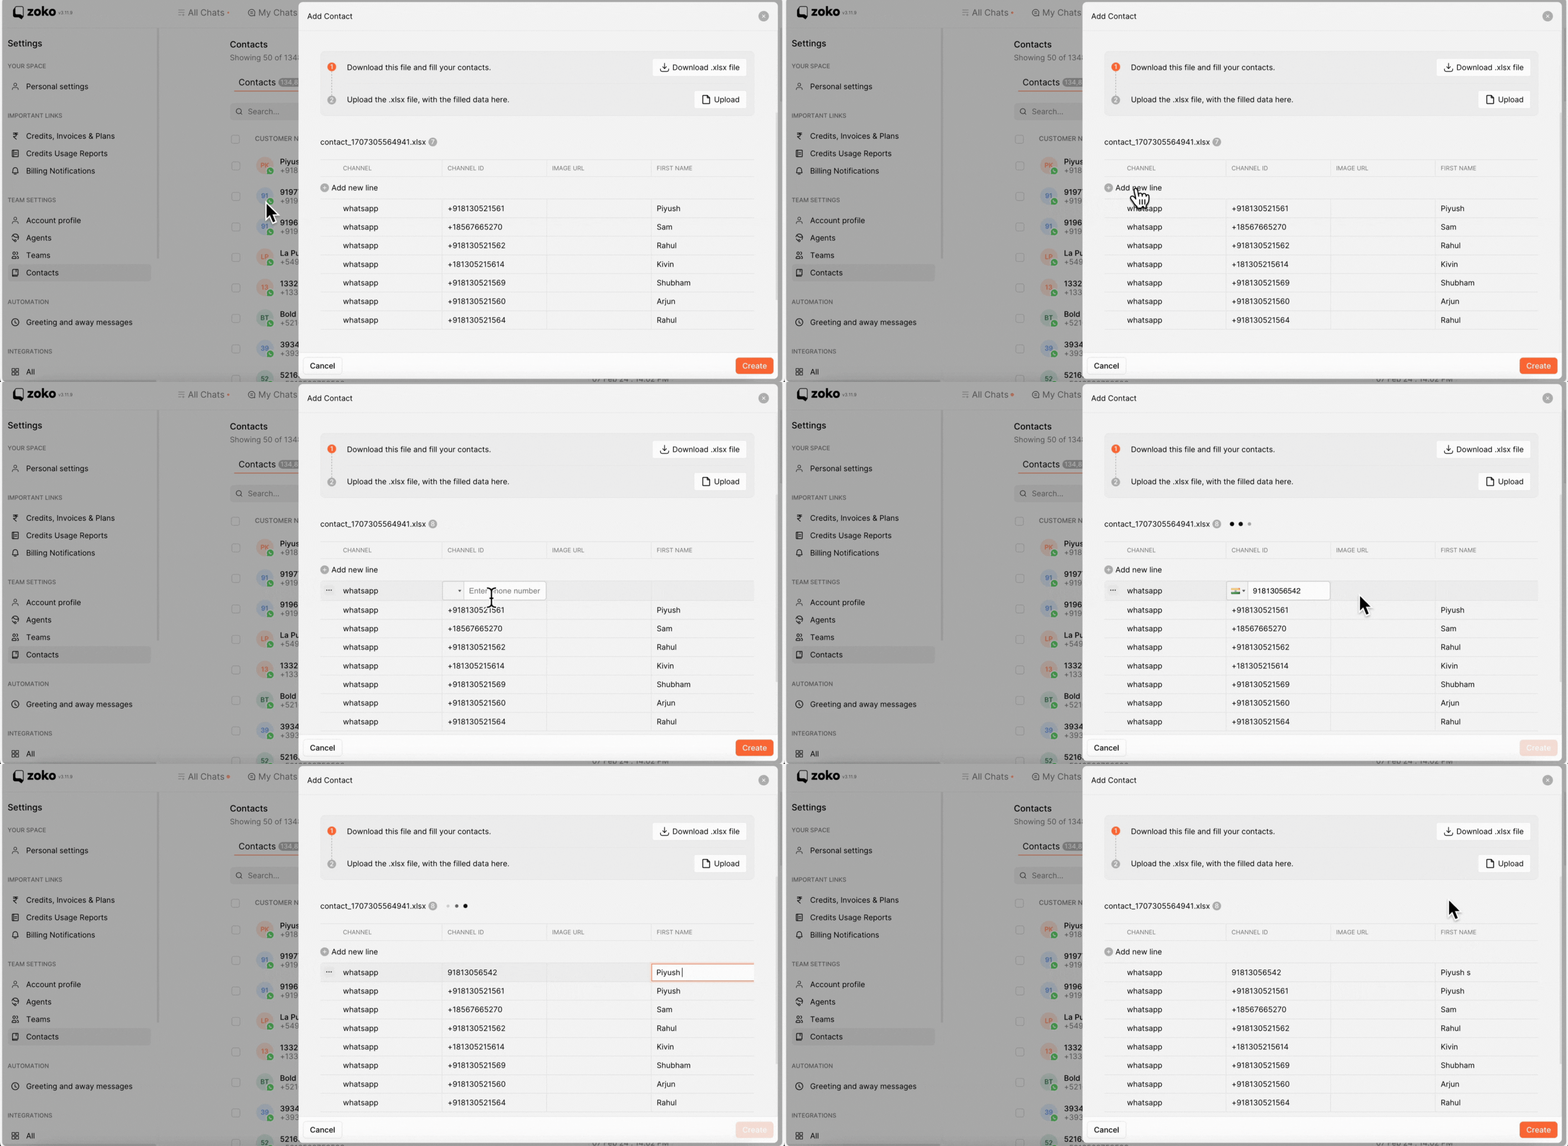
6. Click on Create to add all contacts to the dashboard.
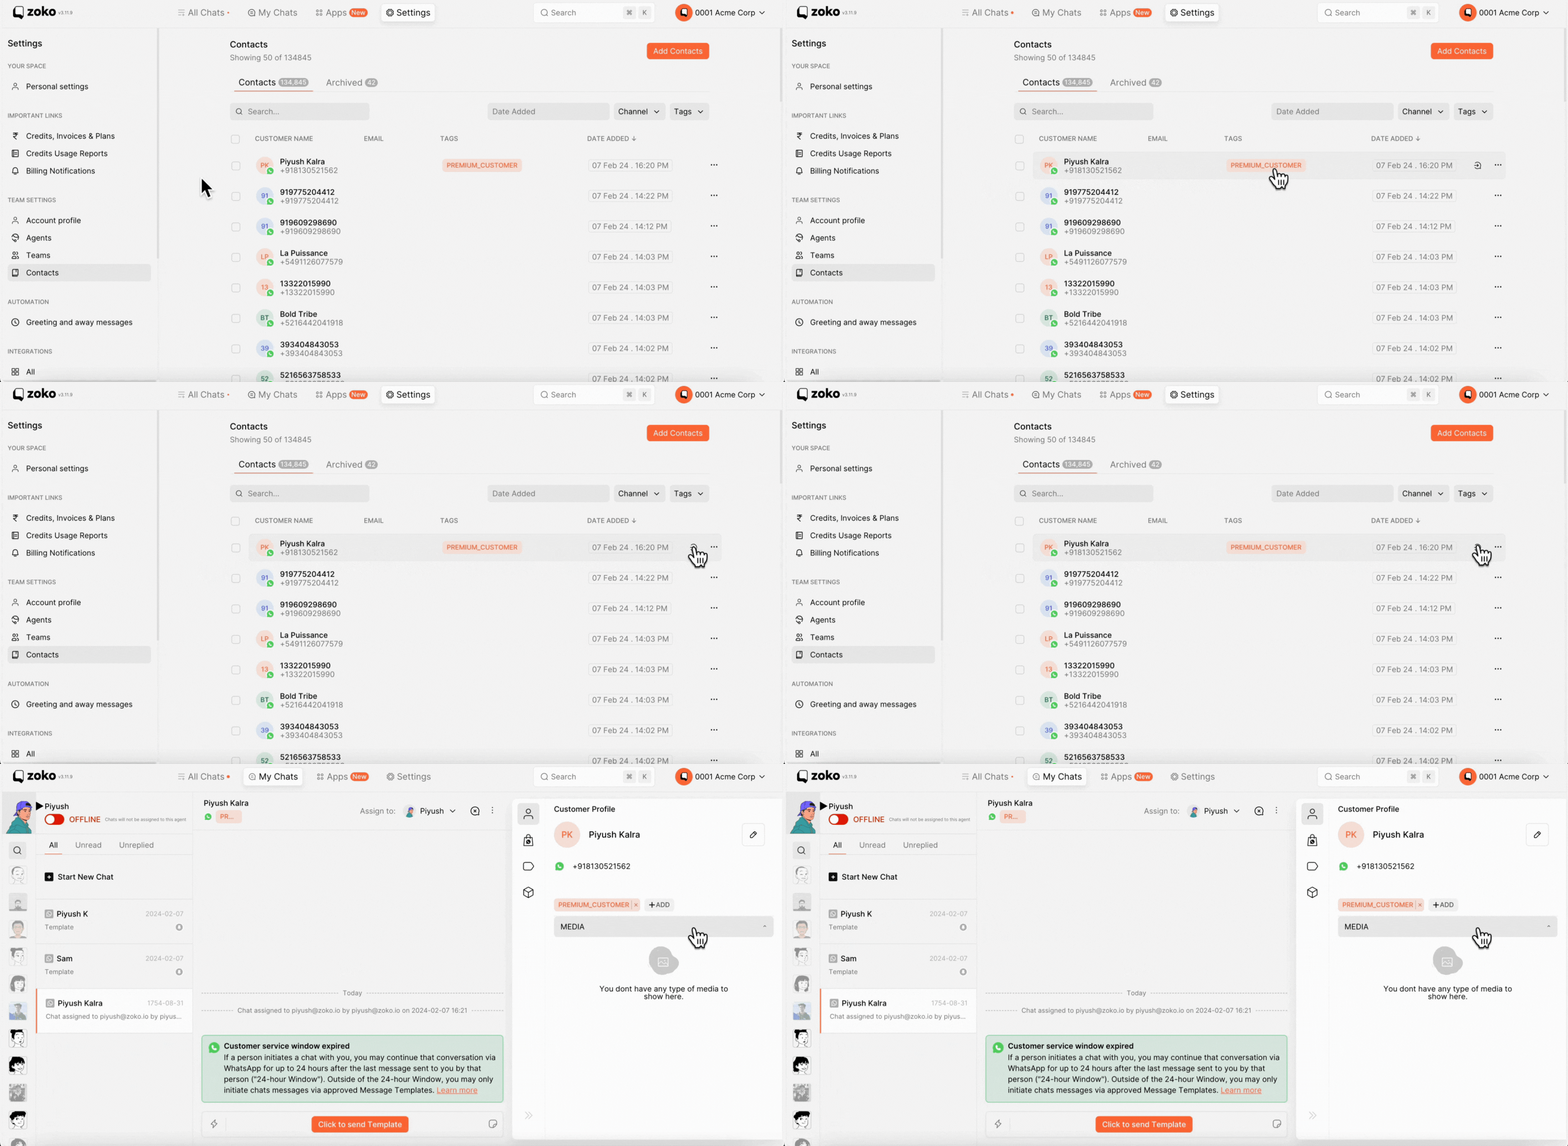
7. To start conversations, hover the mouse over the contact and click on Go to Chat icon.
Keywords: Upload contacts, Bulk contacts, File Import, Phone number, Contact details.


.png)