Enabling Start Verification Button on the Meta Business Manager
Understand how to enable the start verification button on your Meta Business manager.
If the start verification button is disabled or greyed out on your Meta Business Manager account, it's likely because you don't have any apps connected to your account. This is a common issue and can be easily resolved by following these steps:
Step 1: Login to your Meta Business Manager Account
OR
If you wish to Login using your Facebook or Instagram account, click on the "Log in with XXXXX" button to open a new tab and complete the log in process.
(If you don't have a Meta Business Manager account or Facebook account, you can create one by clicking on "Create an account".)

Step 2 : Attach Facebook Page with Business Manager Account
1. First, go to 'Pages' on the left.
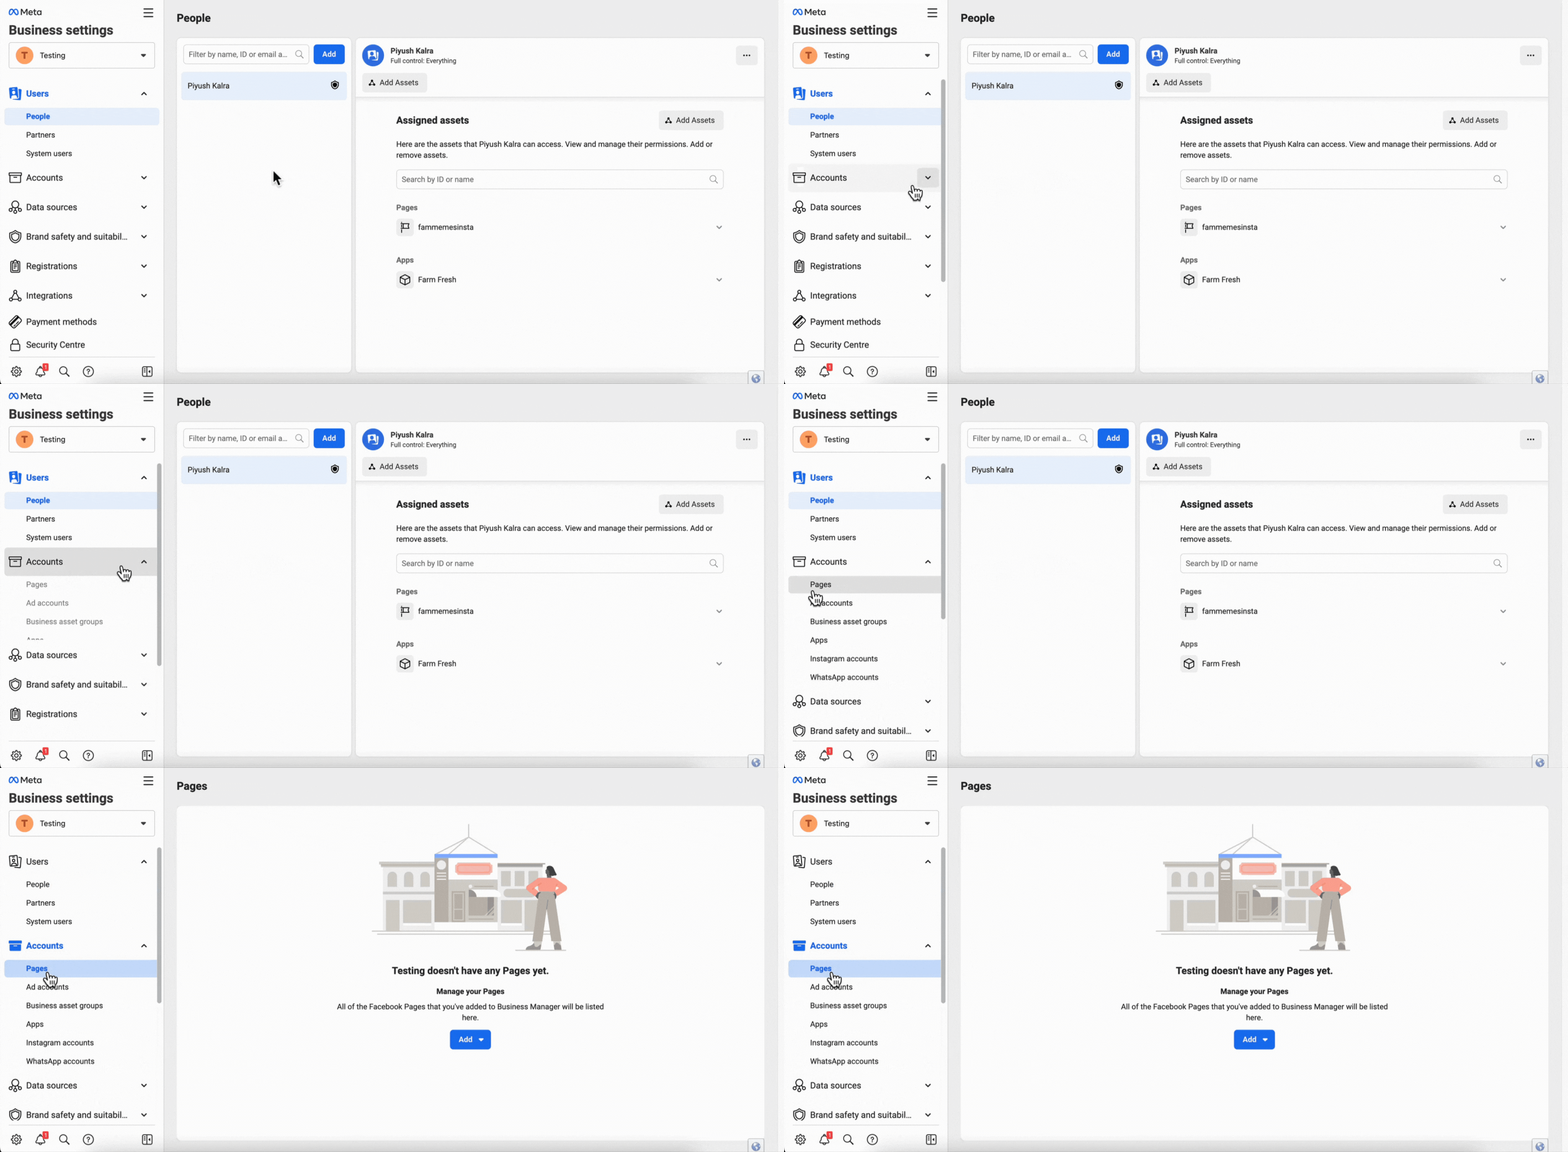
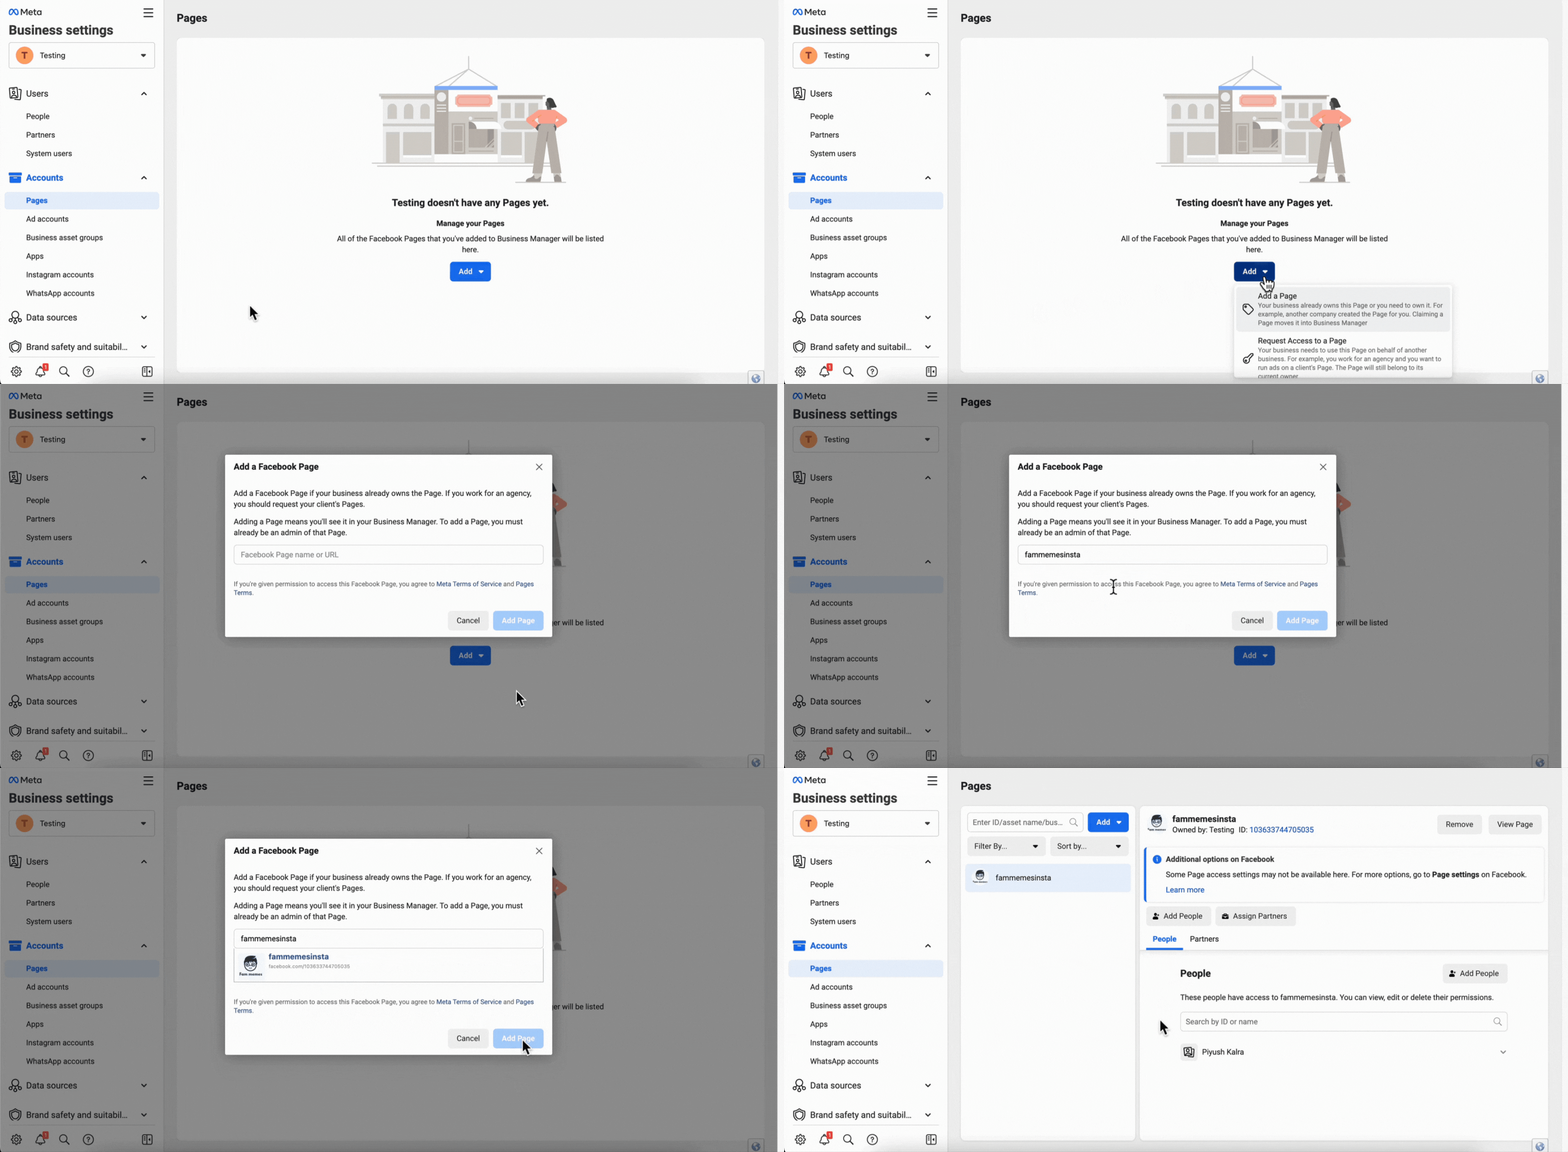
2. Click on Add button, search the facebook page of your business and click on Add.
Note: If you already have a Facebook Page setup, you can skip this step. You should only add/ choose a page of which you are a current admin. Otherwise, you wouldn't be able to apply for the Facebook Business Verification.
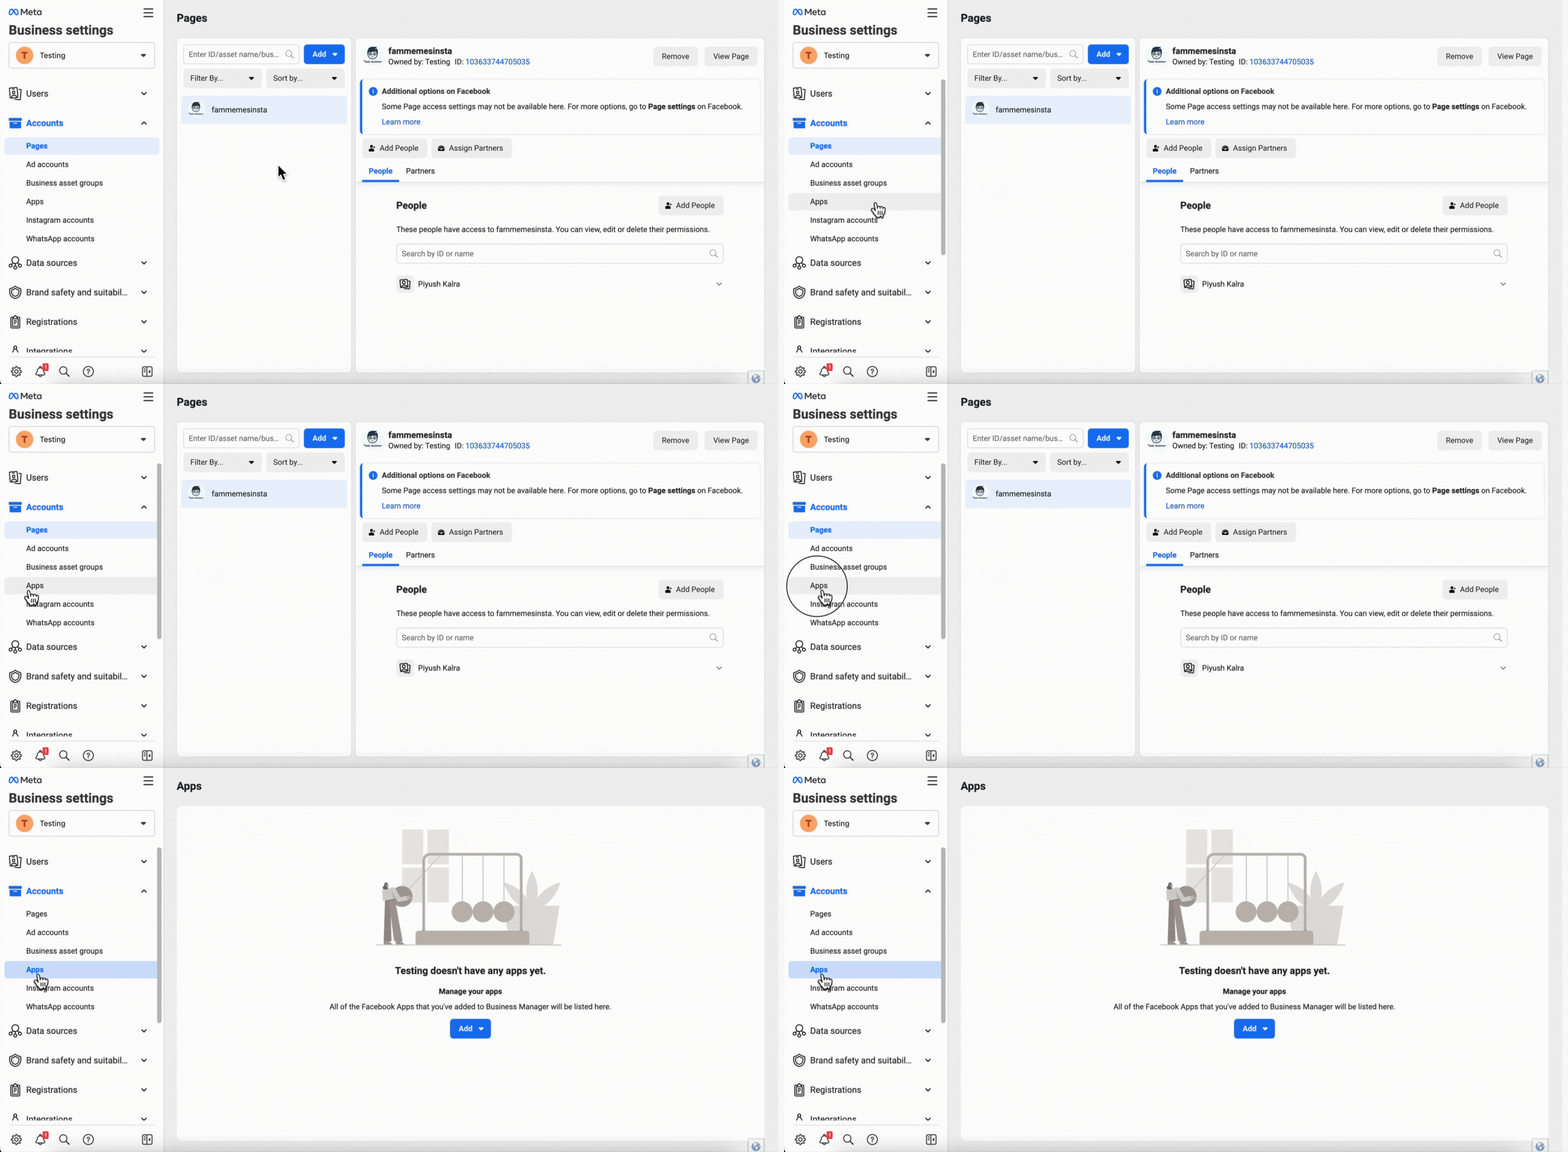
Step 3 : Setup Apps
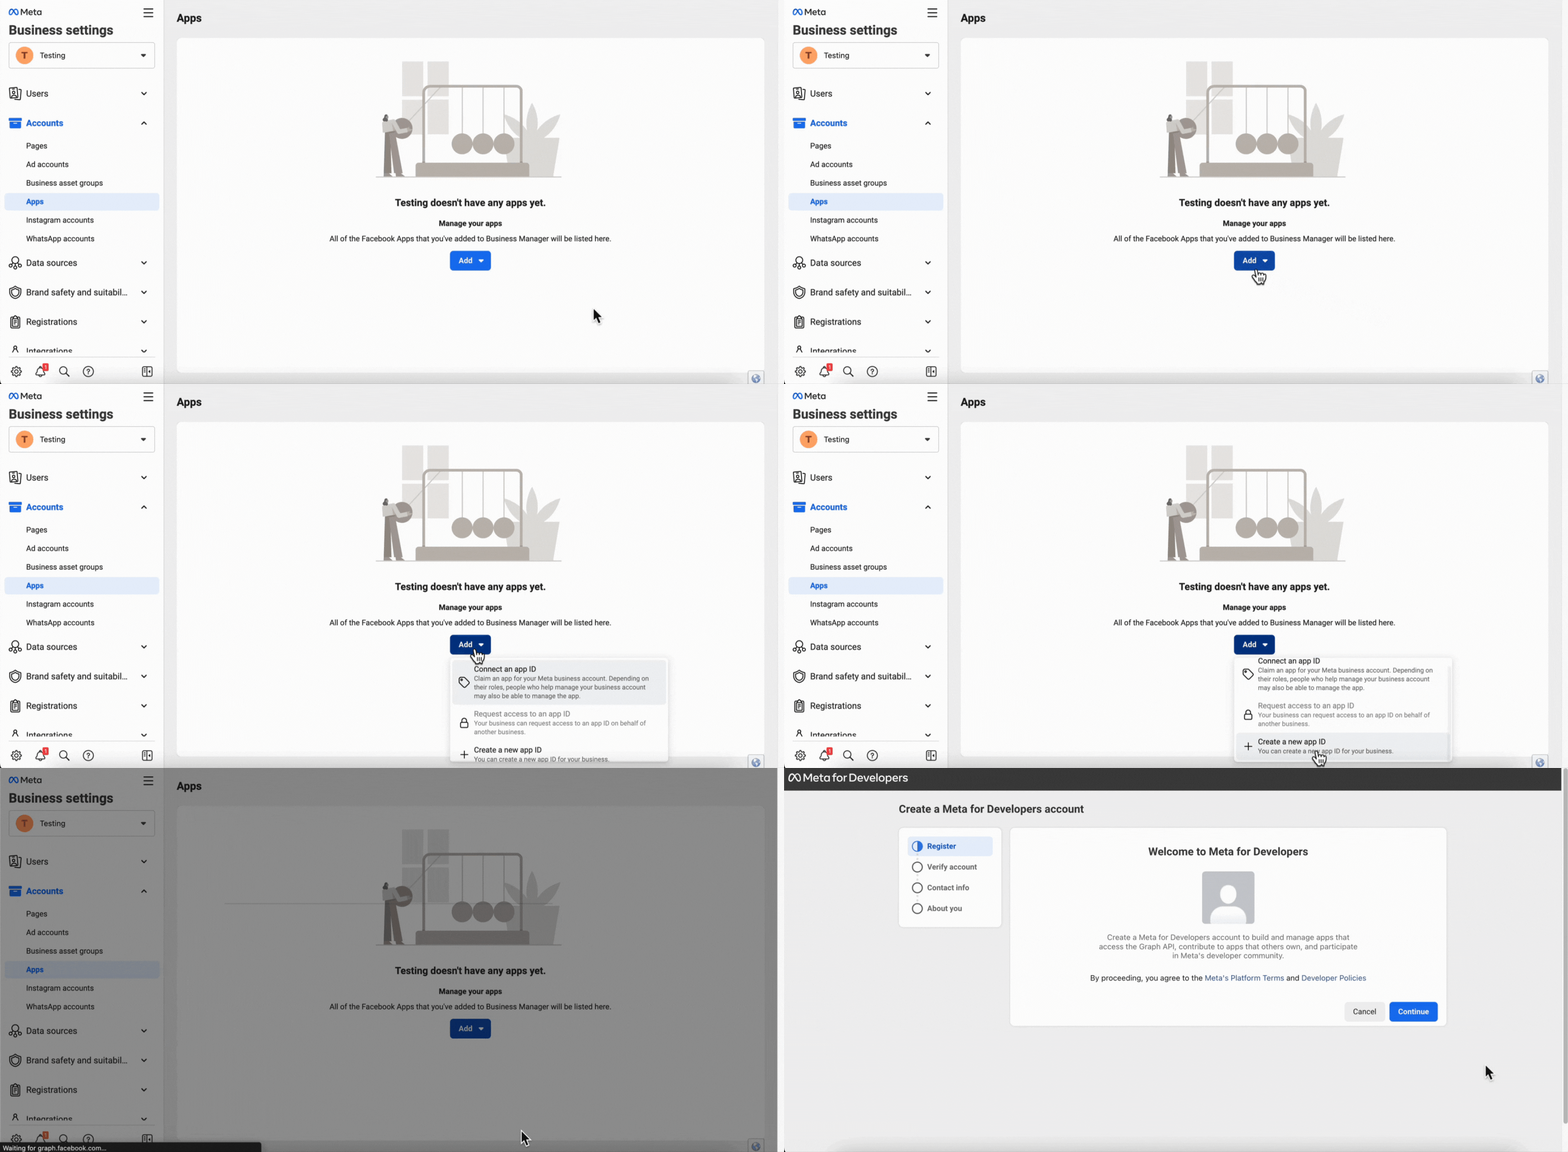
1. Go to Apps on the left and click the 'Add' button.
2. Click on Create a new app ID. It will open a new tab.
Note: If you find the 'Create a new App ID' button to be locked. Hover the cursor over it & press the 'Confirm Account' Button to unlock it. (It’s disabled because your business manager account is not verified using phone number.)
Step 4 : Confirm your Facebook for Developers Account (This is only for New User if you already have one, you can skip it)
1. Click on 'Continue' to confirm the account.
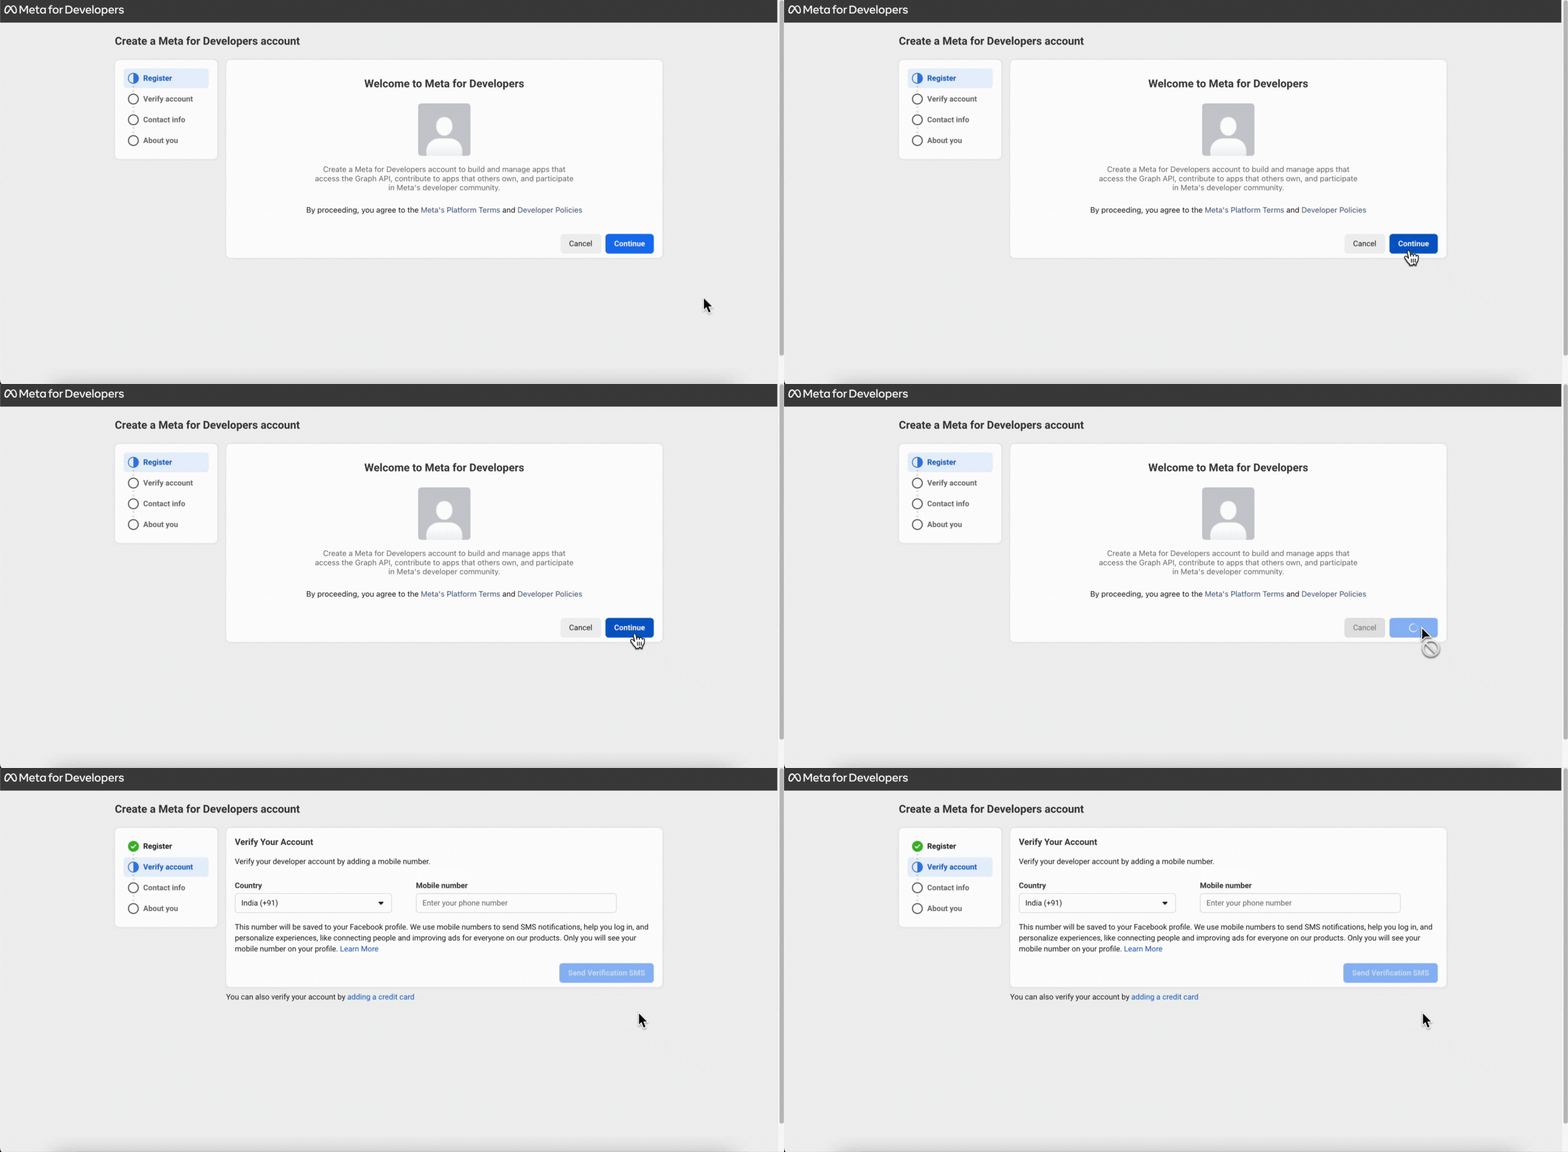
2. Select the country code, add your mobile number and click on Send Verification SMS.
Note: You will receive the otp on that number to verify the account.
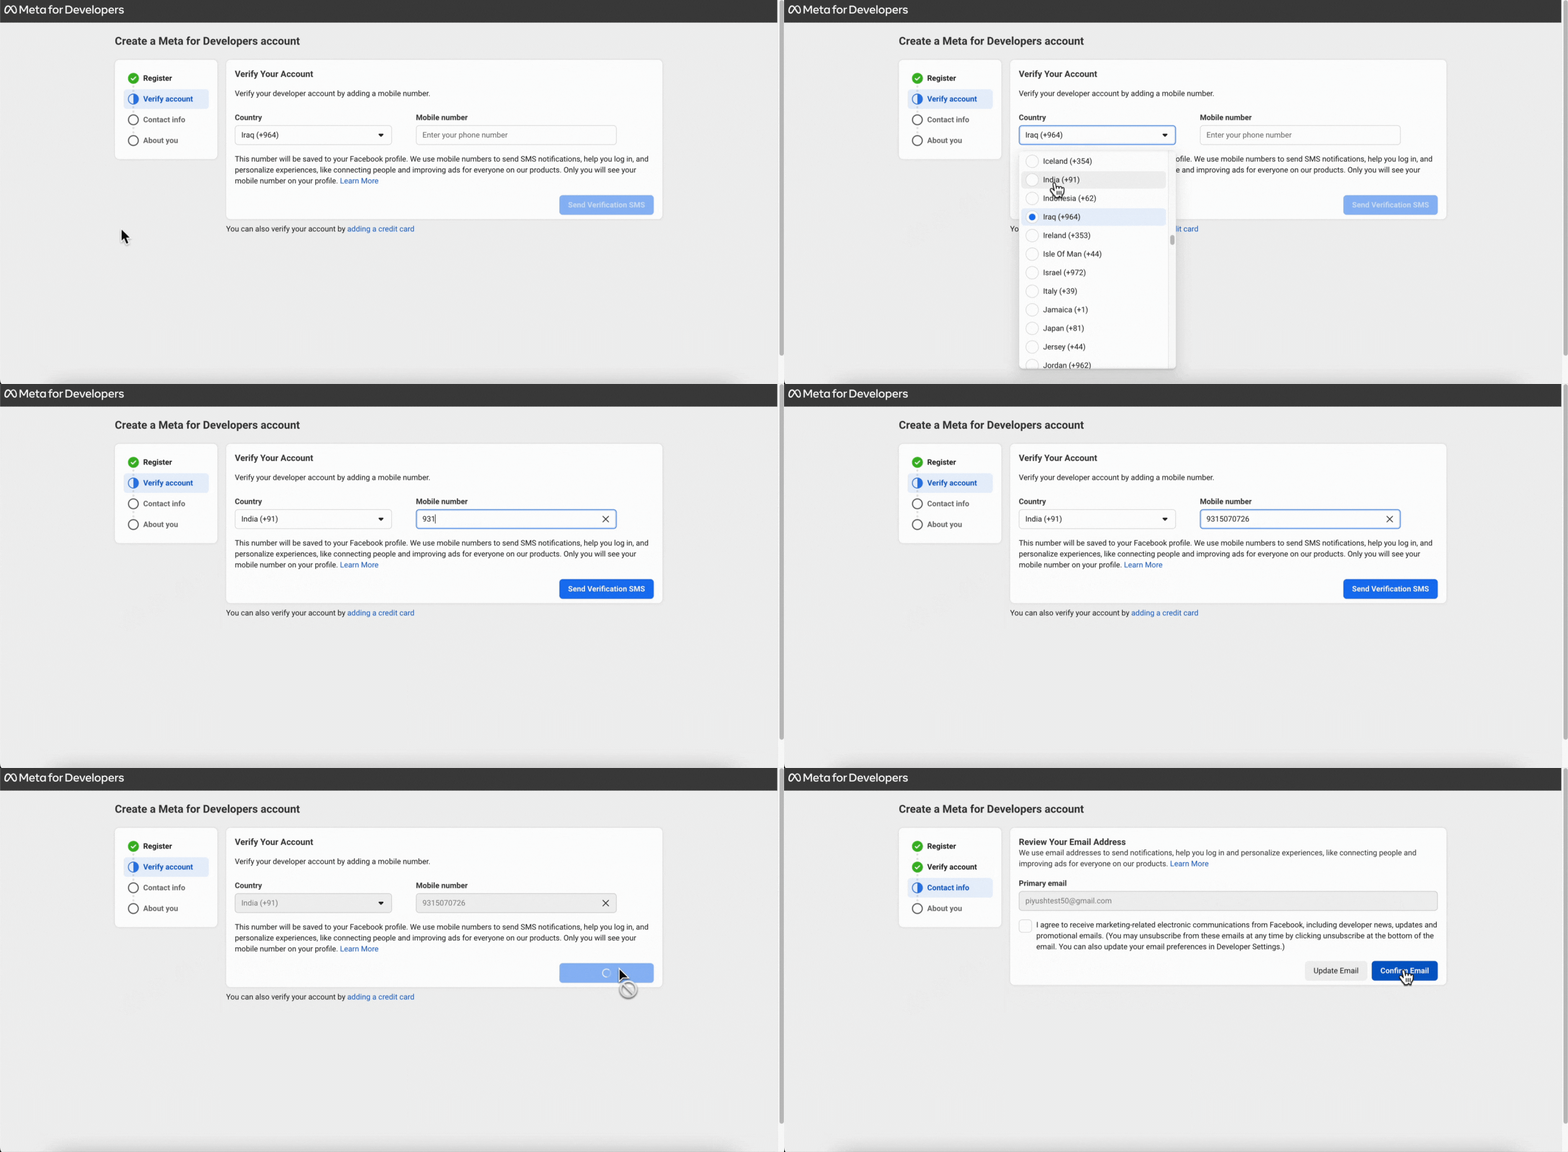
3. Next, check the 'I agree' box and click on Confirm Email.
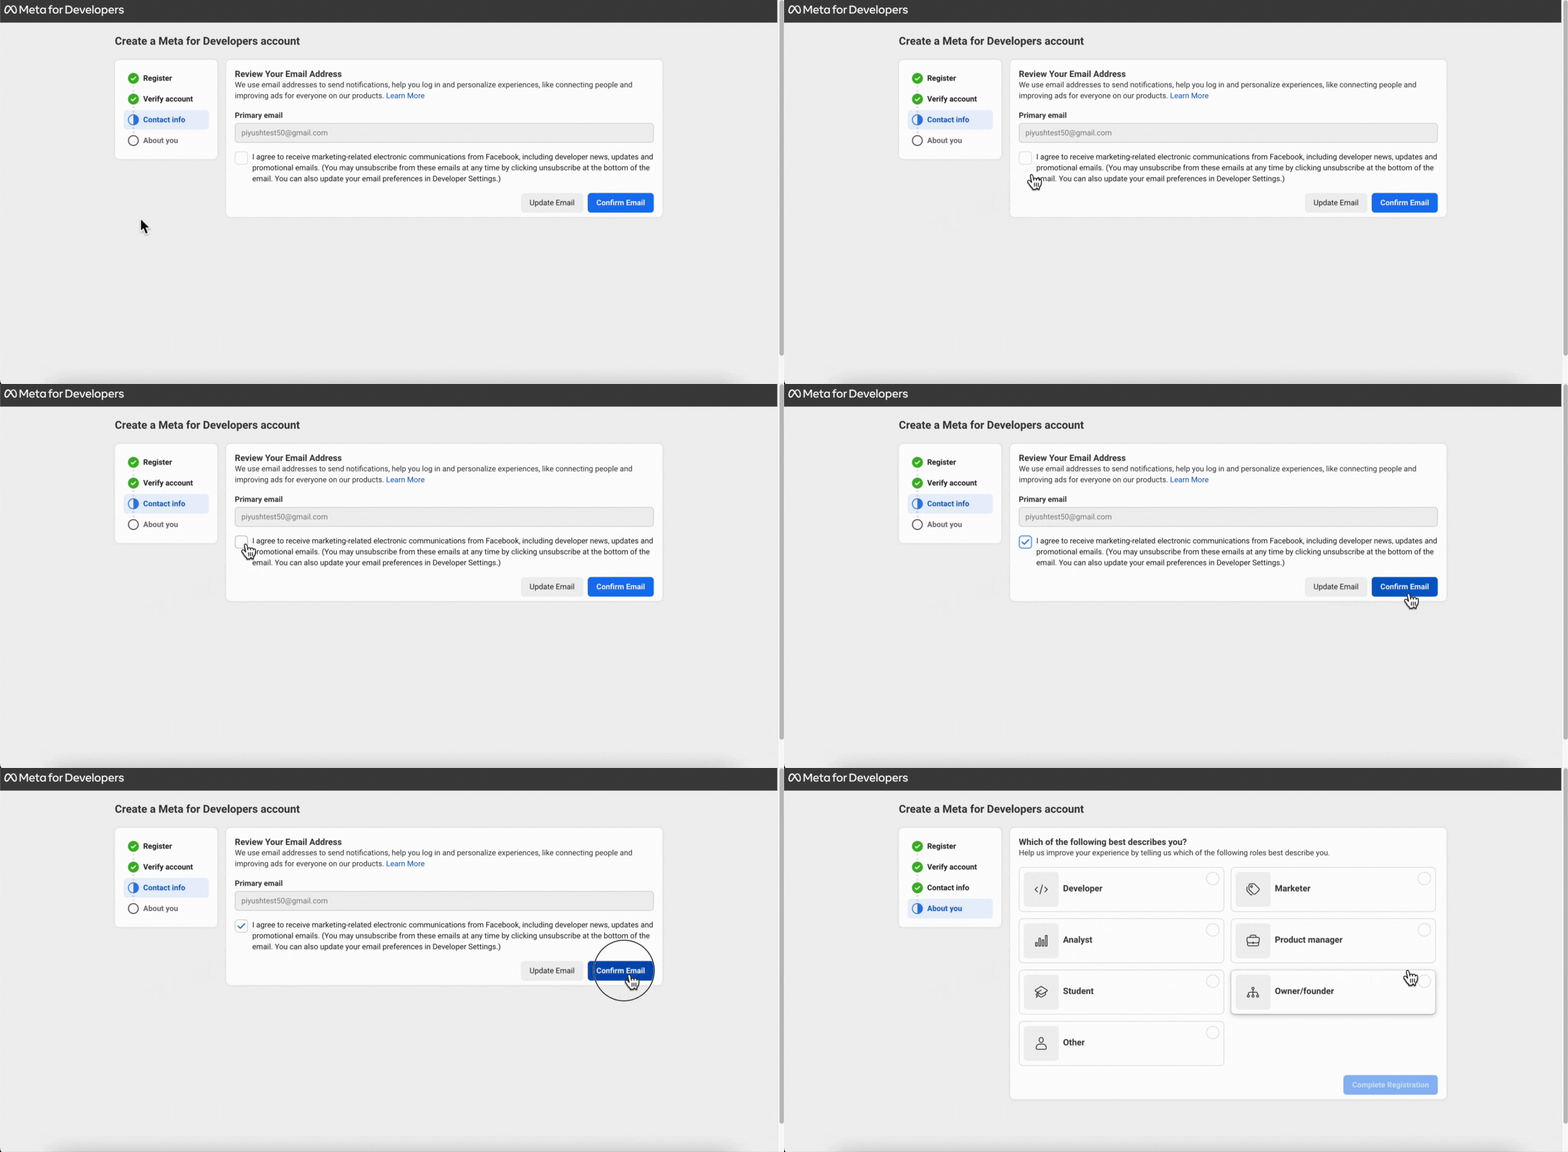
4. Last, select the best option that describes you. In our case, we selected “Other” and click on "Complete Registration".
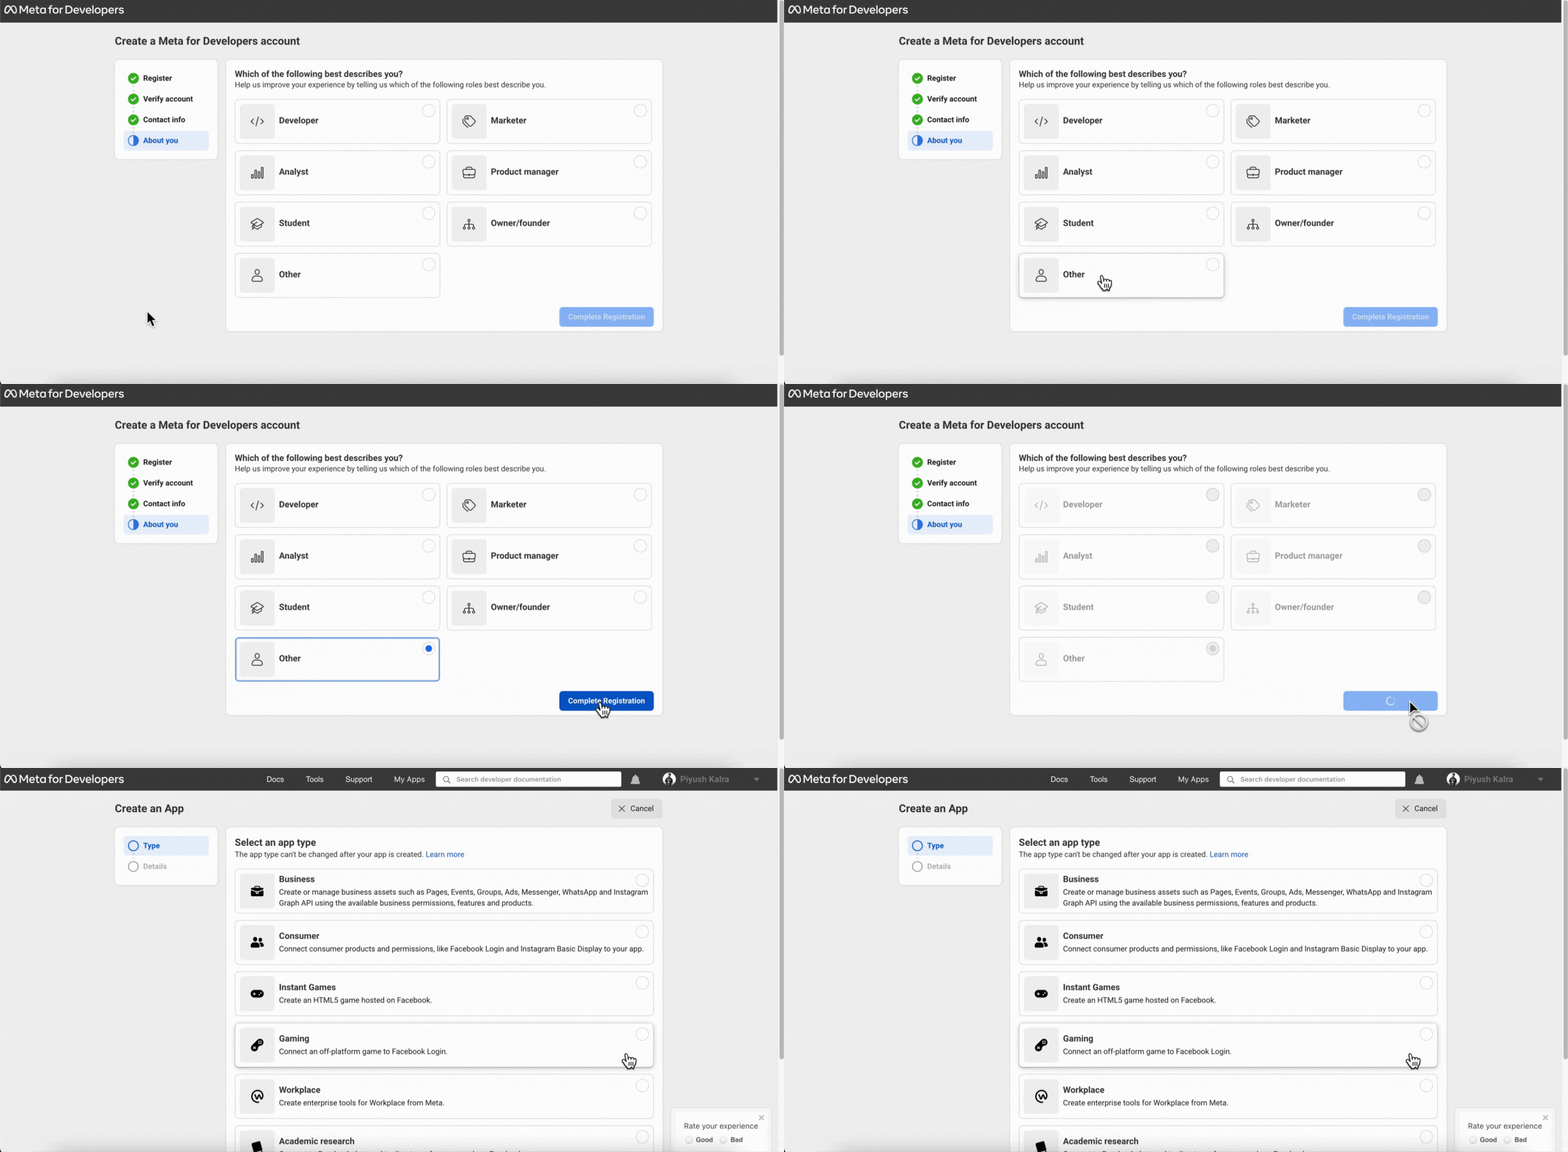
Step 5 : Create an App
1. Select the App type that fits your business. In our case, We selected “Business”.
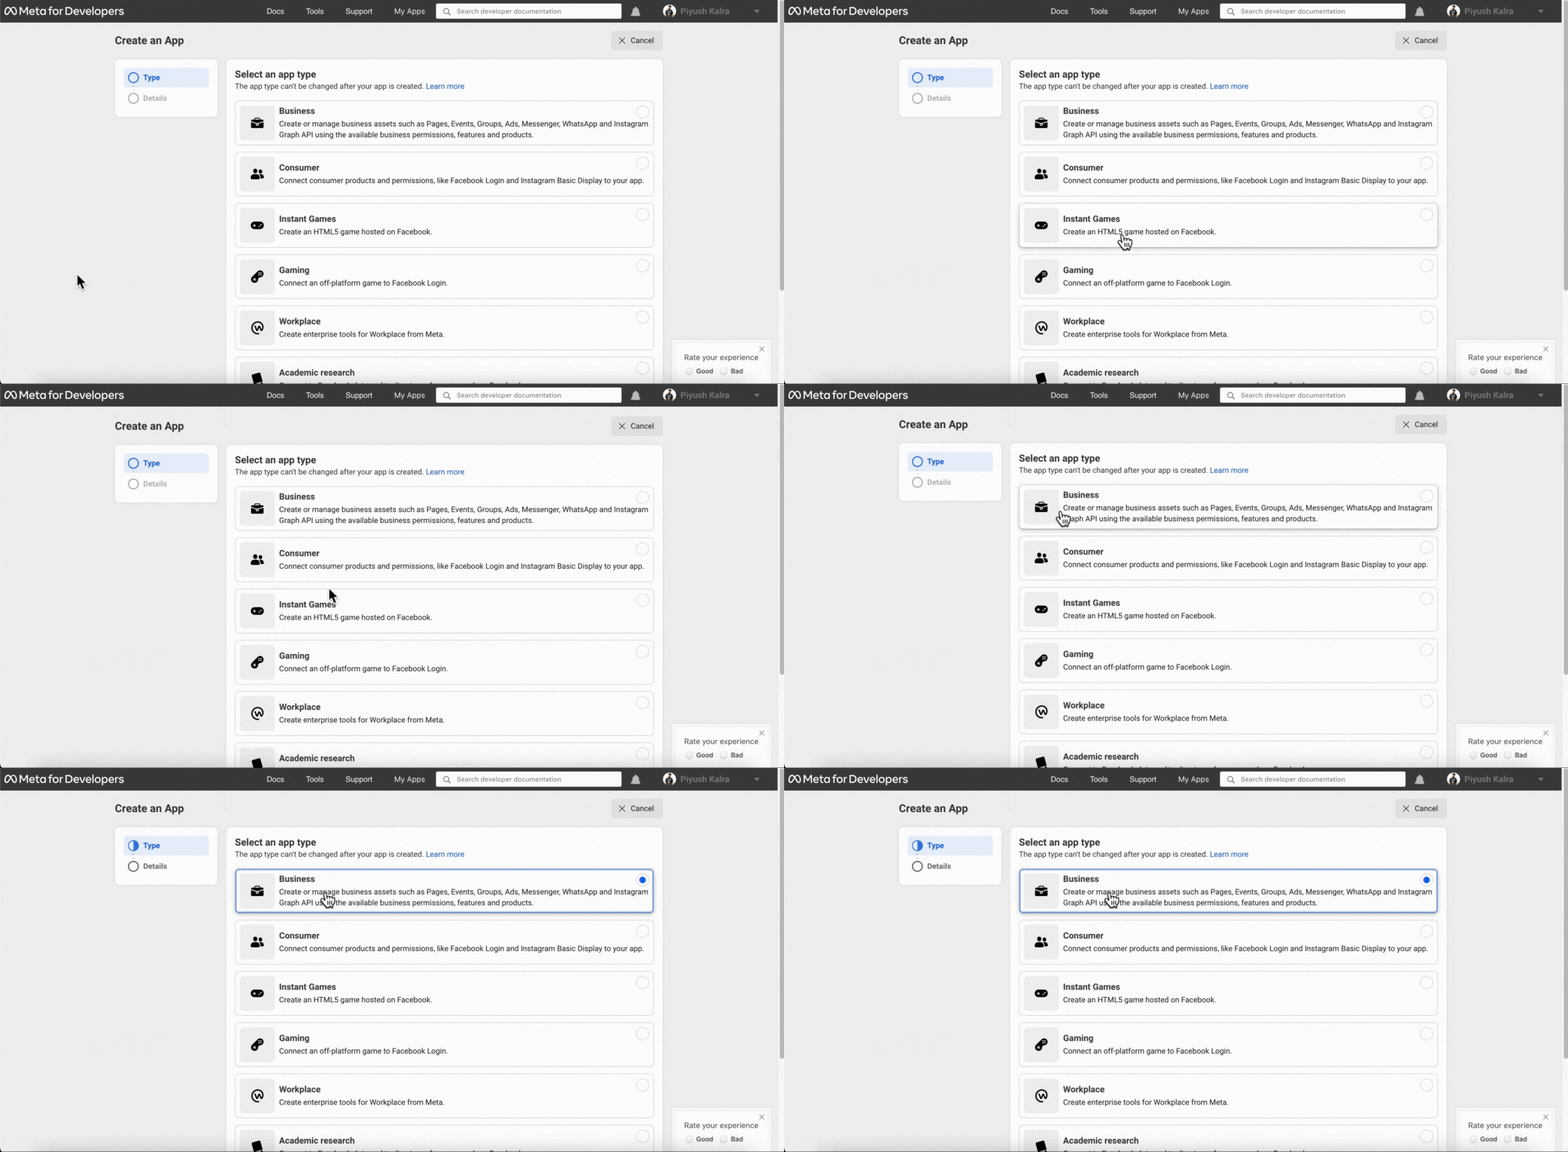
2. Once you have selected the app type, click on “Next”.
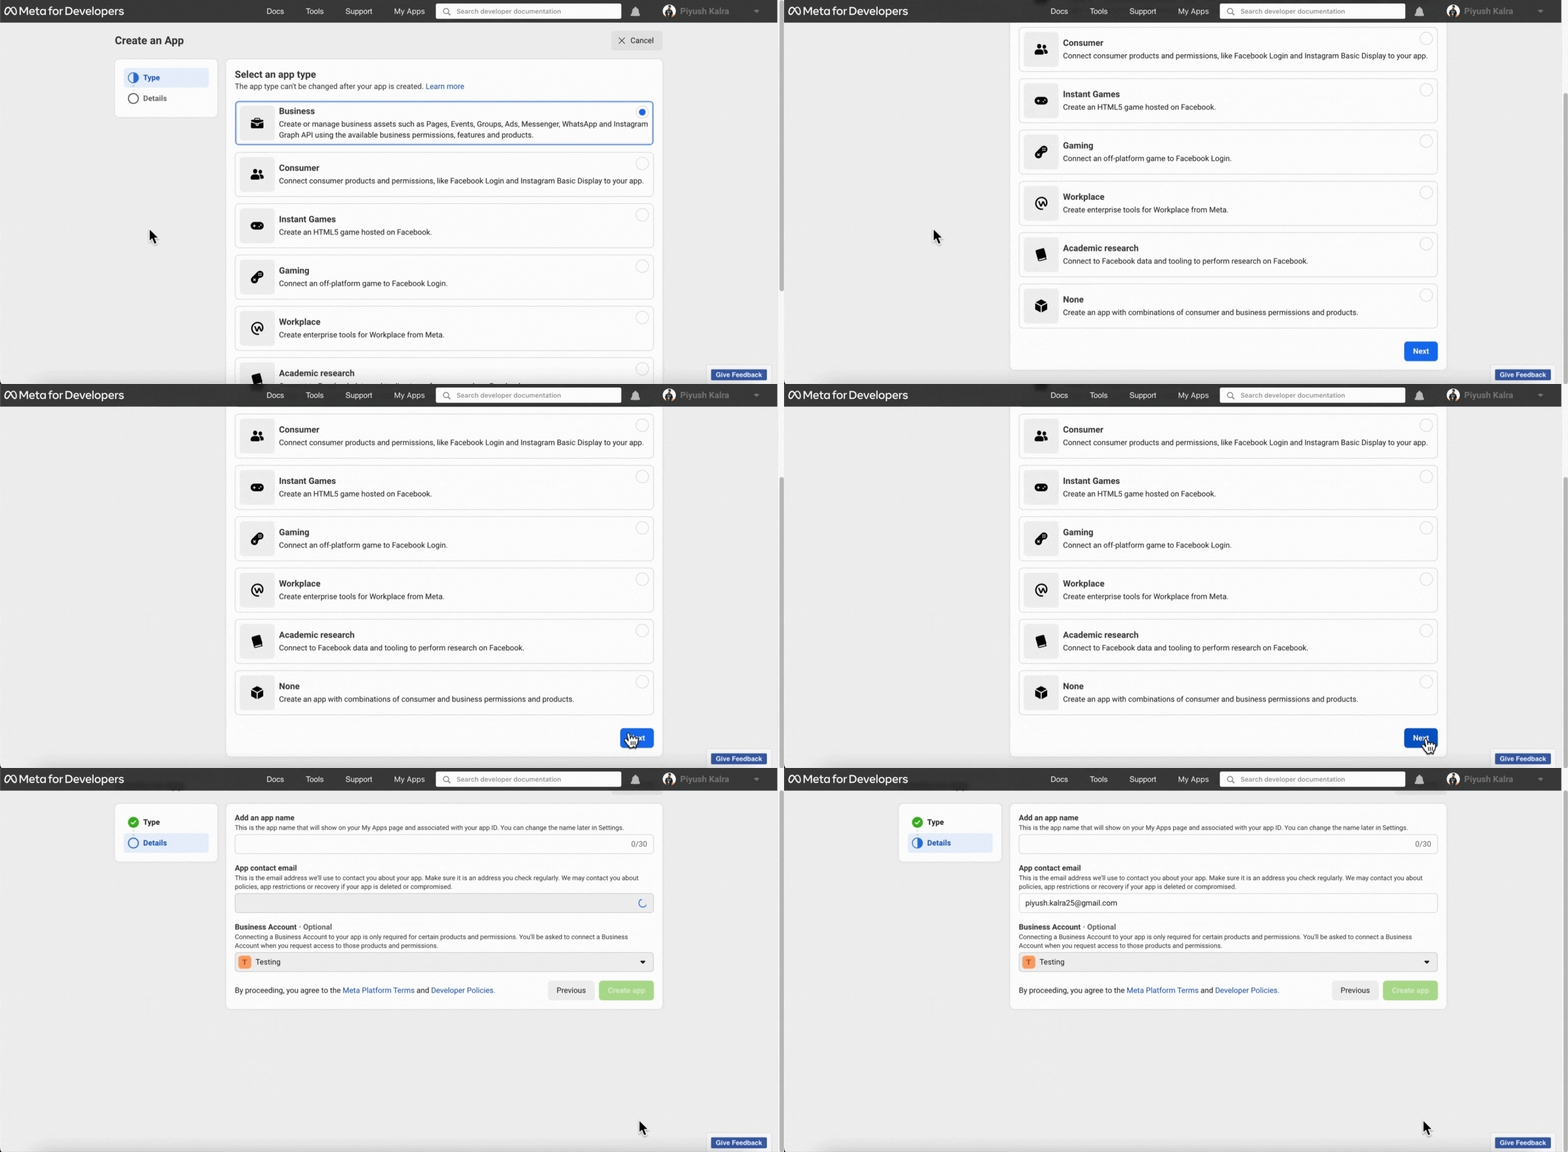
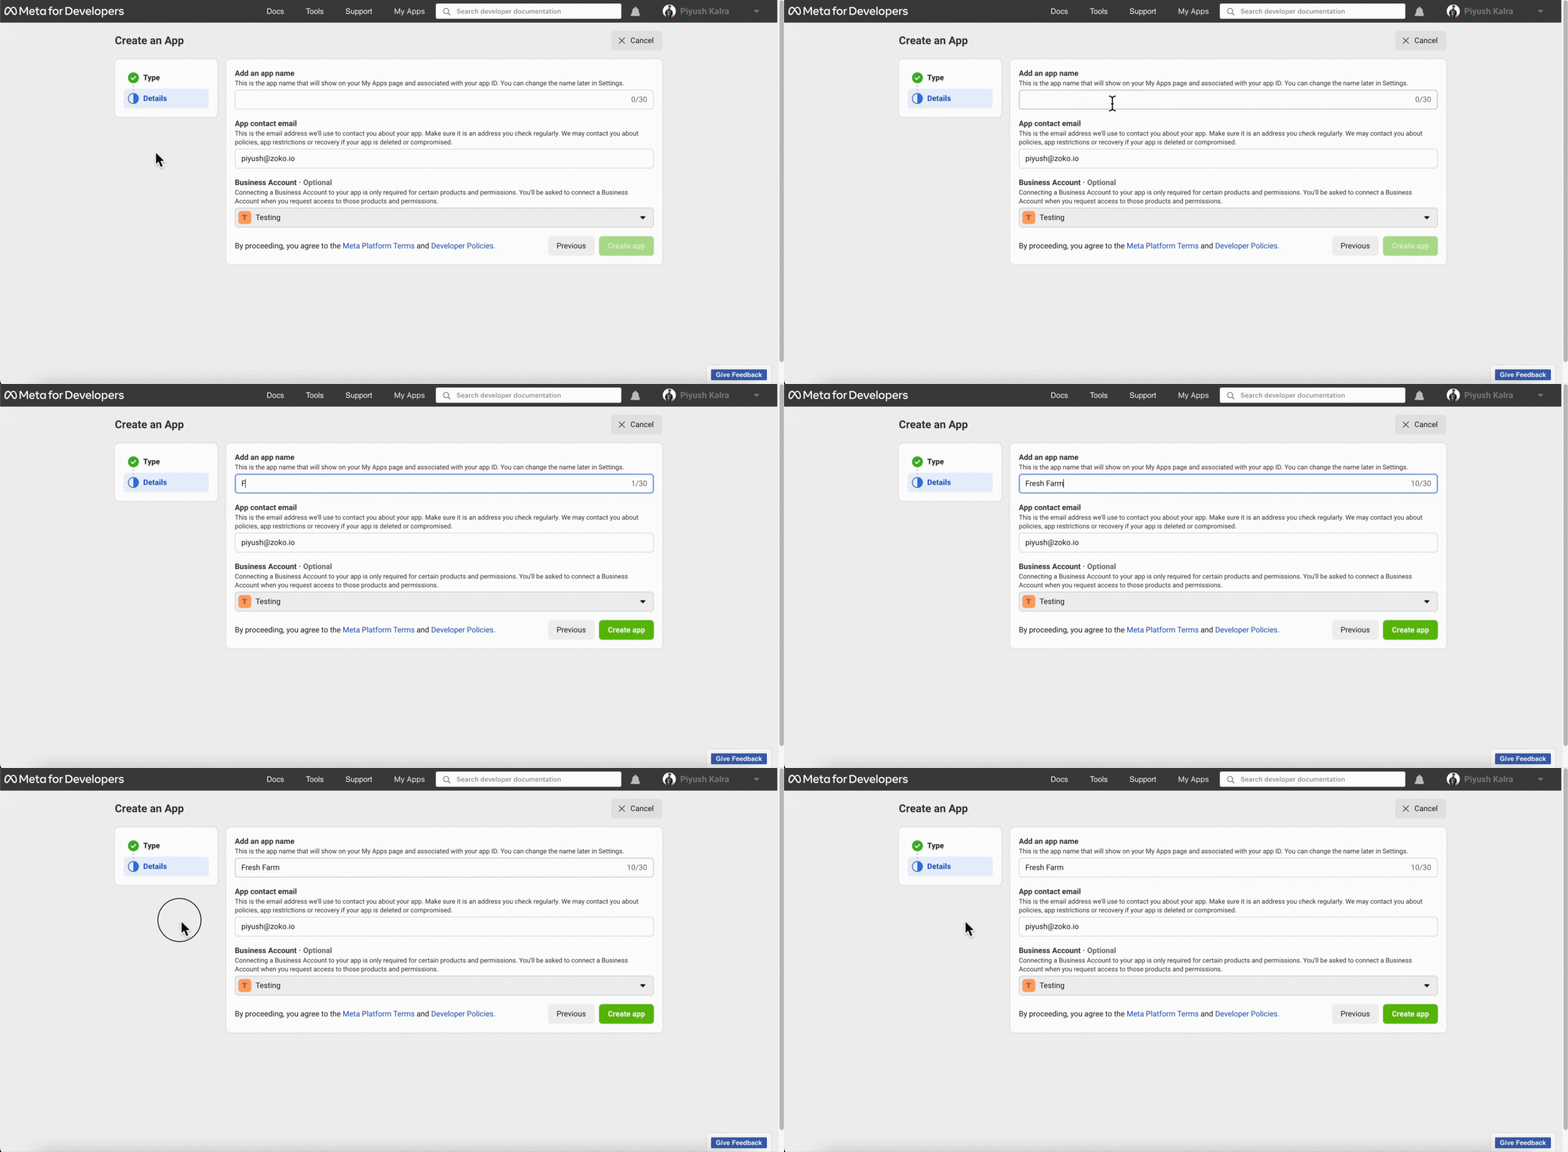
3. Add an App name here. In our case, we added the name as “Fresh Farm”.
Note: This isn't the final App Display Name of your Business. It's the app name associated with your App ID.
4. Add your email address and click “Create App”.
Important note: You'll be asked to add your Facebook Password. Confirm it & you'll be redirected to another screen.
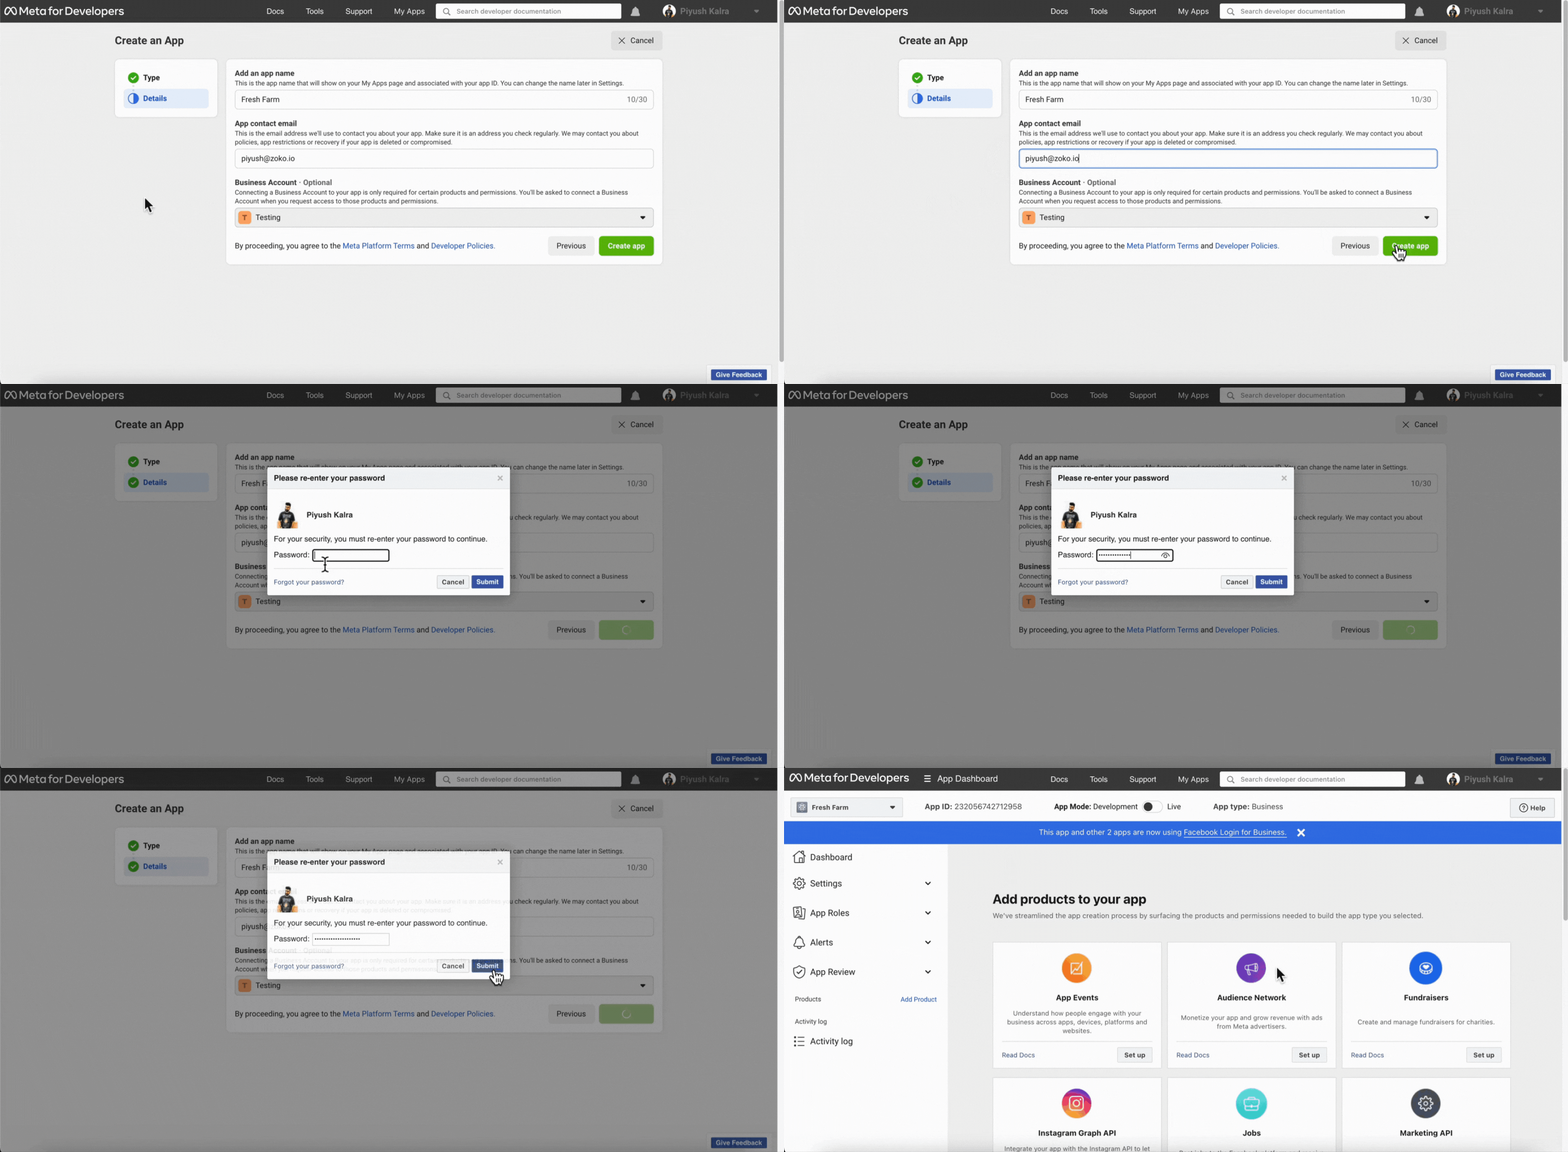
5. Click on 'App Review' on the left and click “Permissions and Features”
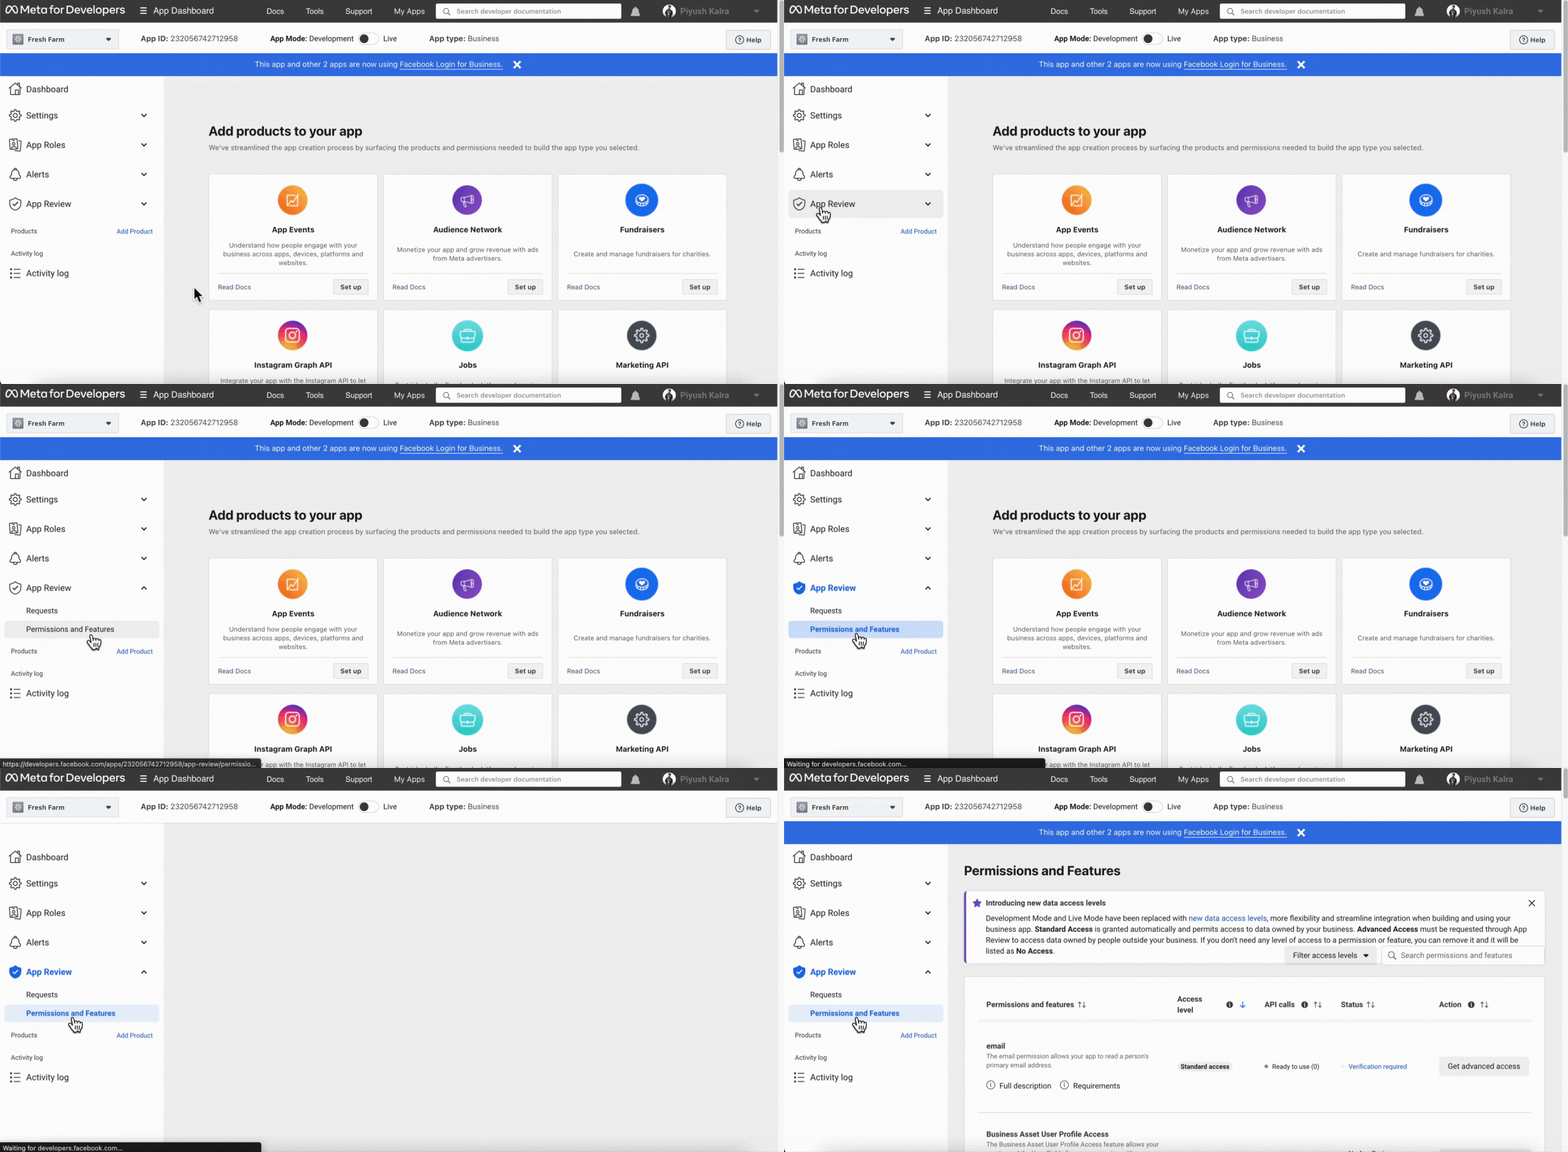
6. Next, type 'Live Video API' in the search box & click “Request Advanced Access”.
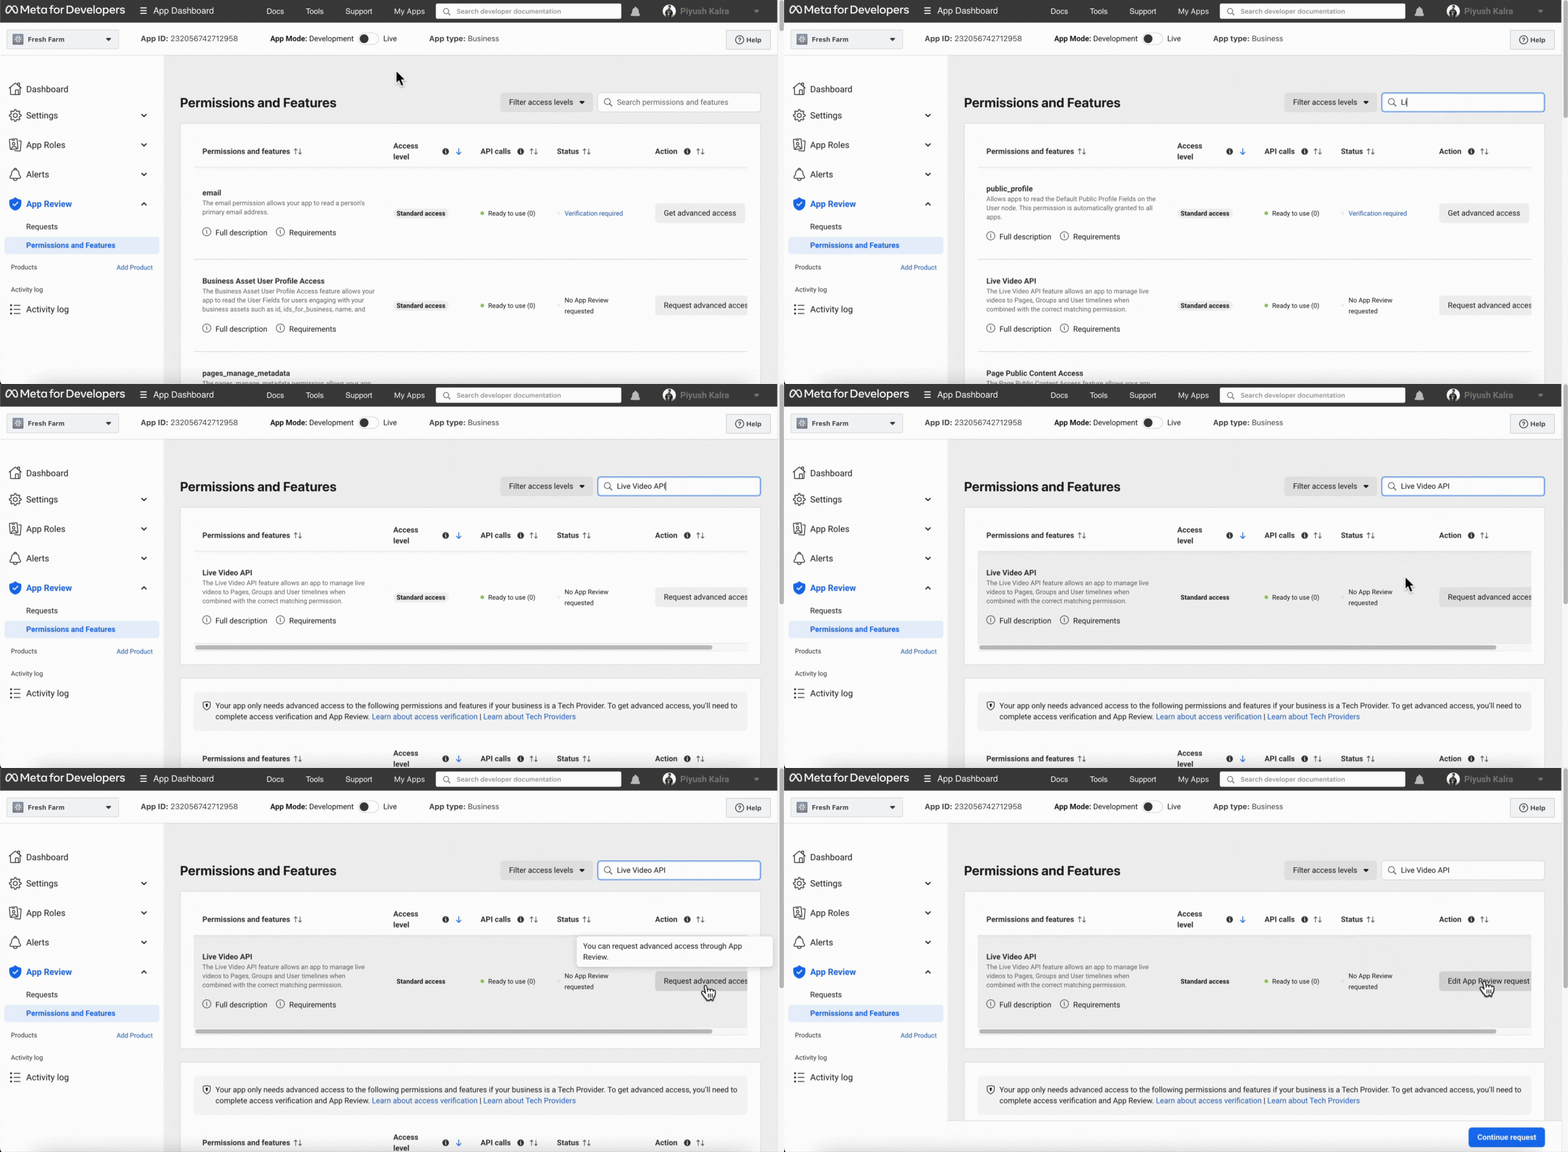
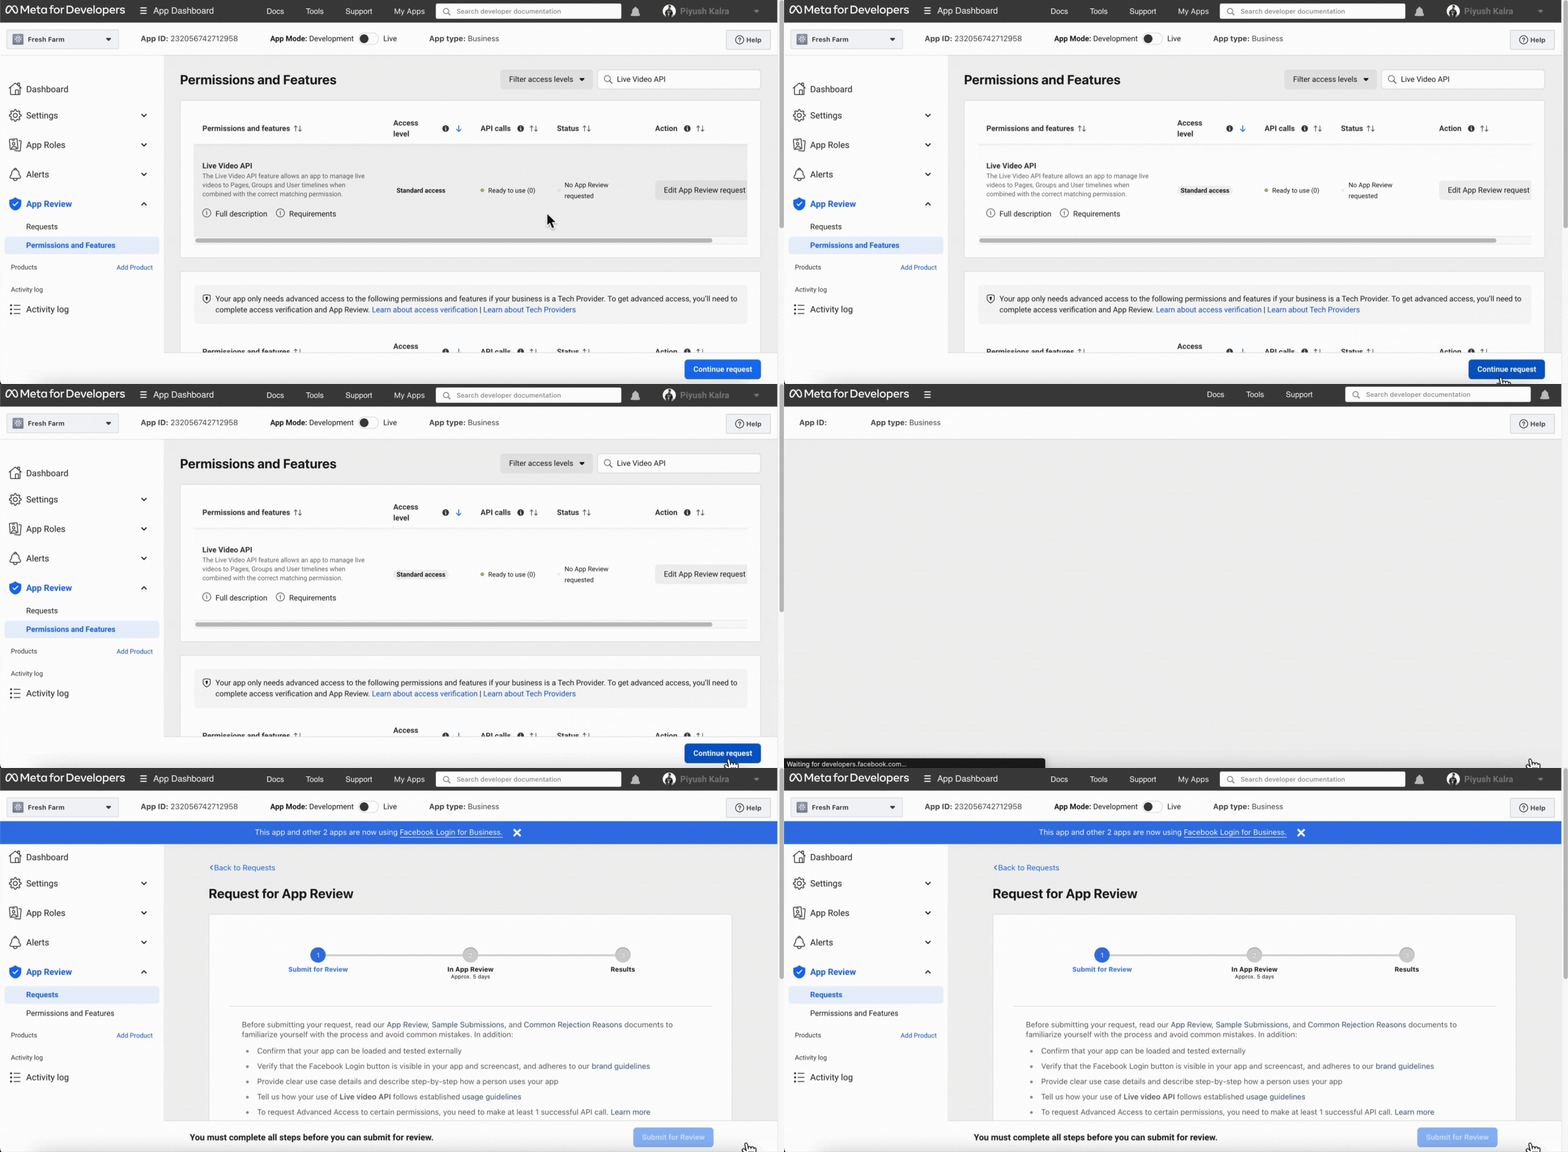
7. Click on “Continue request”.
Note: You will be redirected to another screen where you can skip the request for App Review.
Step 6 : Start Verification
To start verification, follow these steps:
1. Go back to "Facebook Business Security Settings" by clicking here.
2. In the beginning, the "Start Verification" button was not there. Now, you'll now see that the "Start Verification" appears & is clickable.
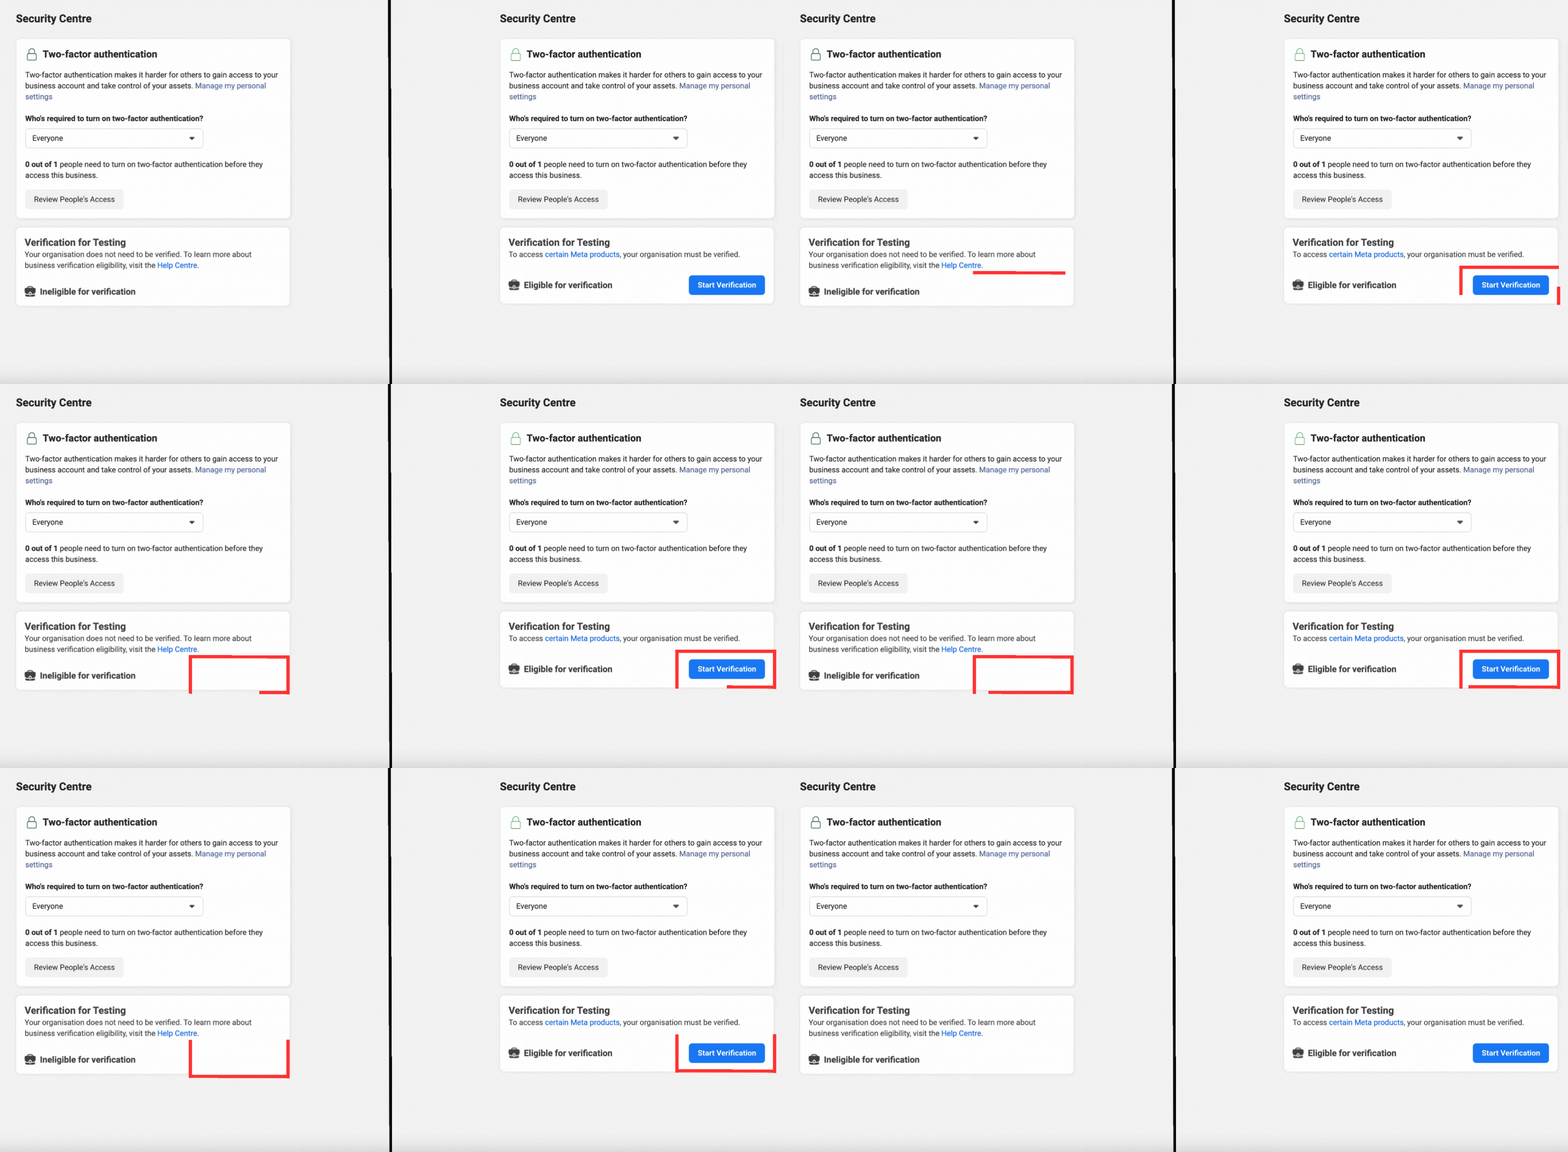
Click it to begin your Facebook Business Manager Verification process. Refer to our article to know more about verification:
- Before Starting the Verification Process.
- Applying Meta Business Manager Verification.
- Full list of Accepted Documents for Verification.
Keywords: Start verification button, Disabled, Enable verification, Verification process, Meta business manager.


.png)