How to use the Chat Screen
Learn all the tips and tricks of using the Chat Screen efficiently
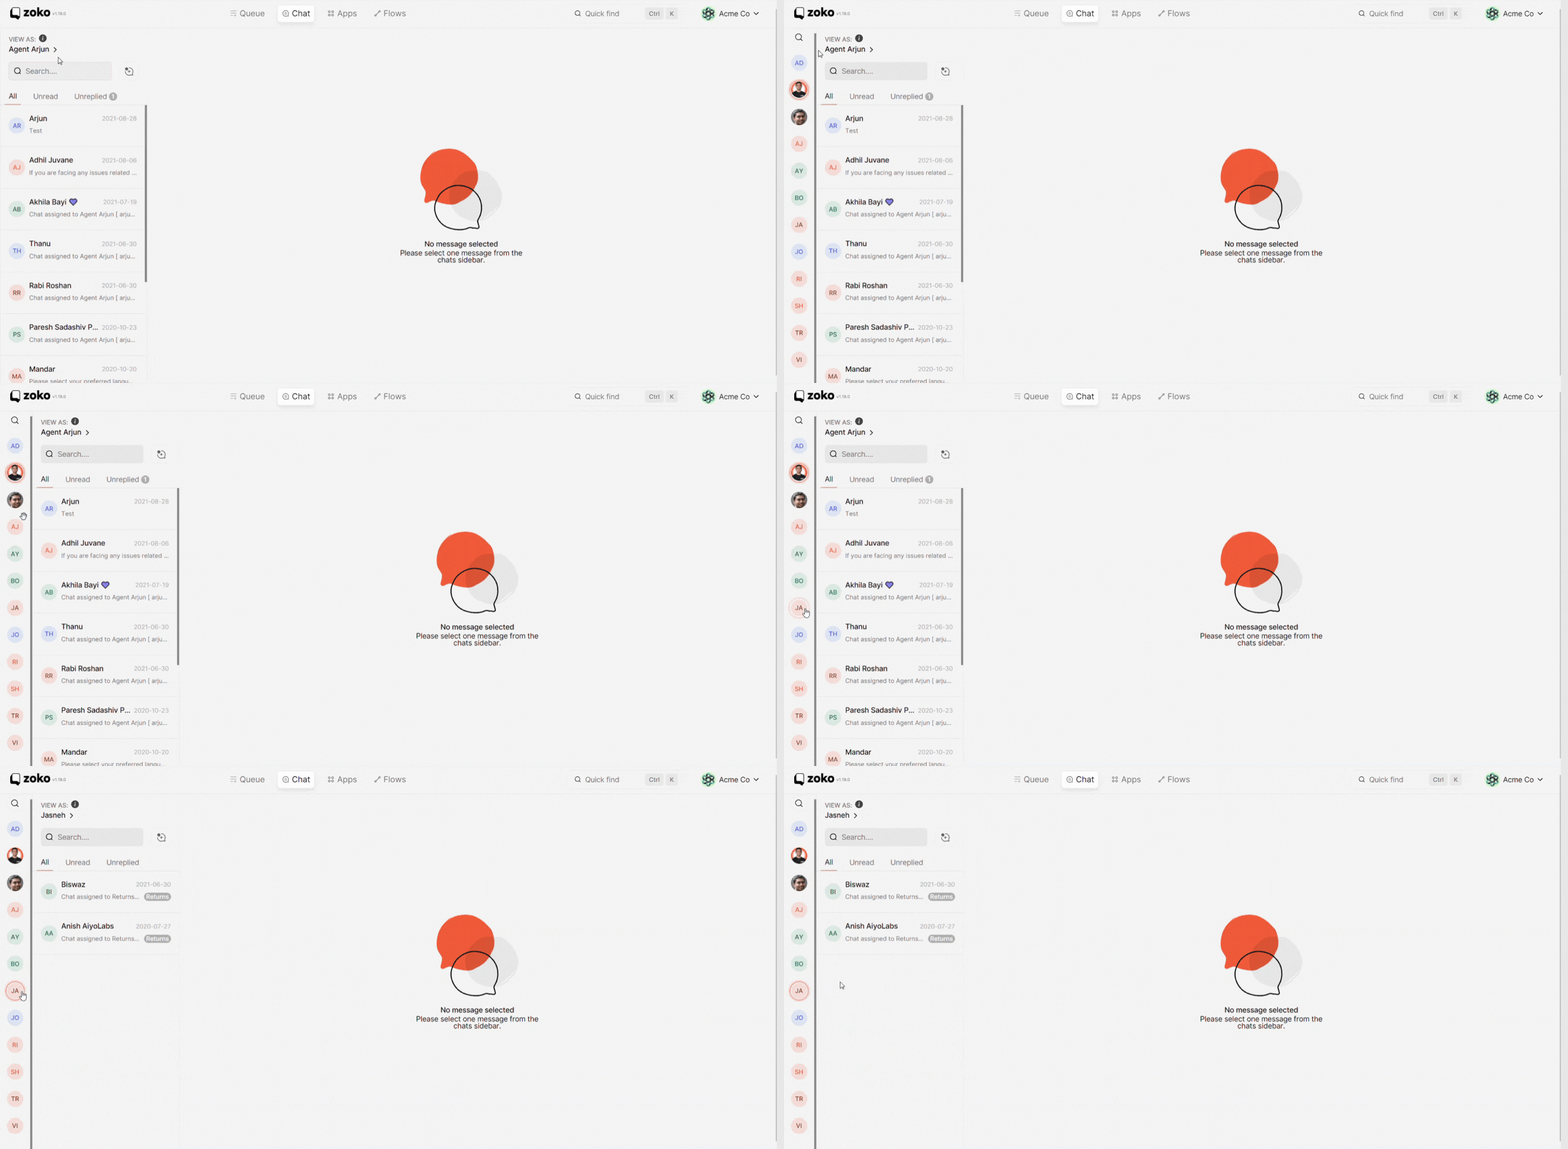
Once a chat is assigned to you from the queue screen, the chats will appear here, in your view. Clicking on Views As allows you to switch to any other agent’s view and start seeing and responding to those chats assigned to that agent. Note that if your role is “Agent Limited” then you will only see chats that are assigned to you and will not be able to switch views. All the chats assigned to you will appear here on the left.
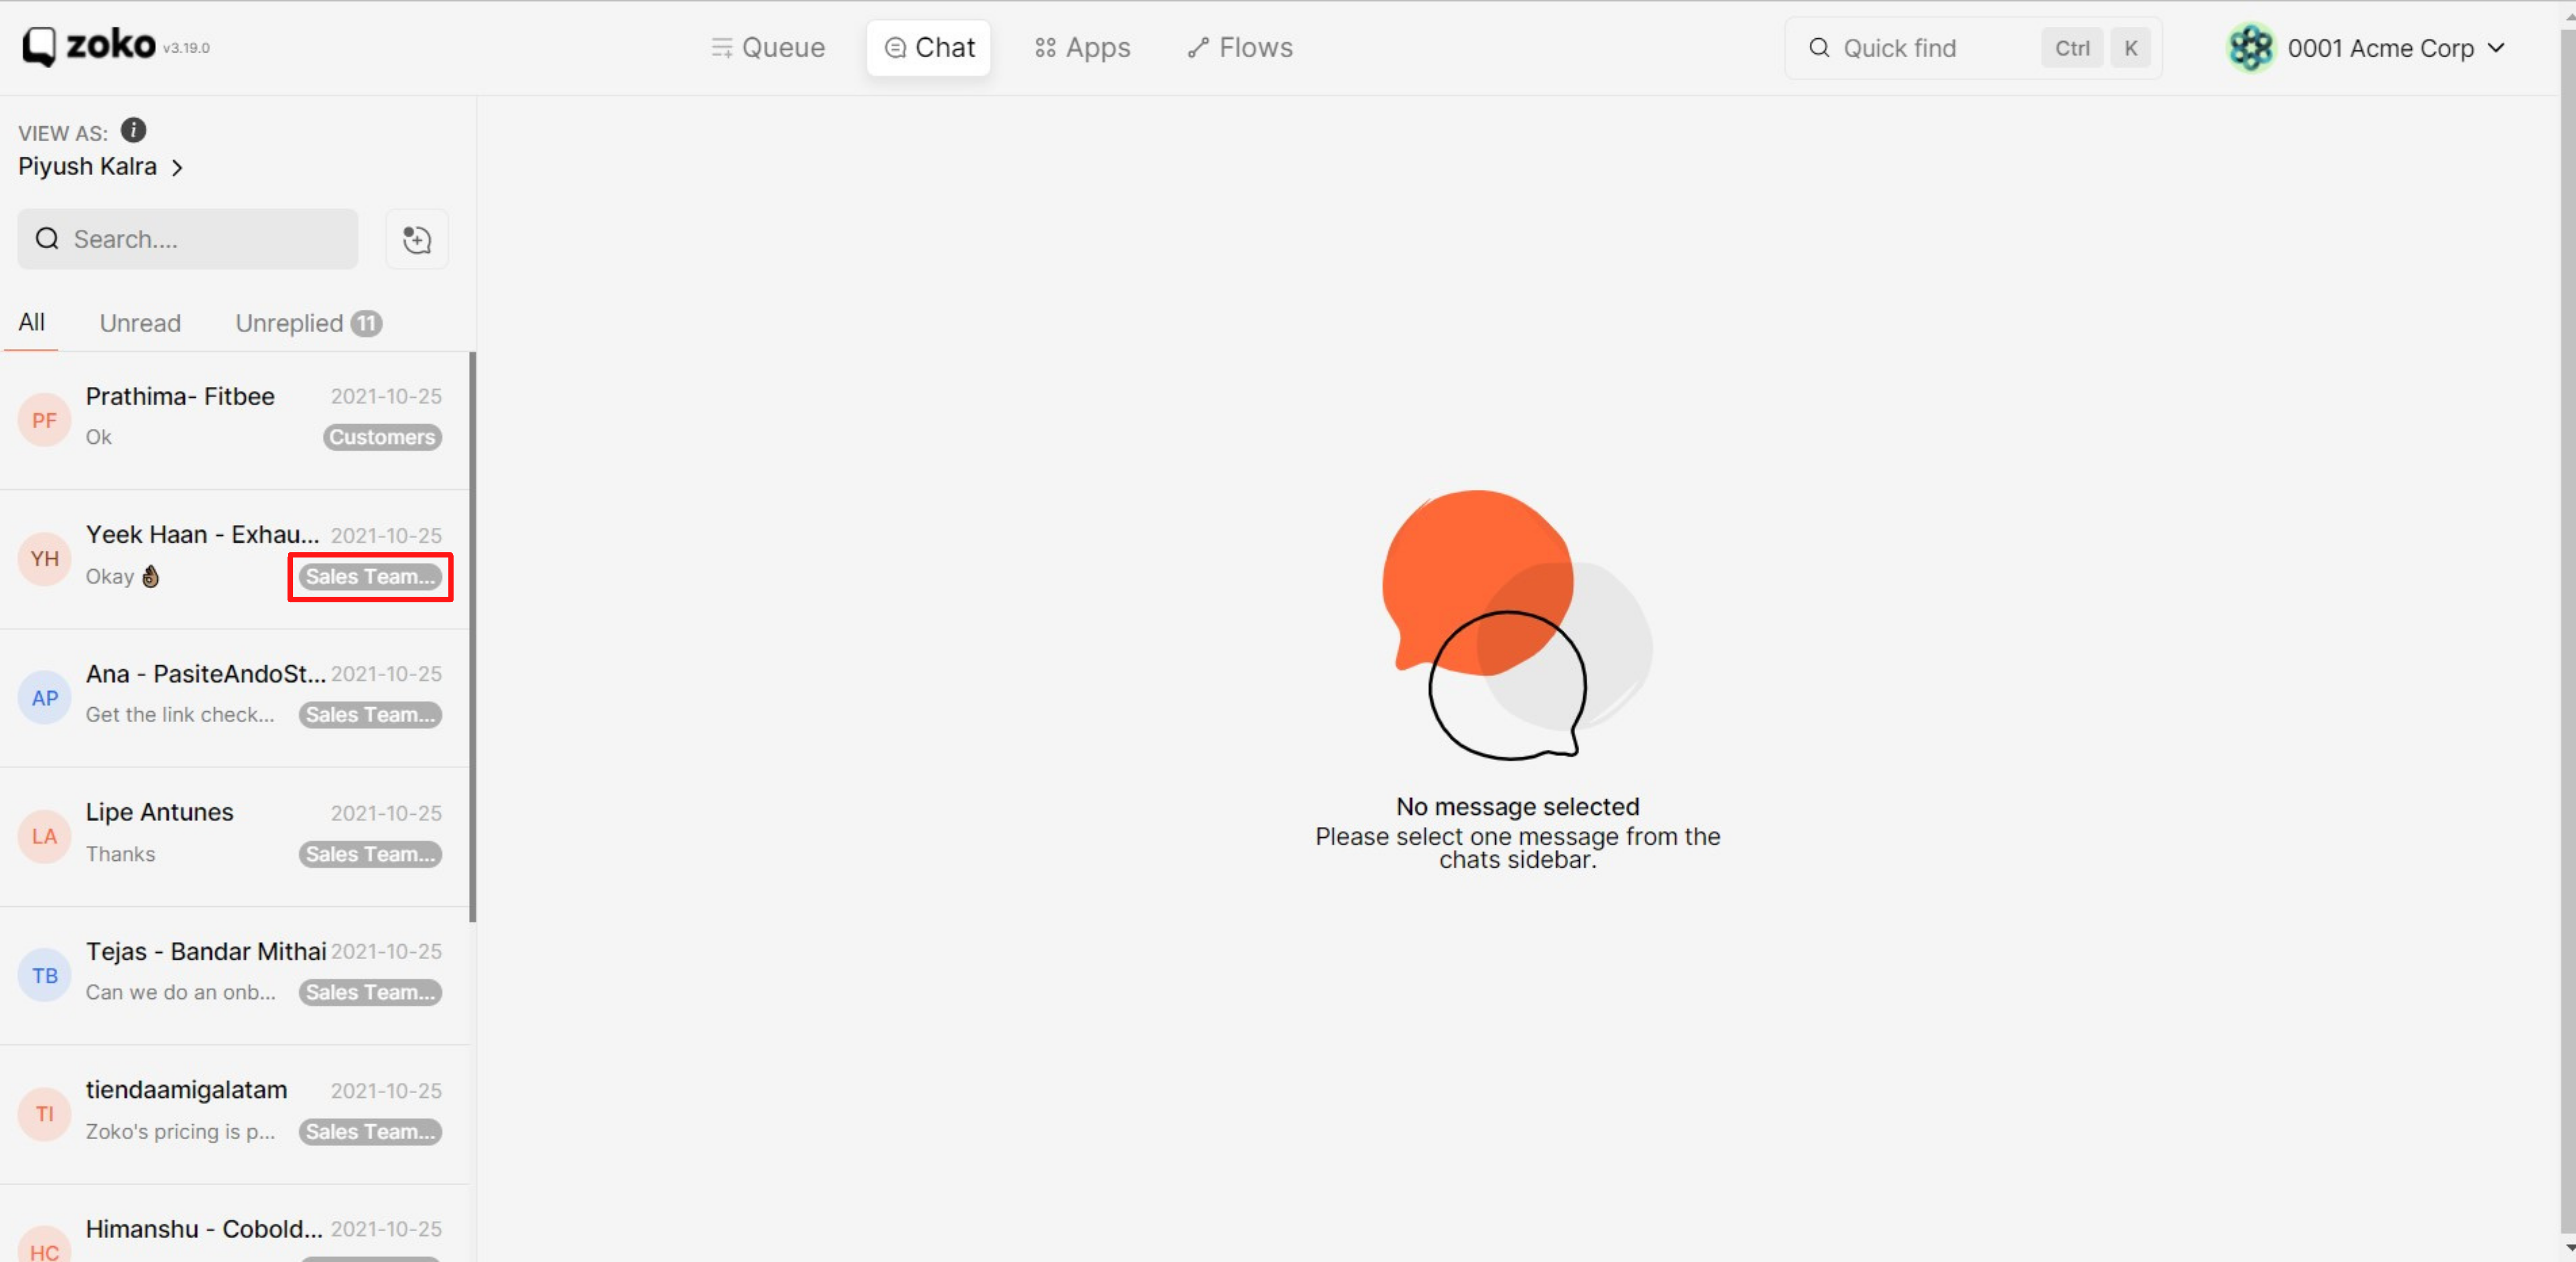
This tag here indicates that this is a chat assigned to a Team that you are in. If a chat is assigned to a team, all team members will be able to see and respond to a chat.
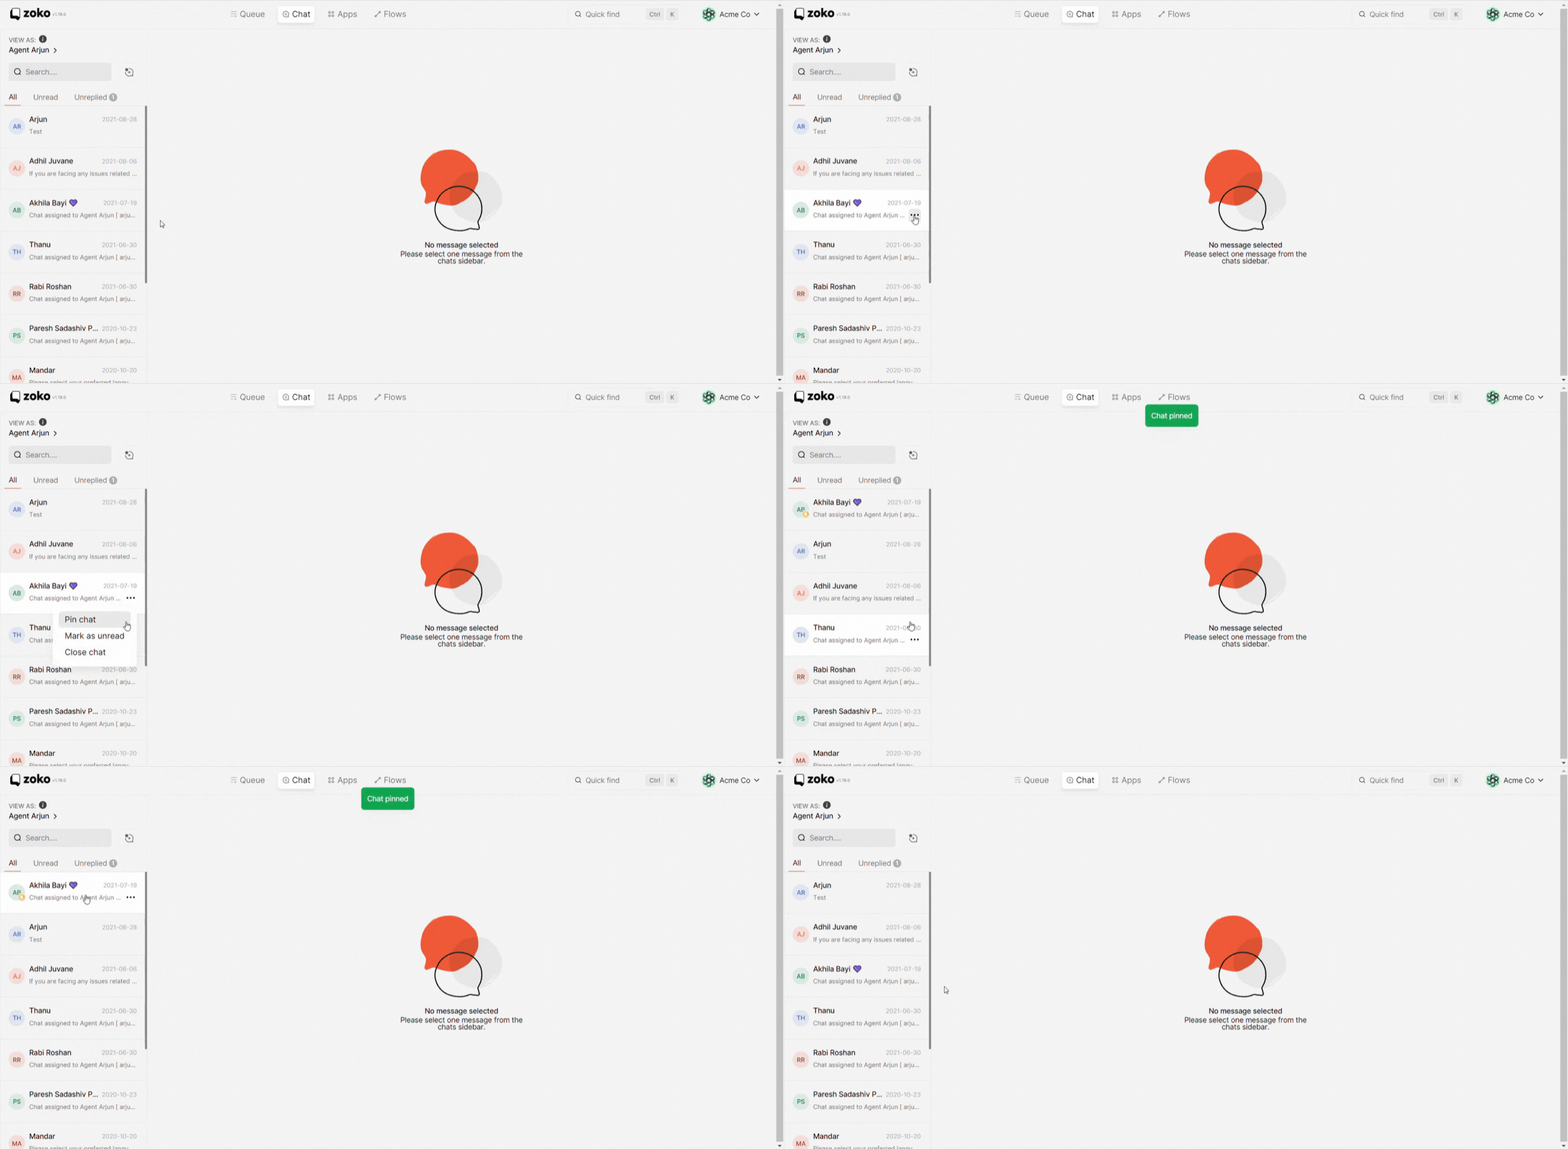
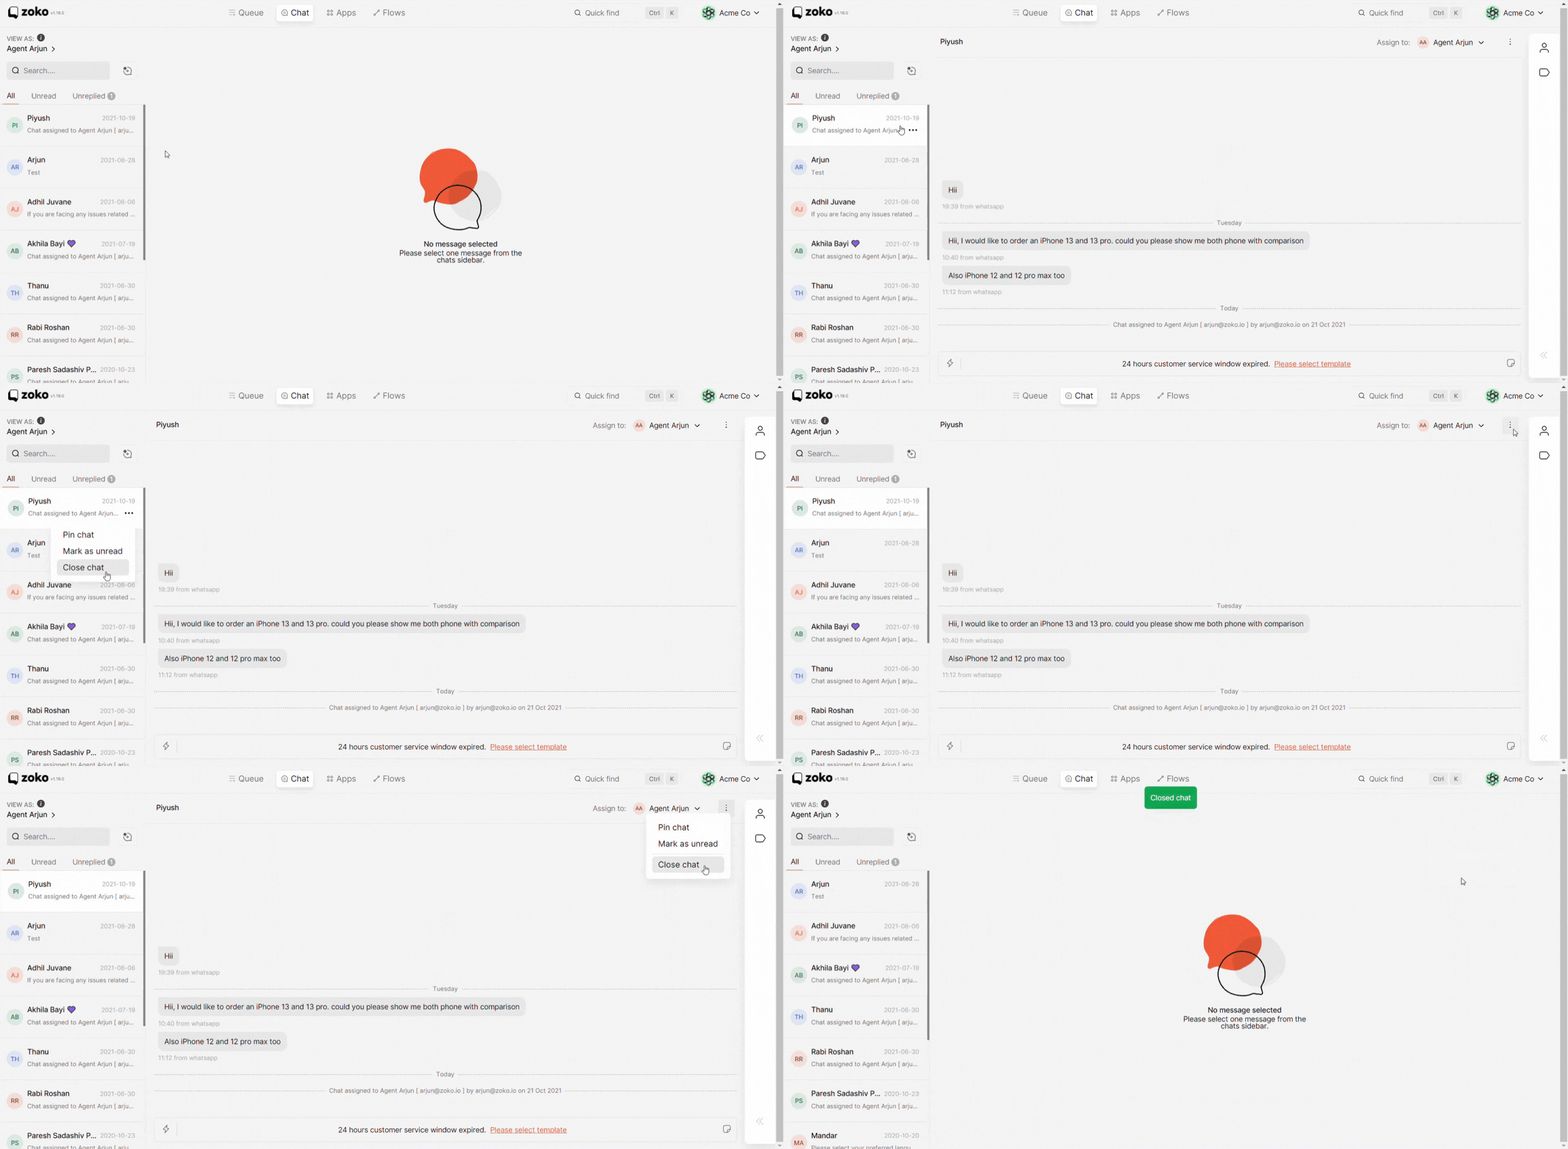
You can pin a chat like this. Pinned chats will always appear on top here. Pinned chats feature is very useful when you want to mark a chat for follow up.
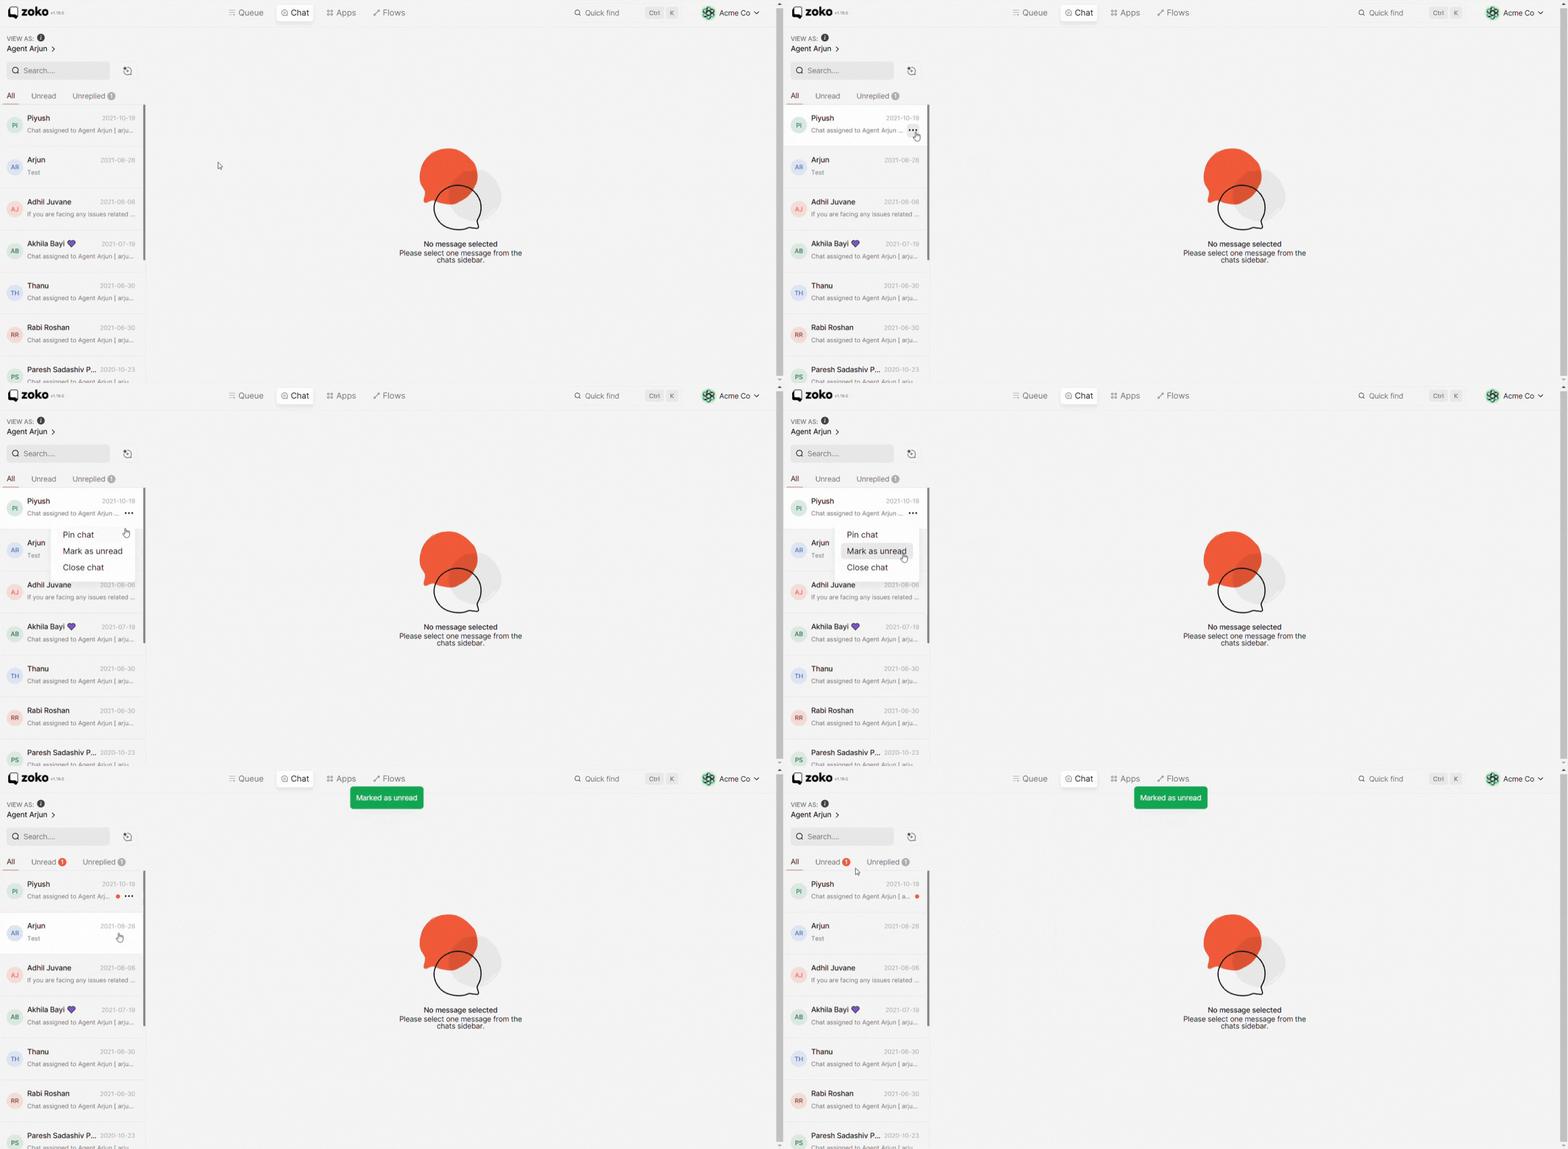
Another feature that helps follow up is the option to mark a chat as unread. Chats that are marked as unread will have this orange dot here.
You can also close a chat from here like this. Alternatively you can close chats under chat screen.
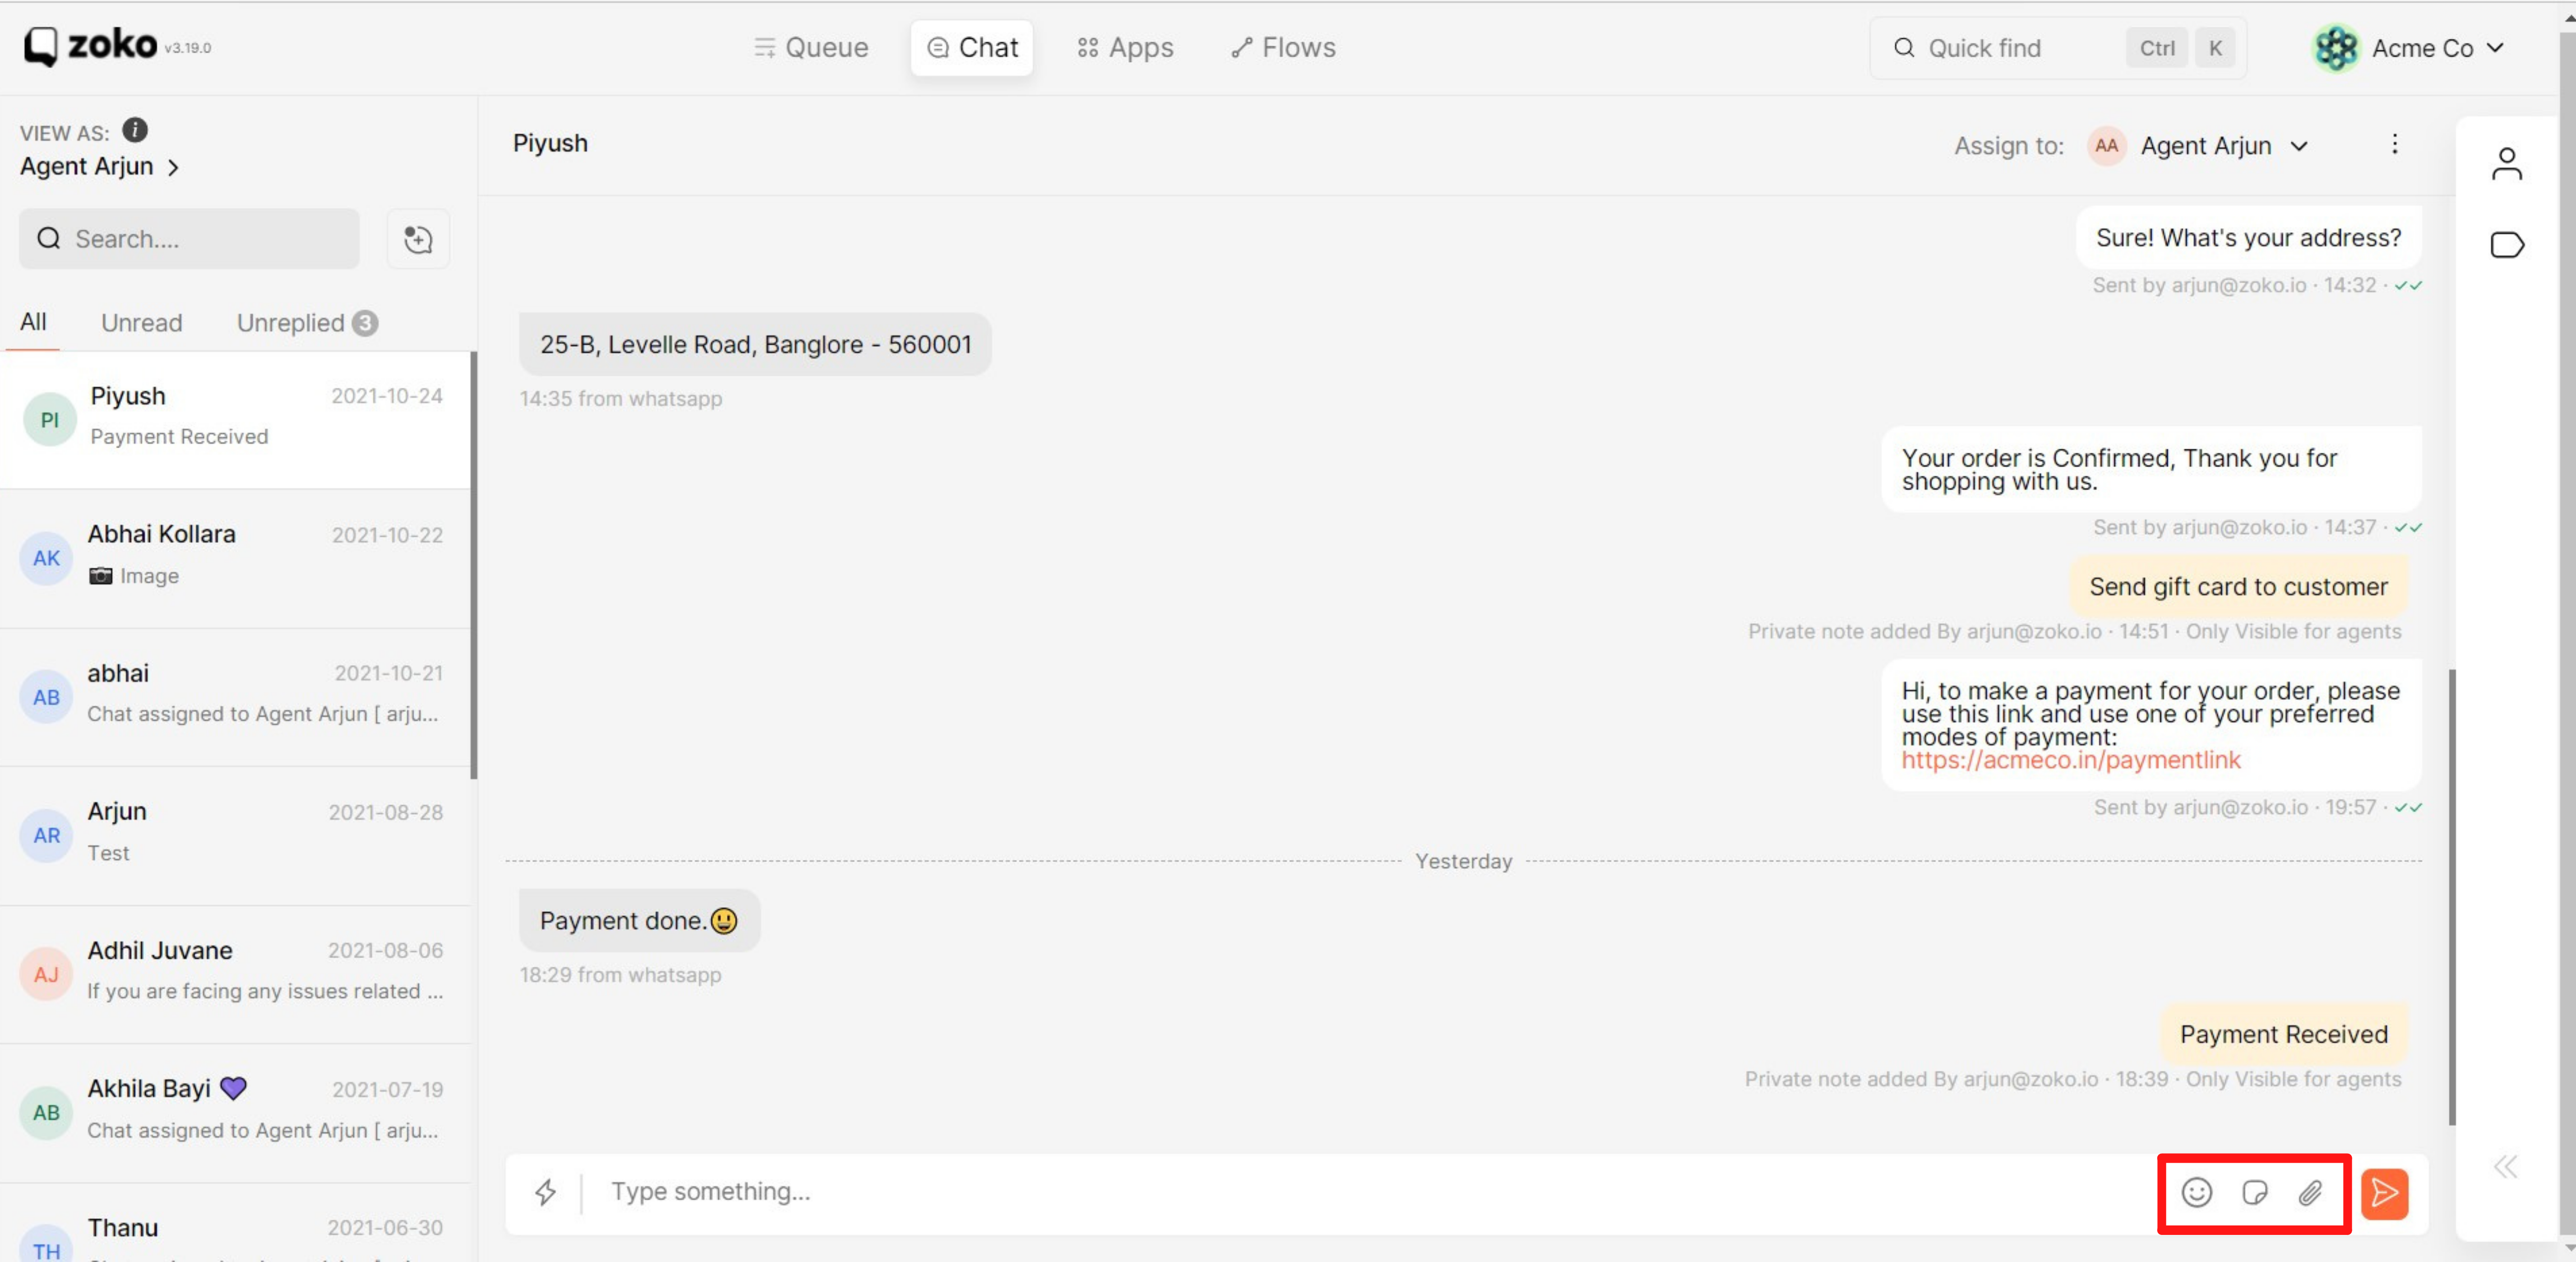
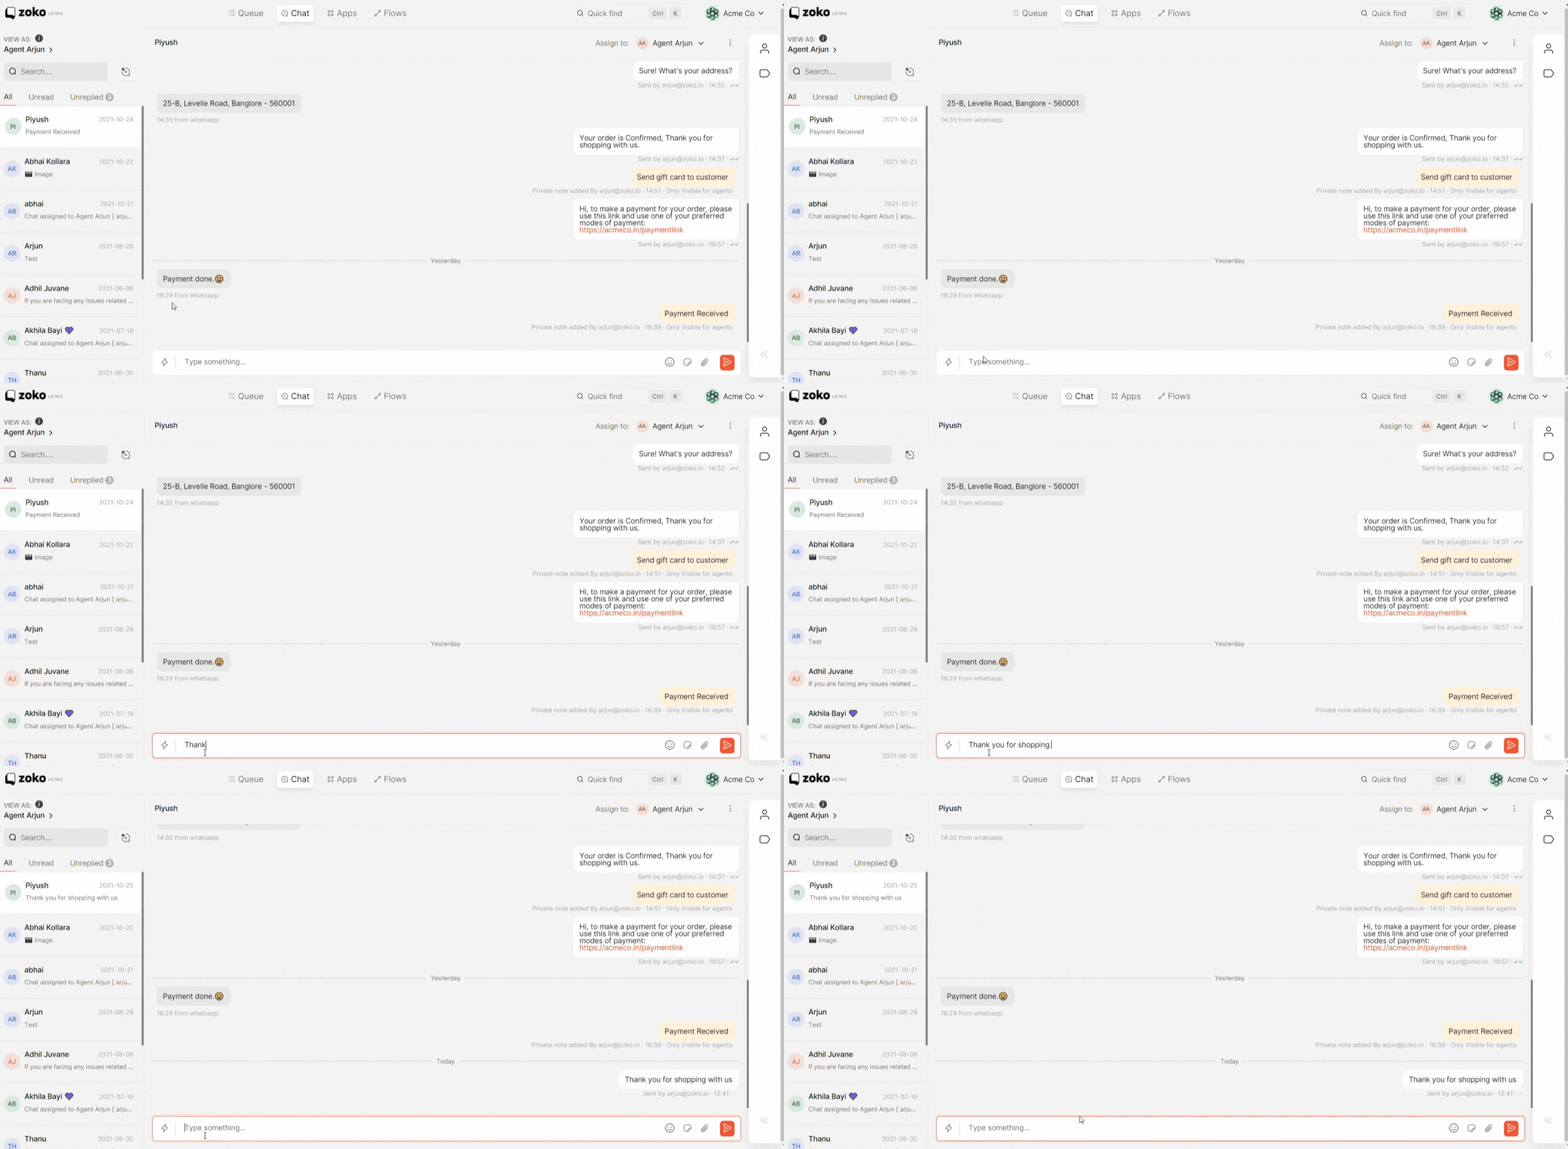
You can type your message in the chatbox and even include emojis or attachments to your messages.
You can bring up the quick replies by clicking on Quick Reply button or by typing '/'. Search and send quick replies to chat like this.
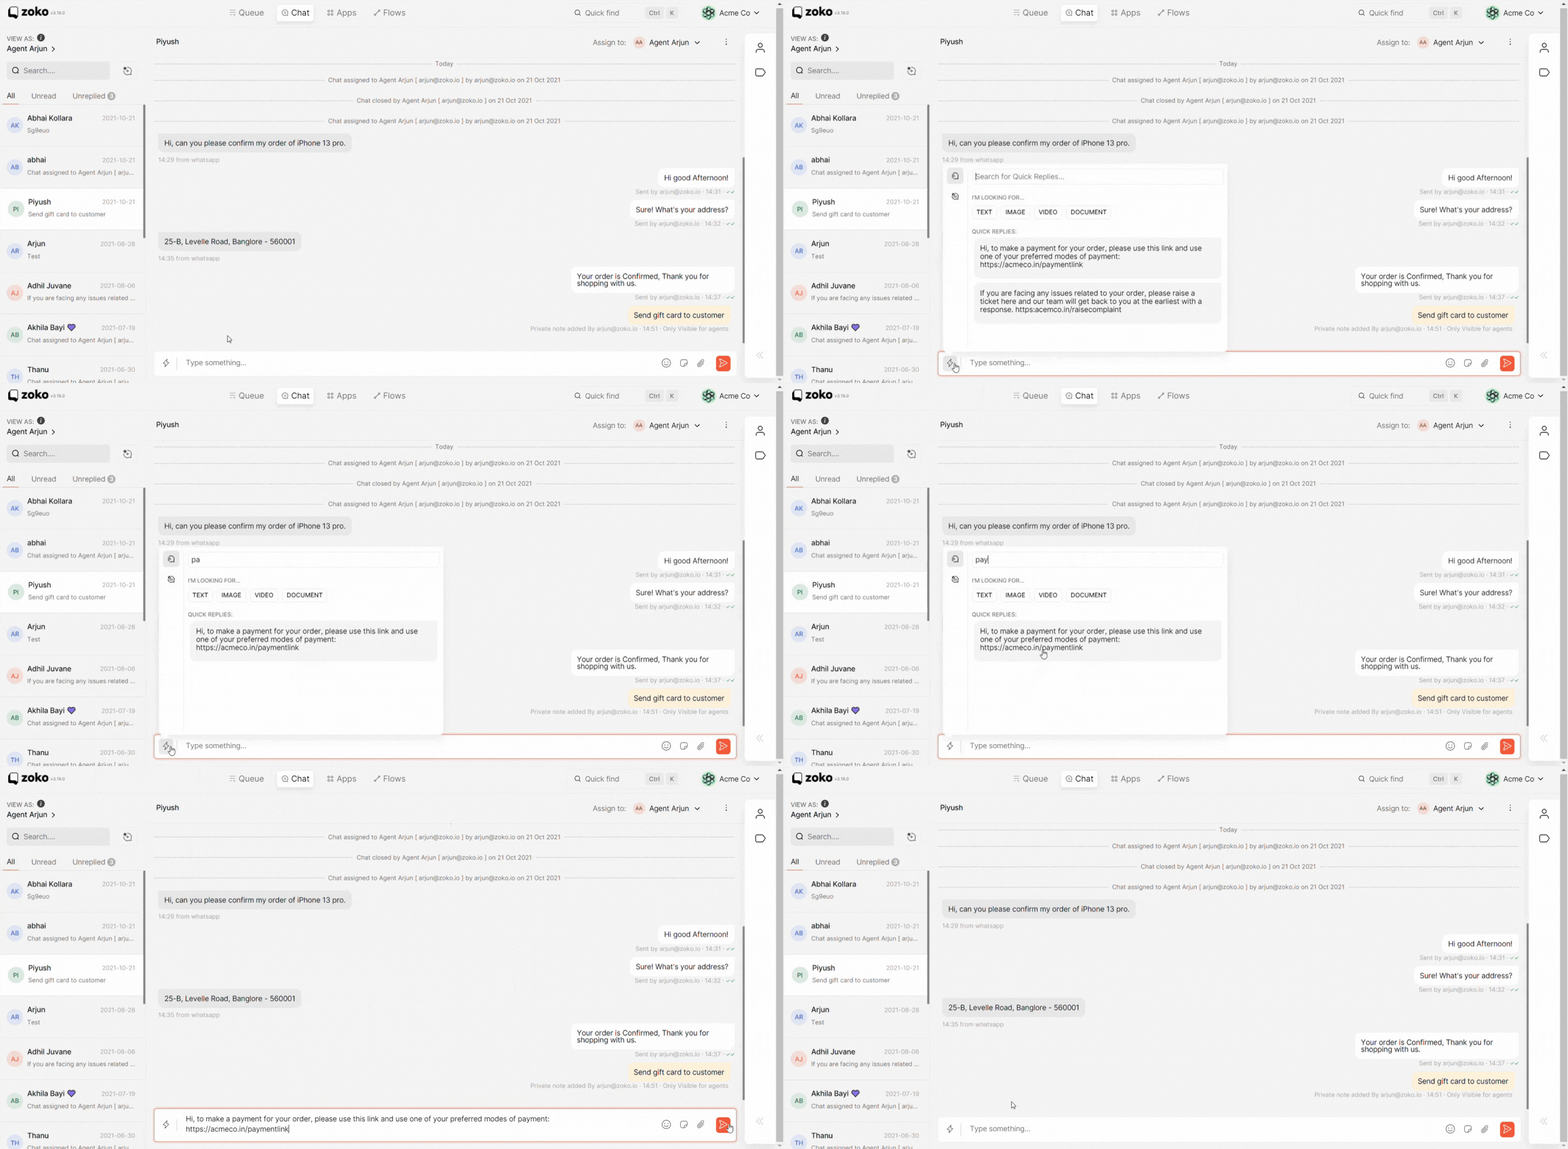
This is also where you can find your approved whatsapp templates.

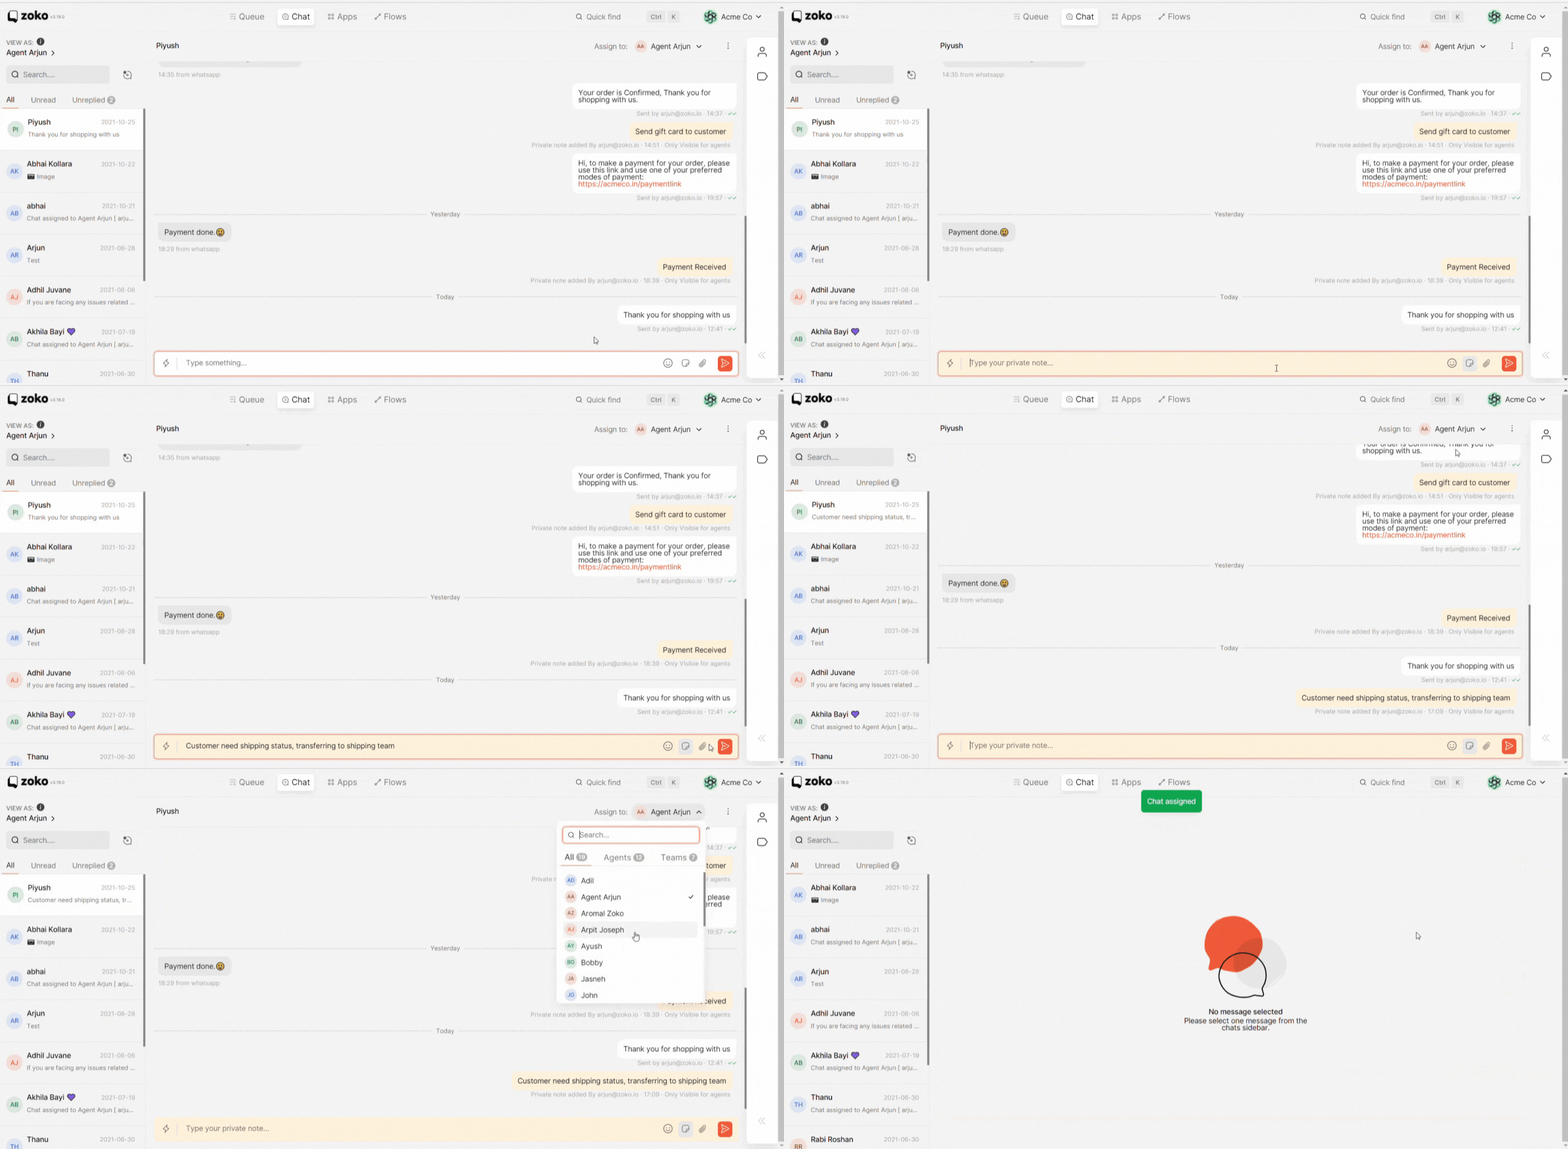
An interesting feature that Zoko offers is Private notes. Notes that are visible only to your team and not to the customer. Click here to enable private note mode. Notice how the colour changes here. This confirms that you are in the private notes mode now. Add the notes and press enter and your private notes will appear in the chat screen. Click here again to disable the private notes mode.
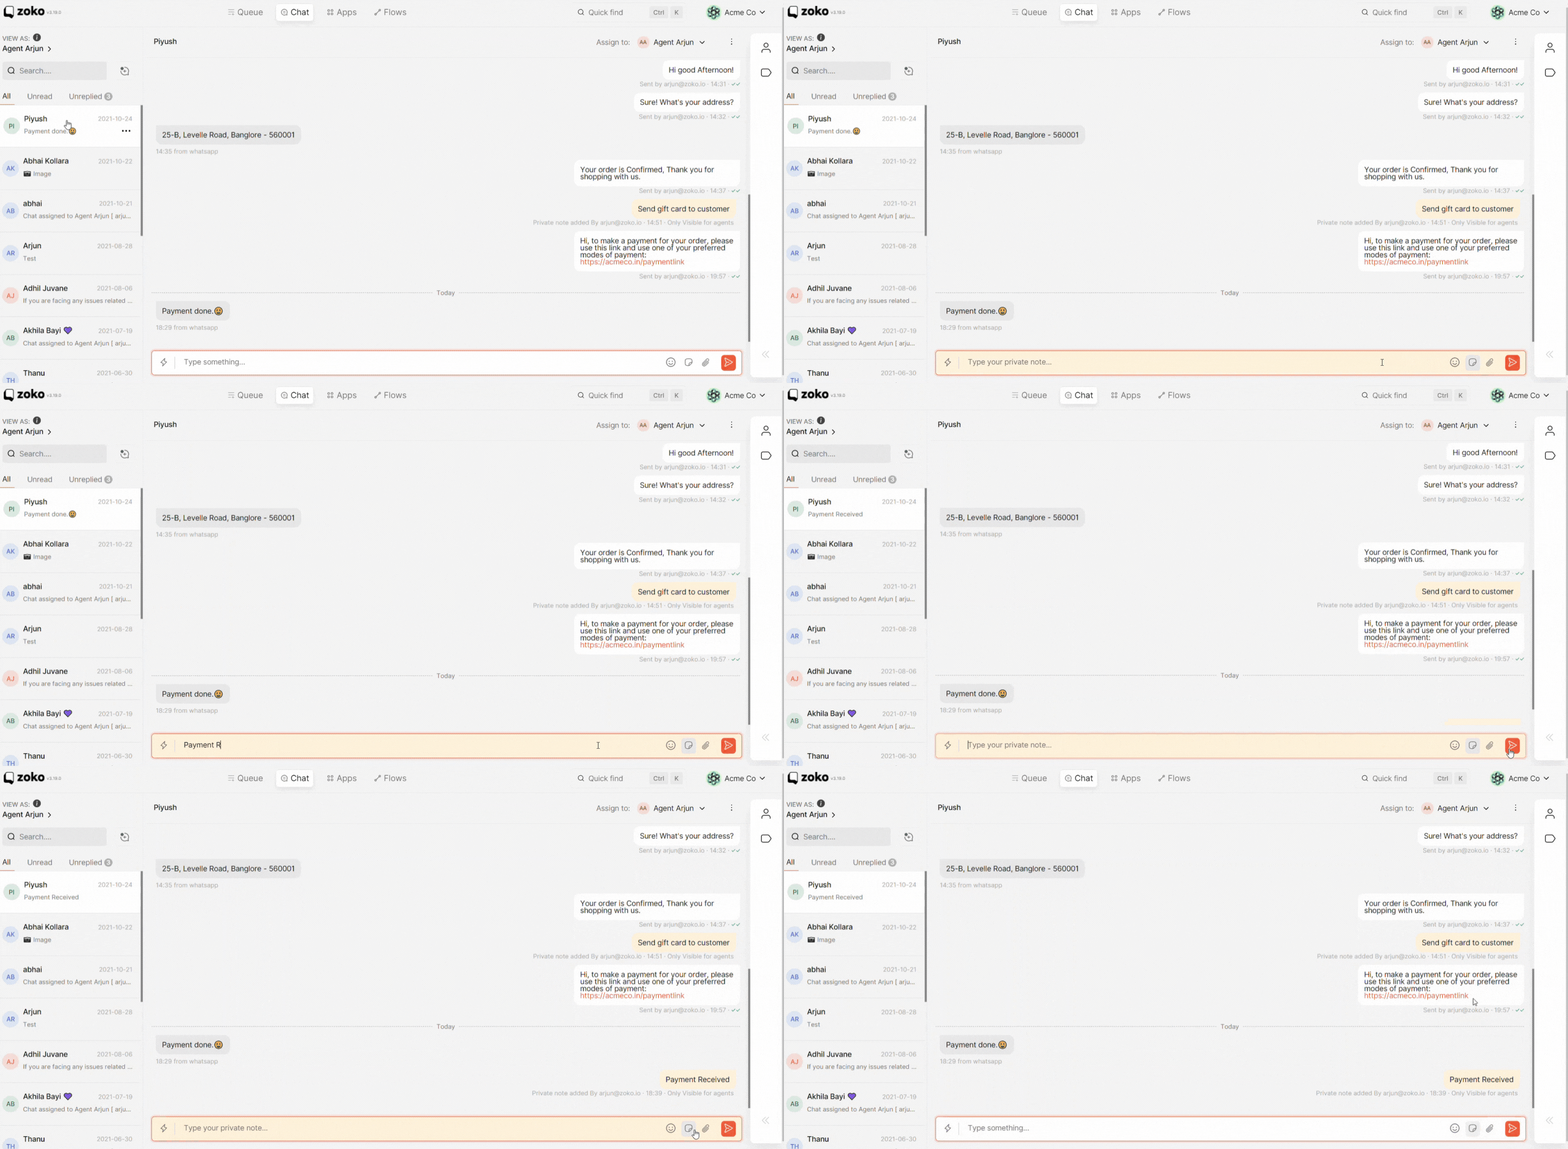
WhatsApp has this unique feature called the 24-hour customer service window. If a customer has messaged you first then you have a 24-hours window from the last customer message to respond to the customer. This open window is called the customer service window. As you can see here, the last customer message came at 18:29. And hence the customer service window will be open till tomorrow 18:29 and you can send any free flowing message like this.
However, if 24-hours have passed since the last customer message you can only send a pre approved template message.

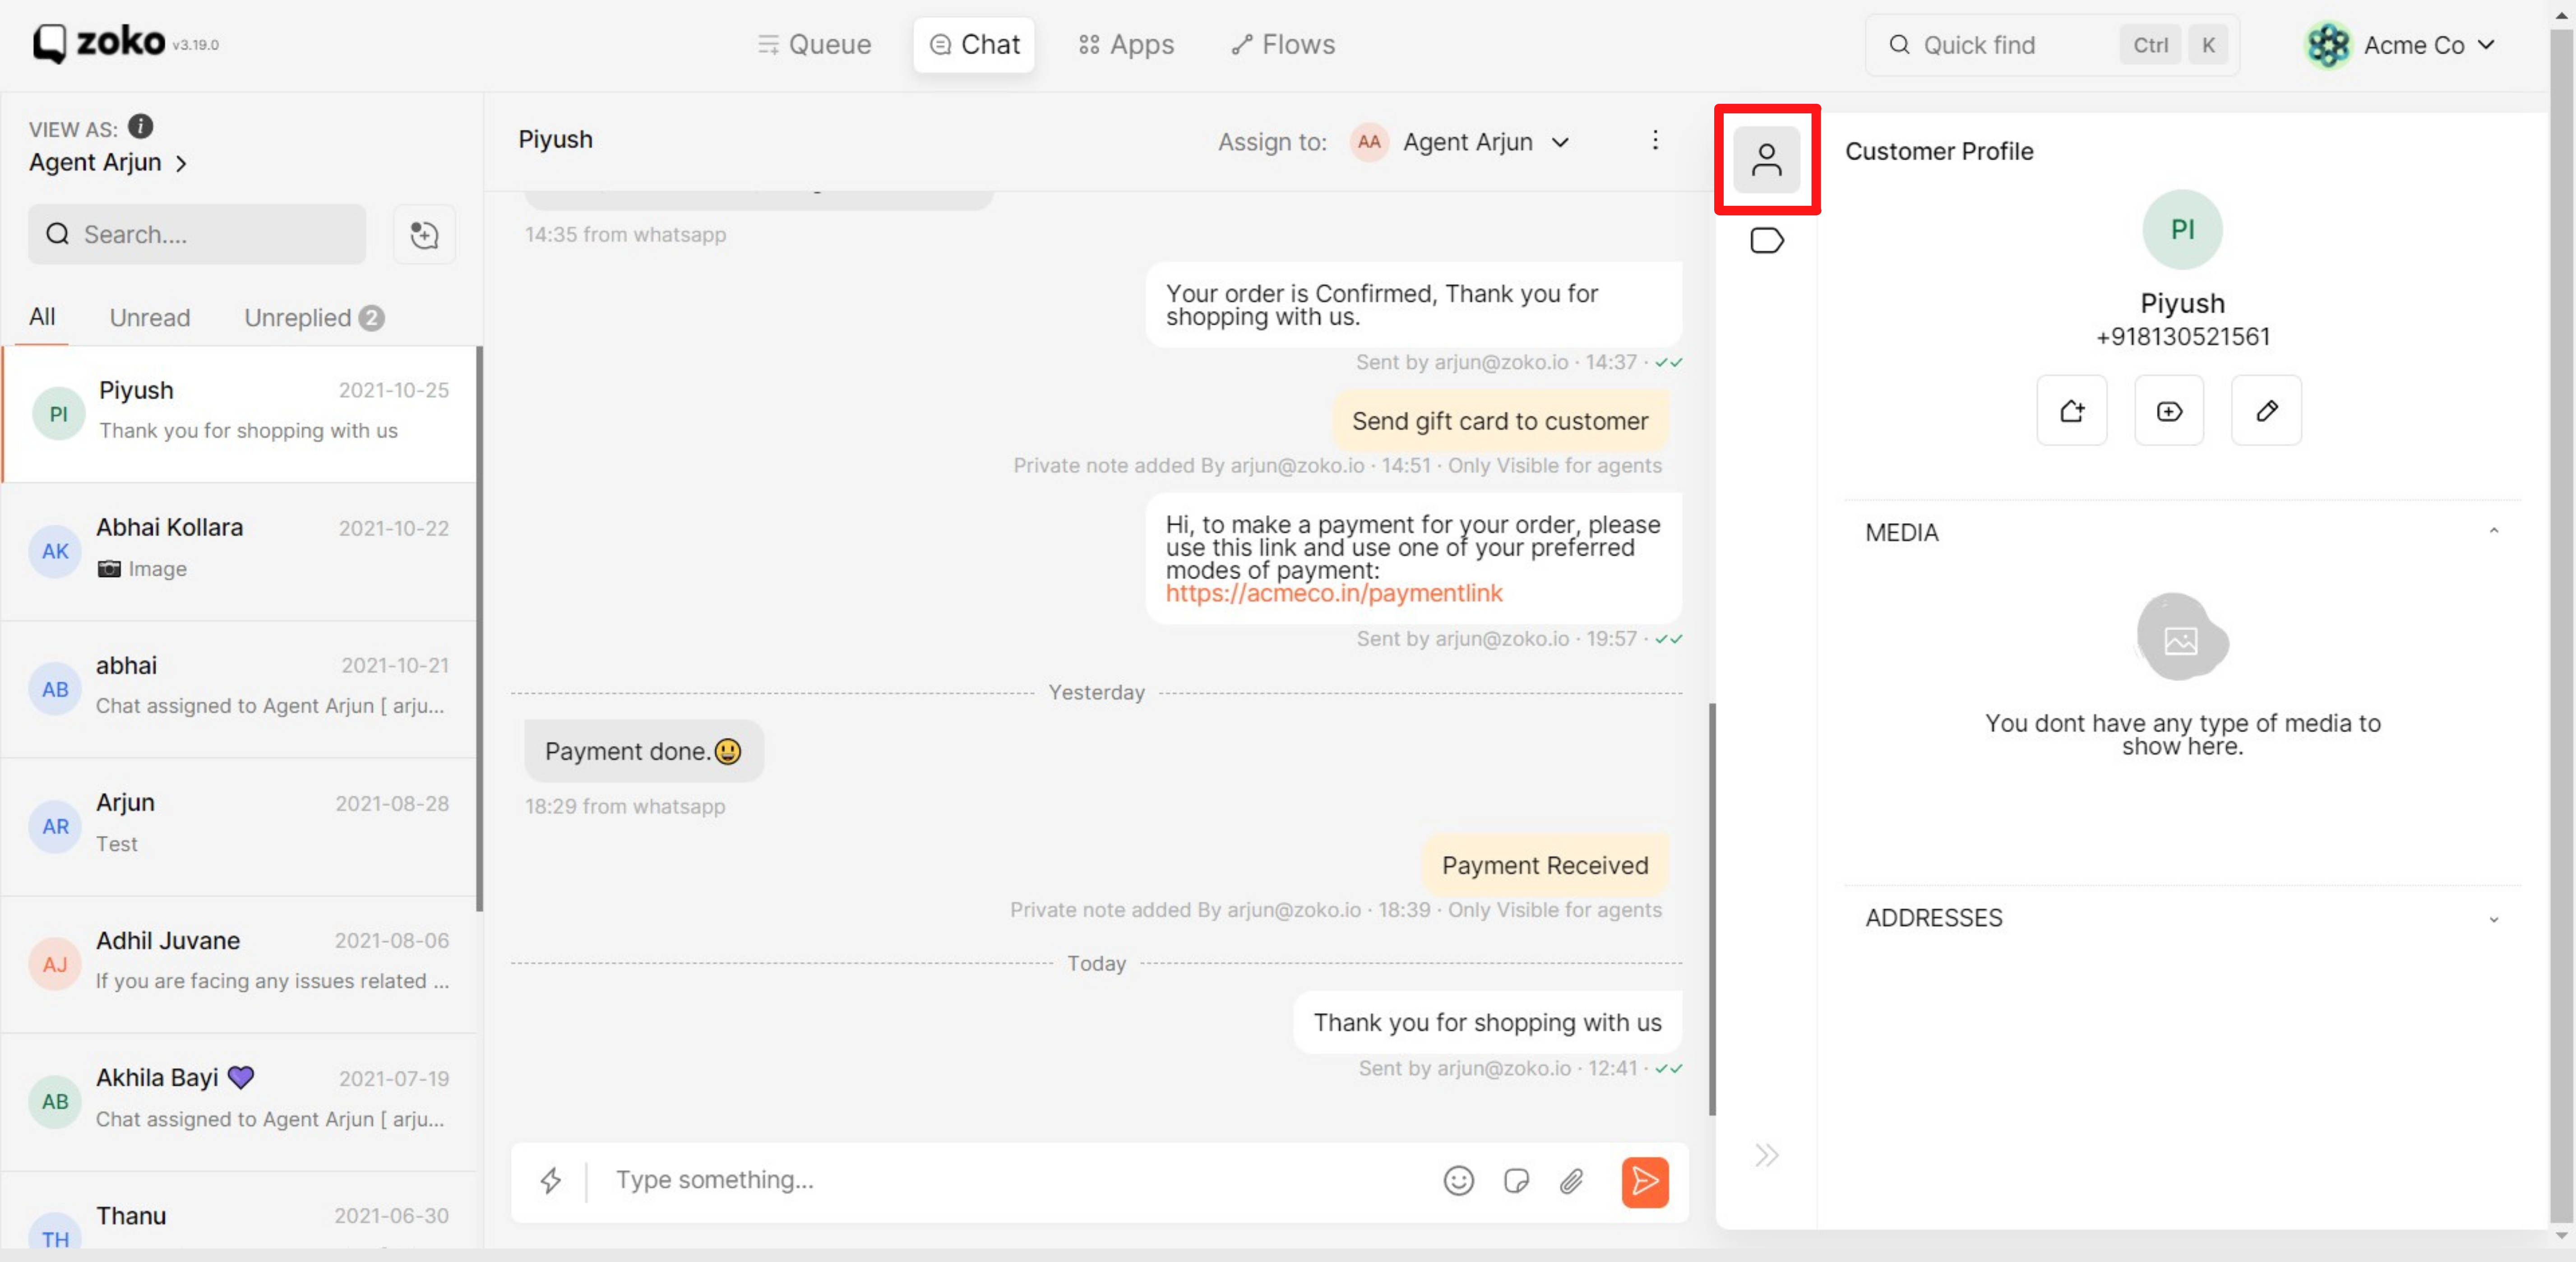
This is where you can see and set context about your customer. The customer’s name and number appear here. You do have the option of masking the customer number for the Agent Limited Role.
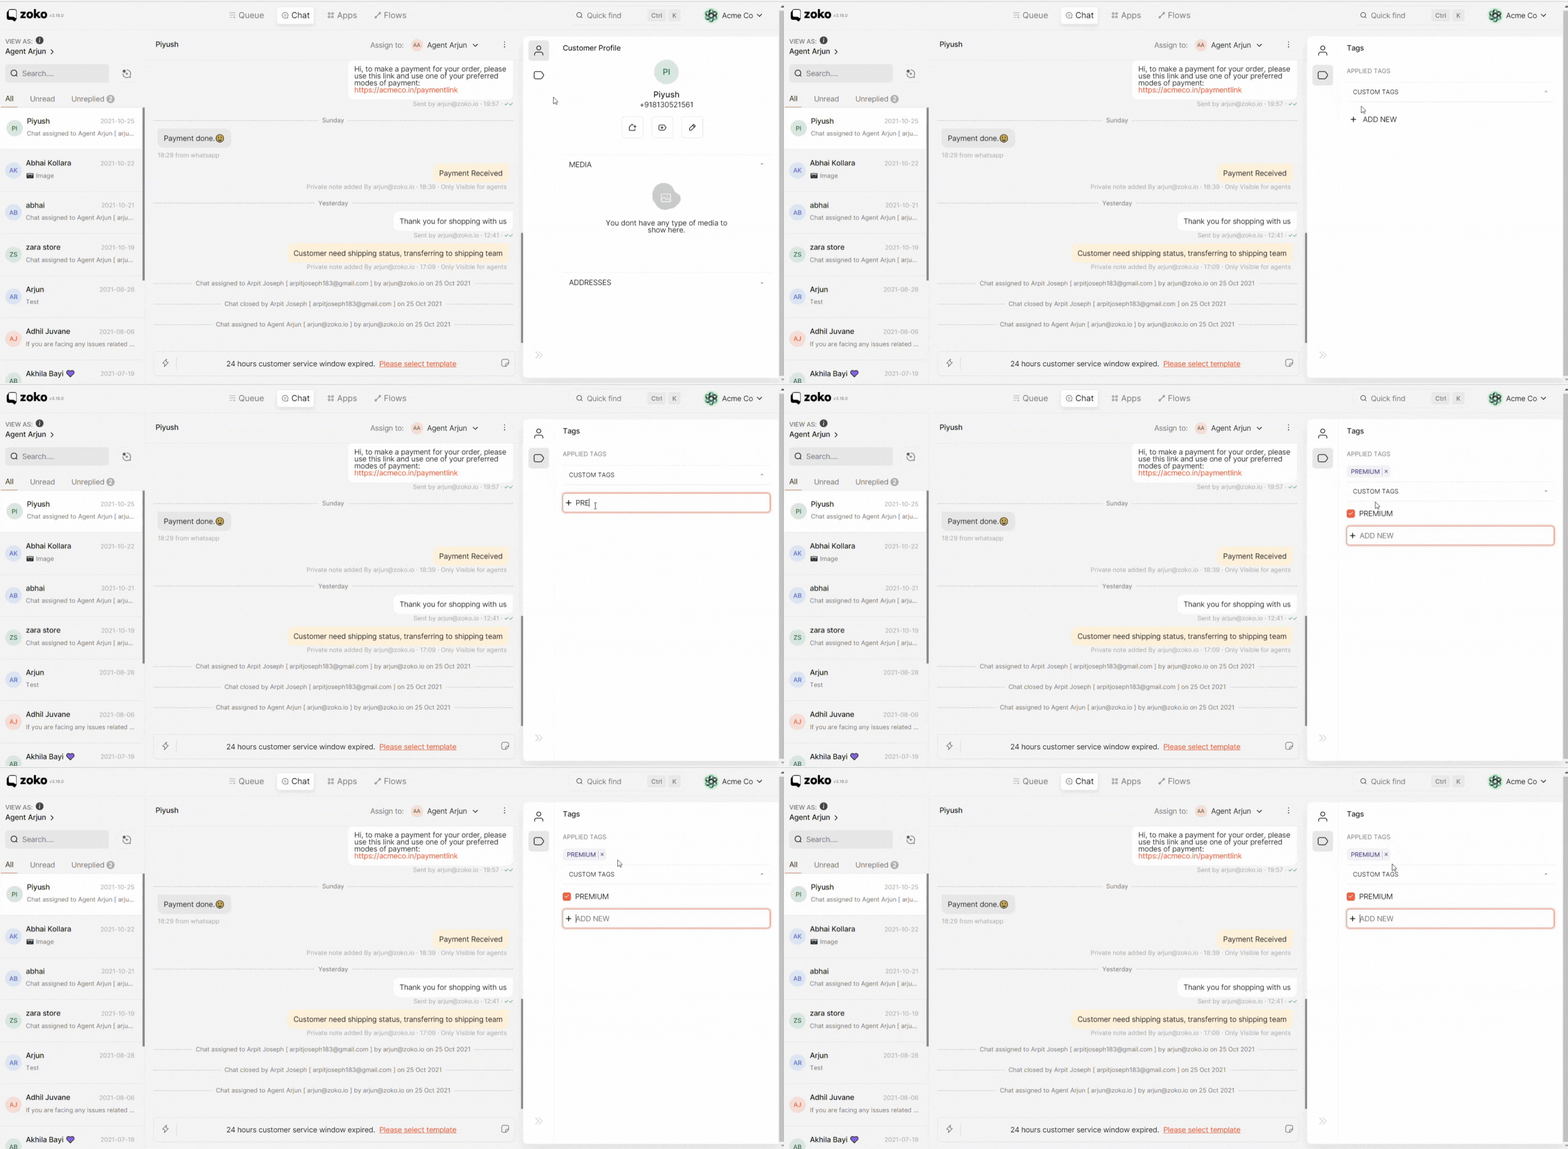
Customer Tags can be added here. For example, I am going to add a tag - PREMIUM. All tags that are added will appear here.
At times, you may also want to handover a chat to another person in your team. For example, if a customer requests a shipping Status, you can add a private note saying “Customer need shipping status”. Then handover the customer to Arpit in your team who handles Shipping updates, by going here and assigning the chat to Arpit. When Arpit logs in, he can see the private note and continue the conversation from where you left off.
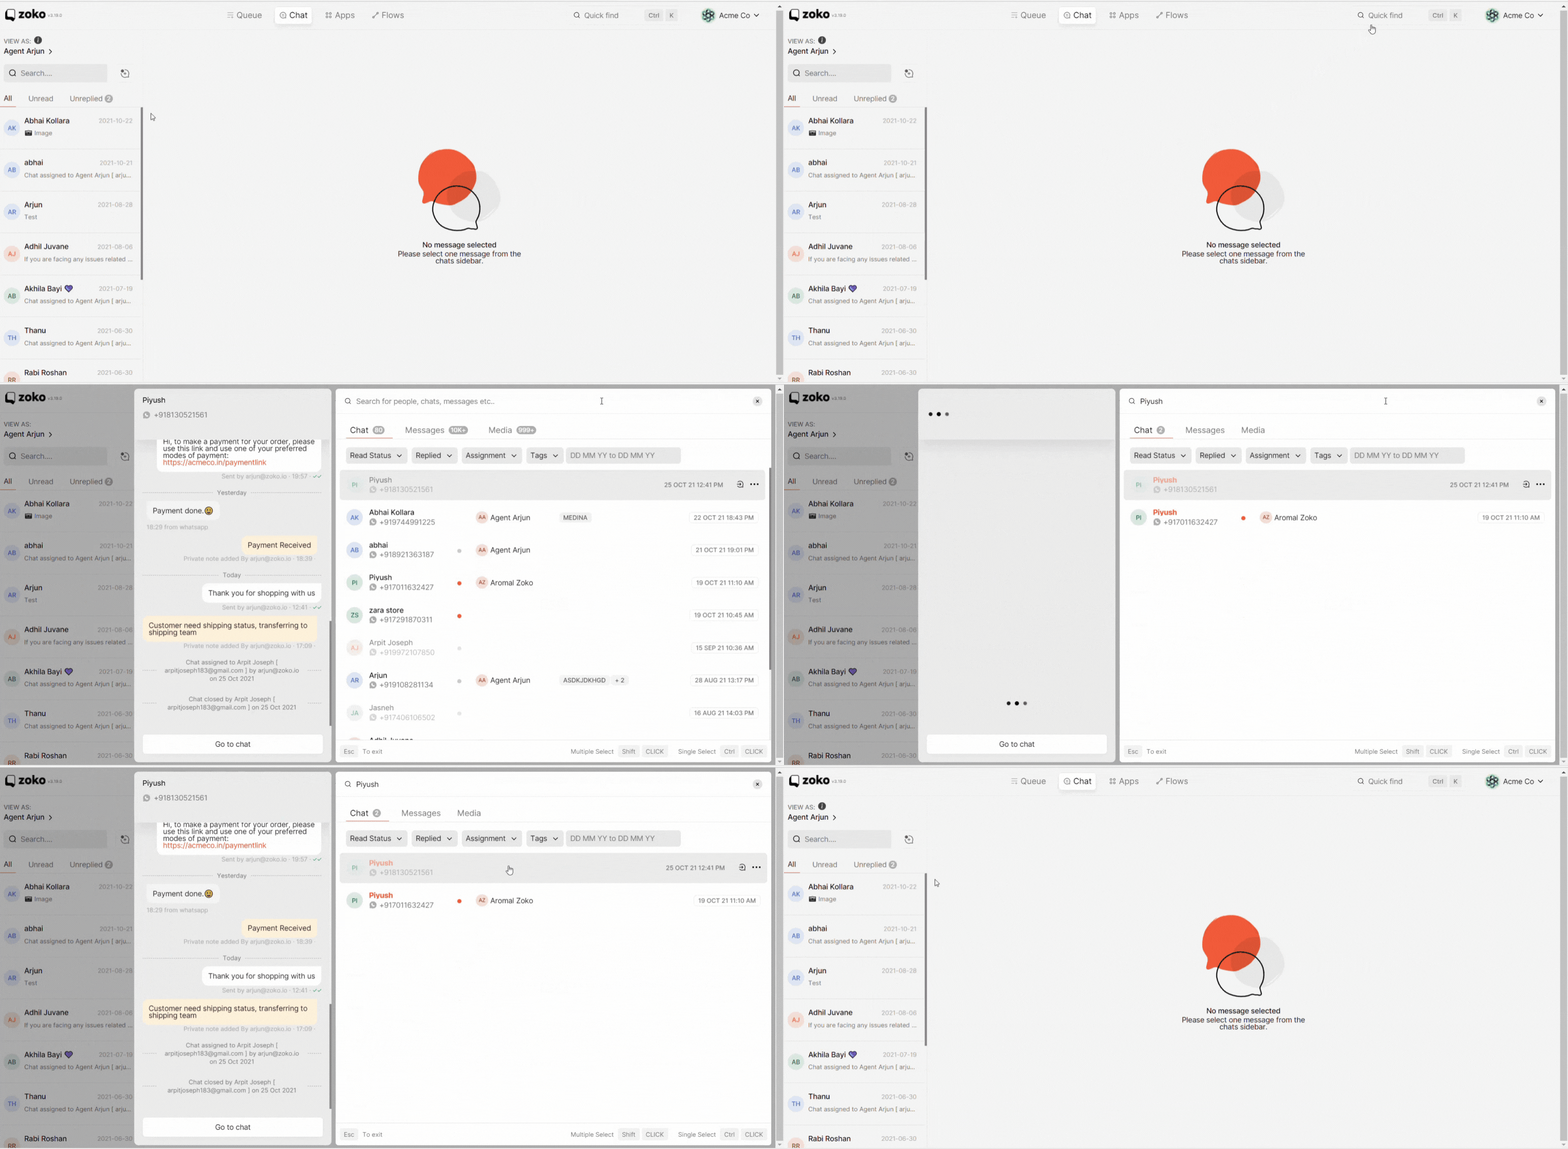
Once a chat is closed, it will disappear from your view. But you can find them from Quick Find by searching for the name of the customer or applying one of the filters.


.png)