Broadcast by Importing File
Learn how the Broadcast feature on Zoko helps you reach out to a list of imported customers from a file.
Broadcast is the most powerful feature that allows you to send messages to several customers effortlessly through a single click by importing a file. You must import your contacts into an Xlsx file before sending a broadcast to the customers. This is comparable to sending messages in a WhatsApp group.
Here's a step-by-step guide:
1. Go to Apps.
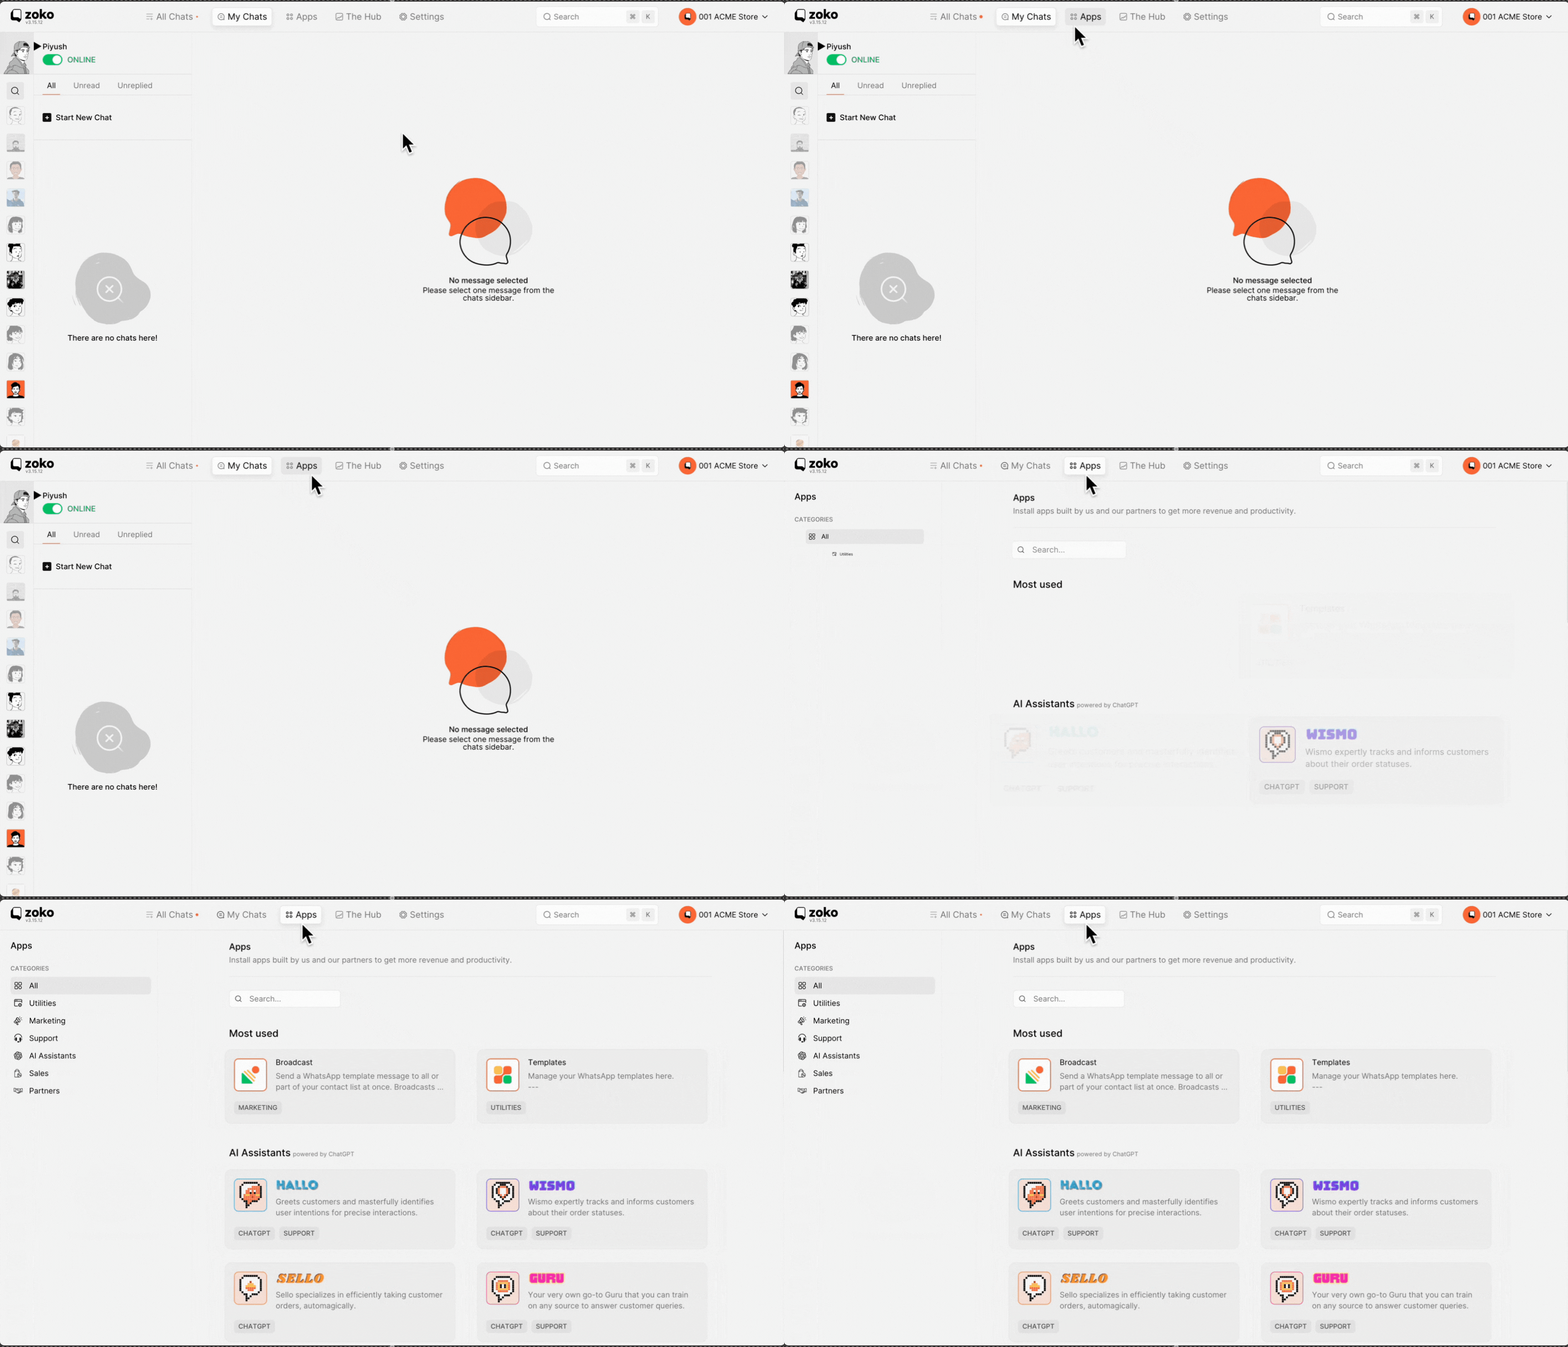
2. Select Broadcast.
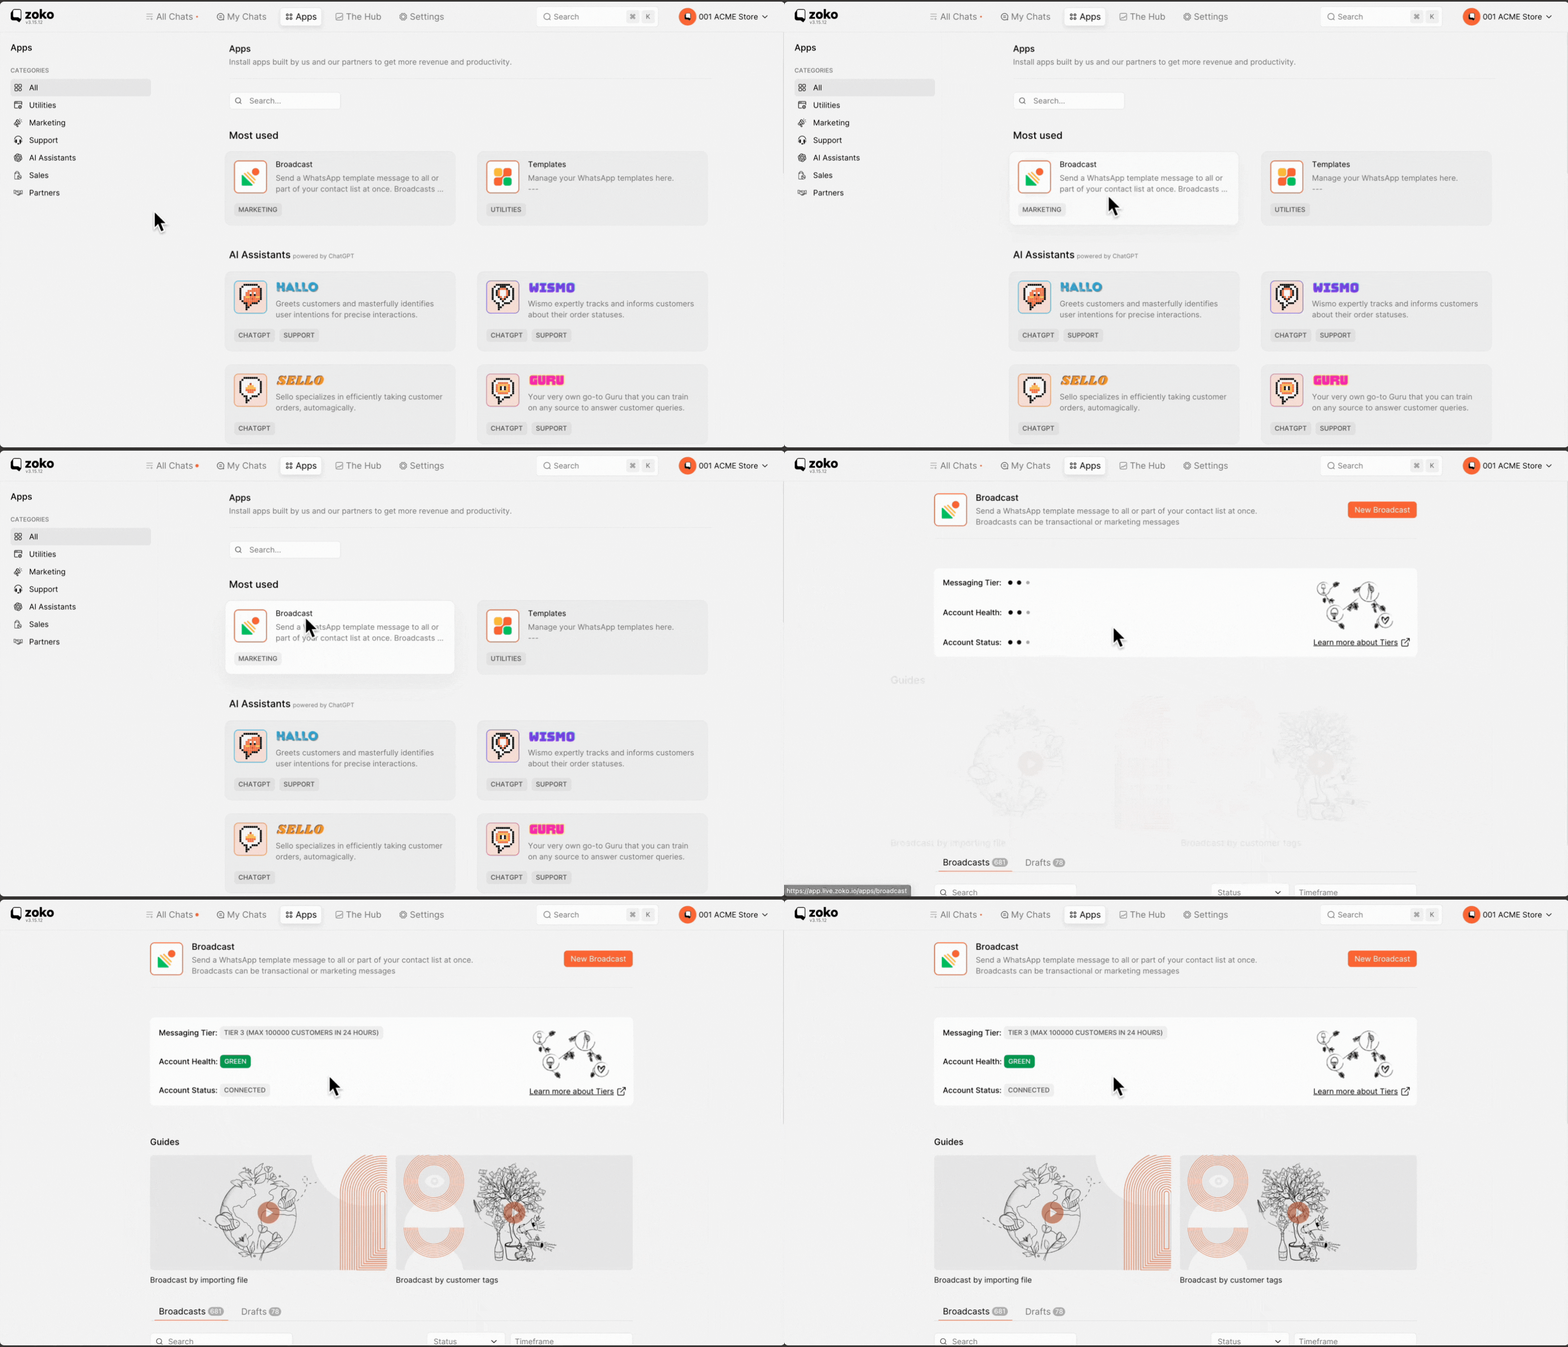
3. Click on New Broadcast.

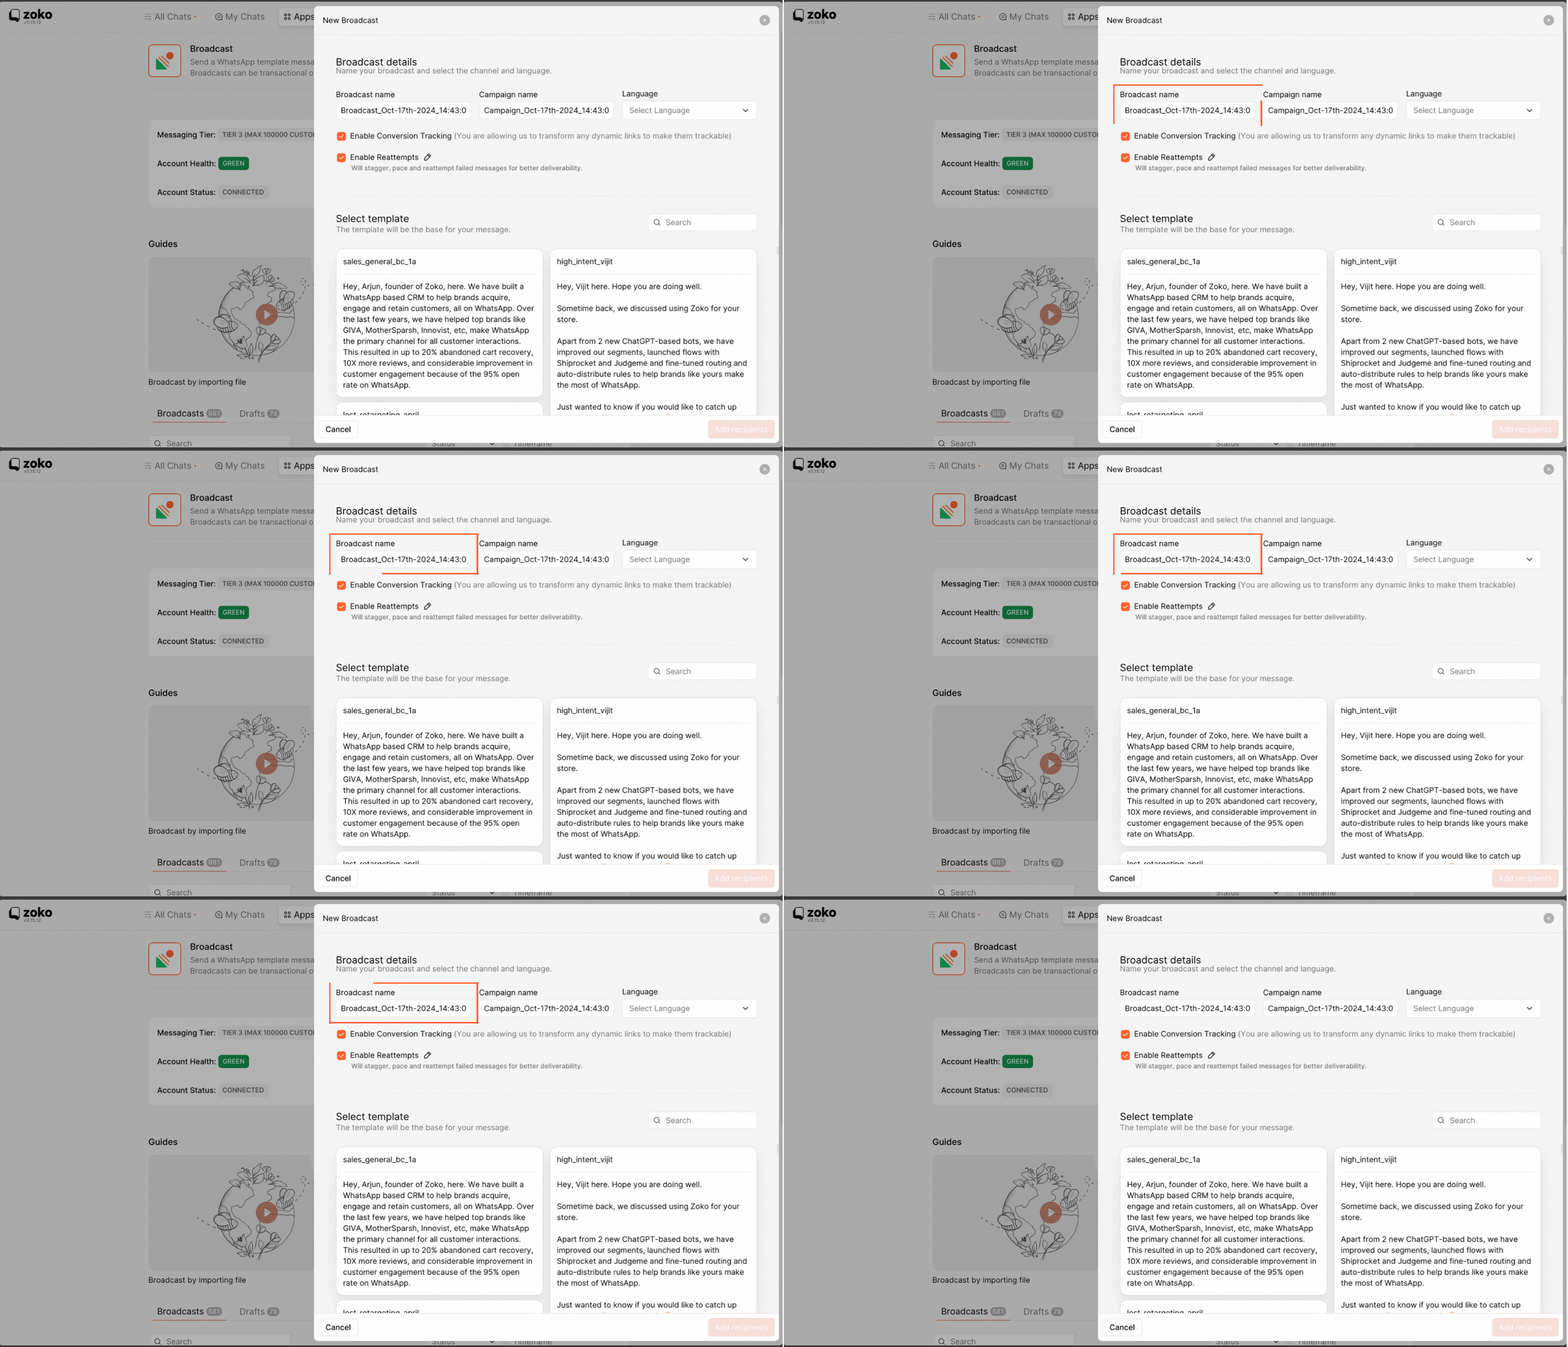
4. The broadcast name is generated based on the date and time of creation of the broadcast. You can change it to a name of your preference.
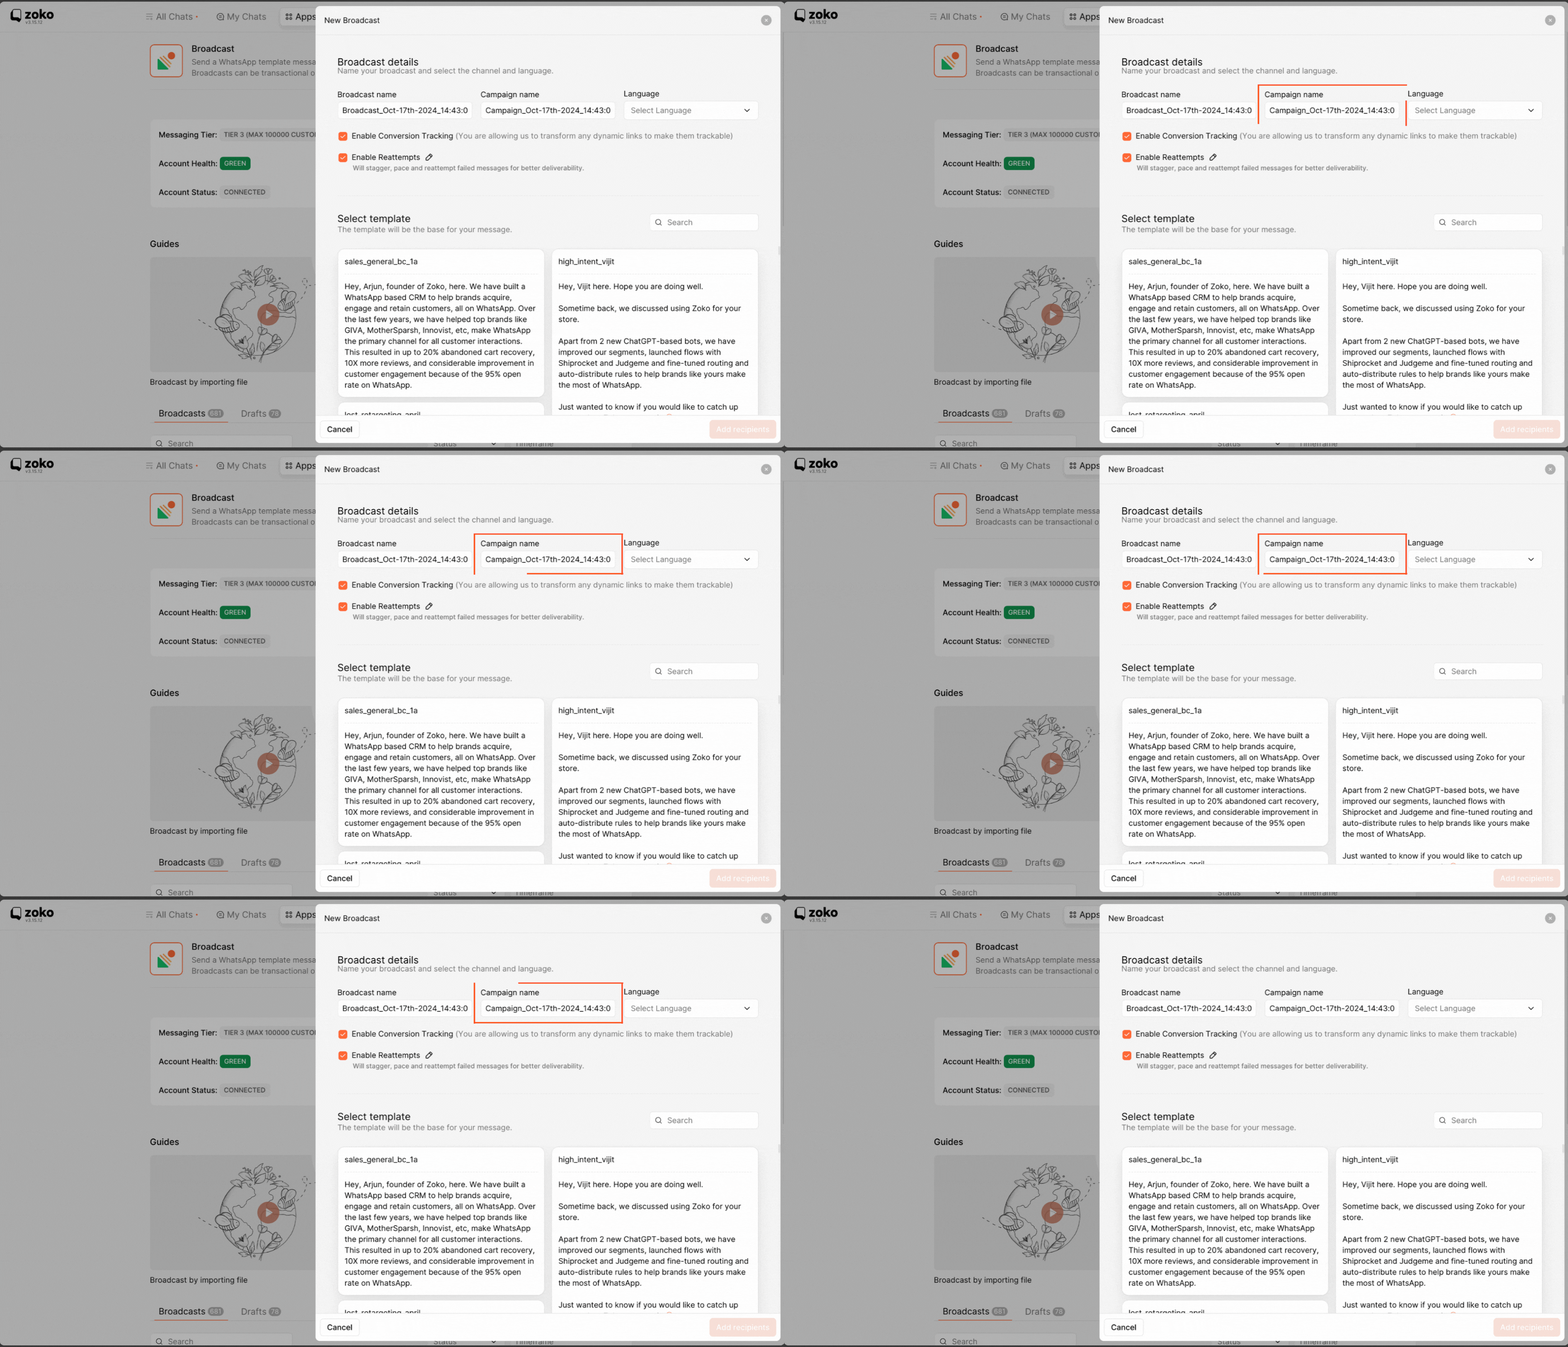
5. The campaign name is generated based on the date and time of creation of the broadcast. You can change it to a name of your preference.
(This is helpful if you create multiple broadcasts with same campaign name and use the campaign name filter in Hub to see the conversions of these broadcasts together.)
6. Select the language of the template from the dropdown menu.
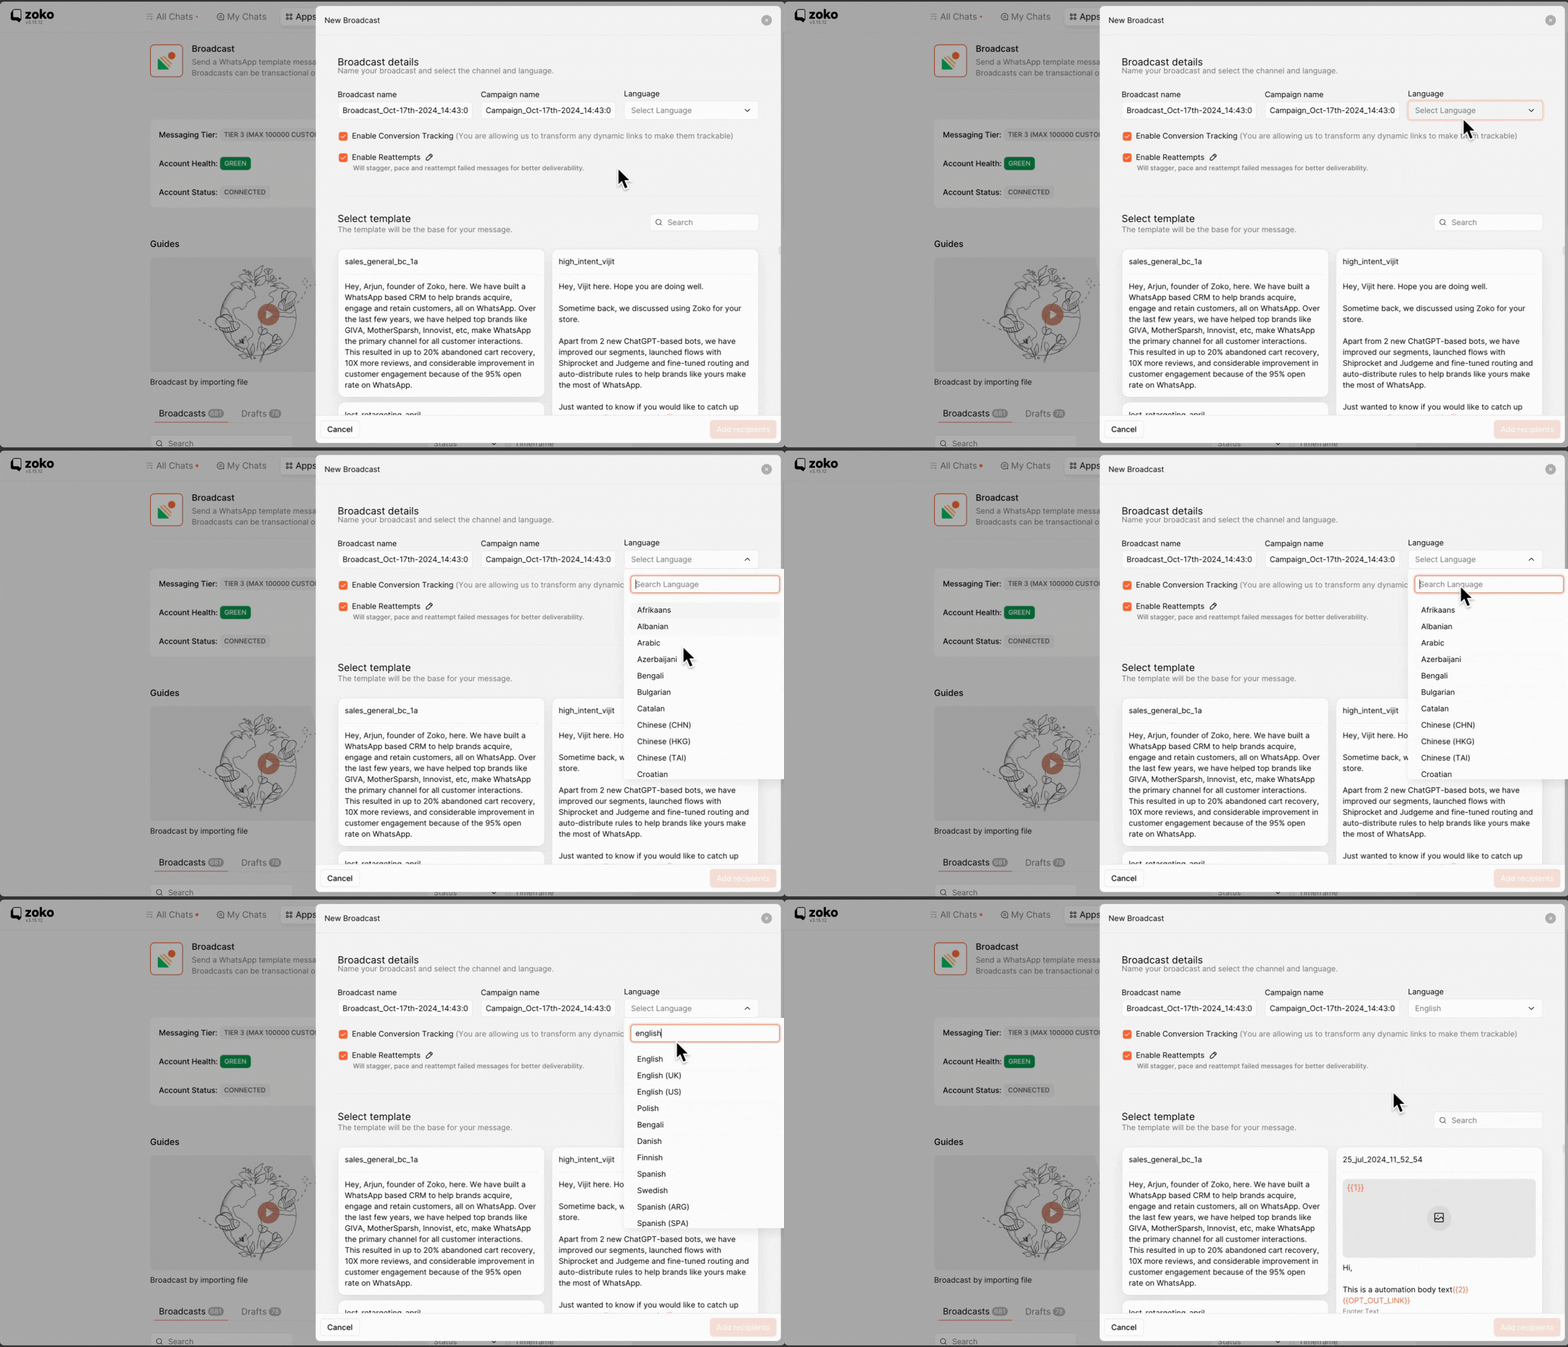
7. You can also enable or disable conversion tracking by selecting the appropriate checkbox, which allows you to transform dynamic links into trackable ones. Refer to our article to better understand of How Does Conversion Tracking Work in Broadcast
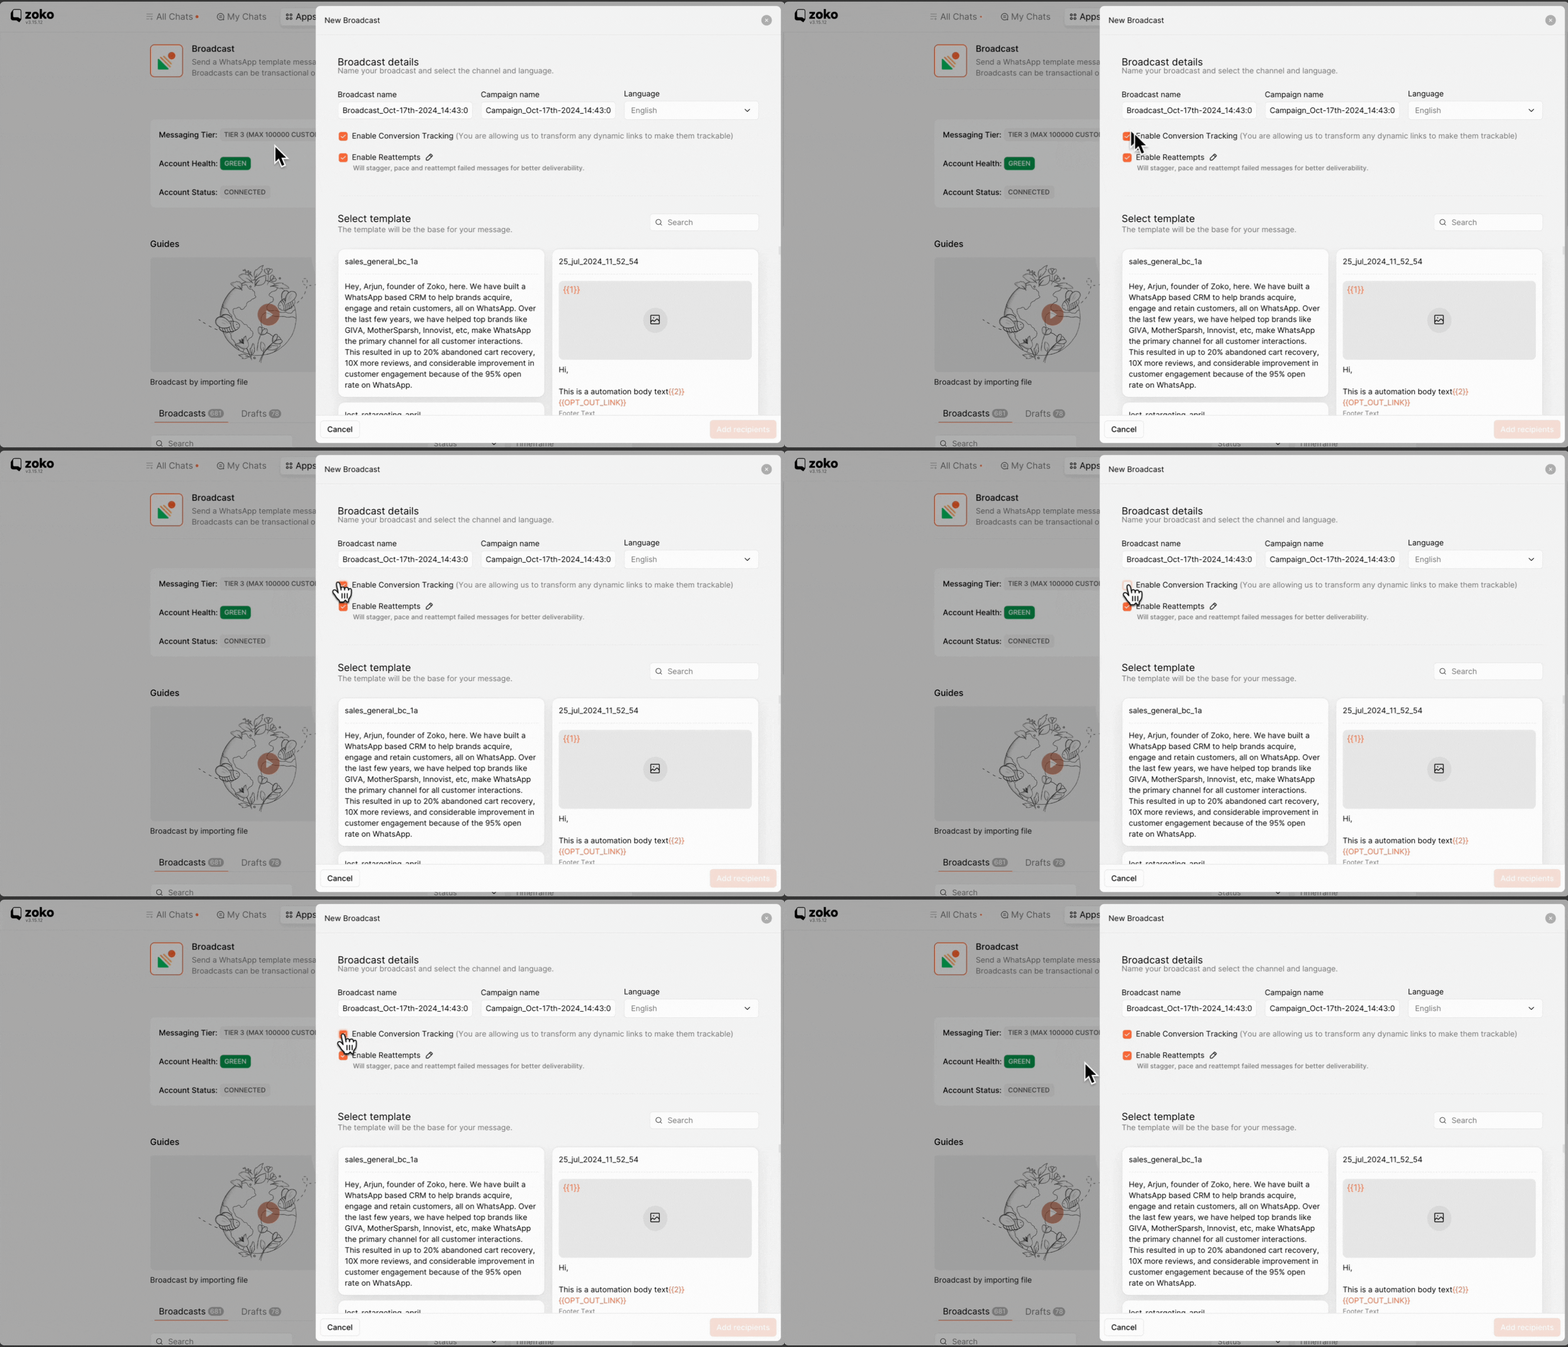
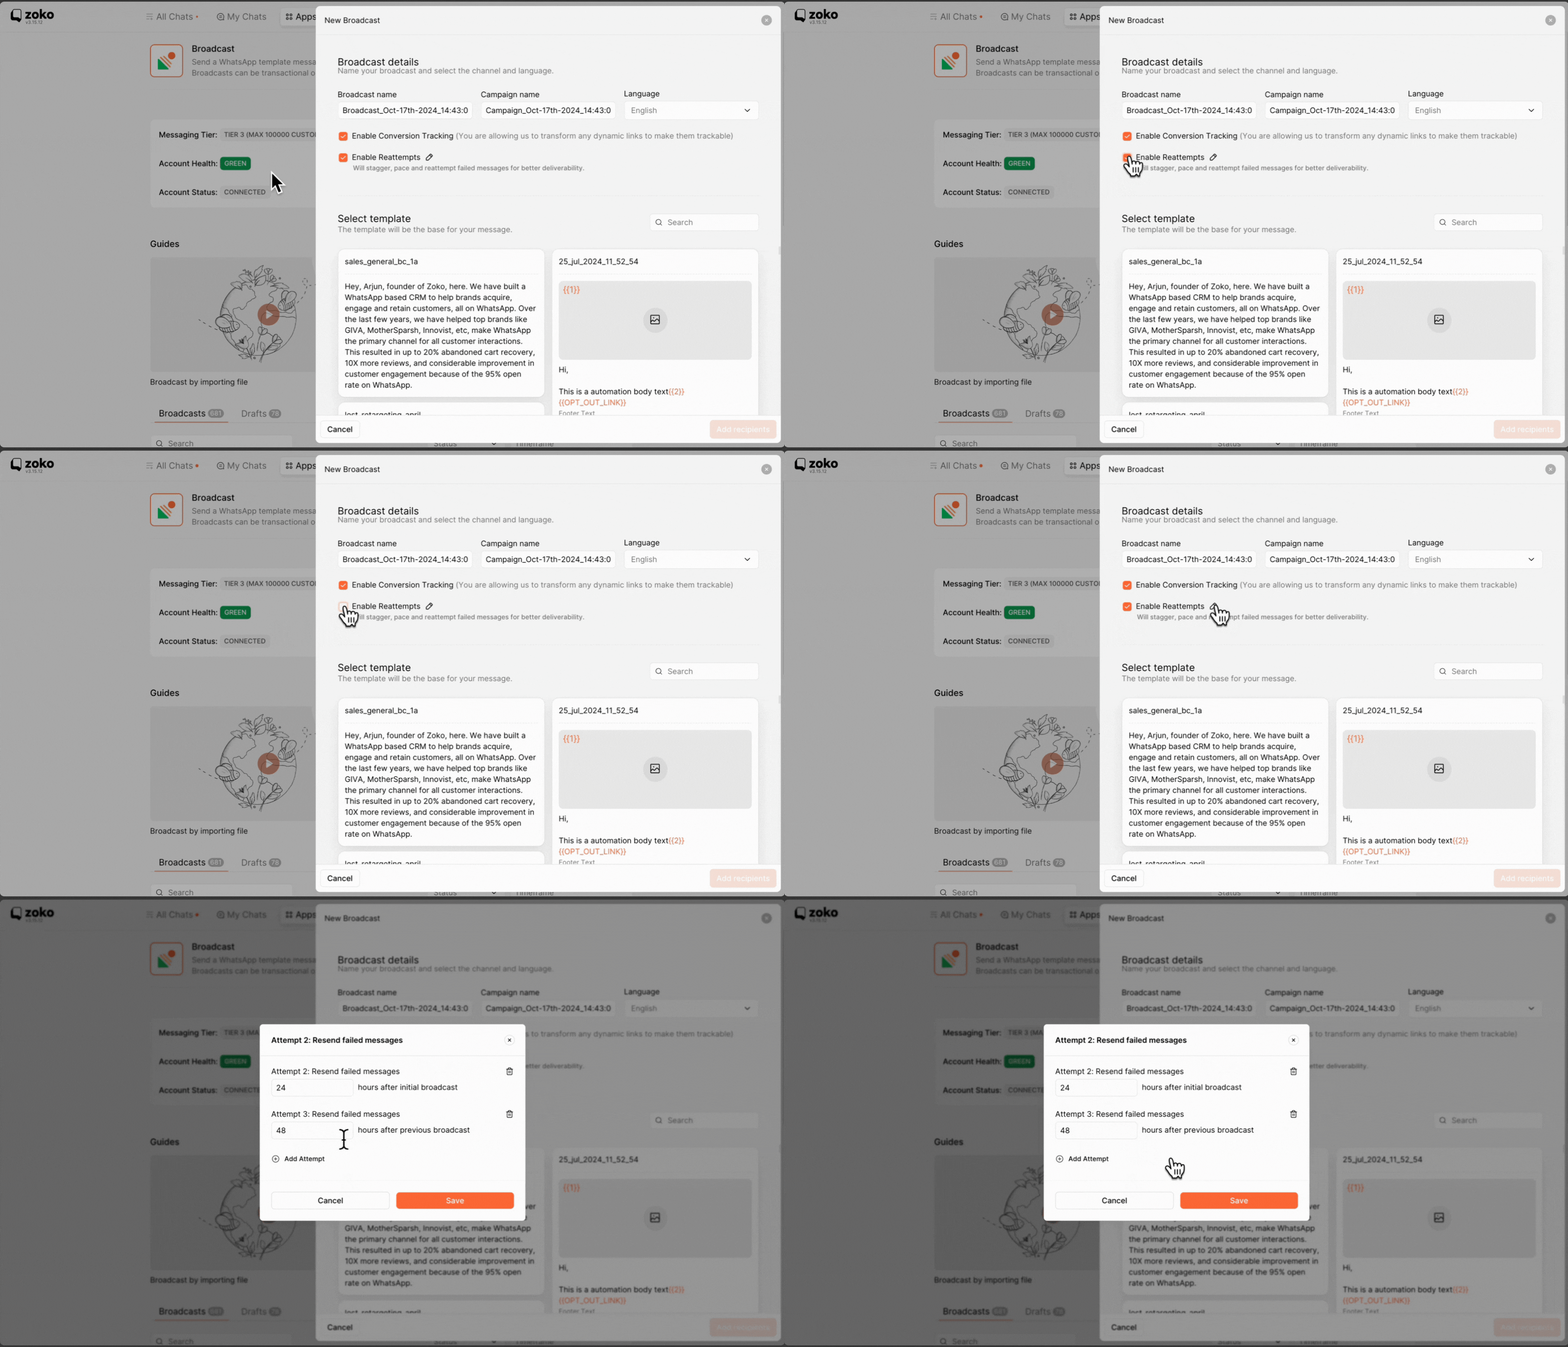
8. You can easily enable or disable reattempts by selecting the appropriate checkbox (enabled by default). This feature allows the system to automatically retry sending the broadcast to recipients whose messages failed after the initial broadcast was sent. To set specific timeframes for these retries, simply click the edit icon. Refer to our article to better understand of How Does "Enable Reattempts" work in broadcast?
9. Depending on the language that you selected, the templates will be listed below. You can select any template that you want to send. Refer to our article on How to create a template.
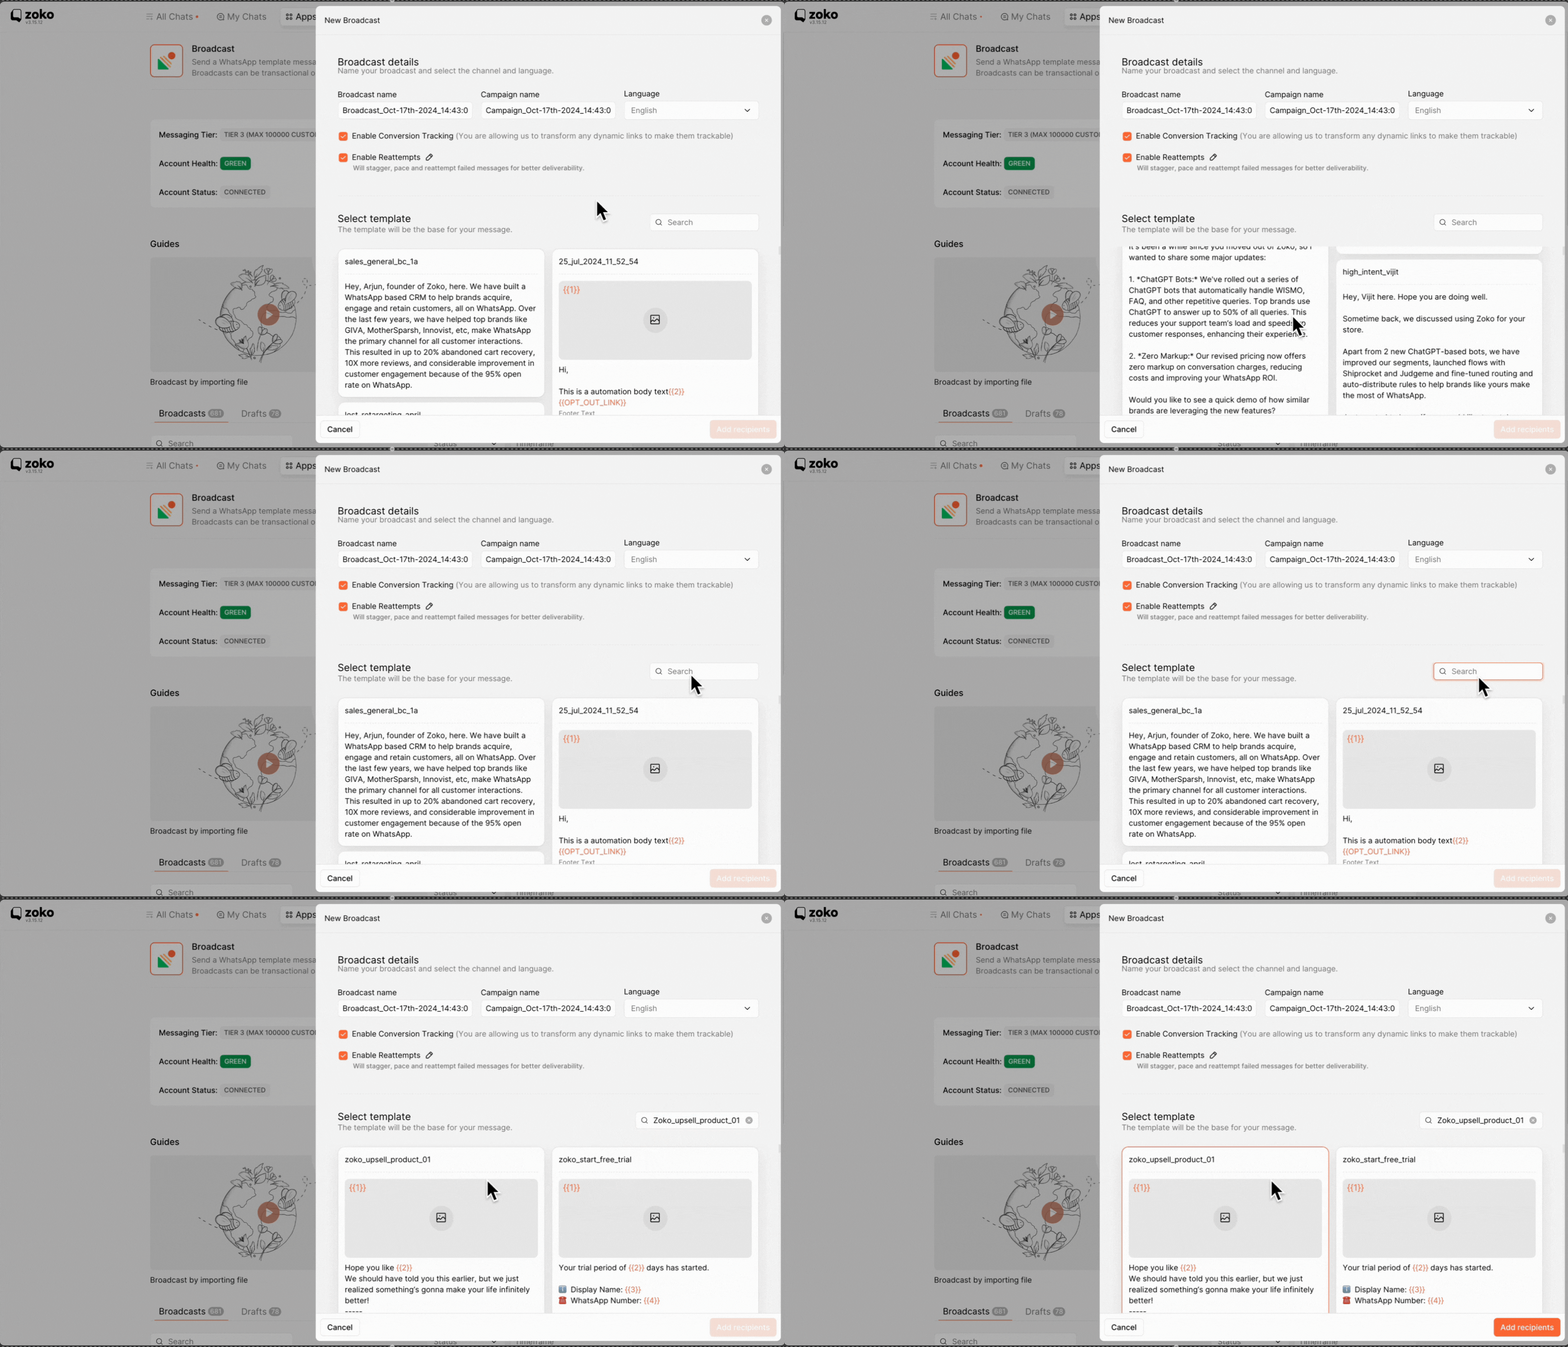
10. Click on Add recipients.
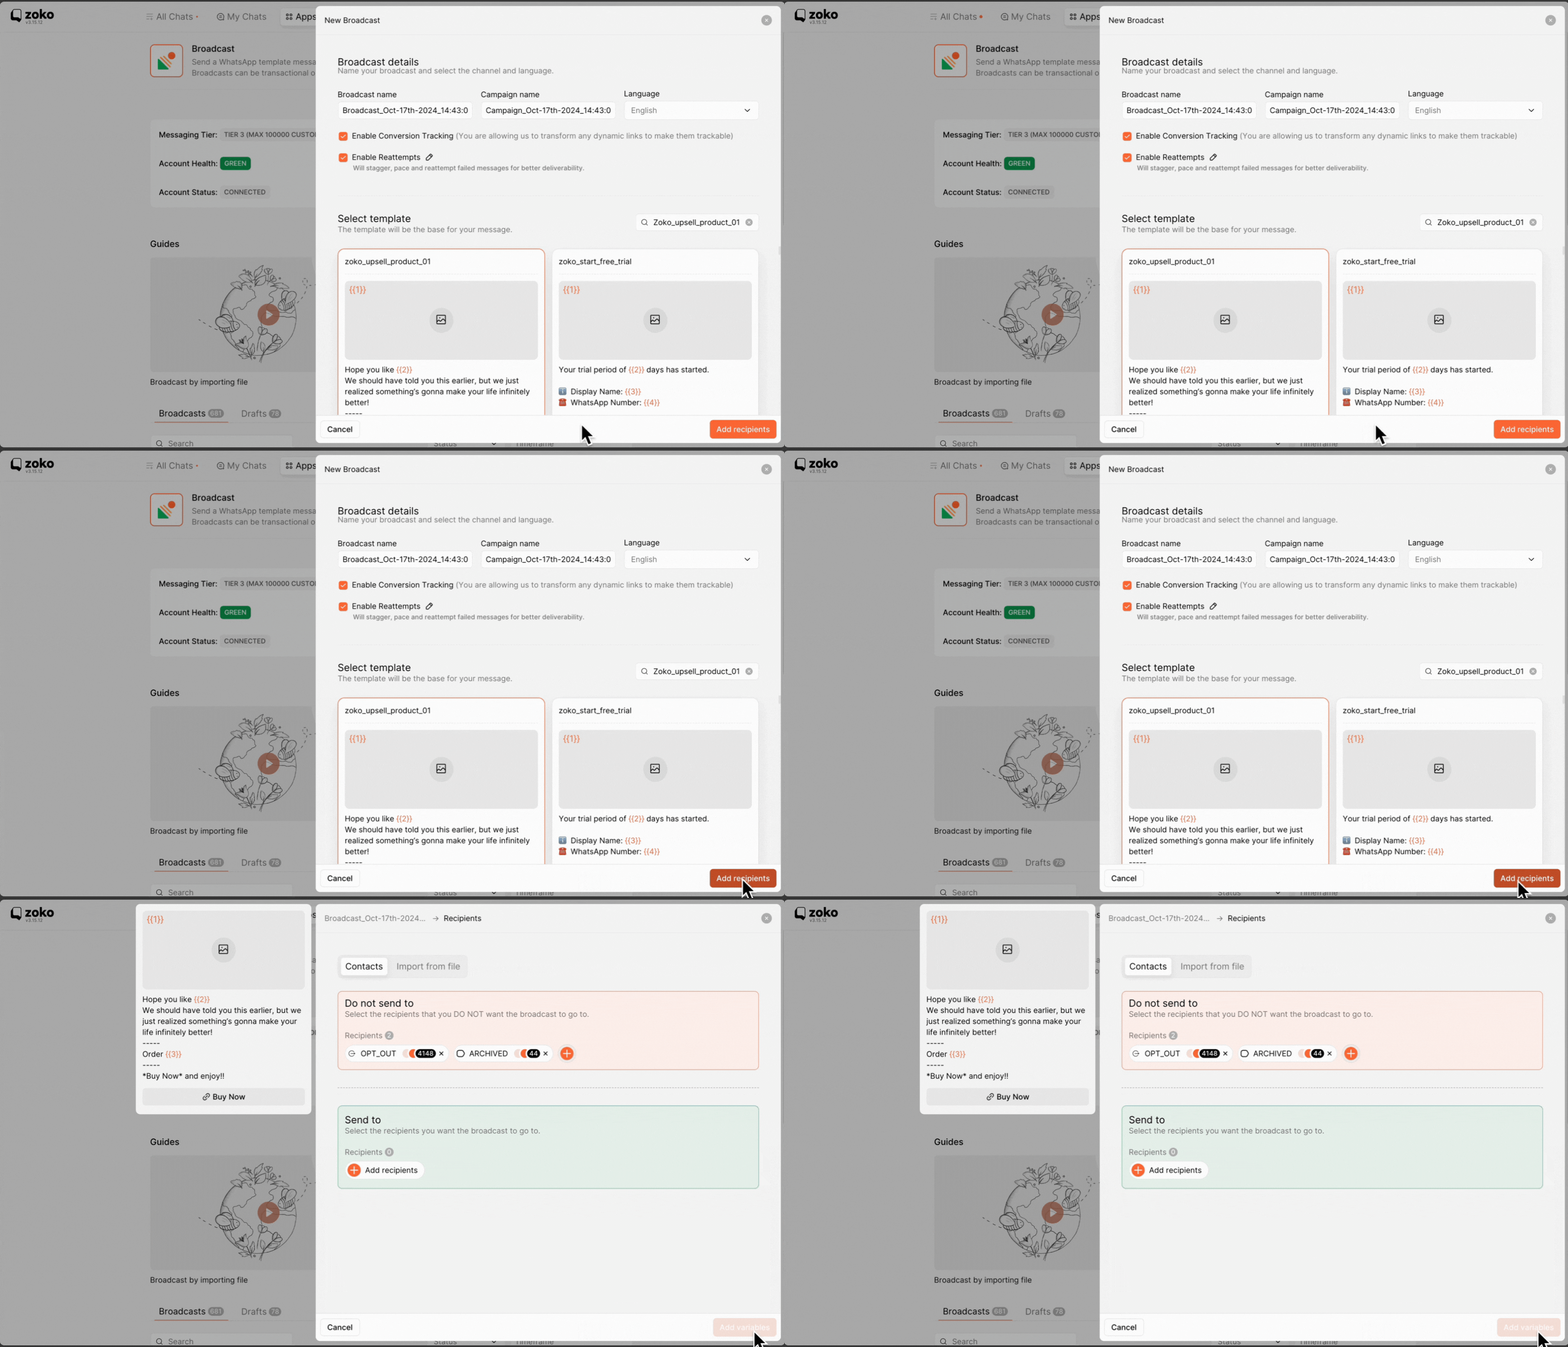
11. Click on Import from File.
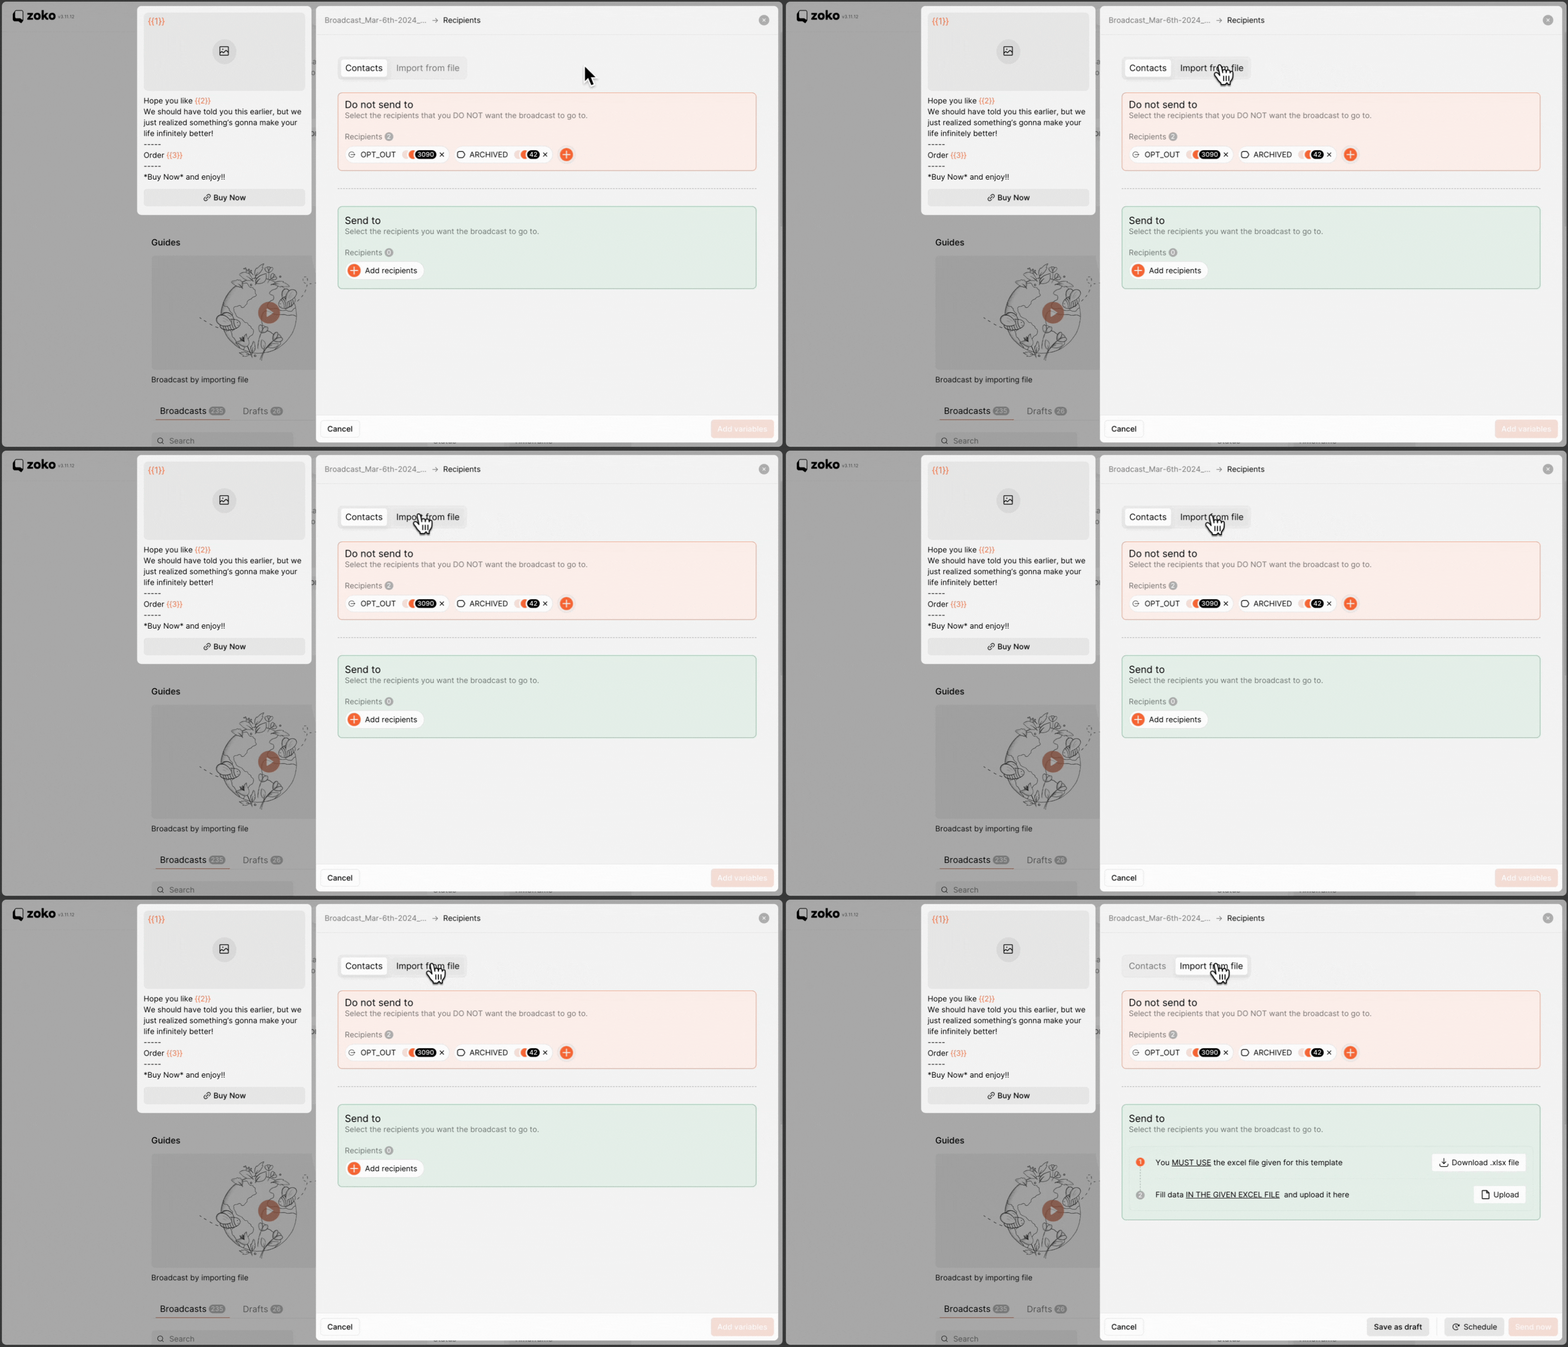
12. If you wish to exclude certain recipients from receiving the broadcast, you can add them under the "Do not send to" section.
Note: The Archived and Opt_Out tags are enabled by default for recipients, but you have the option to remove them if you intend to transmit the broadcast to these recipients.
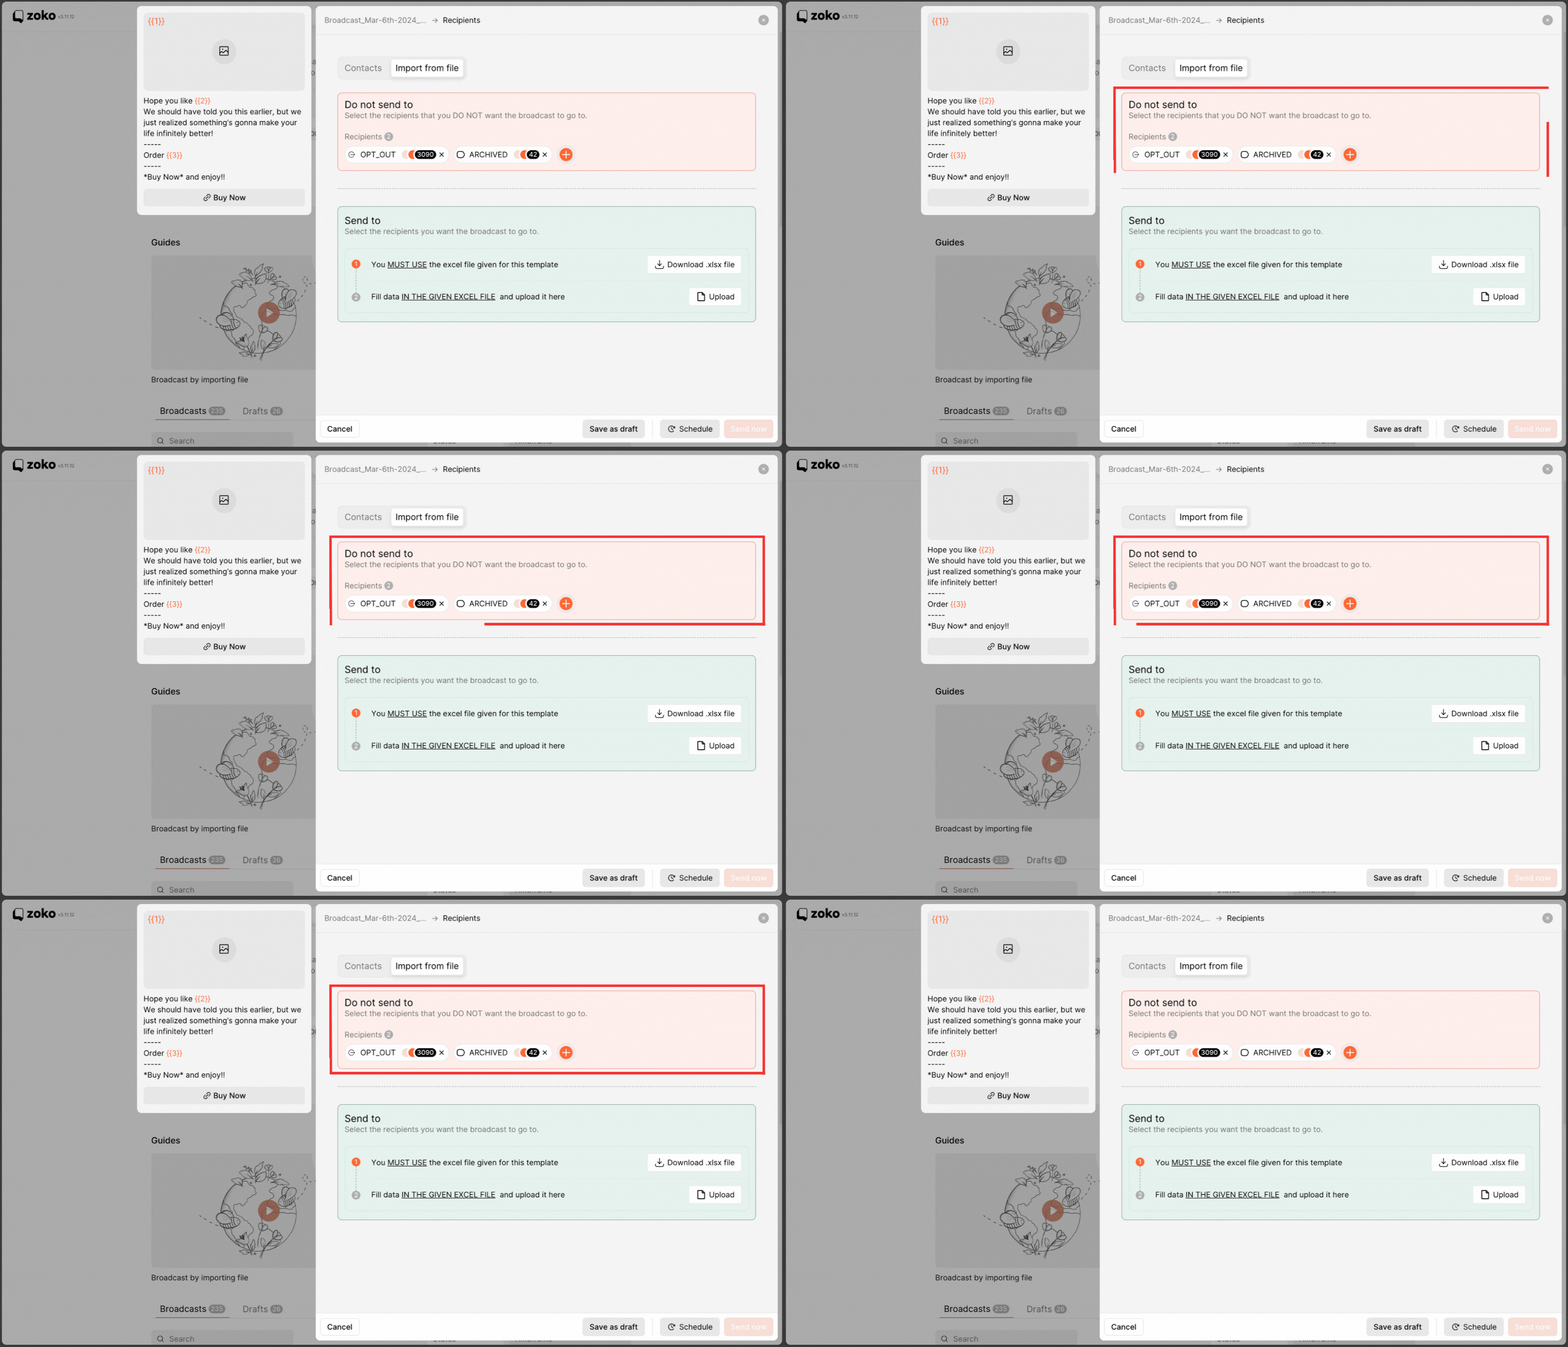
13. Download the provided .xlsx file by clicking on Download .xlsx file.
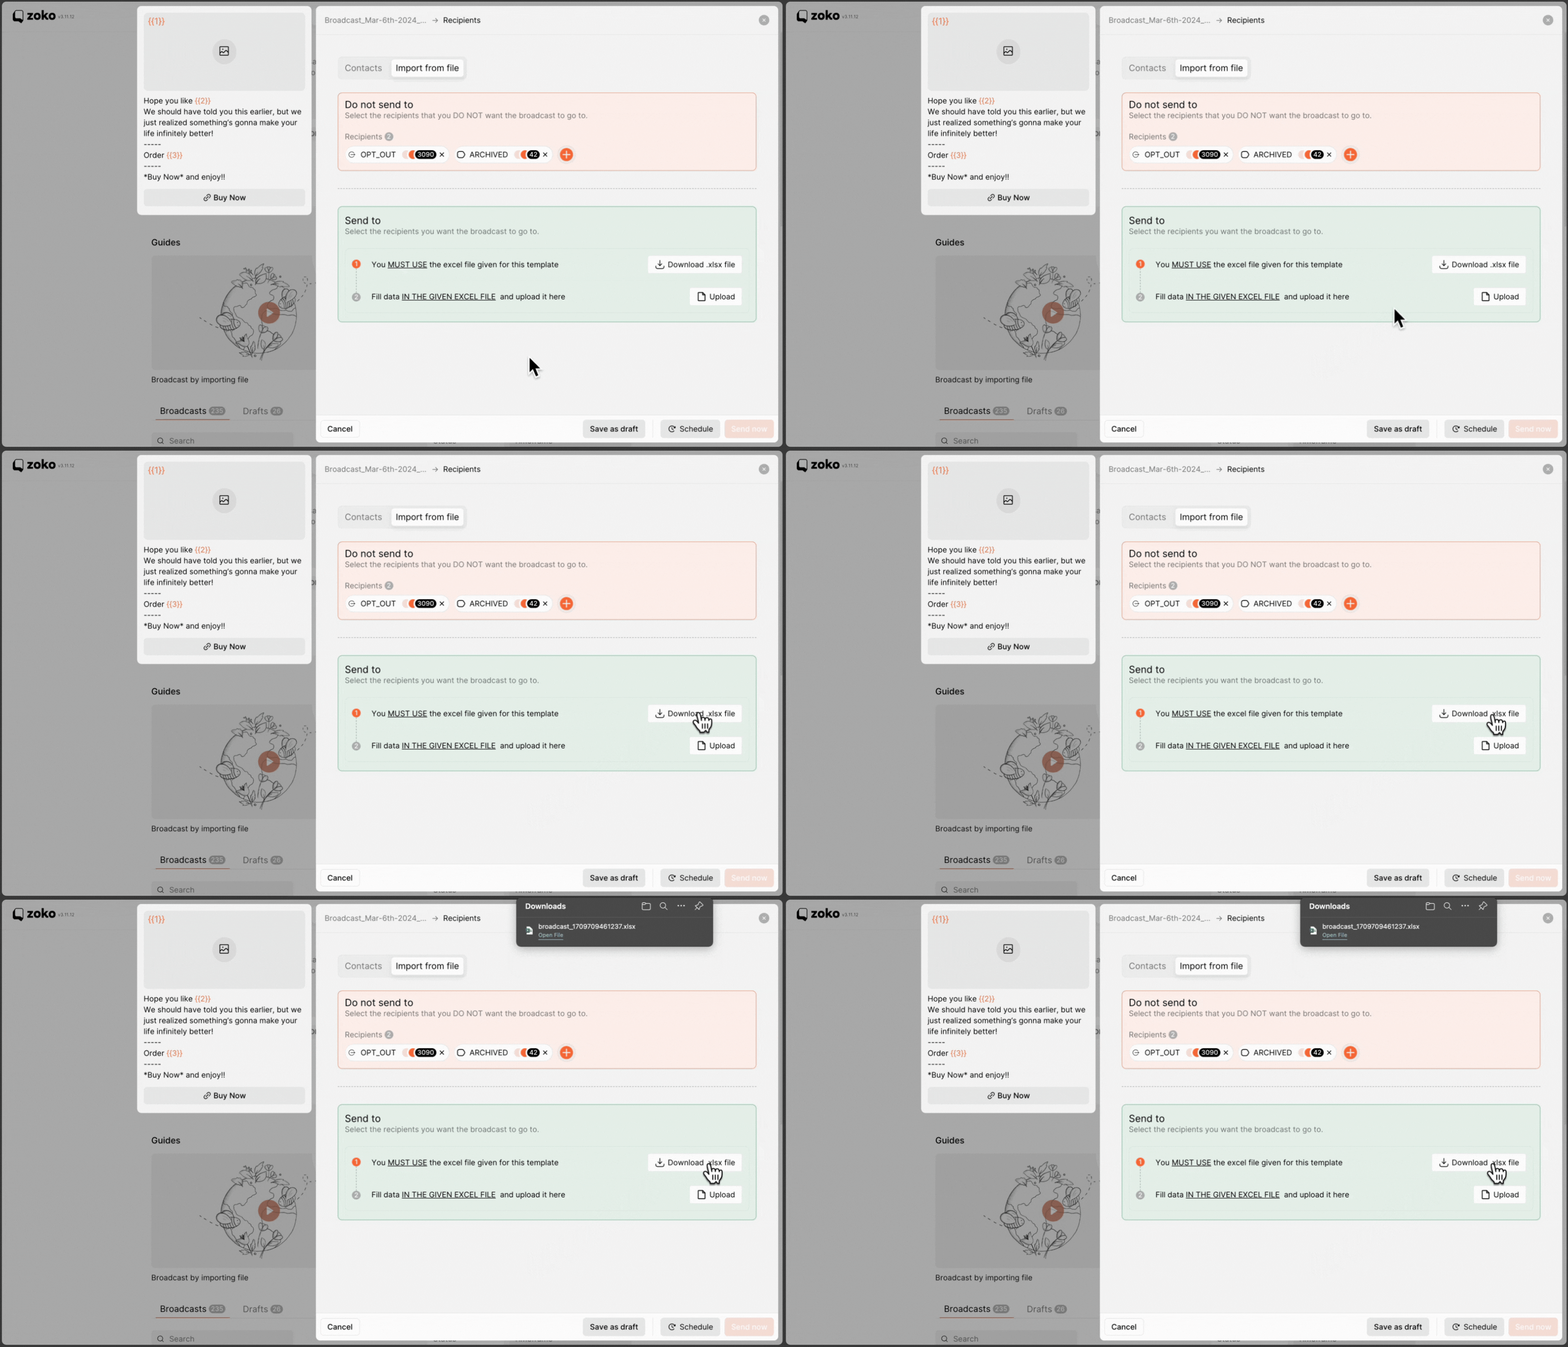
14. Open the file and fill in all necessary details:
(i) In the first column labelled "WhatsApp Number," enter the customer's phone numbers along with the country code. For instance, if the country code for the India is +91 and the phone number is 8130521561, it should be formatted as follows: 918130521561, without any special characters or spaces.
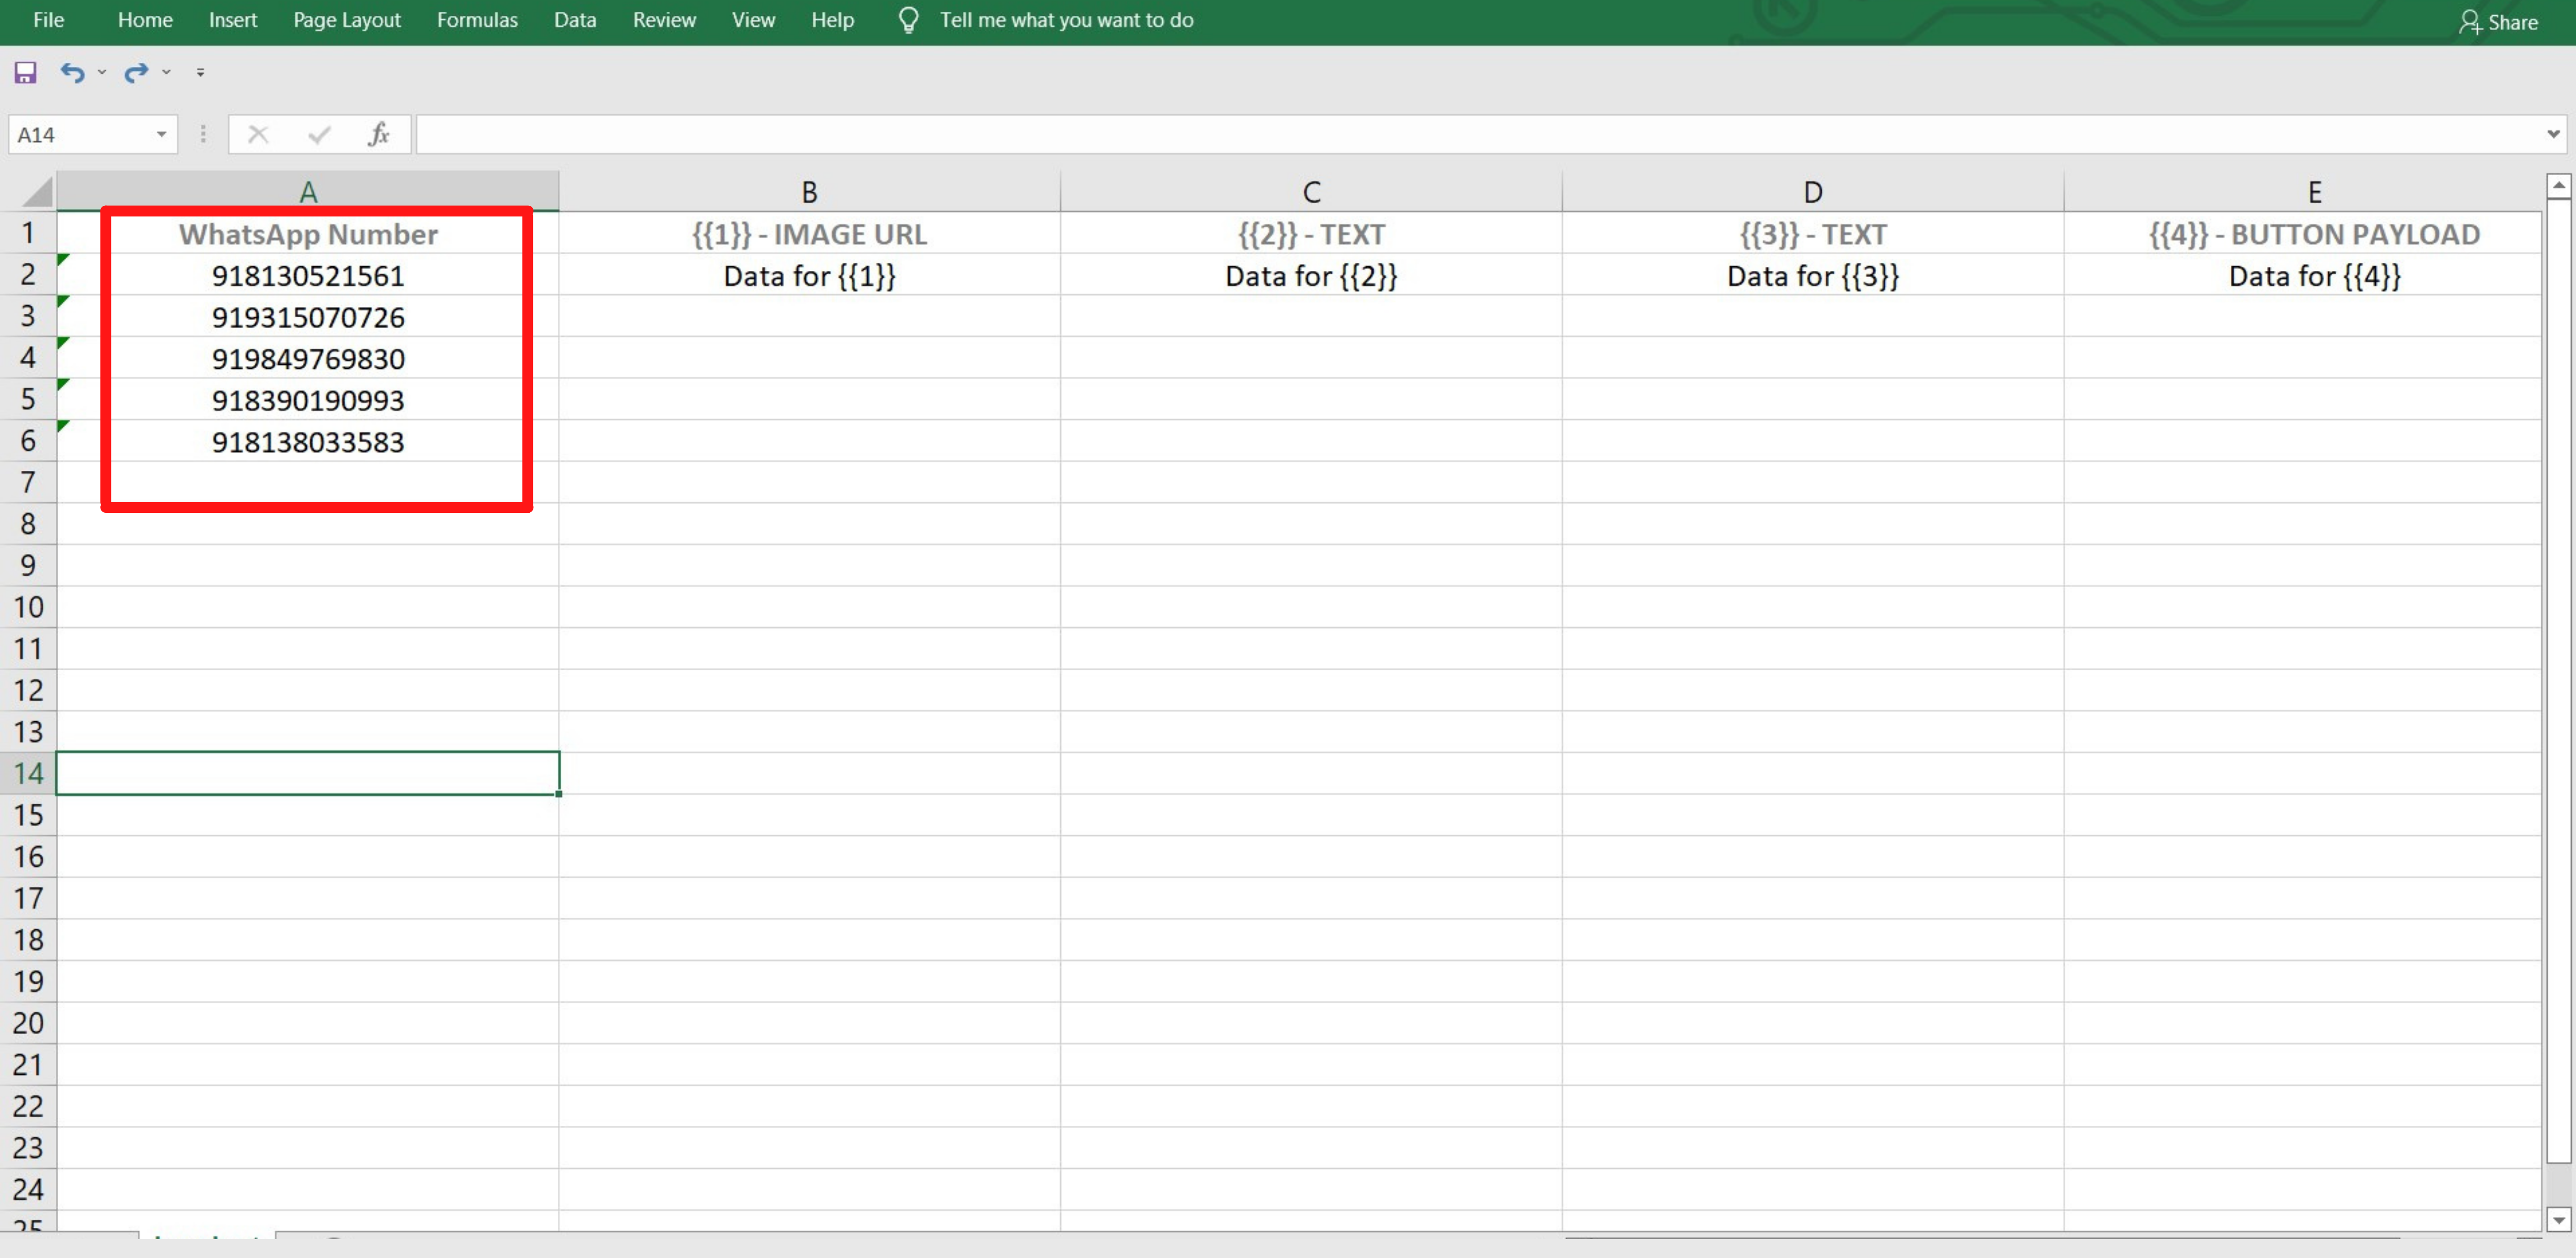
(ii) If you are sending a media broadcast, such as Image or Video, you'll need to paste the media link into the designated {{1}} column.
Pro tip: Generate media links using Zoko’s link creator from the Apps section, then simply copy and paste the links. Refer to our article on How to create links using link creator apps.
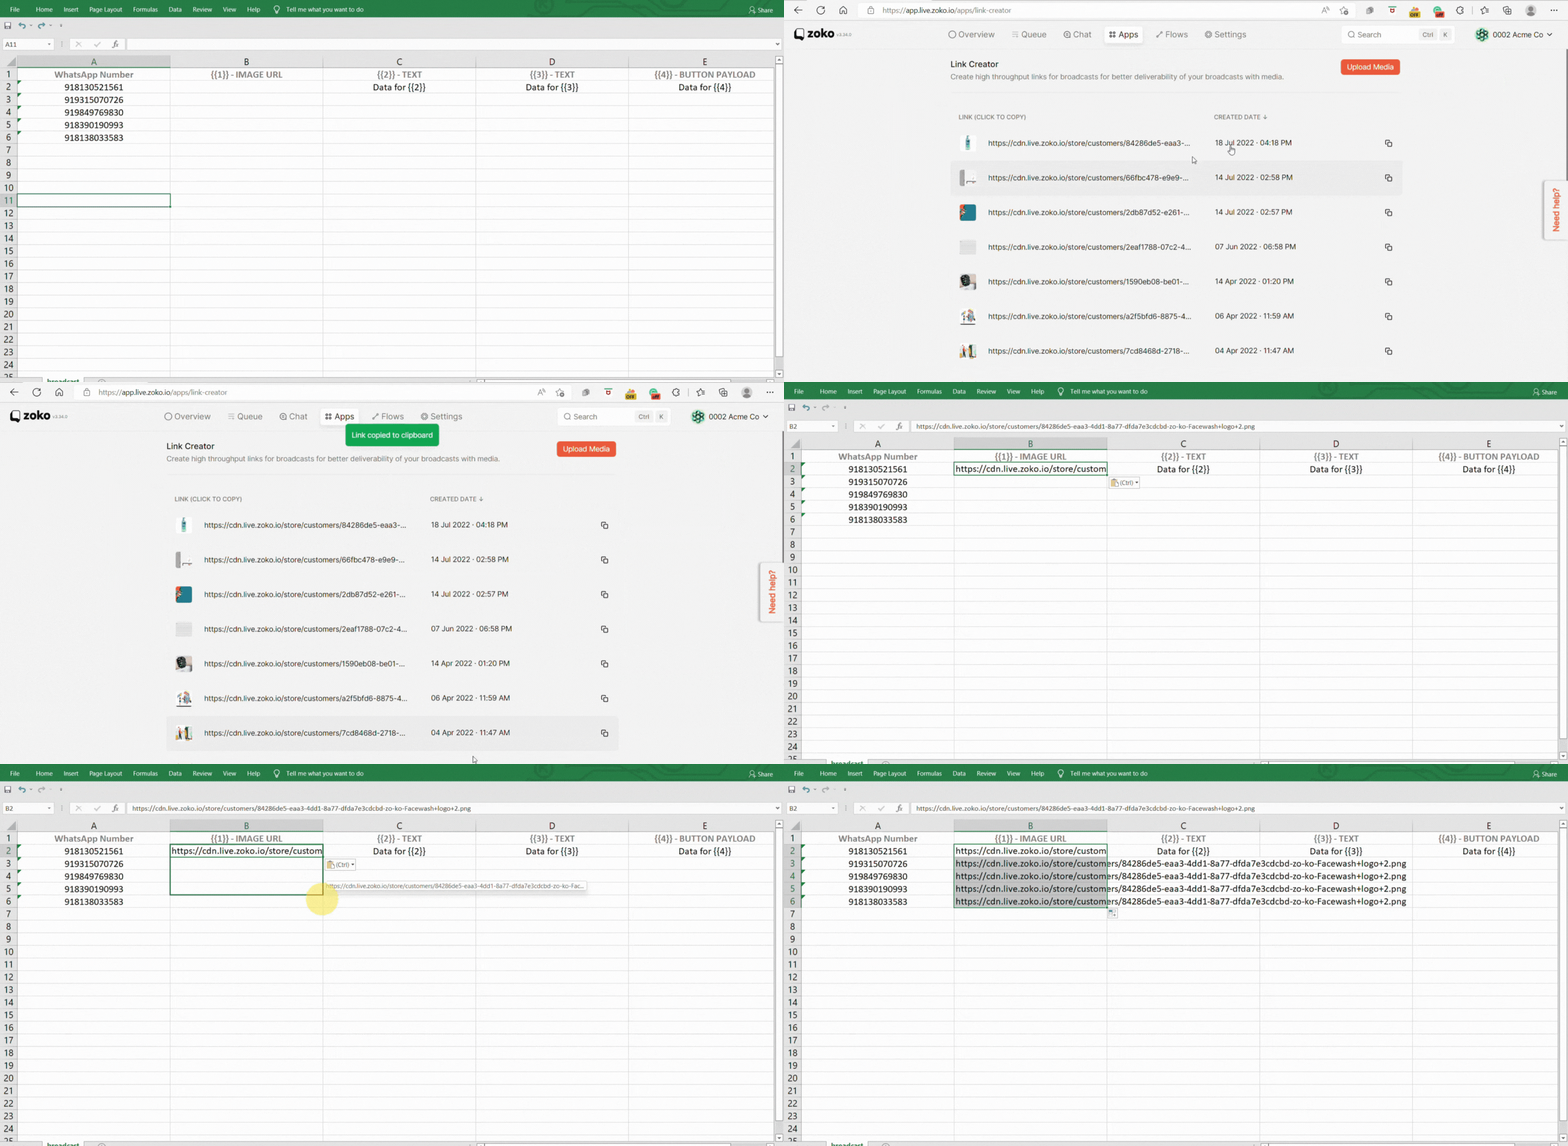
Note: Always remember to double-check the media links within the Xlsx file. If the links are incorrect or differ from the intended ones, the broadcast may fail. Refer to our article on How to do a Media Broadcast.
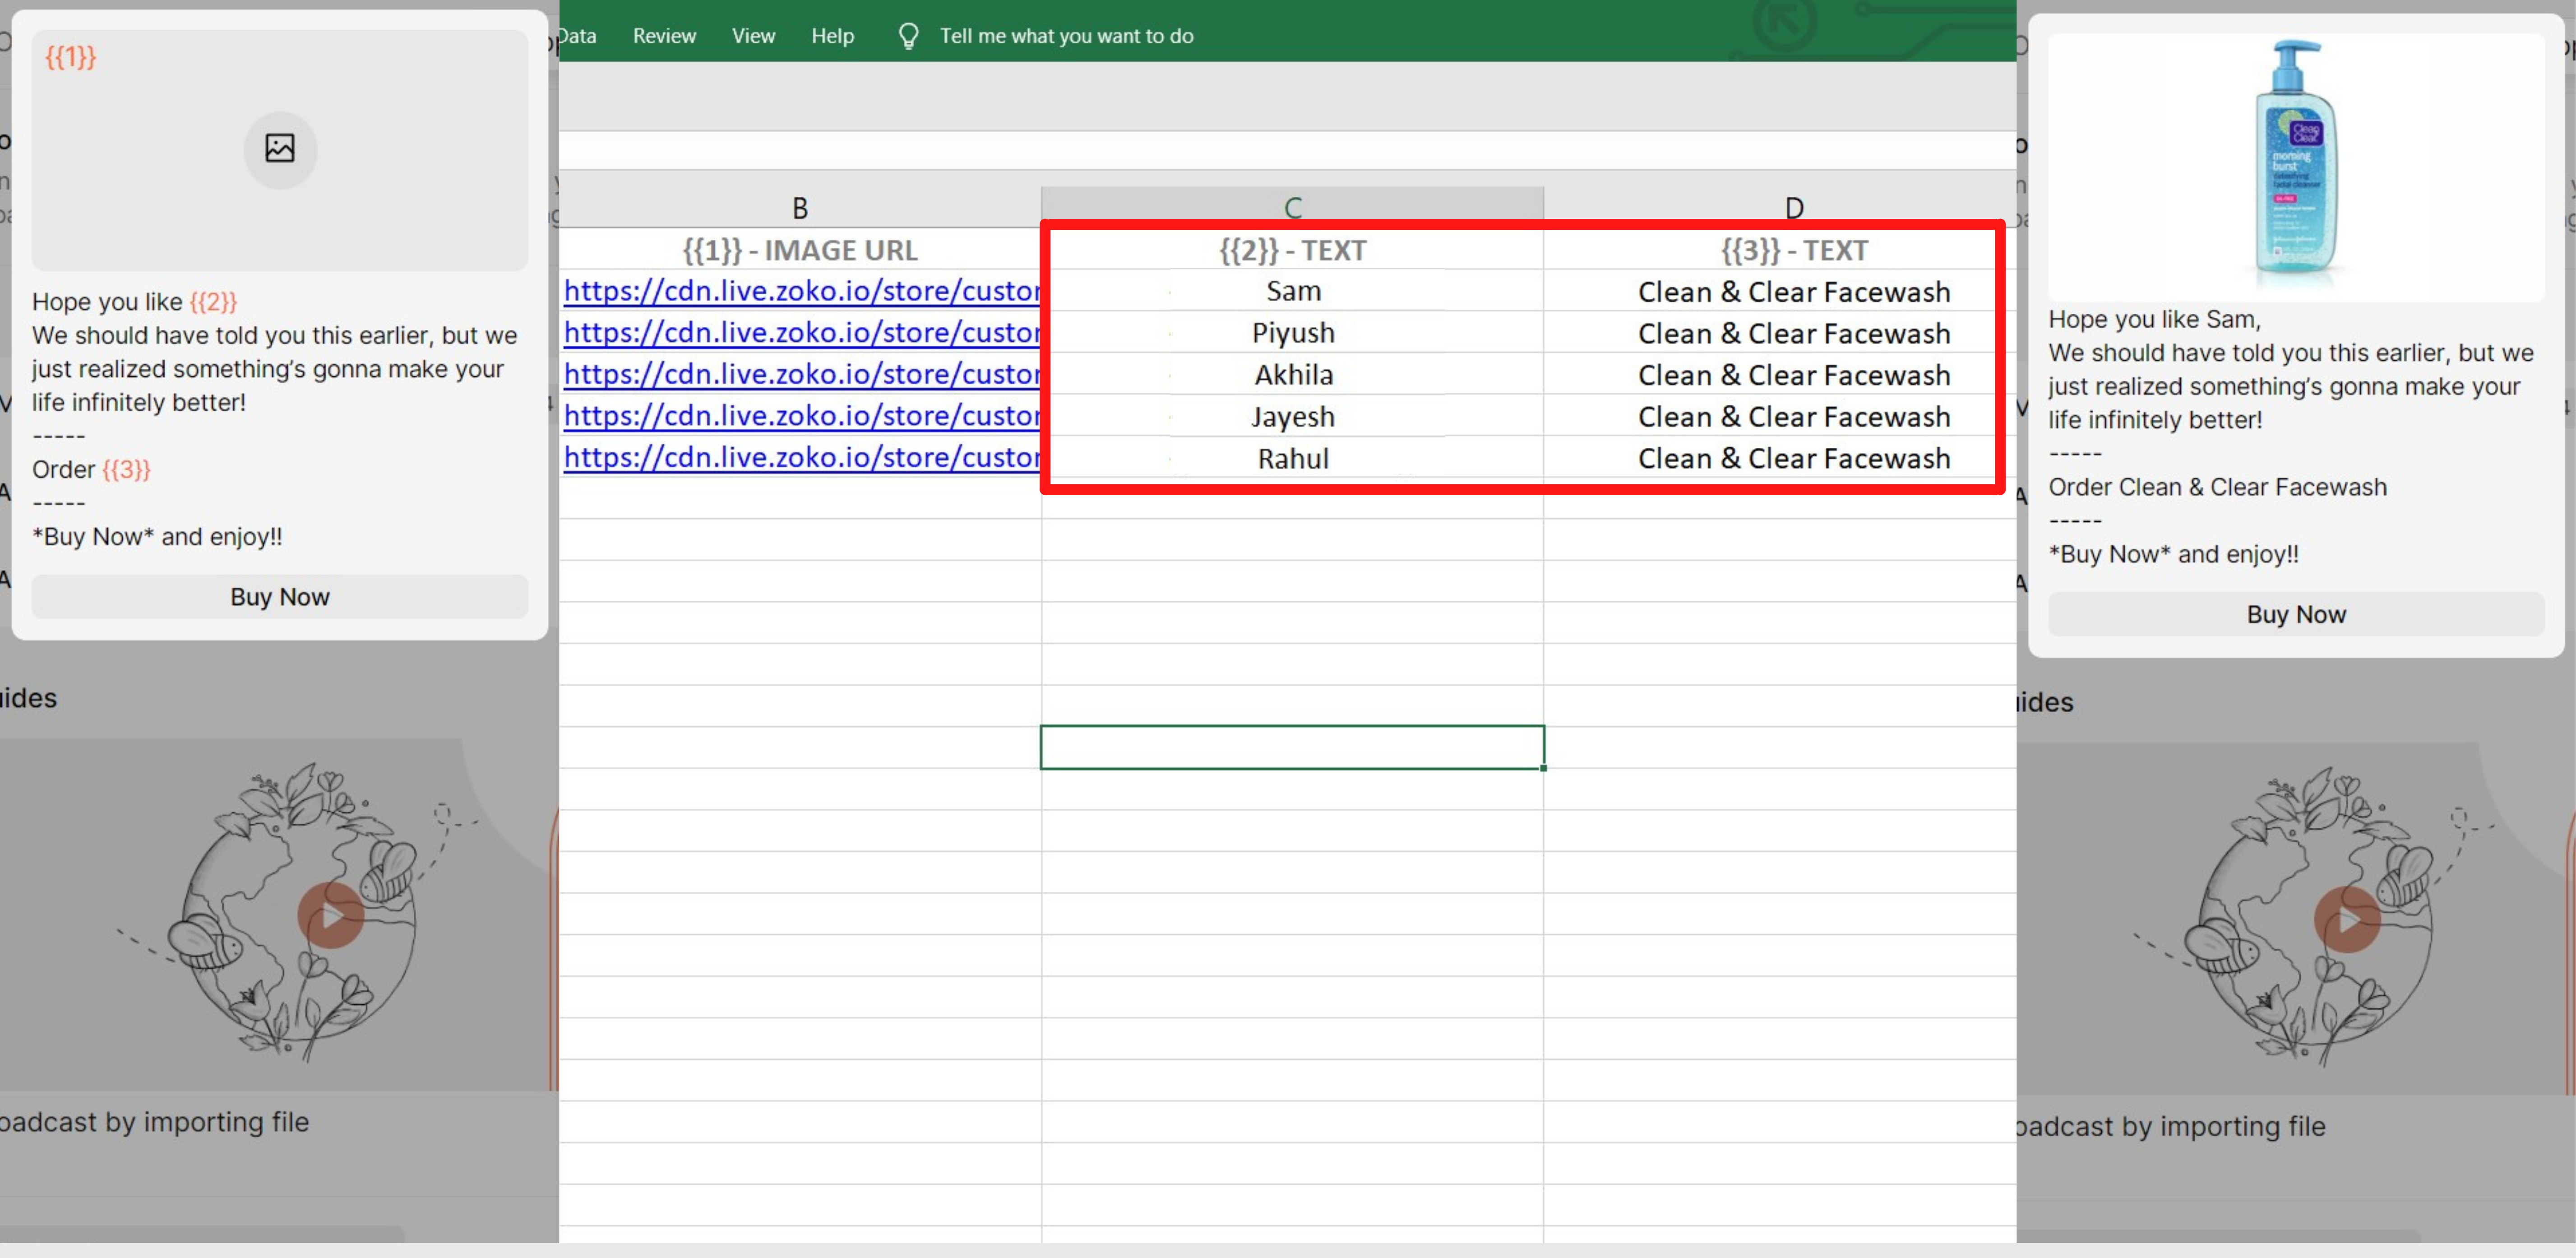
(iii) Next, you will need to input the information corresponding to the variables in the selected template.
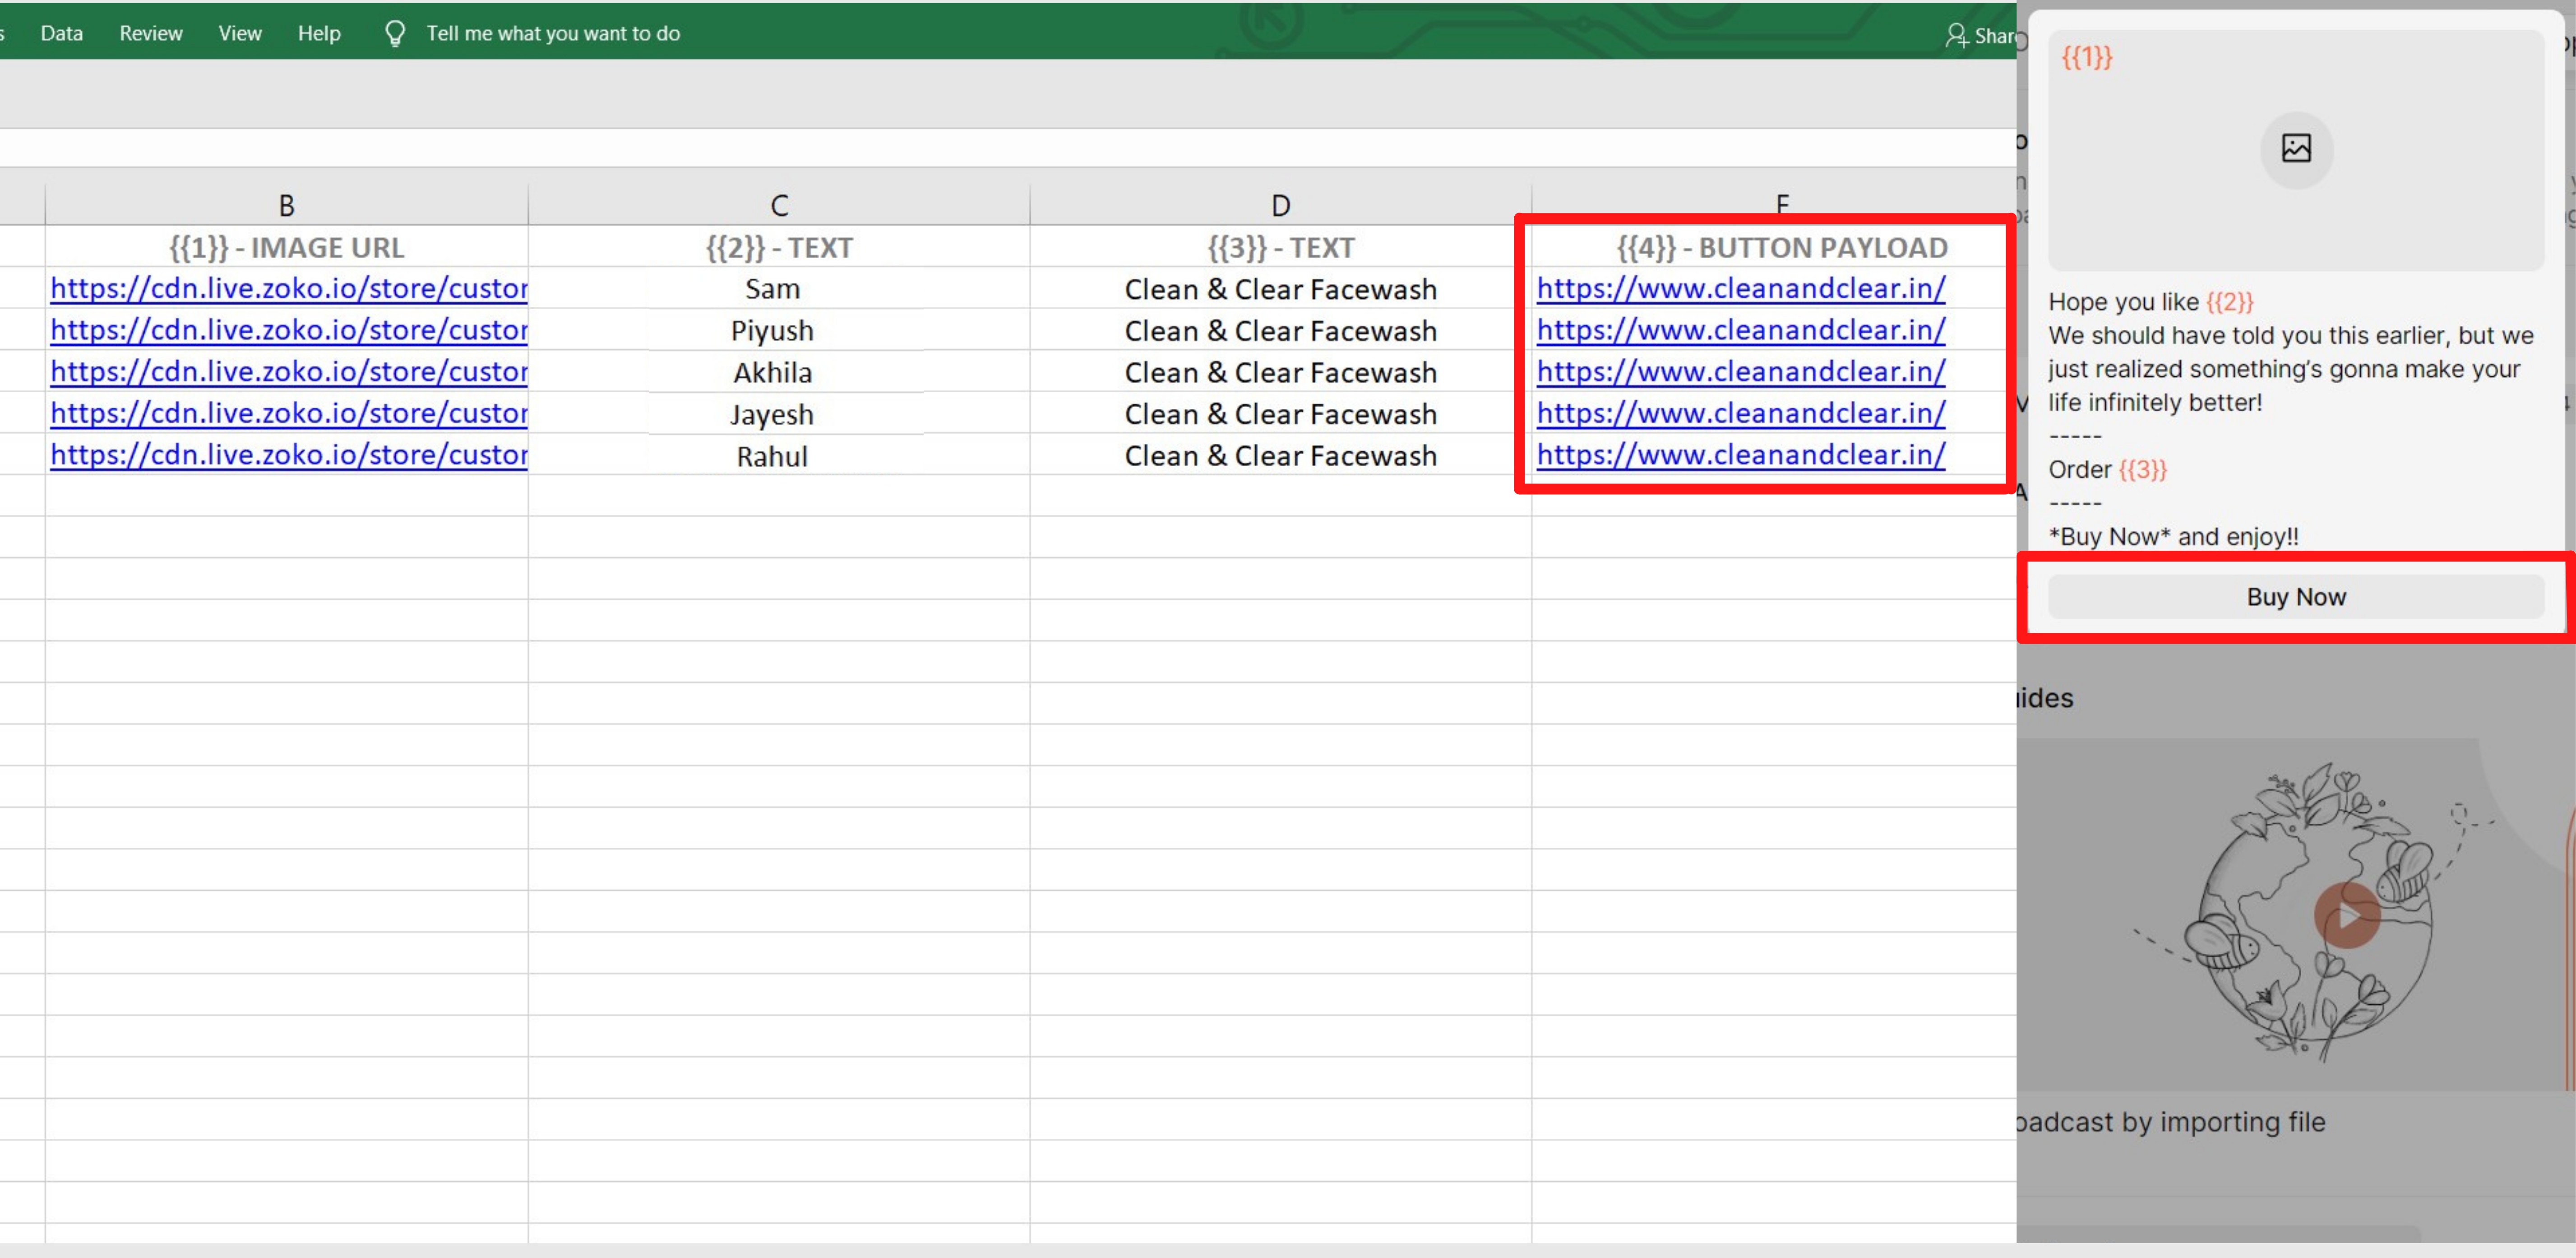
(iv) If your template includes a button, you will need to insert the link under the "Button Payload" section within the Xlsx file.
Always remember that when adding information to an Xlsx file, it's crucial to avoid including extra spaces. Failure to do so may result in the broadcast failing to send.
15. After you have filled in all the necessary information in the Xlsx file, save the file and proceed to upload it on the dashboard by clicking the "Upload" button. You will be able to view the uploaded data here.
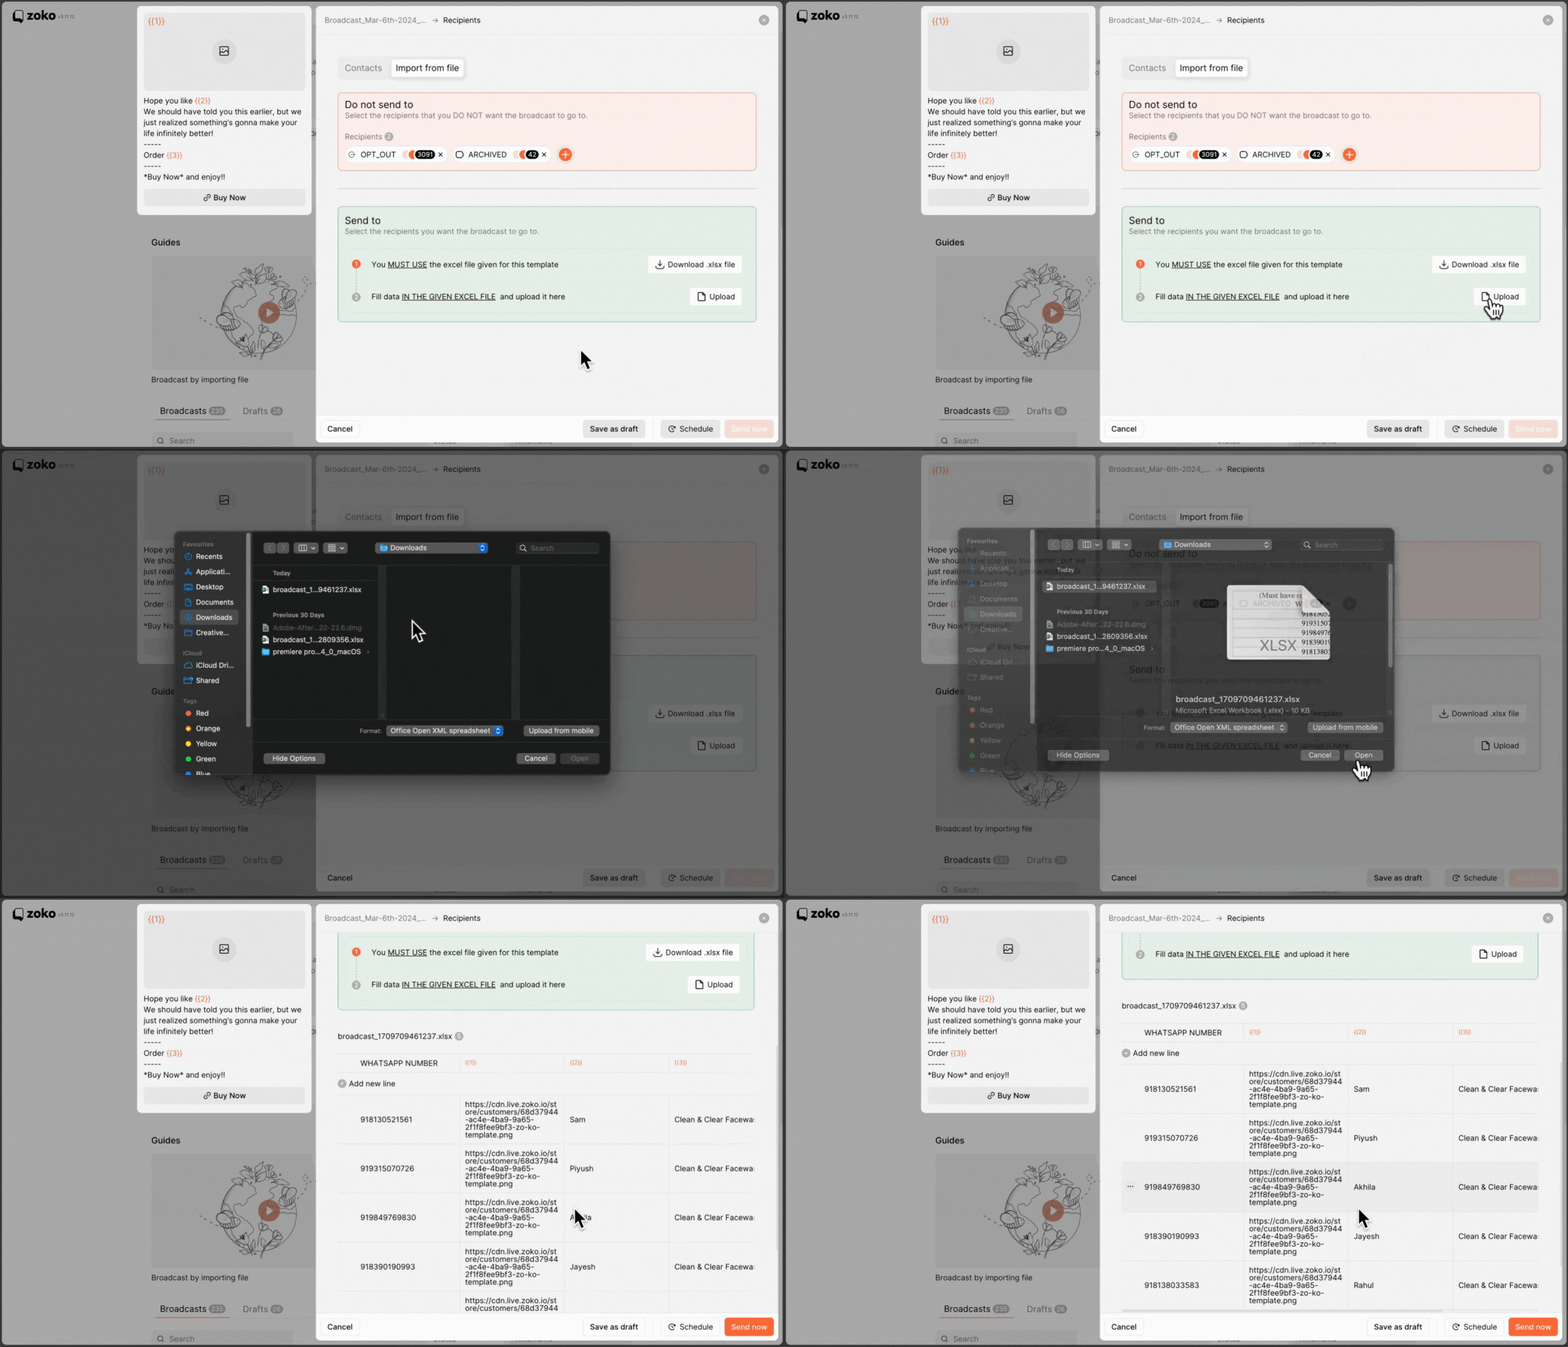
16. You can also send a test message by hovering over any row, clicking on the three dots icon, and selecting "Send test message." This allows you to quickly verify if the data has been prepared correctly.
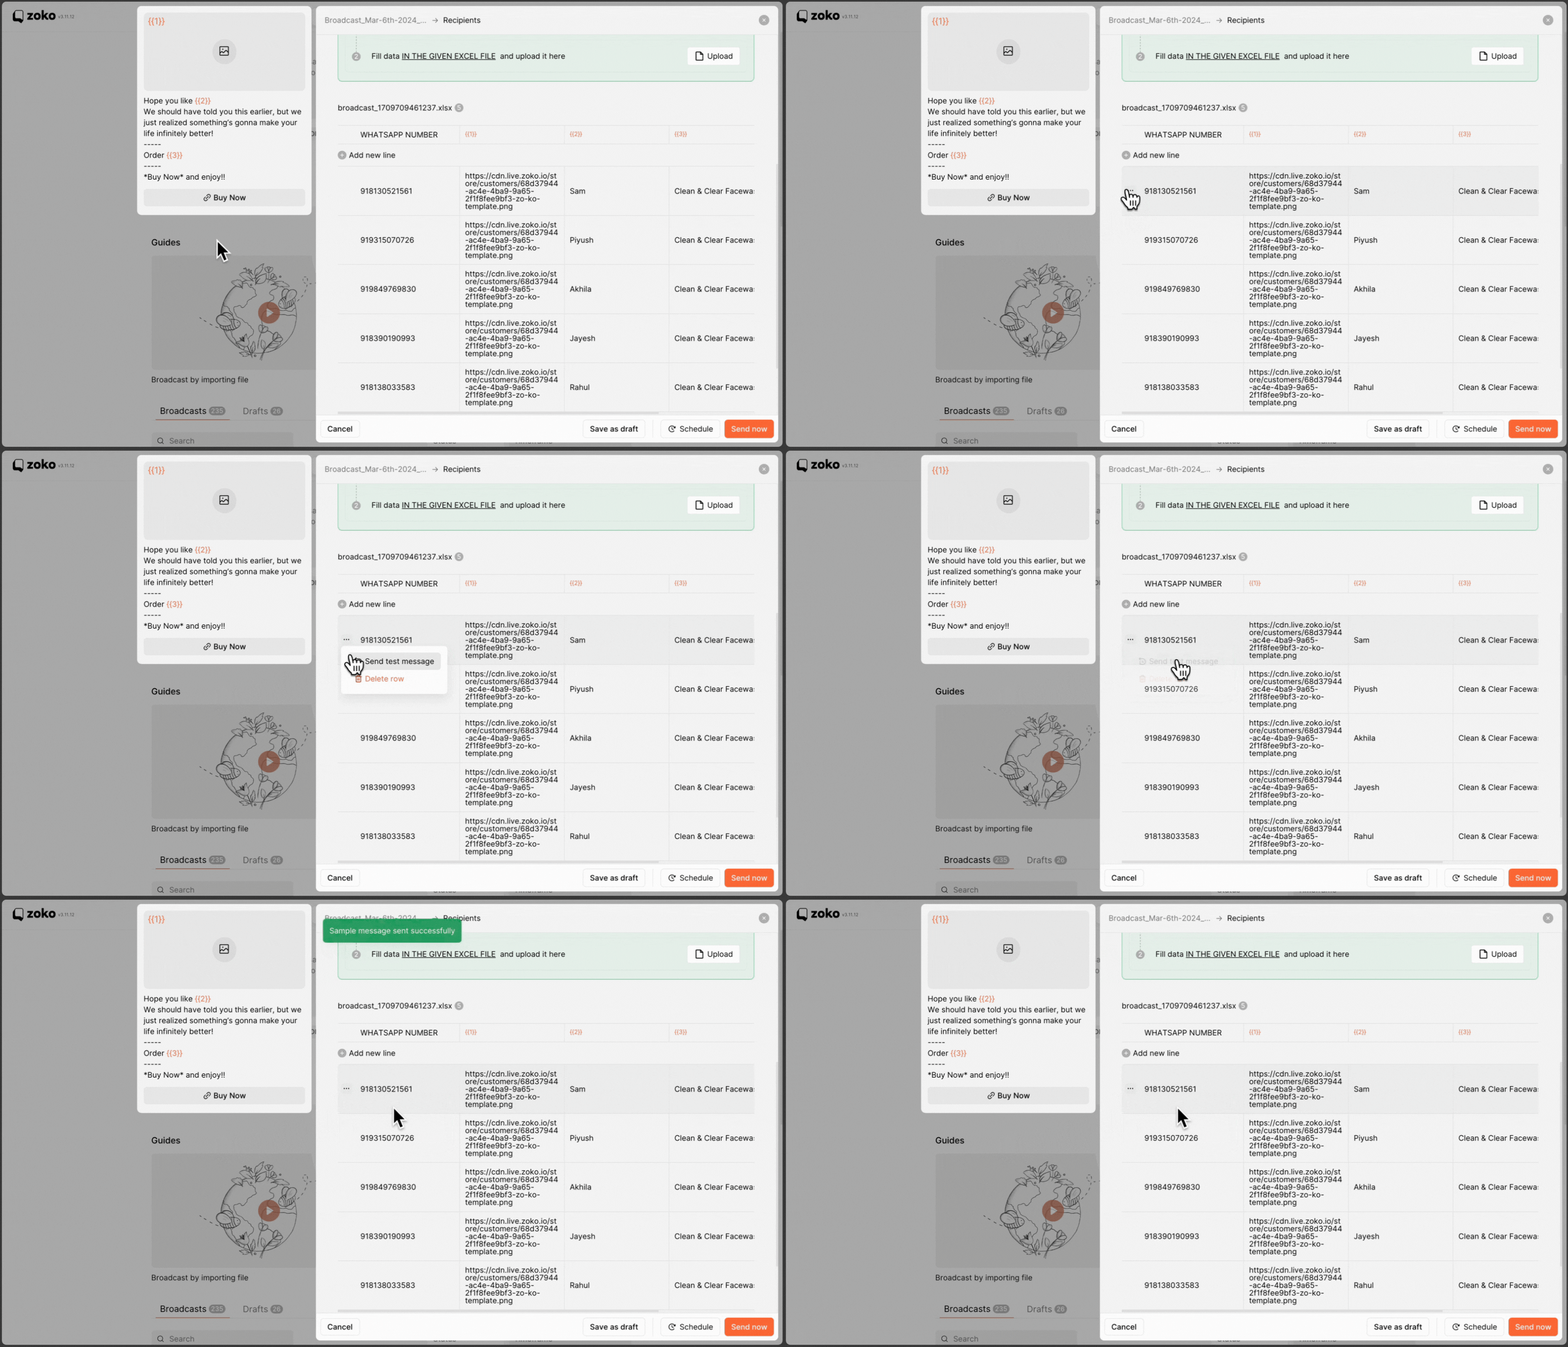
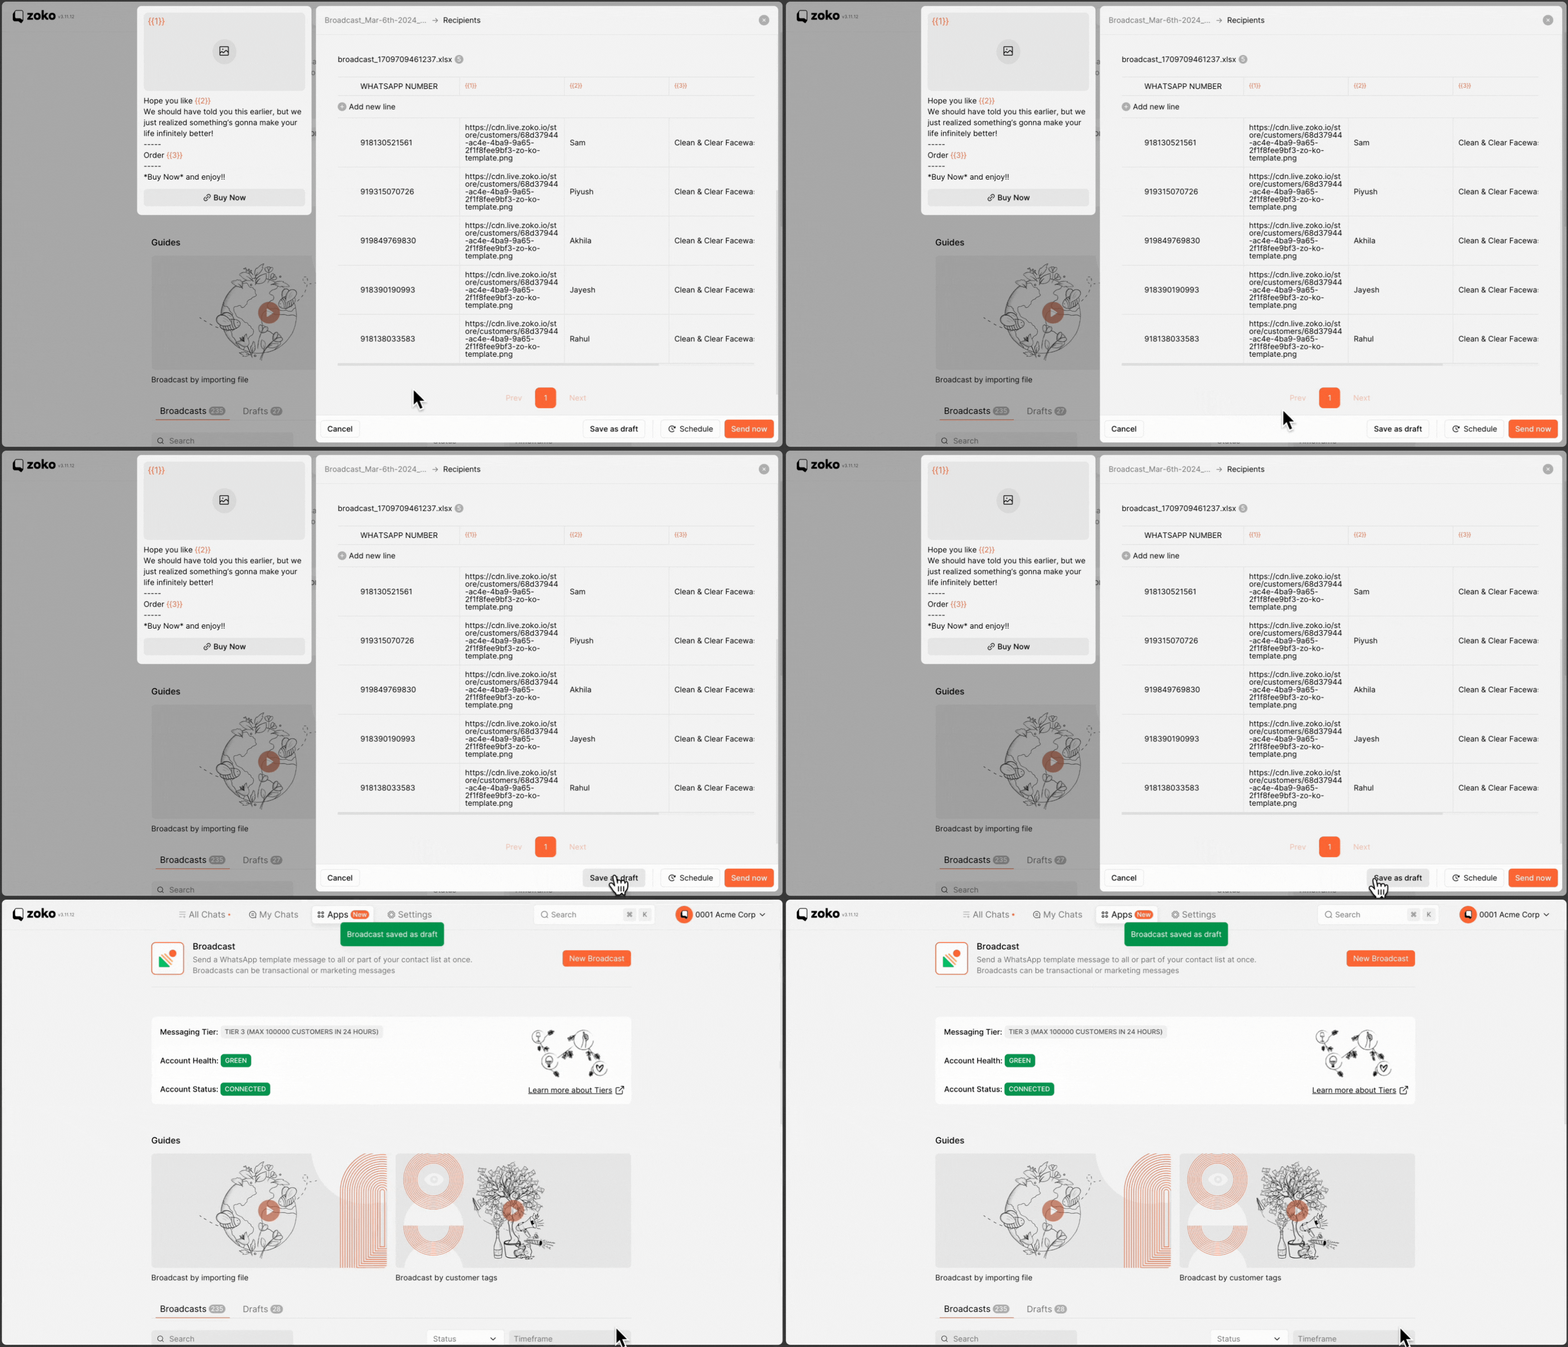
17. If you prefer to save your broadcast as a draft to be sent at a later time, just click on Save as draft. The drafted broadcast will then be moved to the draft section, where you can access it for future sending.
18. Finally, depending on your preference, you can opt to send the broadcast instantly by clicking on Send now, or schedule it for a later time by selecting Schedule.
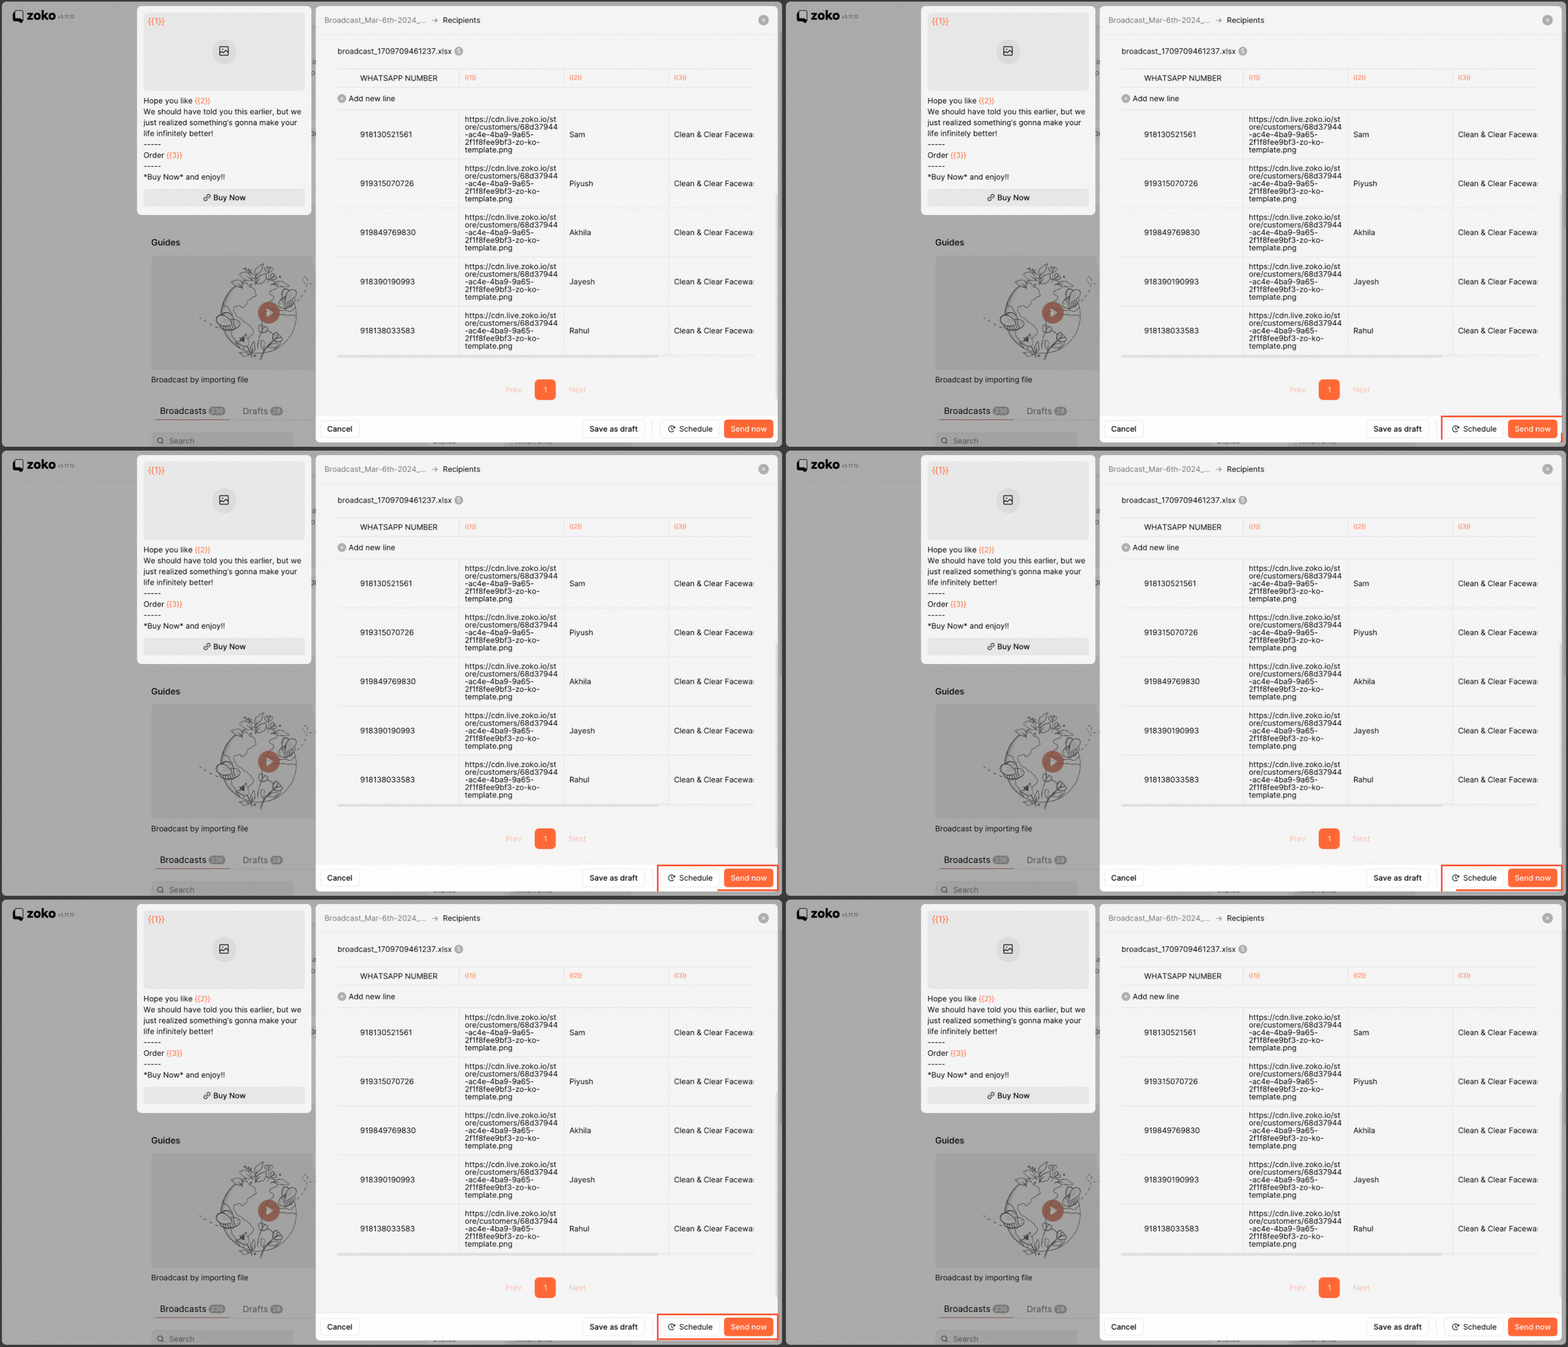
That's it! Your broadcast has been successfully created and sent. To track its performance, you can review the latest statistics by referring to our article on How to Get the Latest Broadcast Data.
Keywords: Broadcast, Bulk messages, Bulk recipients, Bulk broadcast, Import file, Media broadcast.


.png)