Broadcast by Tags
Learn how you can broadcast a message to a group of customers by using the customer tag.
One of the biggest advantages of broadcasts is the ability to effortlessly send messages to customers using tags.
For example, When you tag 1,000 customers with "Marketing Pop Up" on the dashboard, you can easily select all of them at once when setting up a broadcast.
To do this:
1. Go to WhatsApp section.
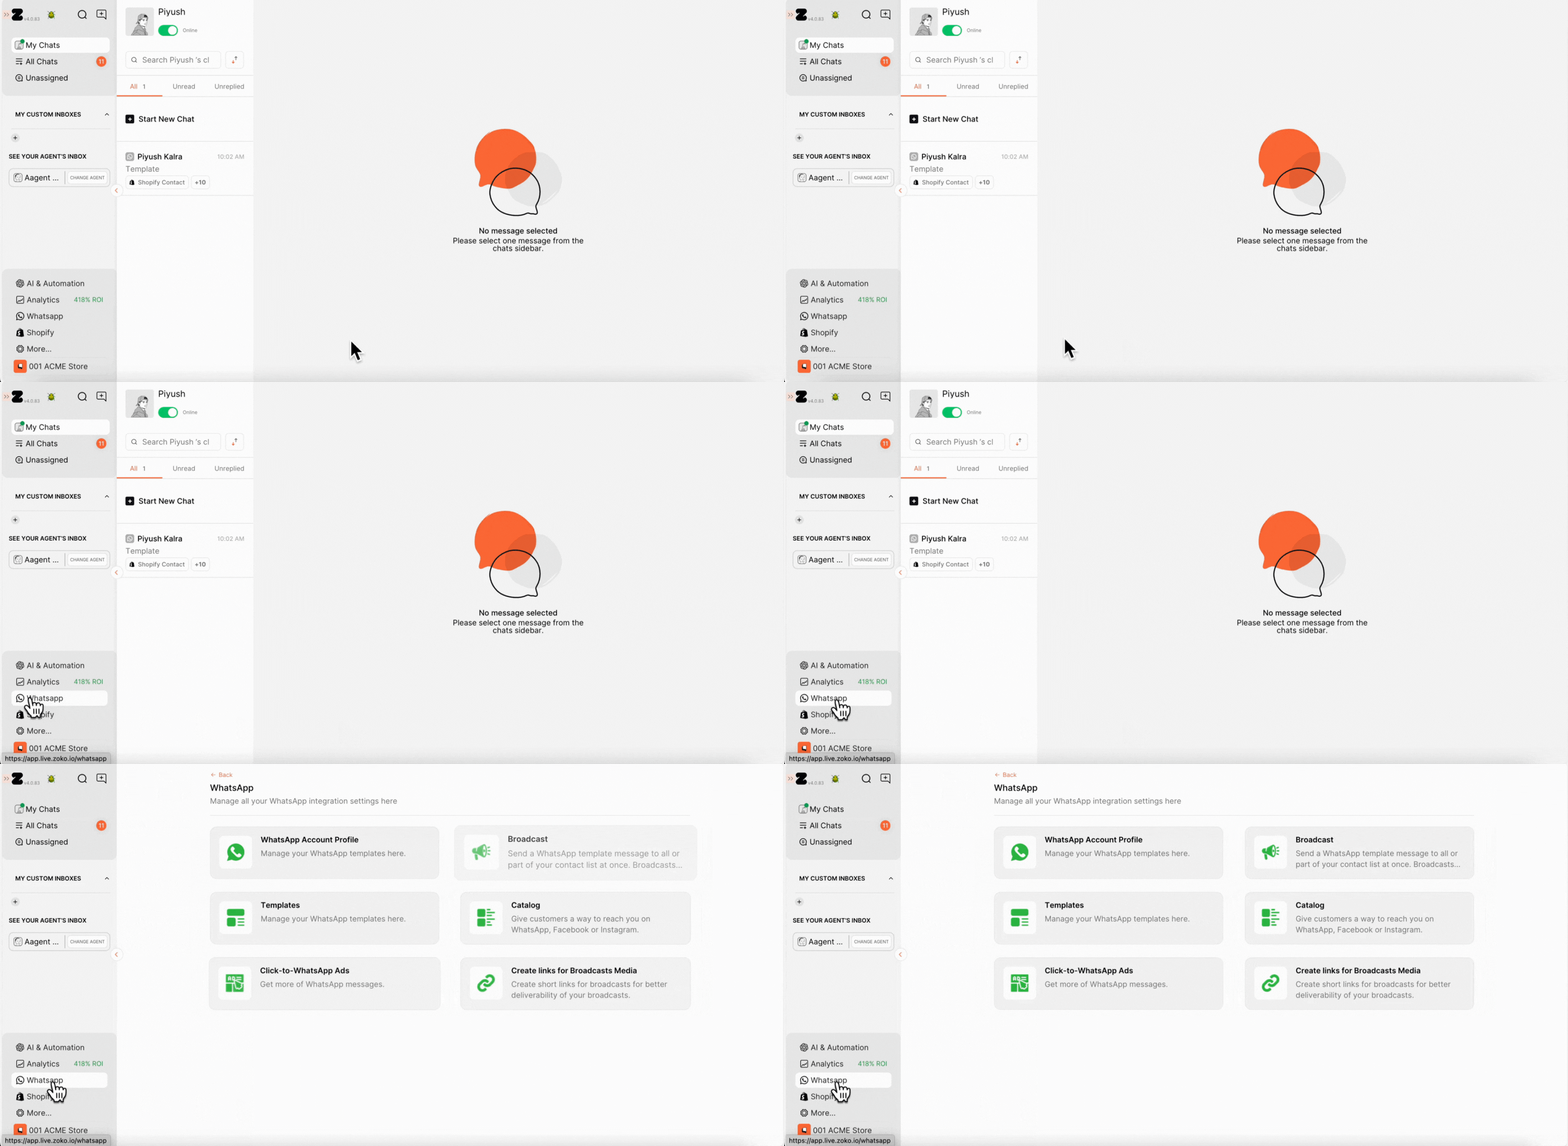
2. Select Broadcast.
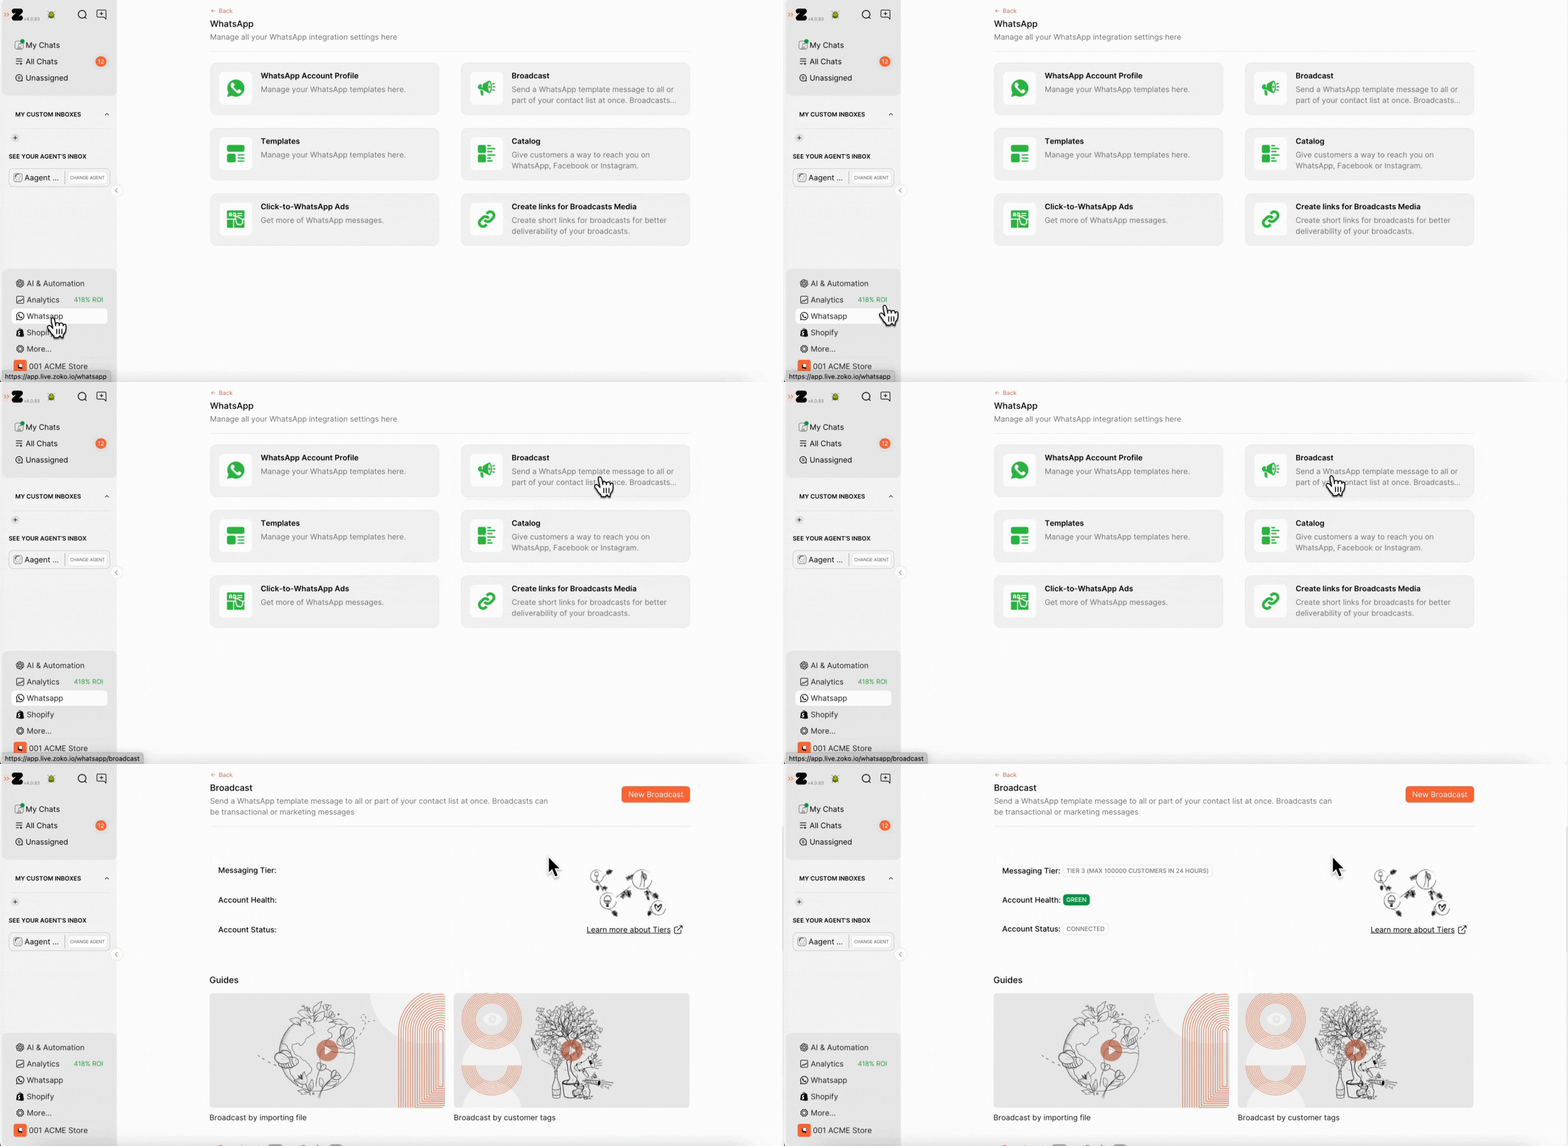
3. Click on New Broadcast.
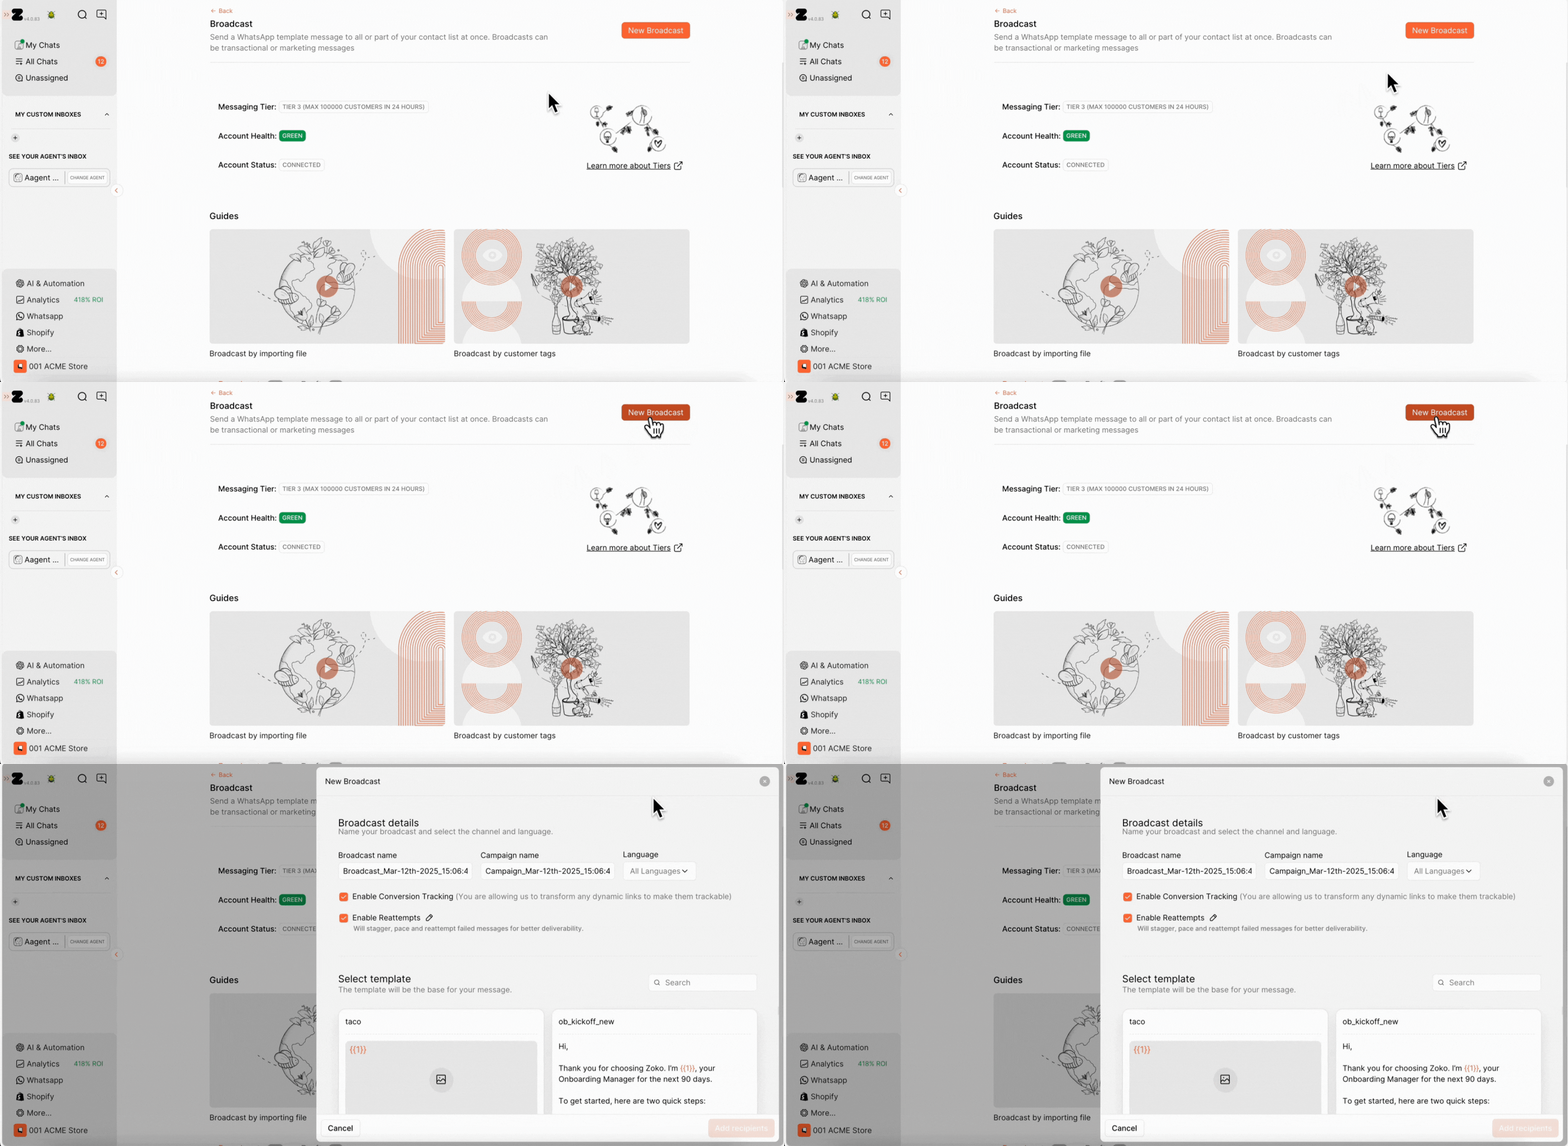
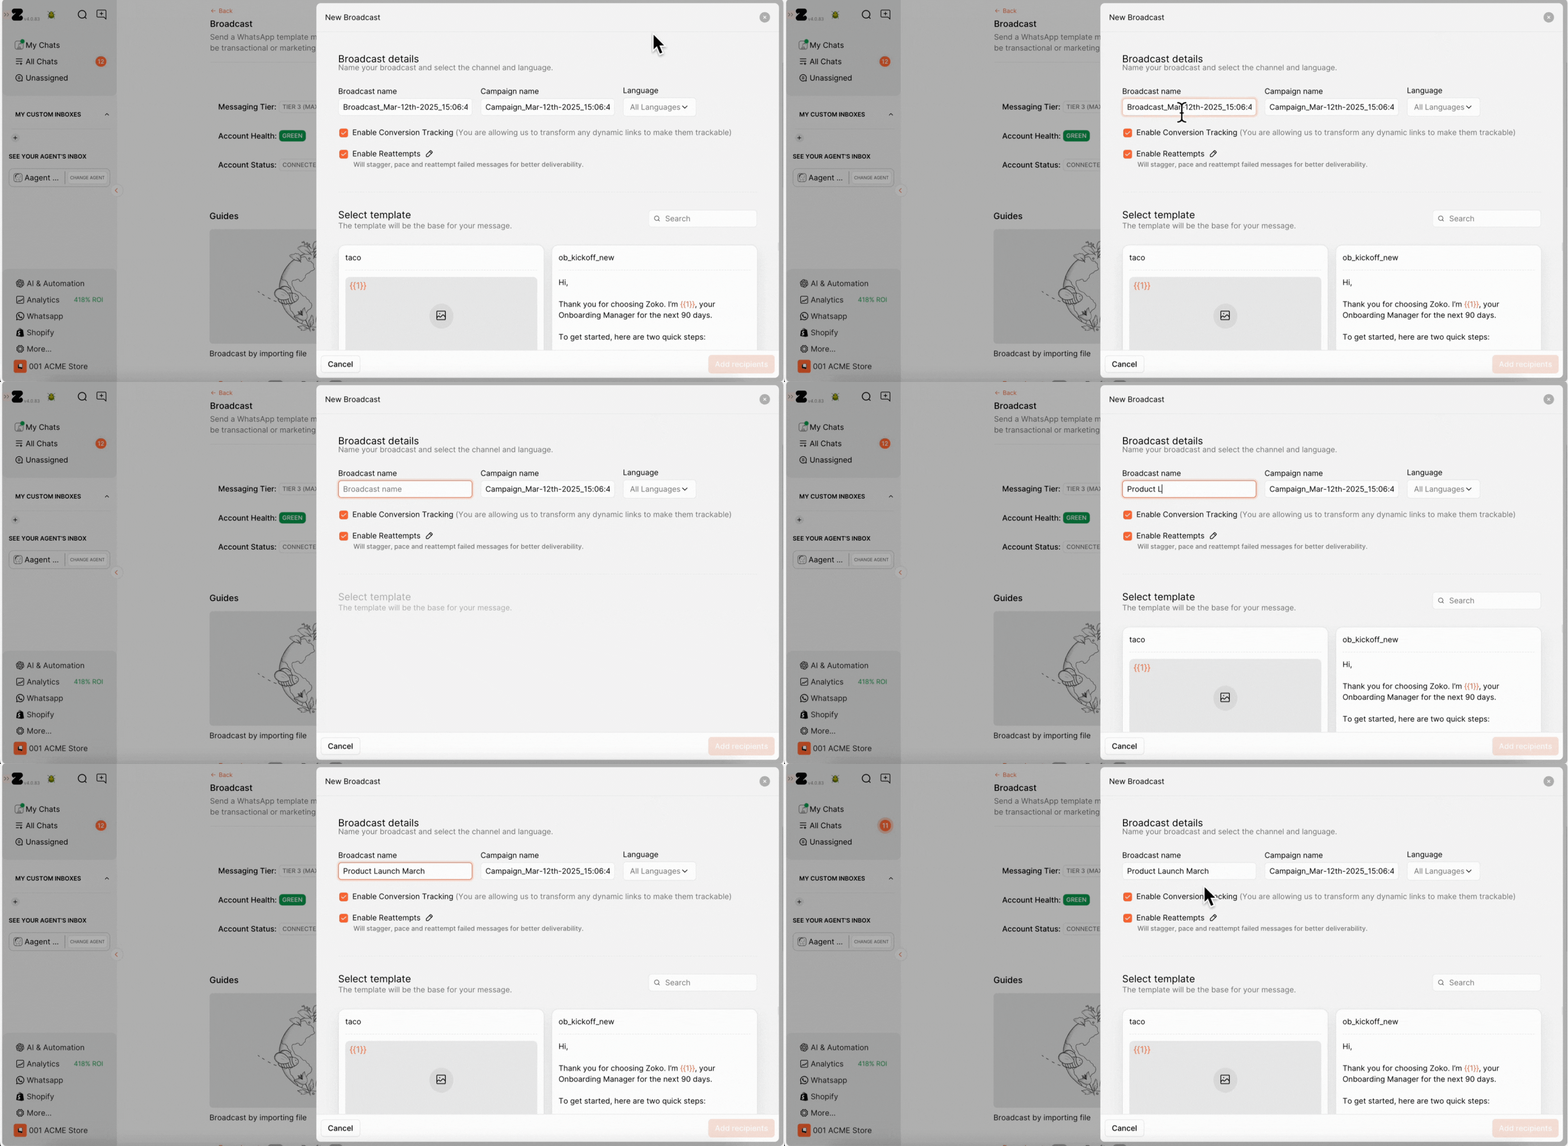
4. The broadcast name is auto-generated based on the date and time of creation, but you can rename it to whatever makes sense for you. Think of it like labeling a folder—the more specific the name, the easier it is to find later. In our case, we named it "Product Launch March".
5. The campaign name is auto generated based on the date and time of creation, but you can rename it whatever makes sense for you. It helps track and measure performance across broadcasts. In our case, we named it "New Balance Icon Launch" to keep it clear and easy to find.
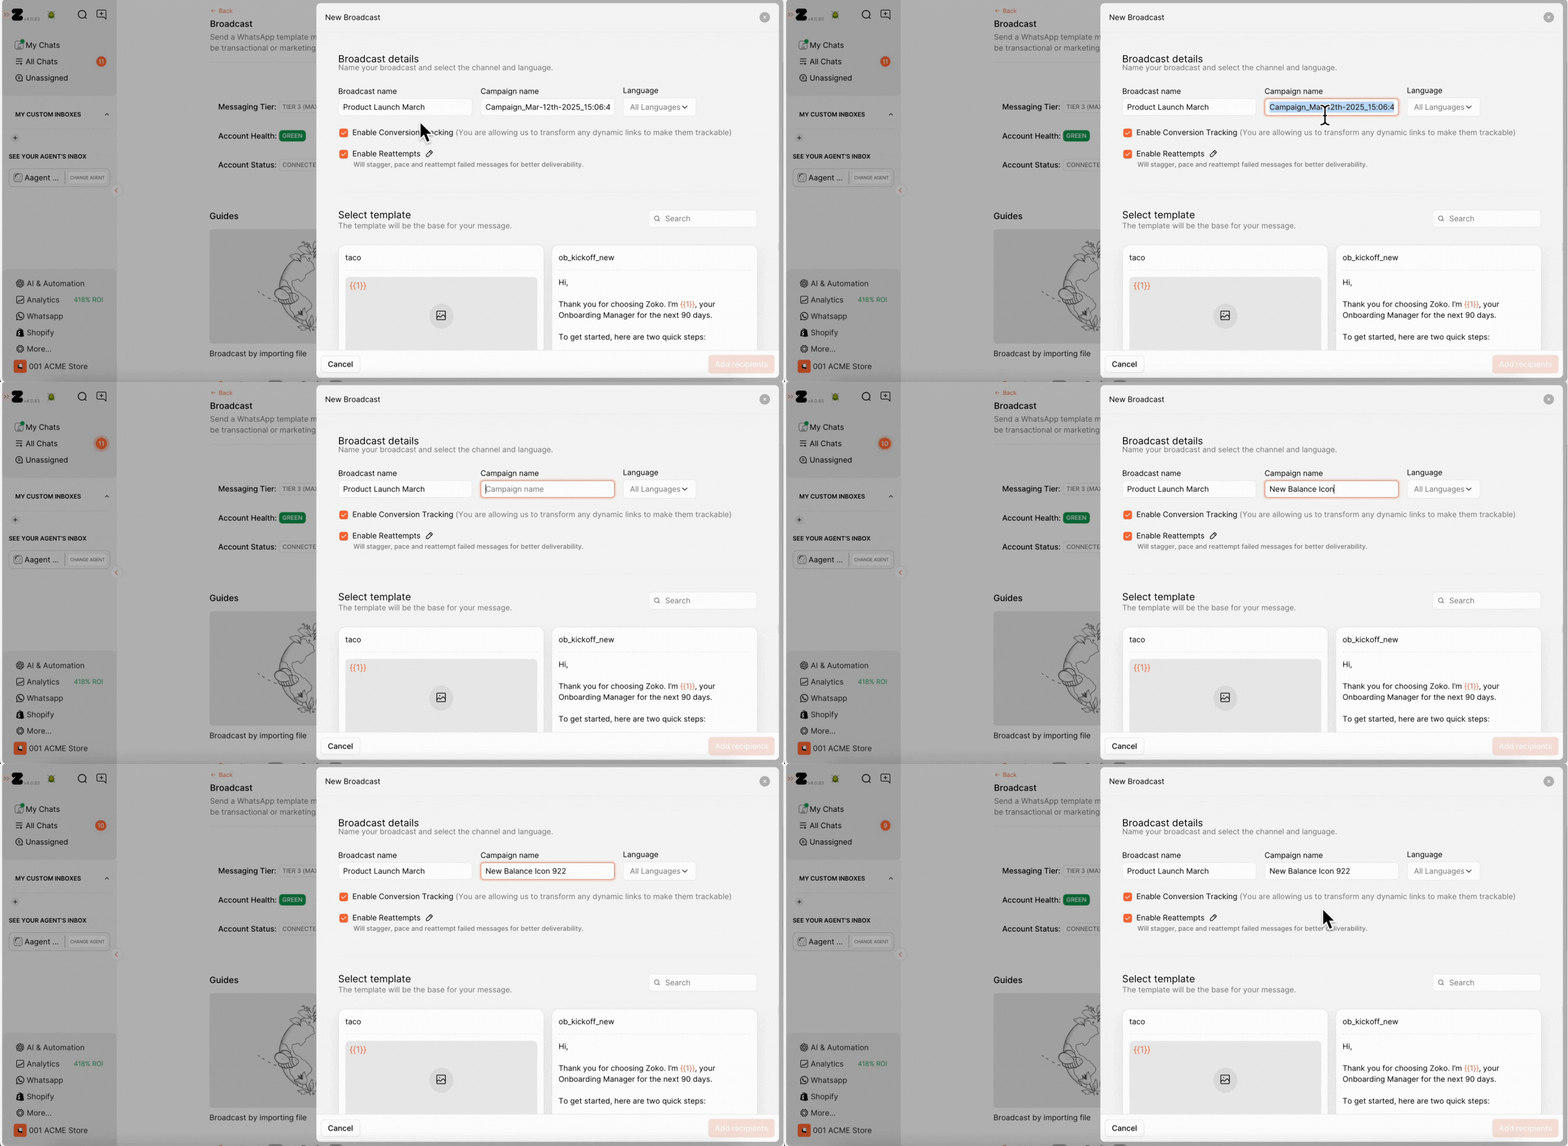
6. Next, you can enable or disable conversion tracking by selecting the appropriate checkbox, which allows you to transform dynamic links into trackable ones. Refer to our article to better understand of How Does Conversion Tracking Work in Broadcast
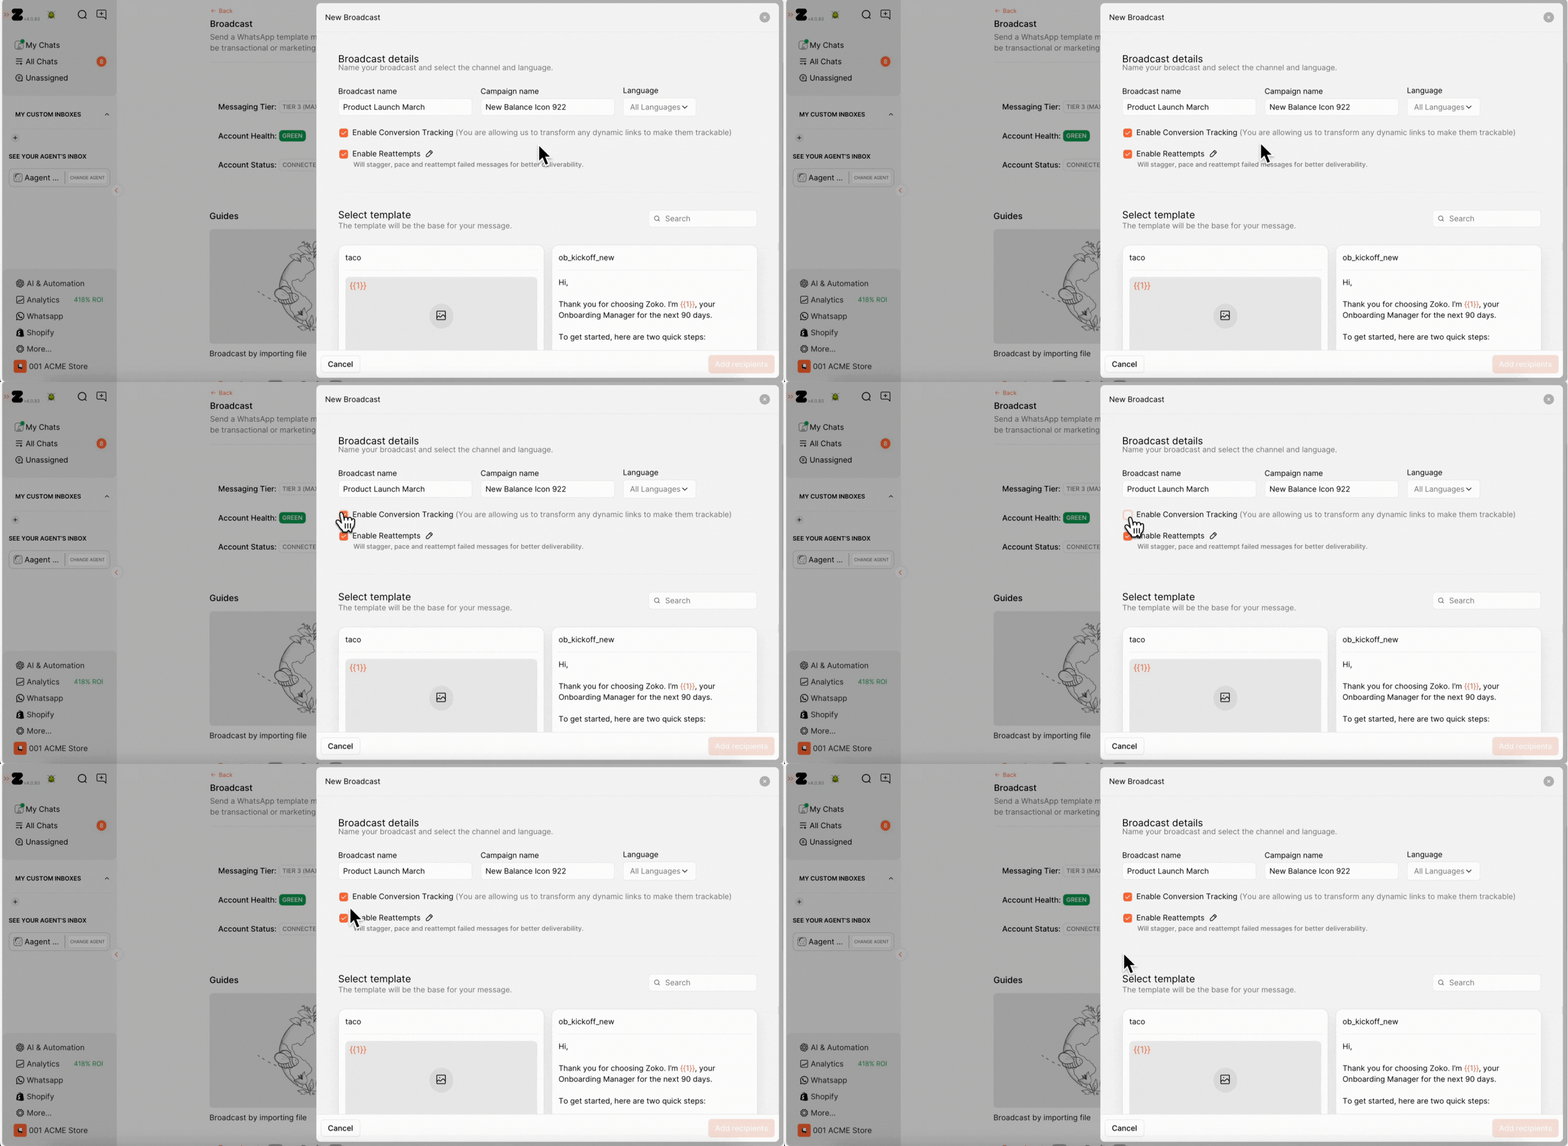
7. Now, you can easily enable or disable reattempts by selecting the appropriate checkbox (enabled by system default). This feature allows the system to automatically retry sending the broadcast to recipients whose messages failed after the initial broadcast was sent. To set specific timeframes for these retries, simply click the edit icon. Refer to our article to better understand of How Does "Enable Reattempts" work in broadcast?
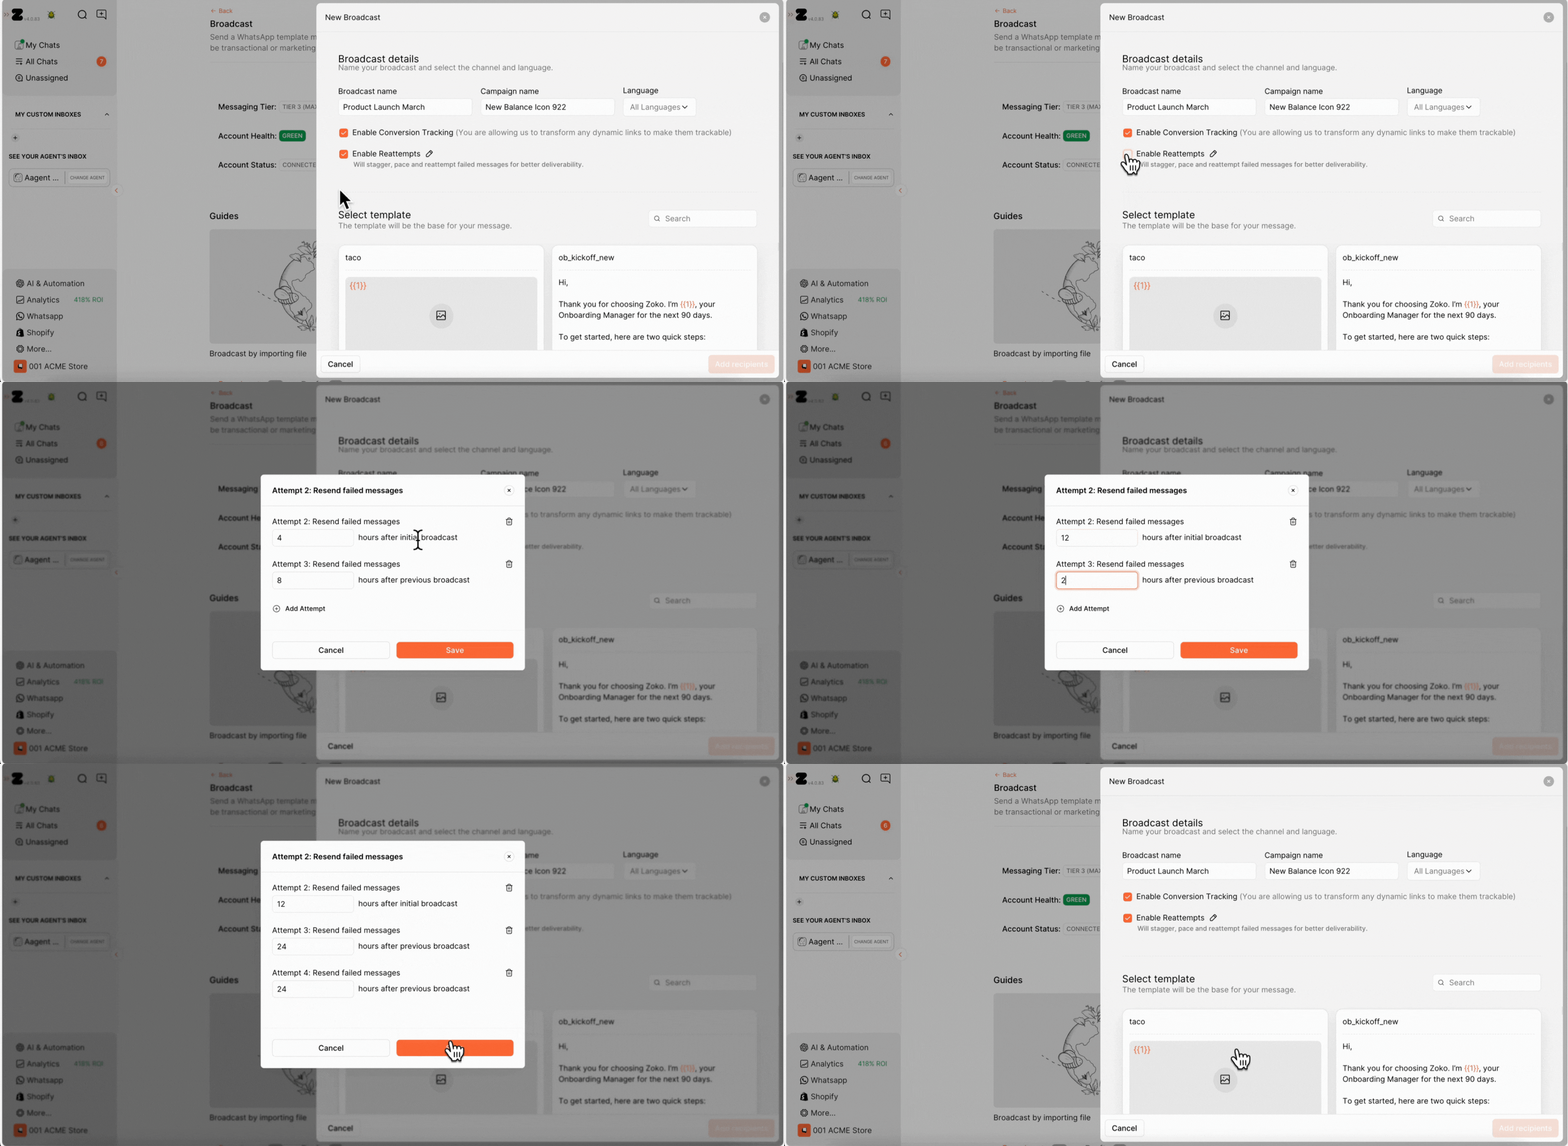
8. Depending on the language you selected, the templates will be listed below. You can search for a template you’ve already created for this campaign, select it and click on Add recipients. Refer to this article on How to create a template.
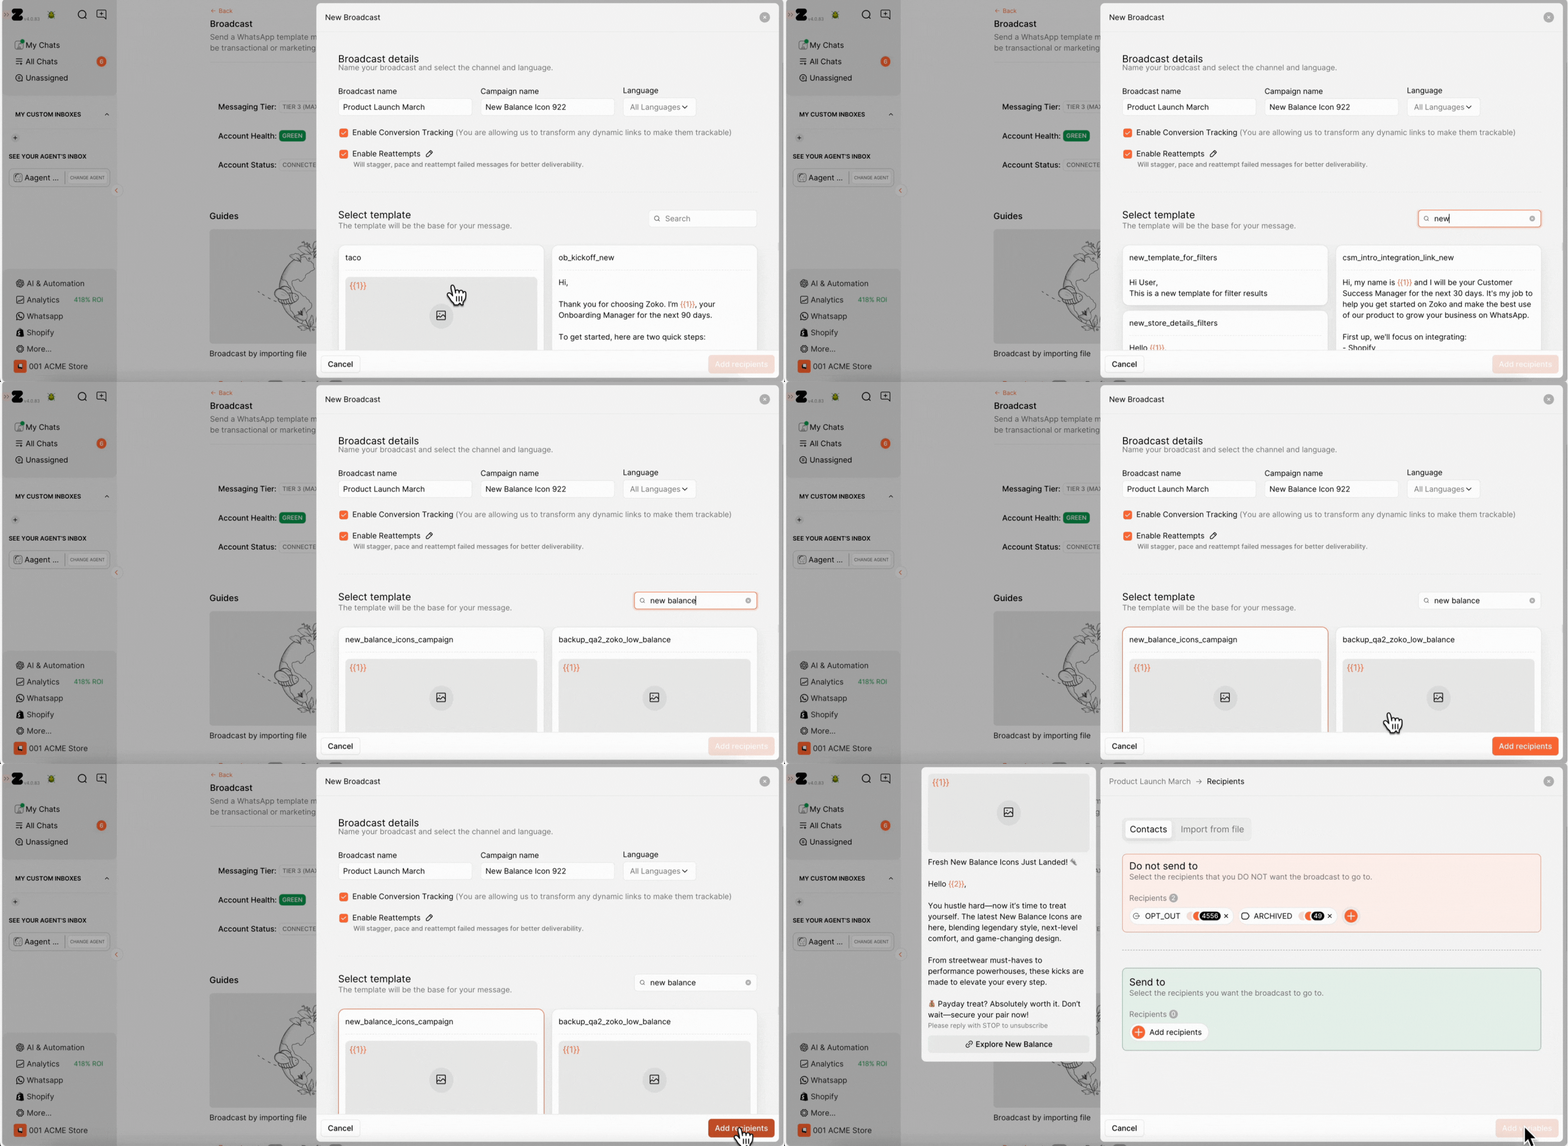
9. Under "Do not send to," you can filter out customers who have opted out of marketing or aren’t the right fit for this campaign. Simply click the "+" icon and select the relevant contacts or tags.
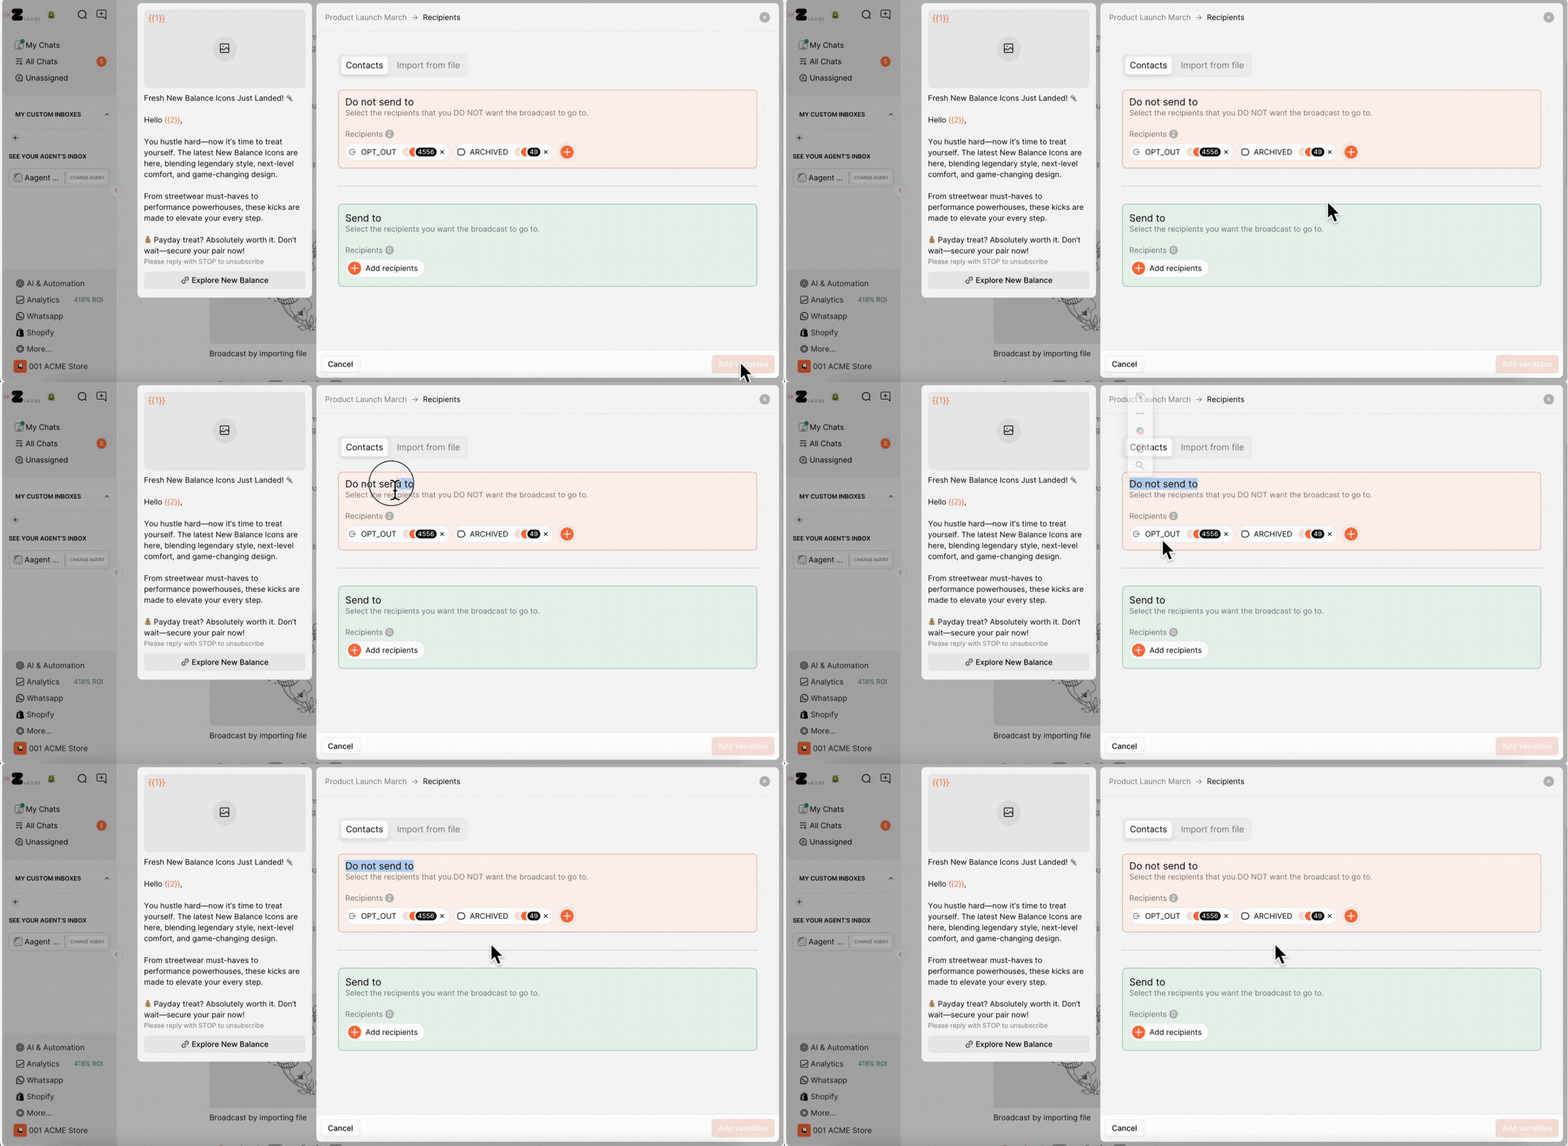
10. Under “Send to,” click on "Add Recipients," type the tag name in the search field, and select "TAGS" to filter the results. In our case, we selected the "Marketing Pop up" tag.
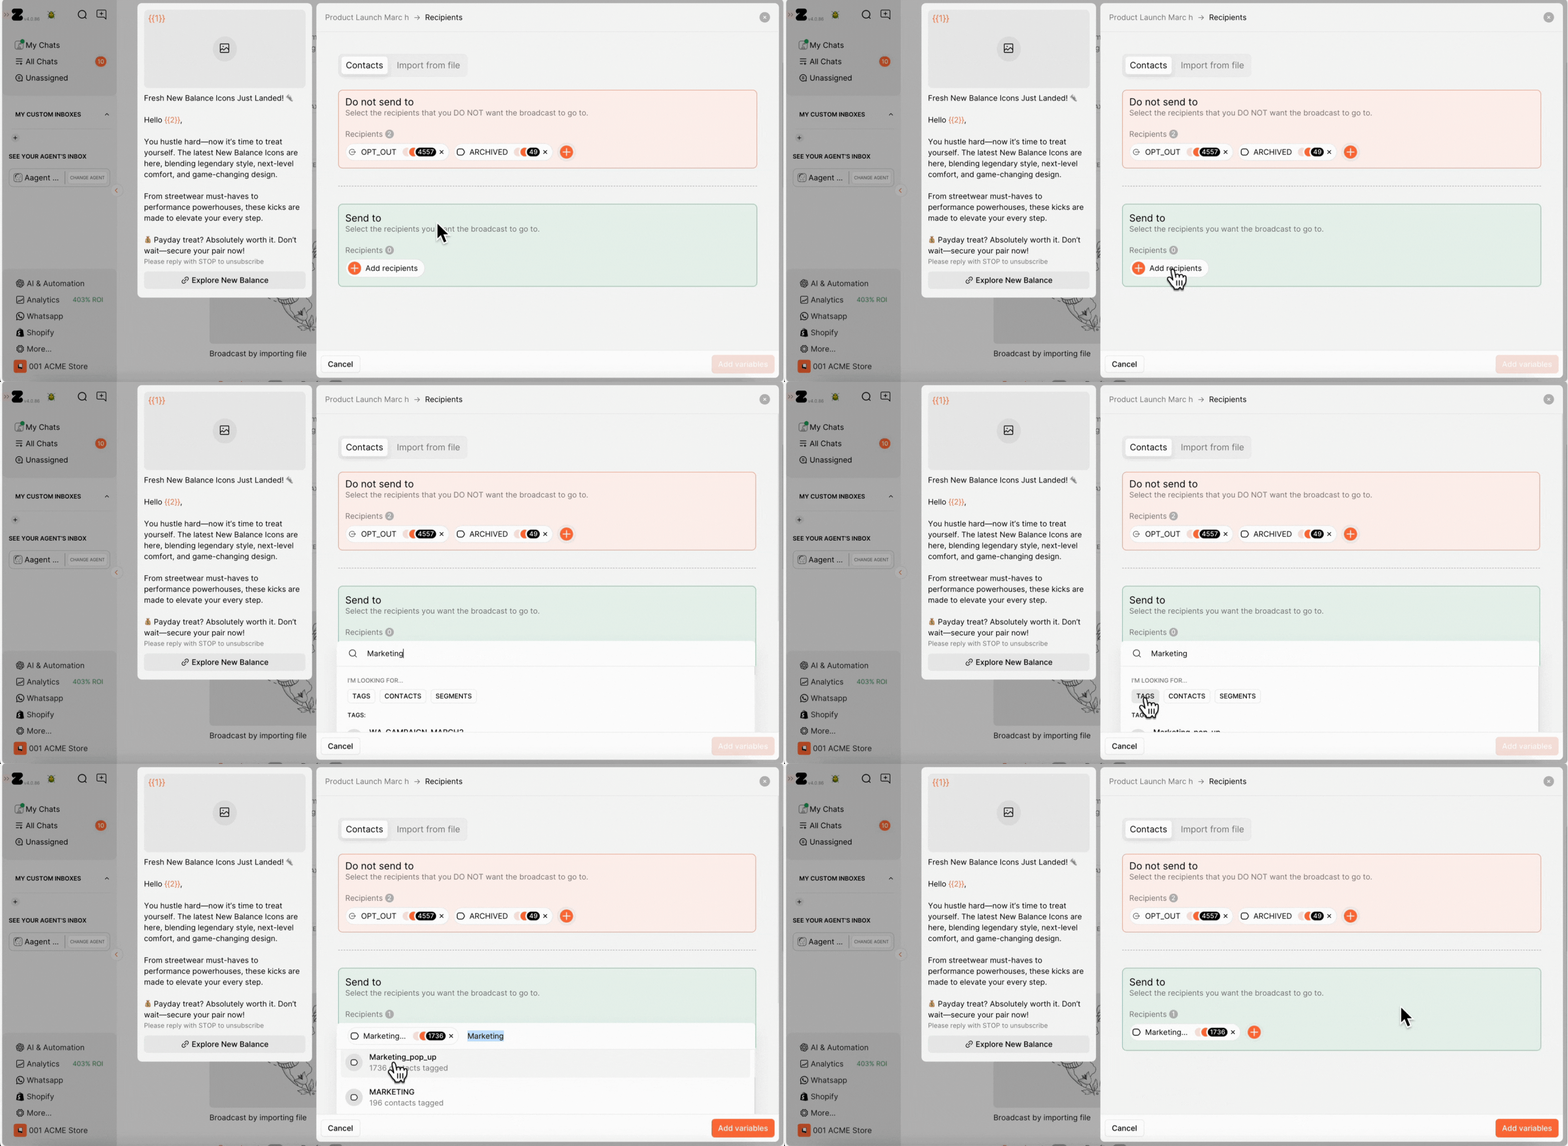
11. Click on Add variables.
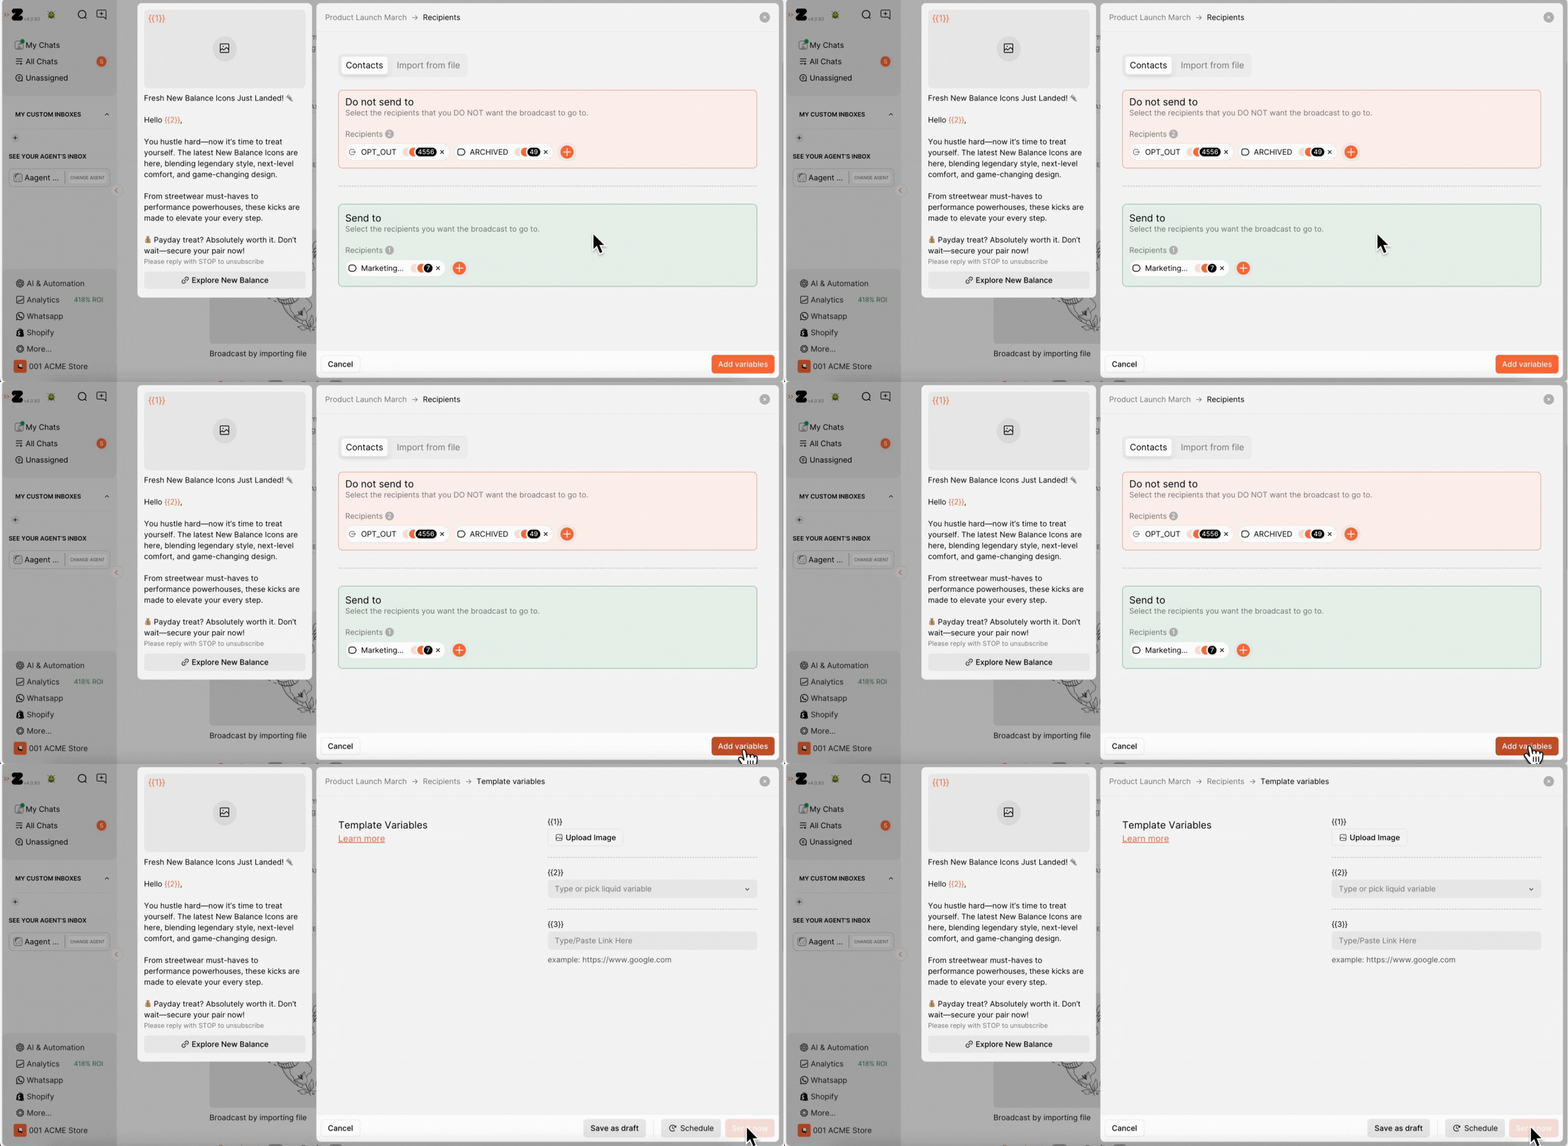
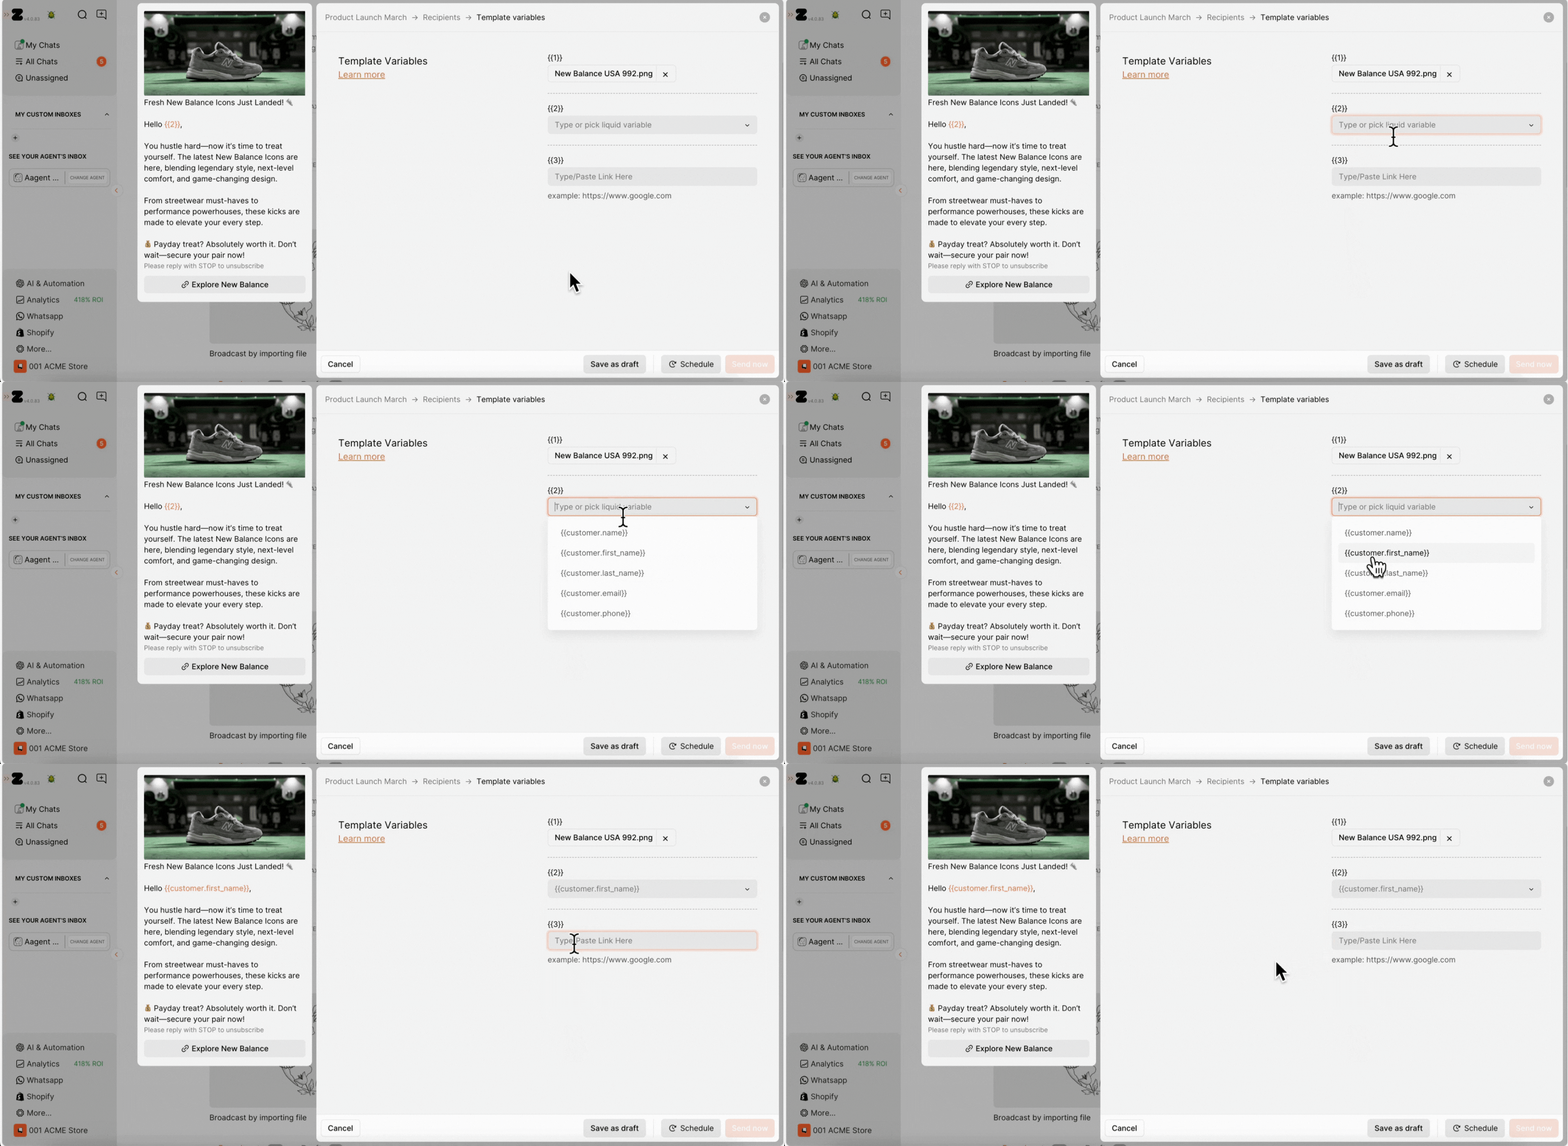
12. Fill in all the required details in the variables. The variable fields will vary based on the template variables you have created. Here’s how it applies to our case:
- Click on "Upload Image," and select the image you want to send.
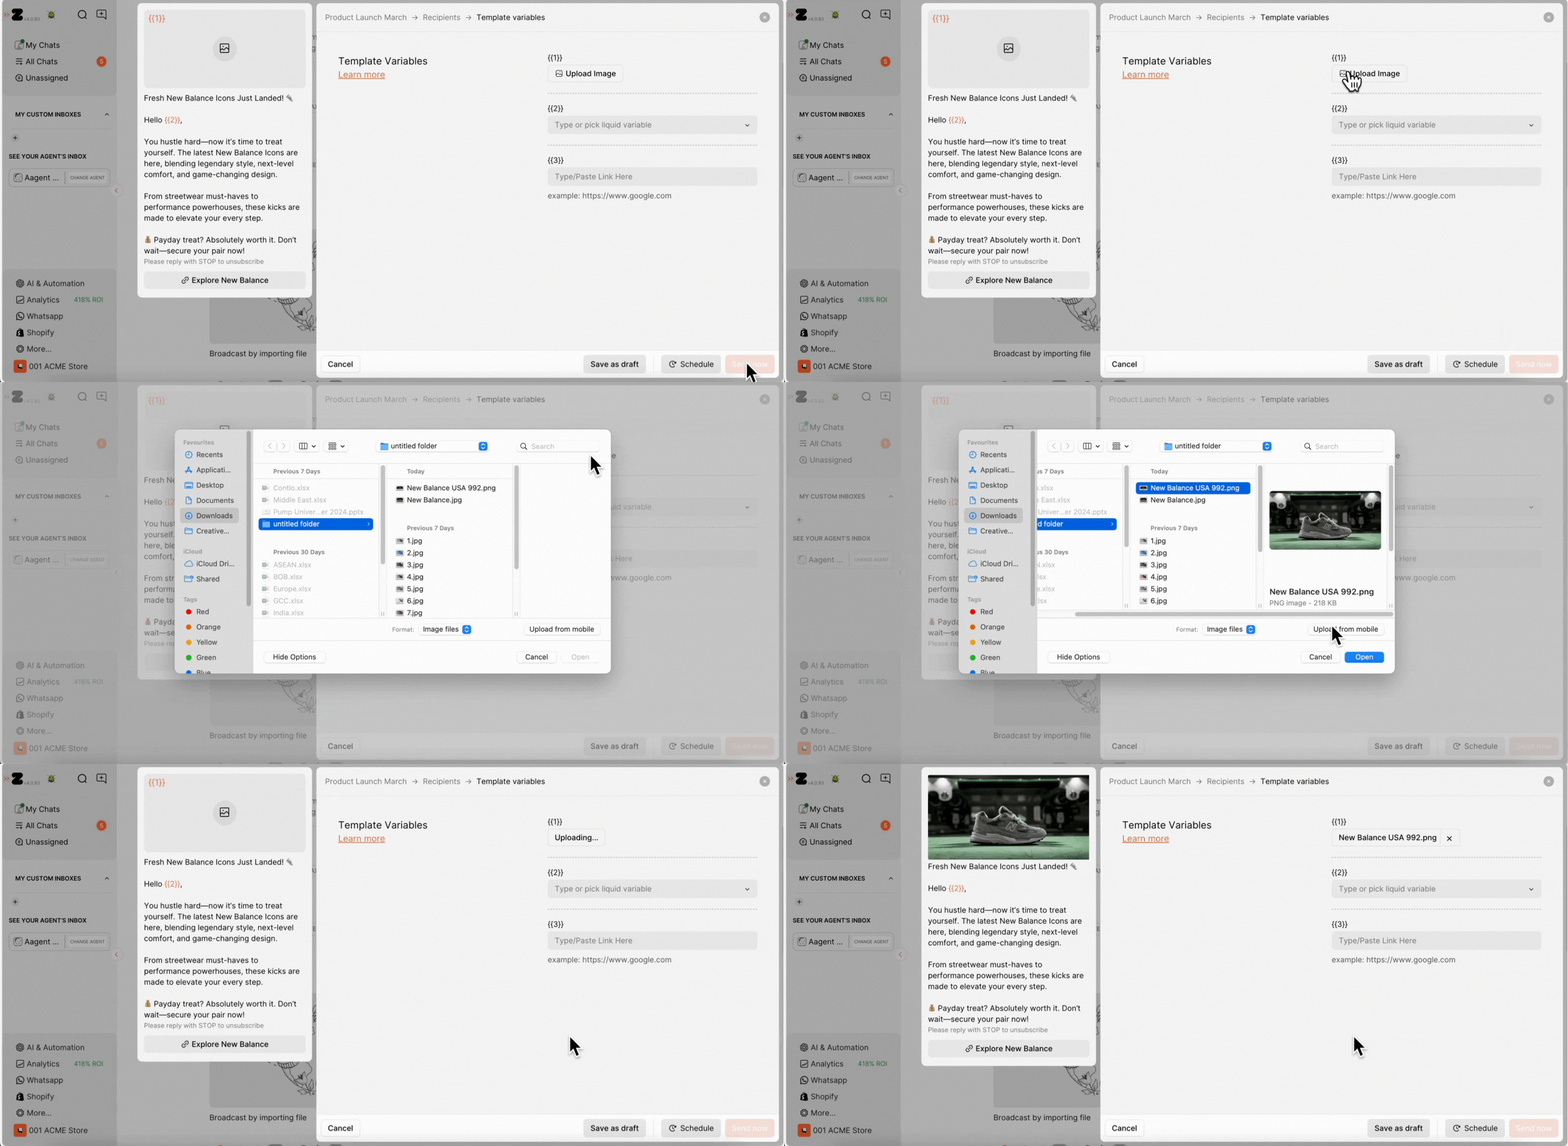
- Select the variable from the dropdown. In our case, we selected "Customer First Name."
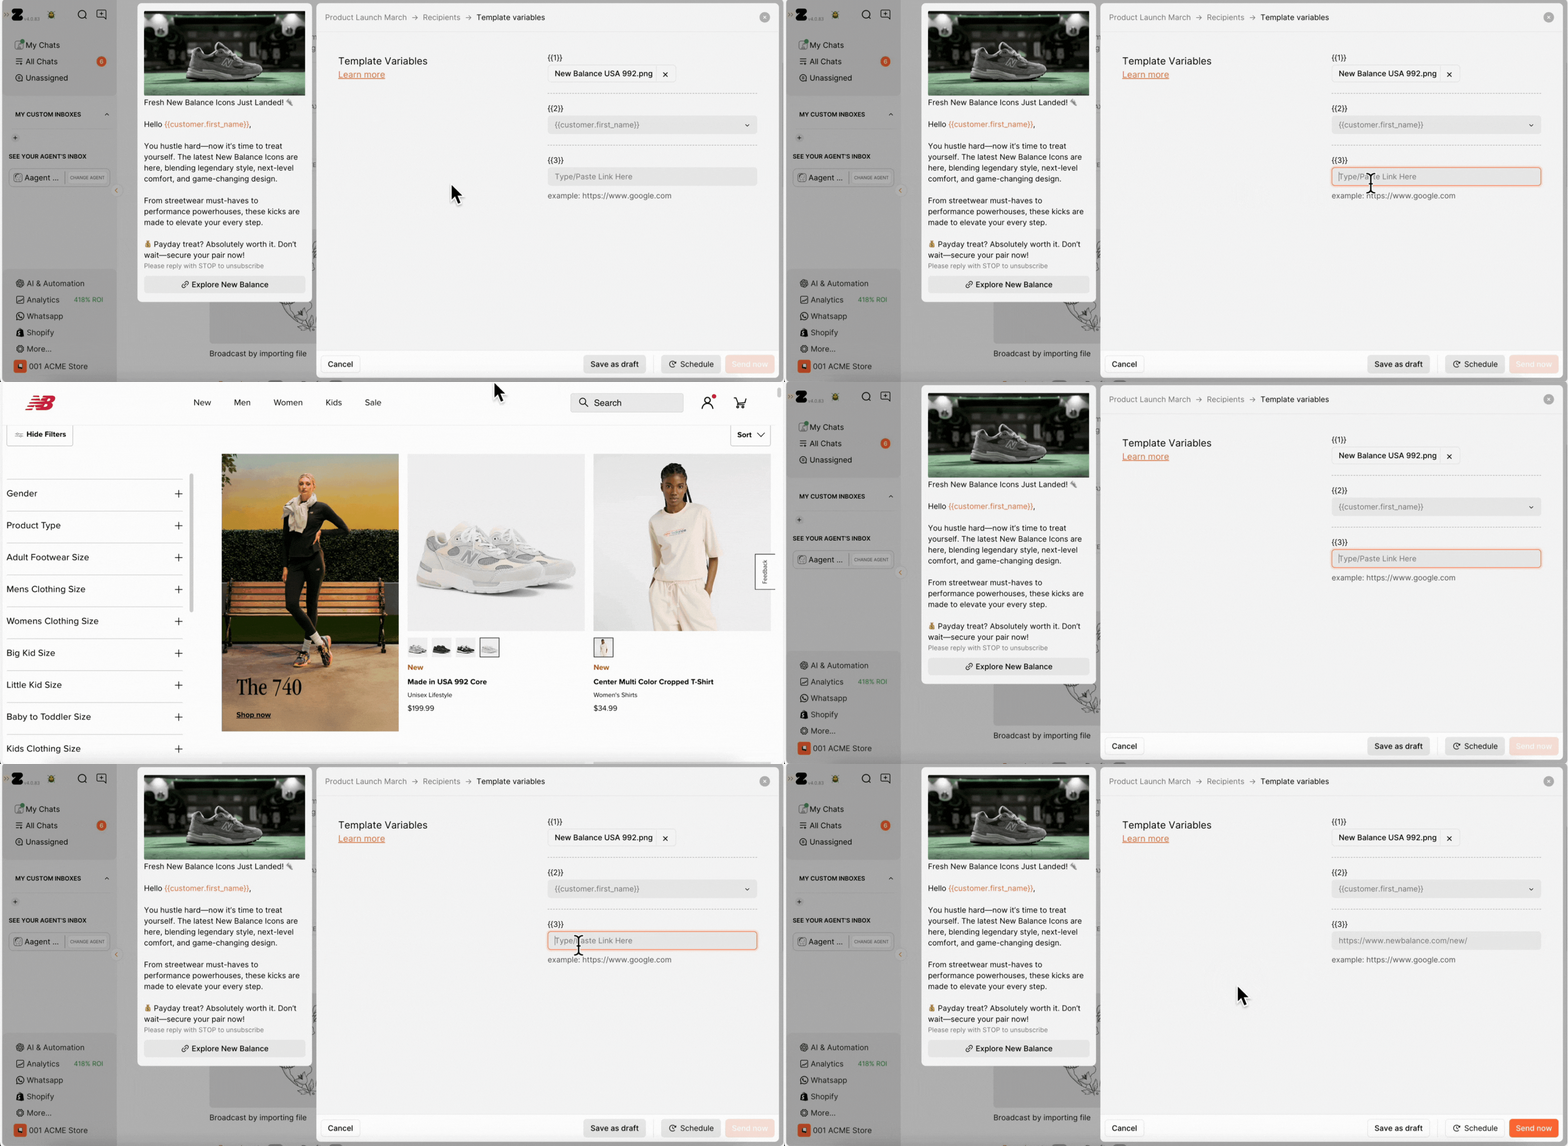
- Now, add the product link so that when customers click the "Explore New Balance" CTA, they will be seamlessly redirected to the product page to browse and make a purchase.
13. Lastly, you have three options based on your requirements:
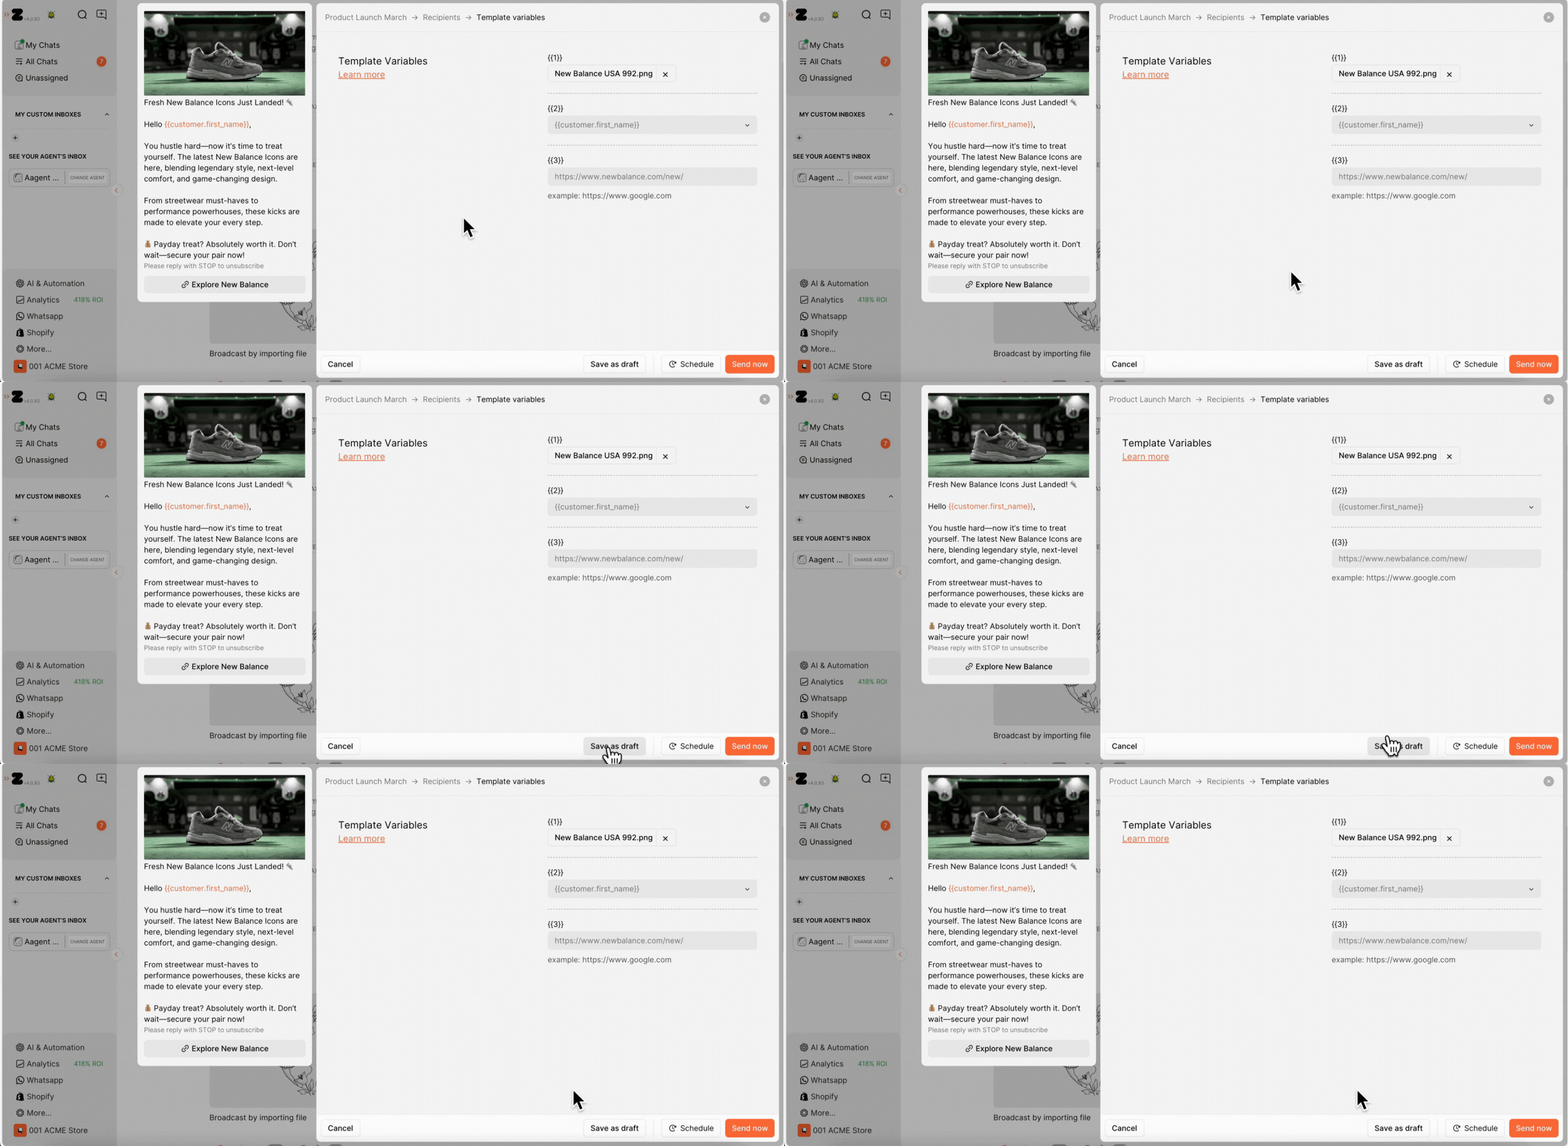
- Save as Draft if you are not ready to send, keeping your broadcast in draft mode so you can review and make changes.
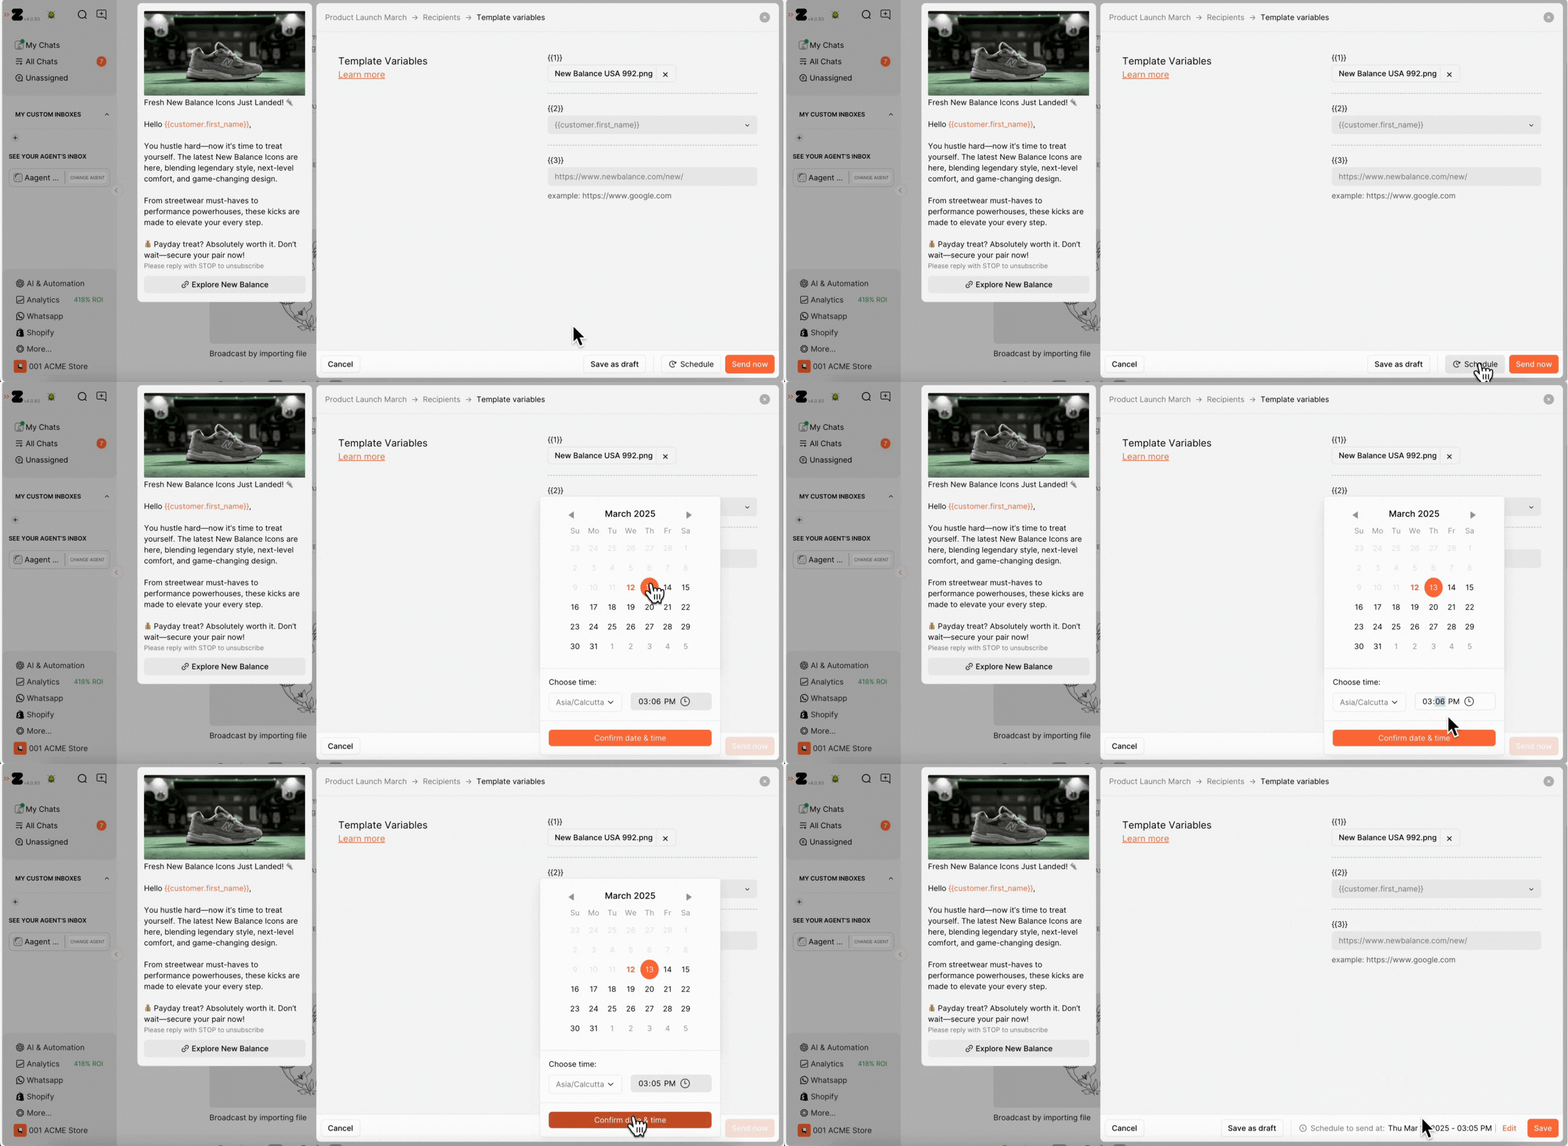
- Schedule Broadcast to plan ahead by setting the message to go out at the perfect time when engagement is highest. Simply select the date, region, and time.
- Send Now if you want to send the broadcast instantly.
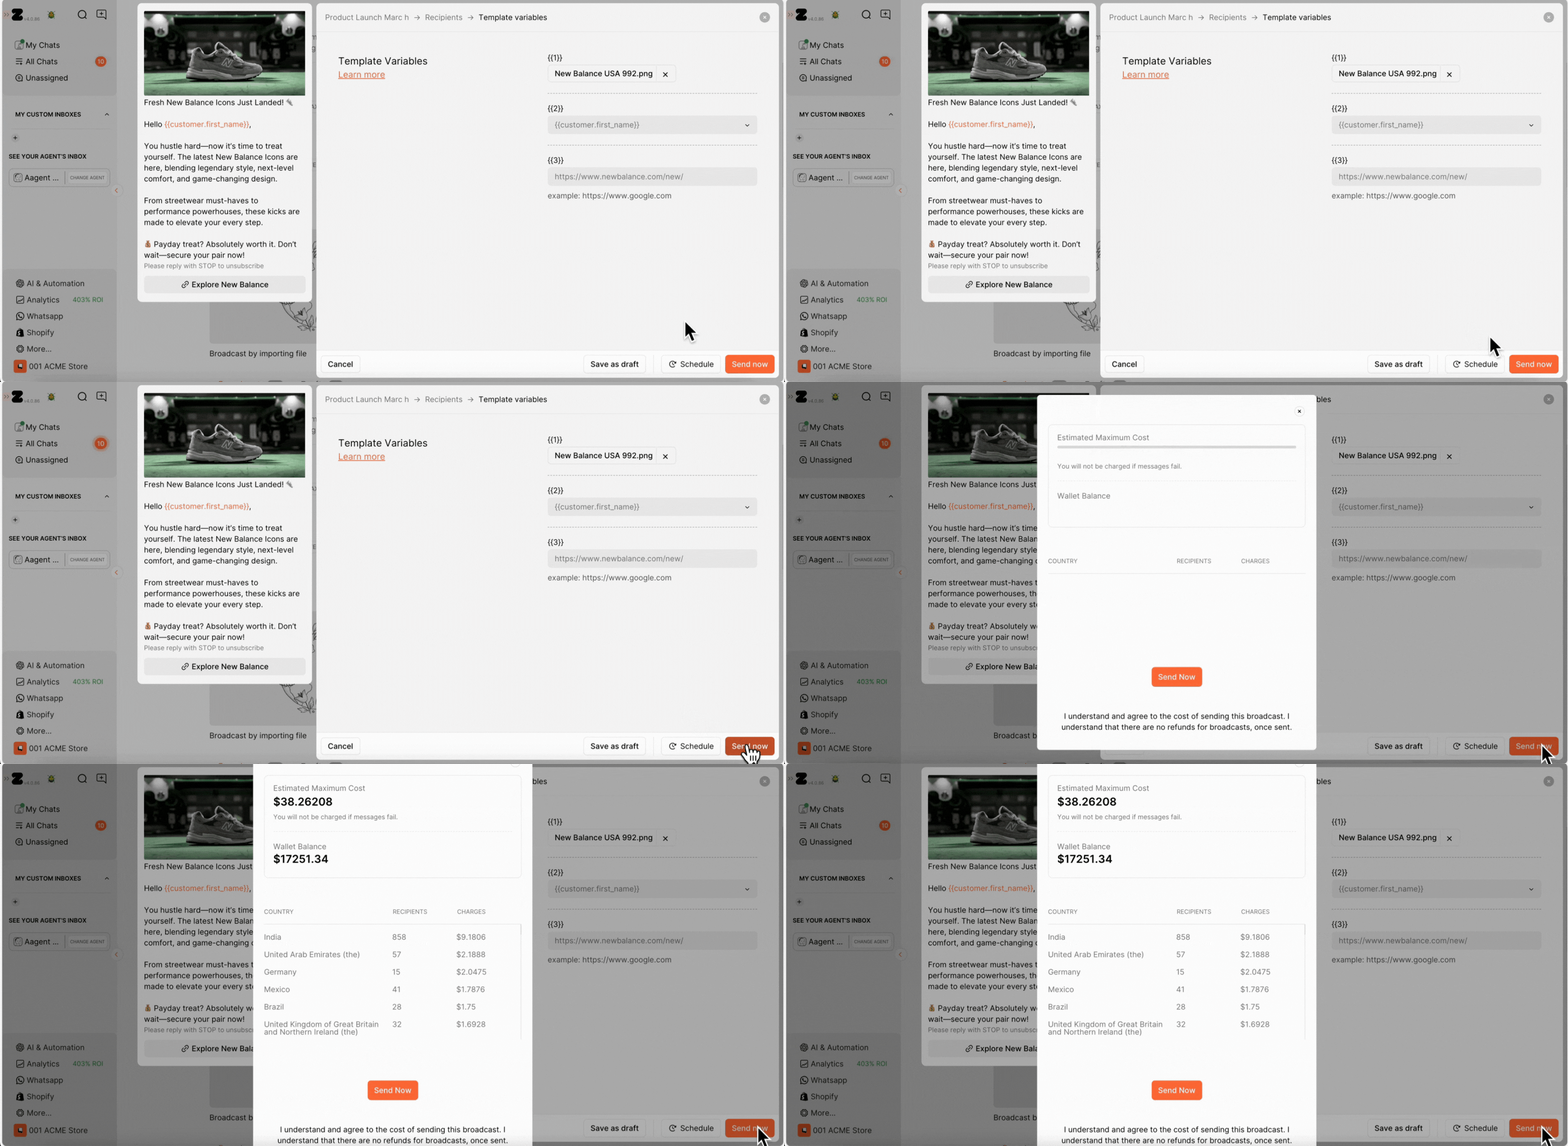
- A cost breakdown pop-up will appear, showing the total cost for your broadcast. Once you confirm, click Send Now from the pop-up to launch your campaign.
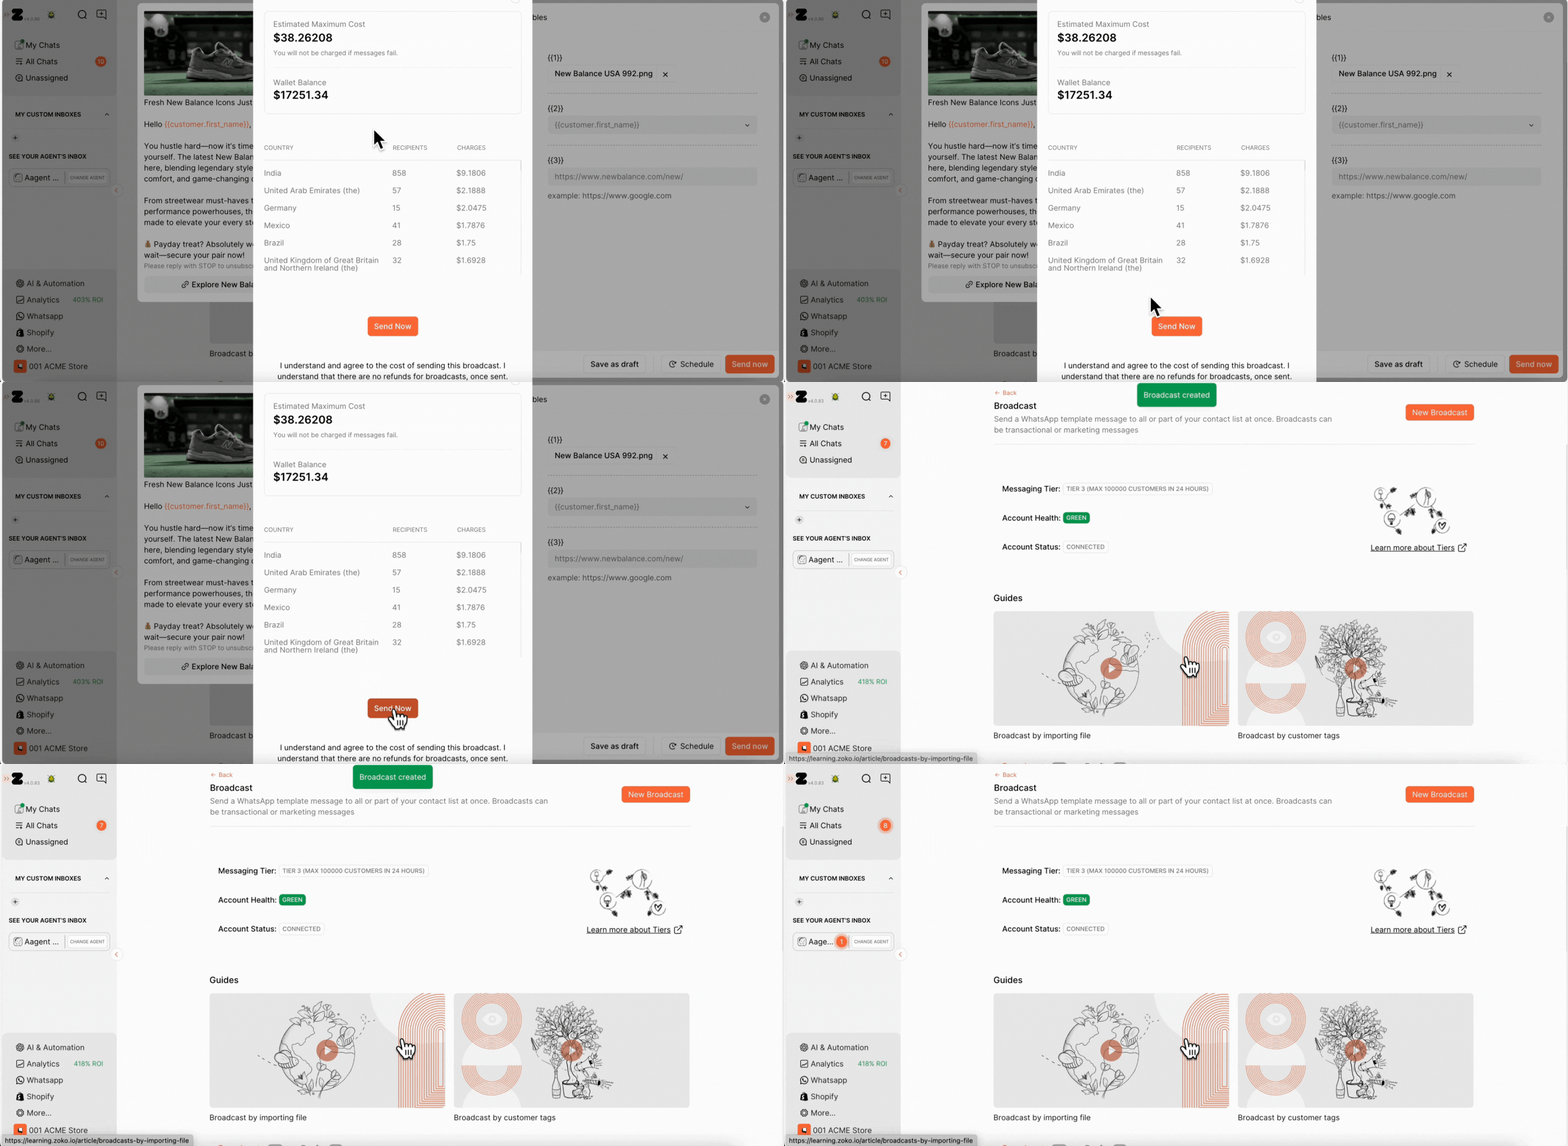
That's it, your broadcast has been successfully created and sent.
Keywords: Broadcast tags, Tag contact, Label, Send message, Bulk messages.


.png)