How to Add Tags in Chats
Learn how to add new tags for your customers
You can add tags to your customers, which help categorize conversations, making it easier to assign them to the right teams promptly. These tags act as labels applied during or after chat sessions, aiding in effective organization of customer communication. They enable you to create segments, send broadcasts, and automate chat assignments based on specific tags, streamlining communication for various benefits.
Adding Tags to Individual Chats:
1. Select the chat to which you want to add a tag. Look for the Tags icon and click on it.
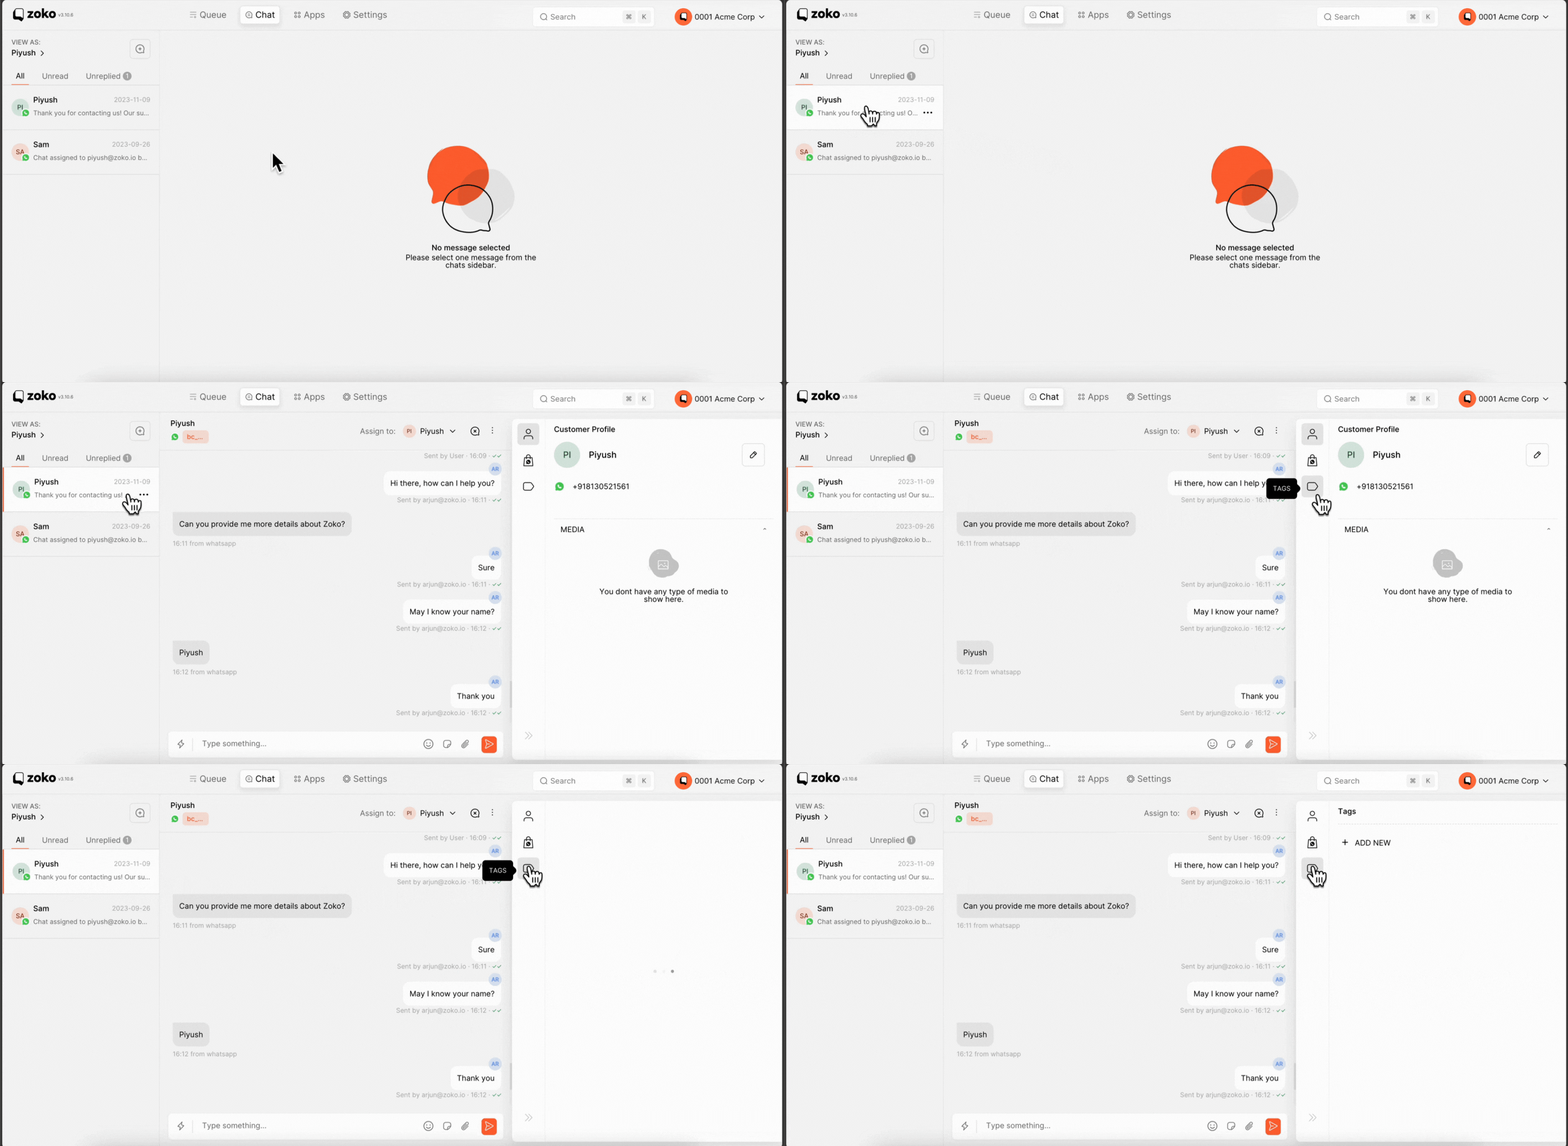
2. Click Add New.
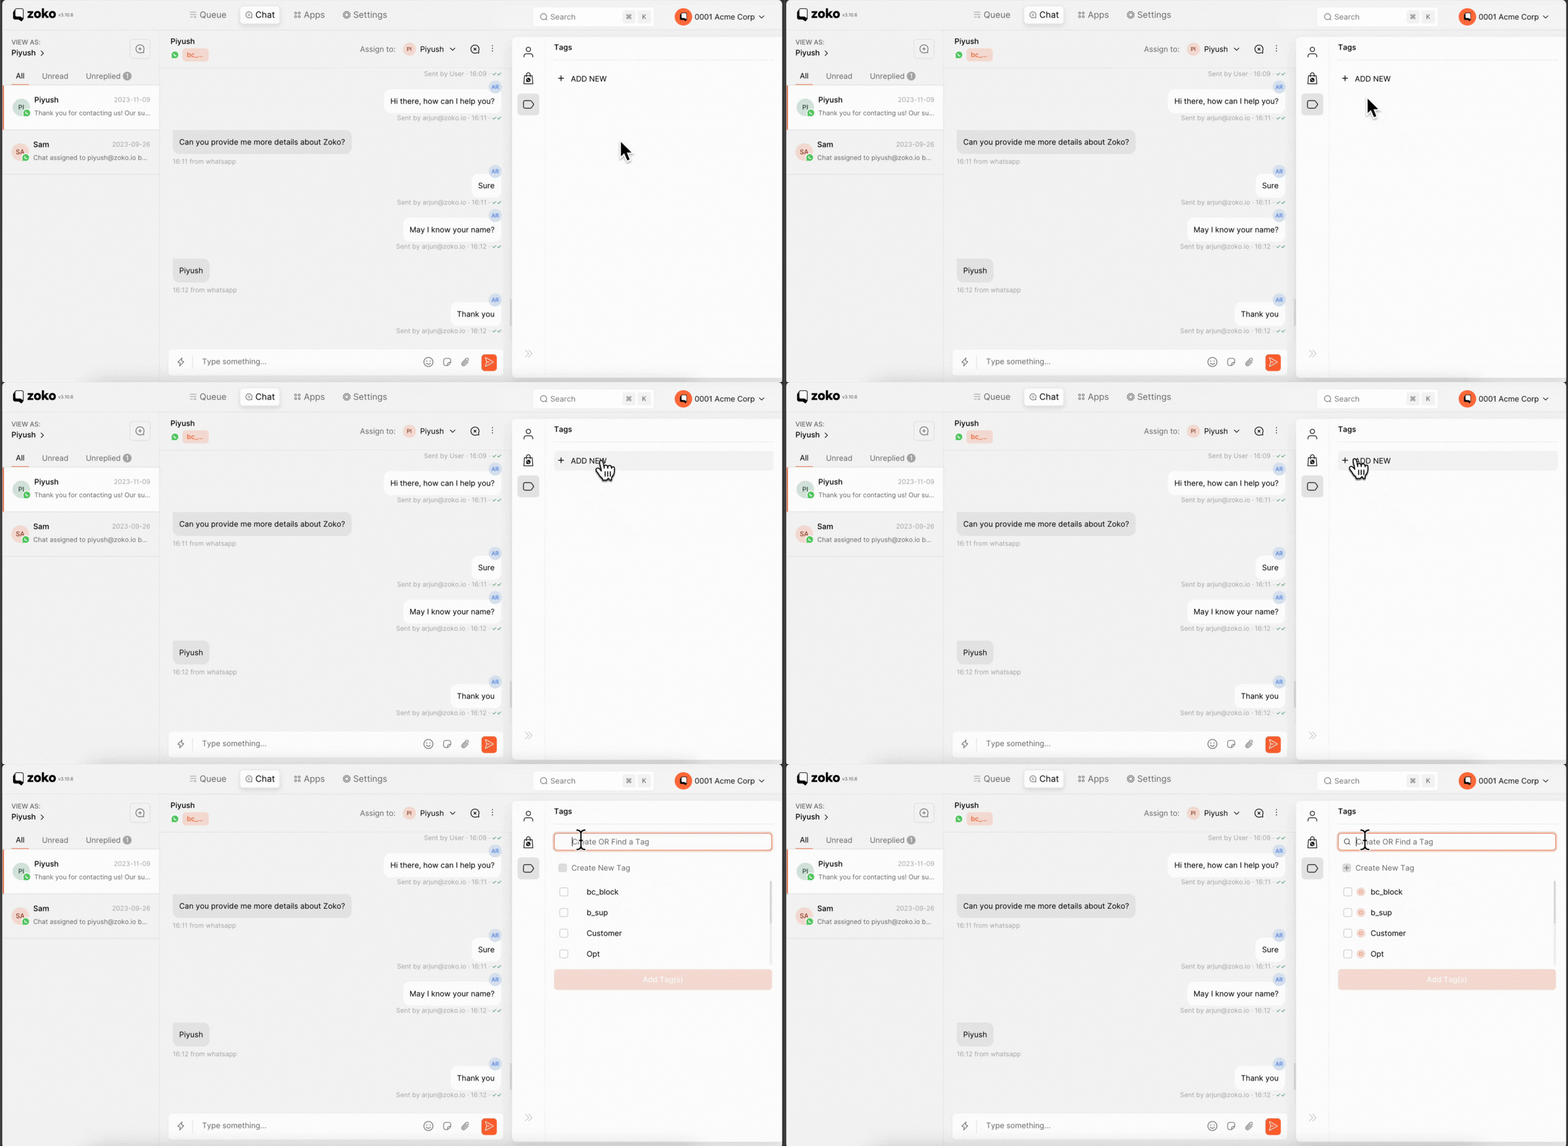
3. Click Create New Tag to add a new tag or choose an existing one from the list. In our case, we created a new tag called Premium Customer.
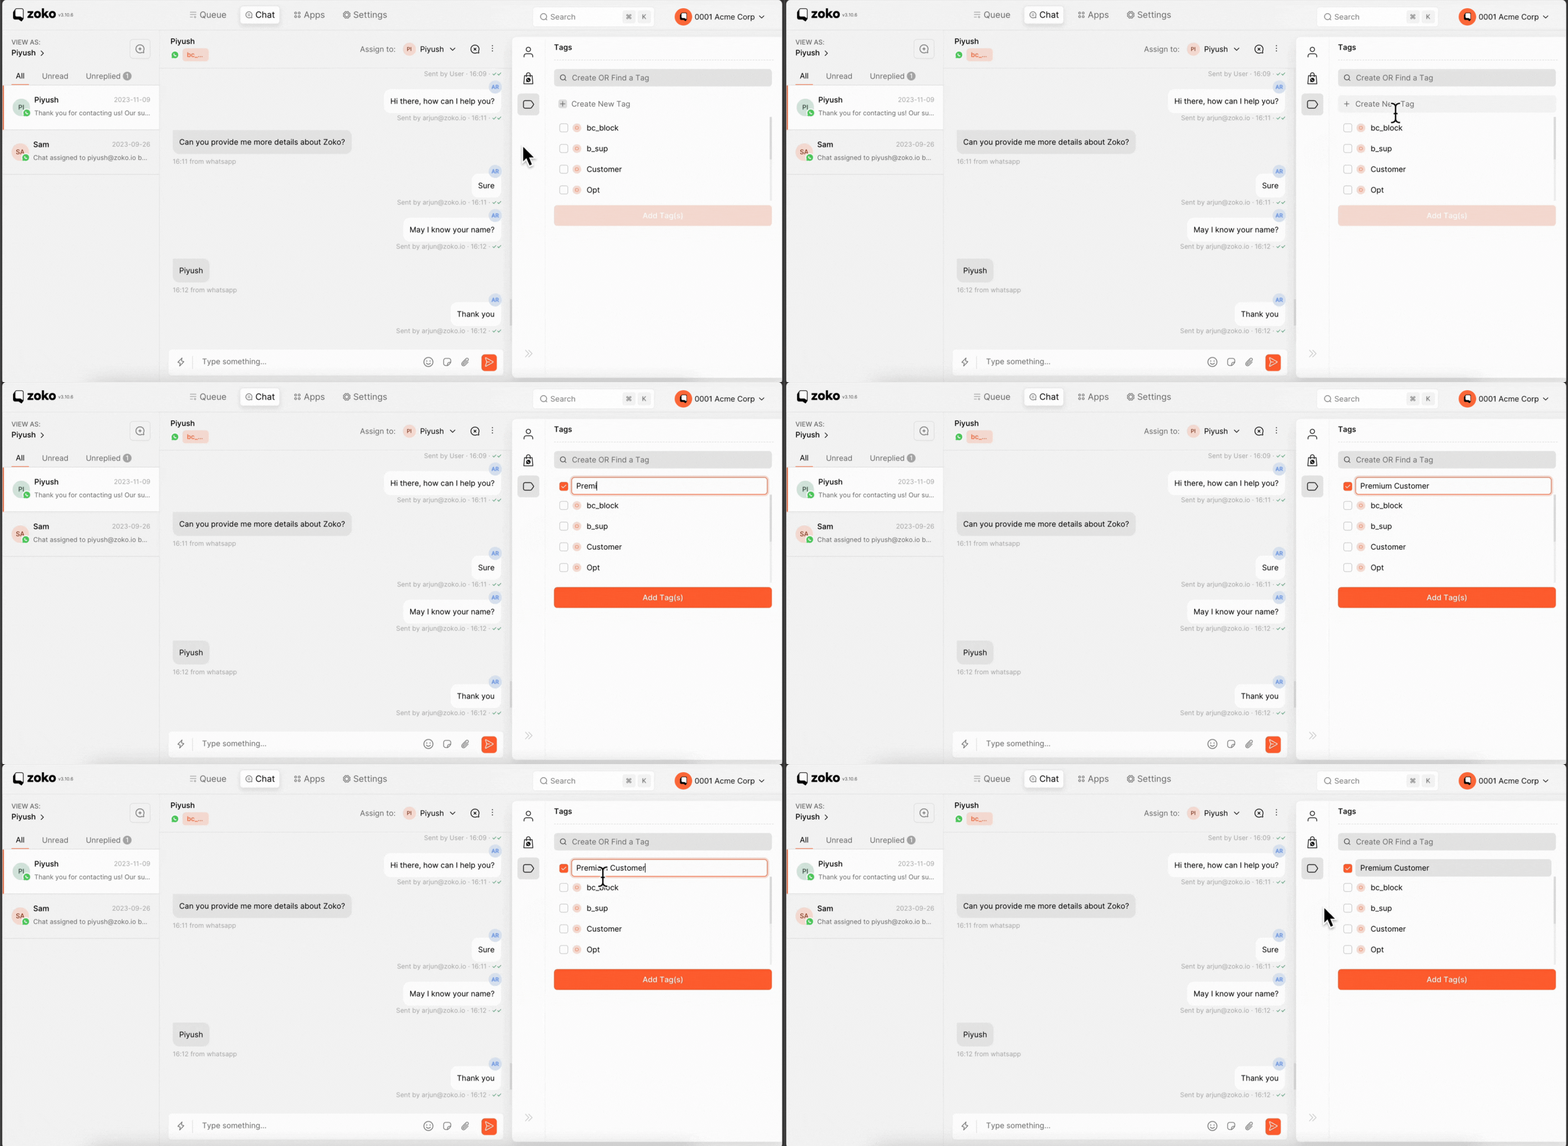
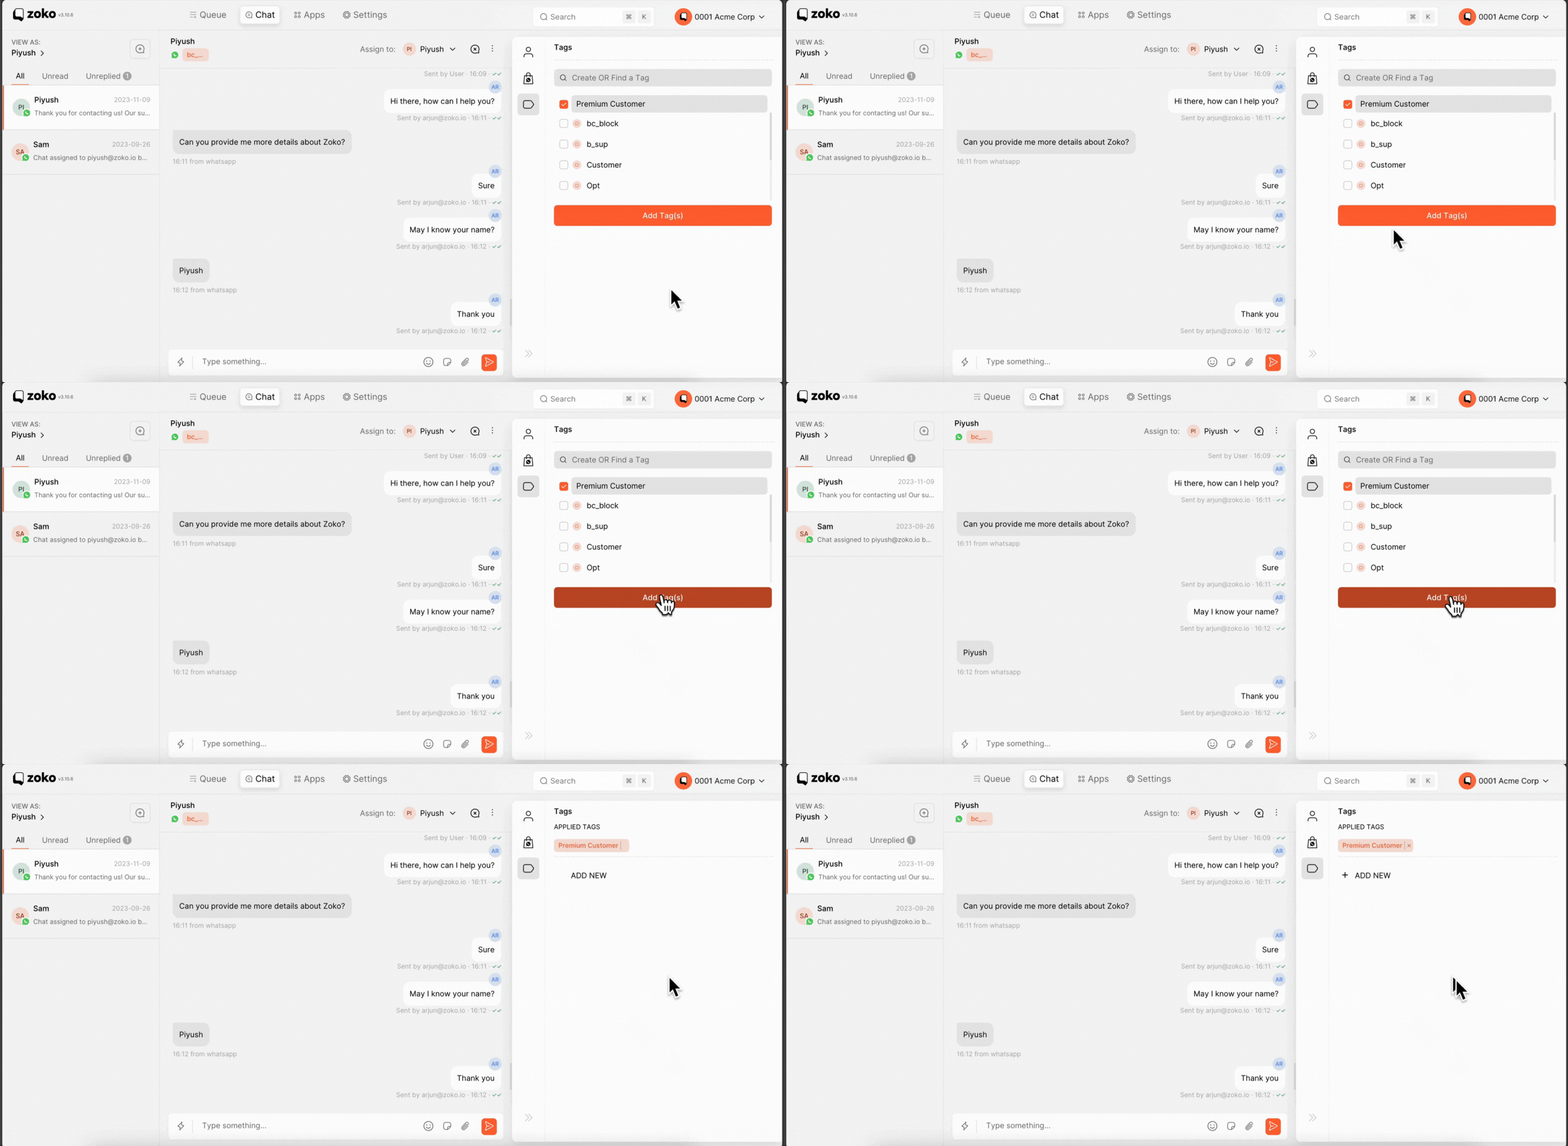
4. Click Add Tag(s) to add them to the chat.
Adding Tags in Bulk:
1. Go to Settings.
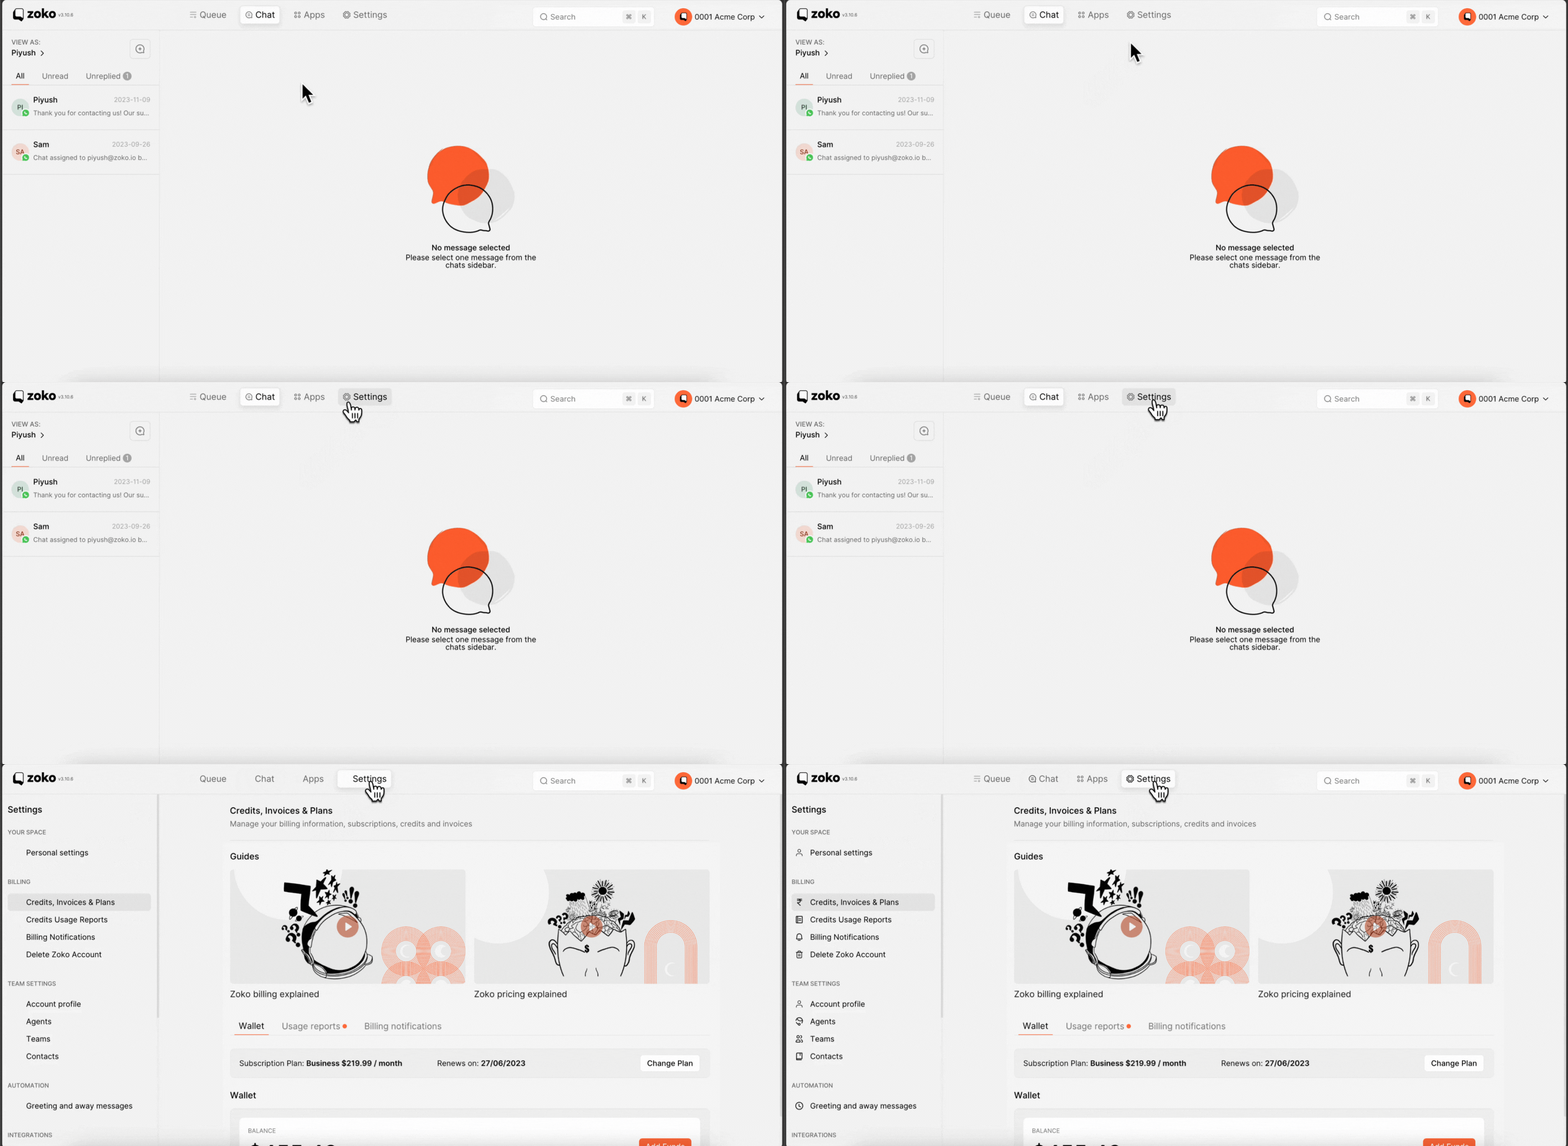
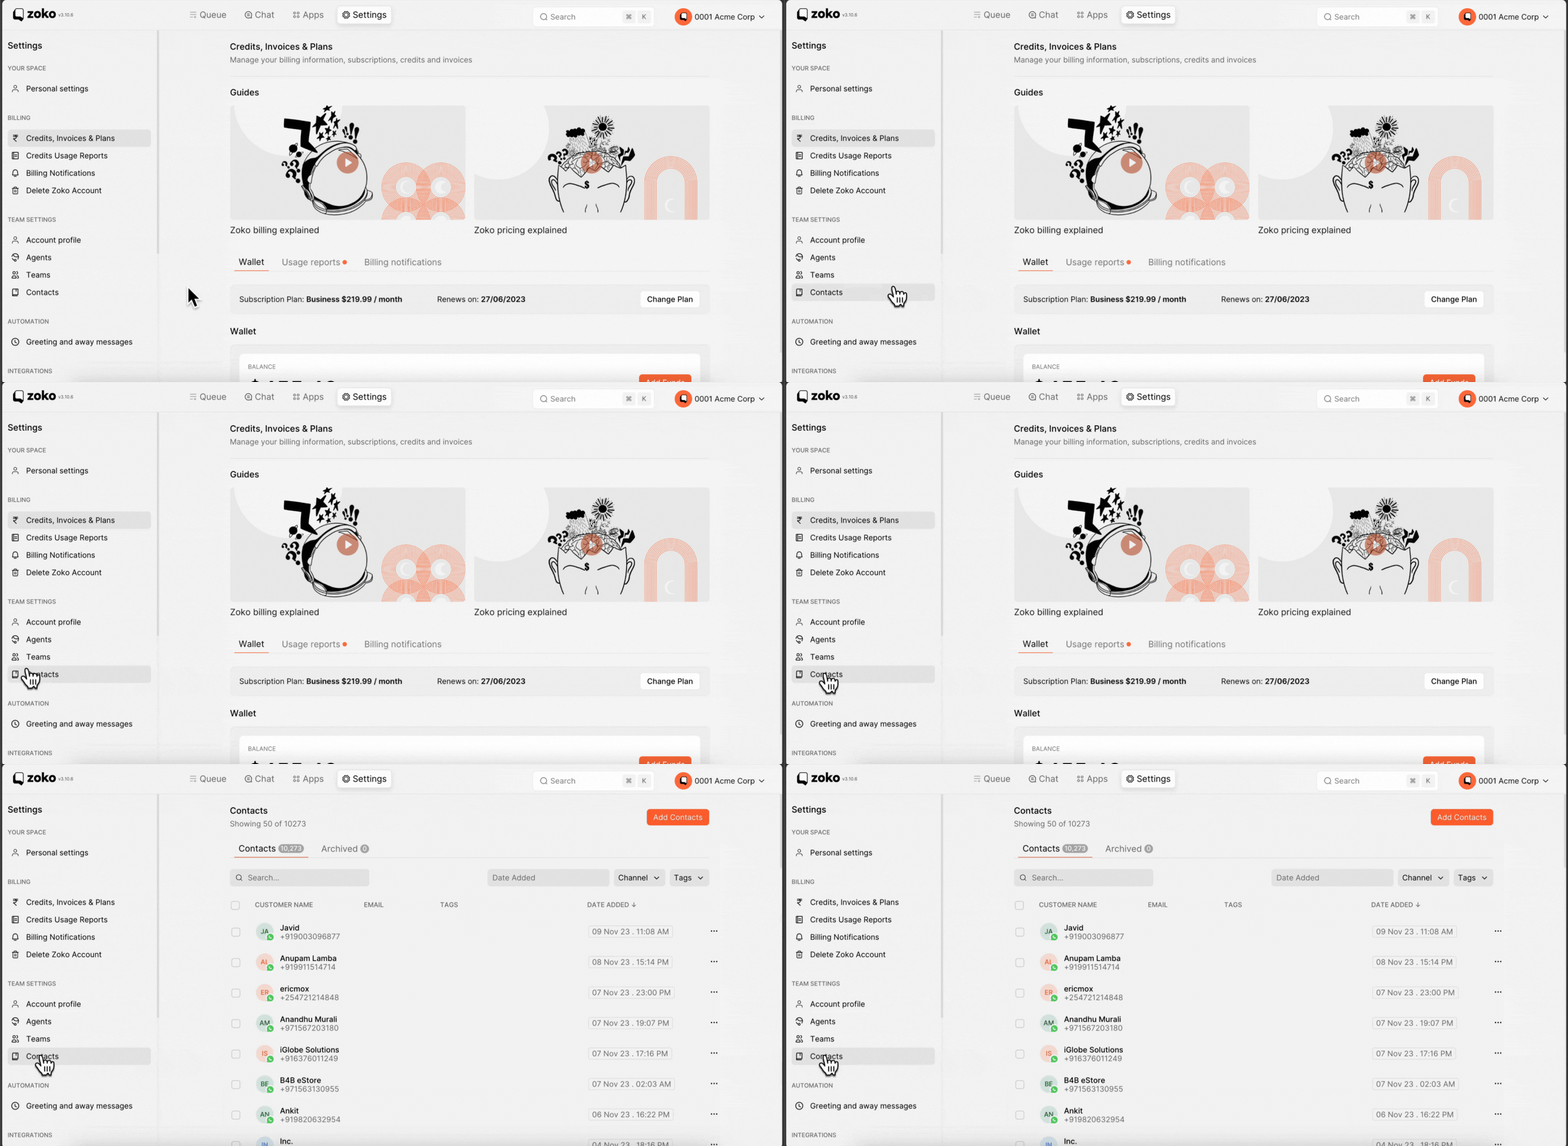
2. Click on Contacts.
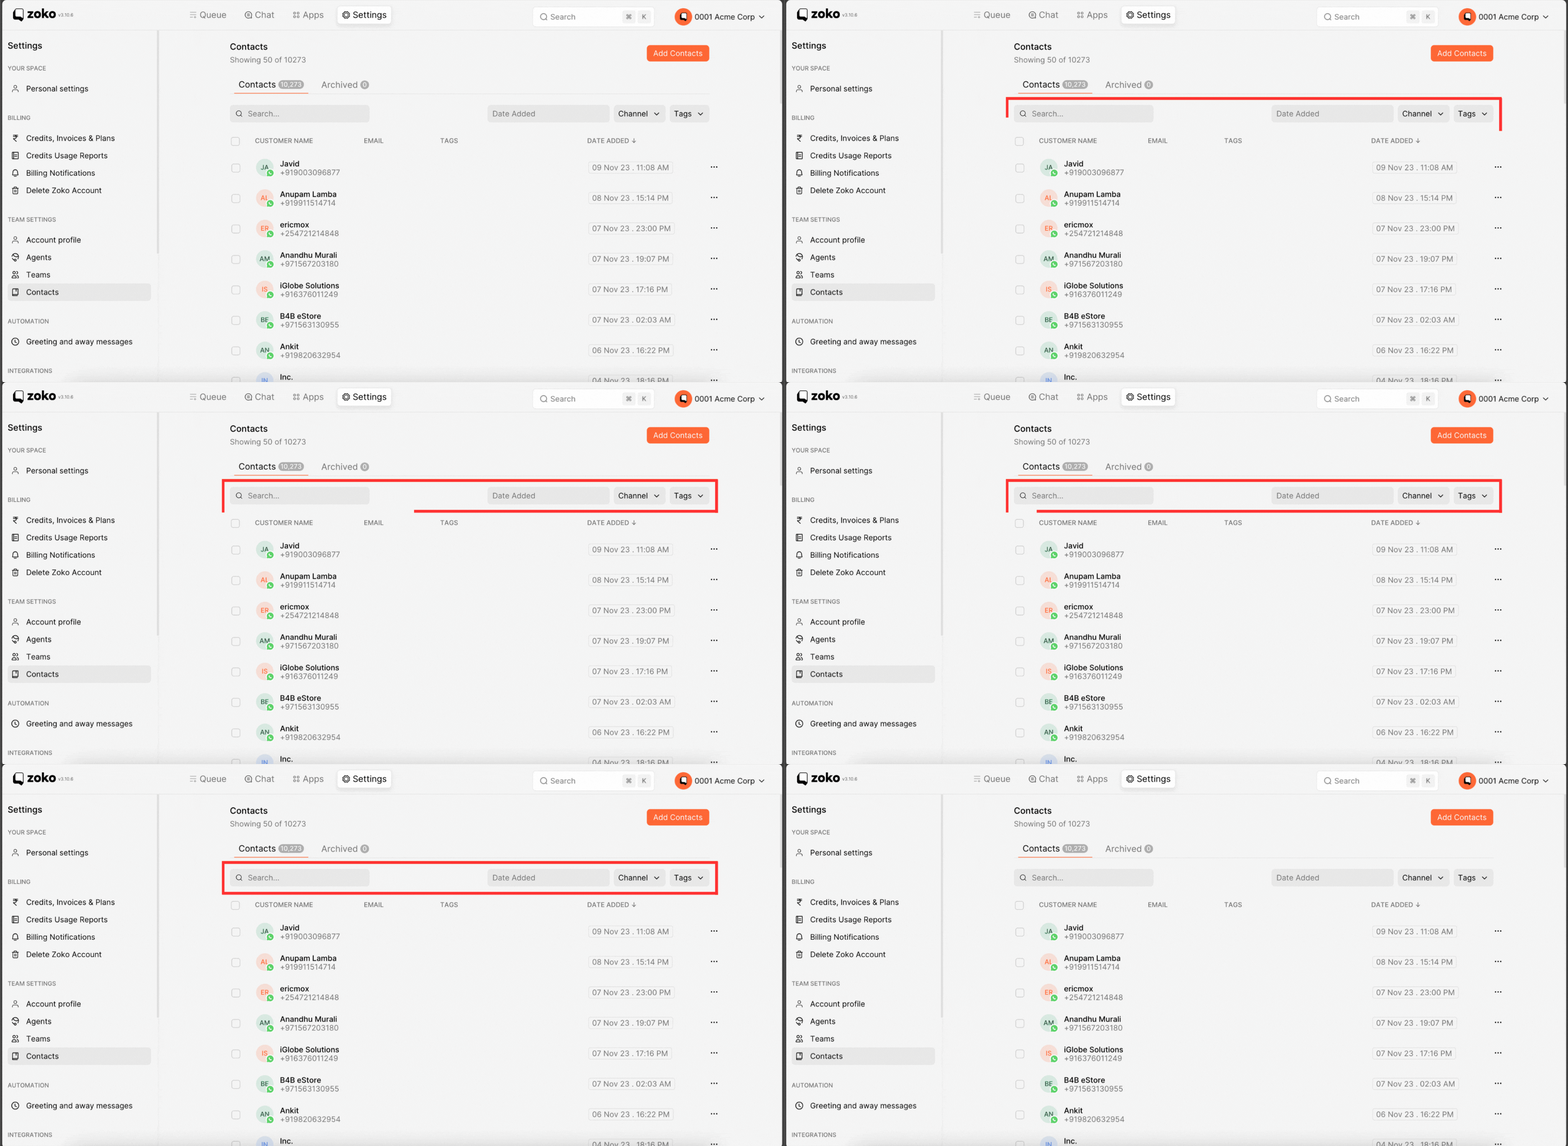
3. You can utilize filters for date, channel, or tags, and you also have the option to search by number or name for adding tags.
4. (i) To apply tag to specific contacts, tick the checkboxes next to those contacts. Click on Add Tag at the bottom and select an existing tag or create a new one.
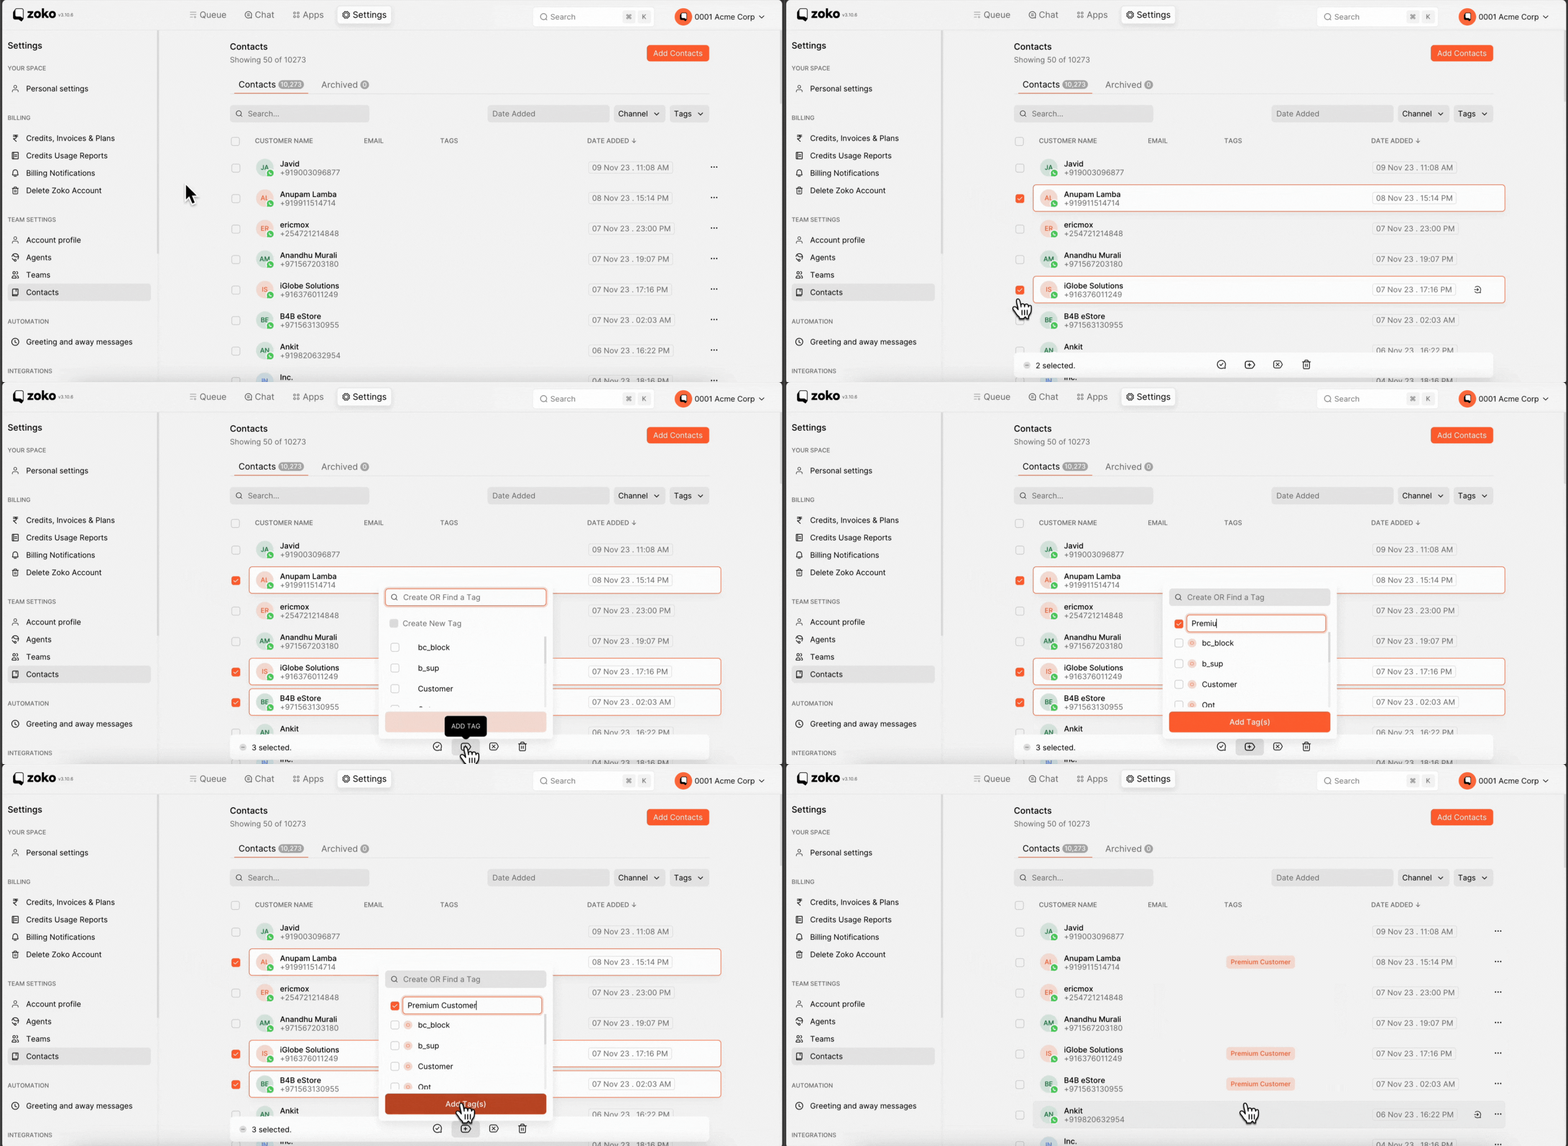
(ii) To apply the tag to all contacts, tick the Select All option. Then, click on Add Tag at the bottom and choose whether to use an existing tag or create a new one.
Important Note: Adding bulk tags may take up to 10 minutes to sync, and the time required depends on the number of contacts. Larger contact lists may take more time to sync. Please refrain from adding or removing new tags until the ongoing tag operation is complete.

Adding Tags from an Excel File:
When adding new contacts in bulk, you have the option to simultaneously add tags.
1. Download the .xlsx file, which you can find under Multiple from the Add Contact option.
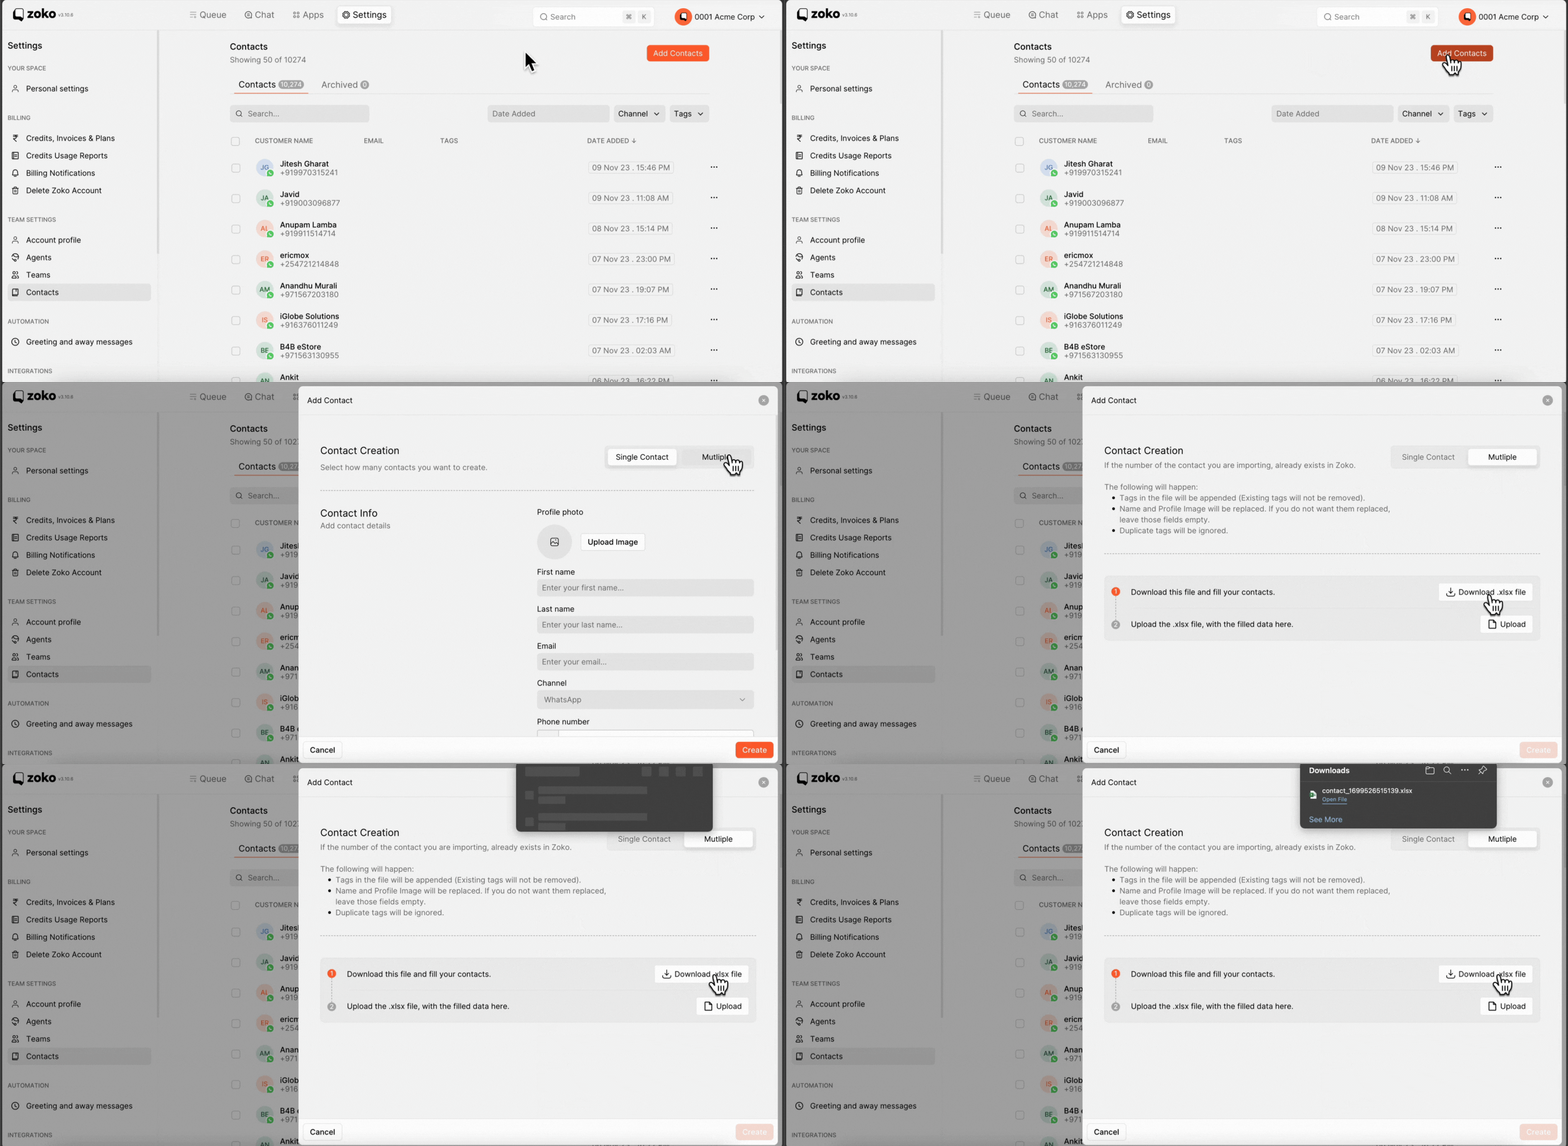
2. In your Excel file, add tags to the new contacts under column "G" and upload it on the Dashboard.

Keywords: Add tag, Bulk tag, Tags, New tag.


.png)