How to Set-up Priority Rules
Learn how to set-up priority rules on the dashboard.
You can create the Priority rule in the Zoko dashboard that allows you to automatically assign the chat to your agent and team members to handle the repetitive tasks to save time.
To do this:
1. Go to Apps on the top bar.
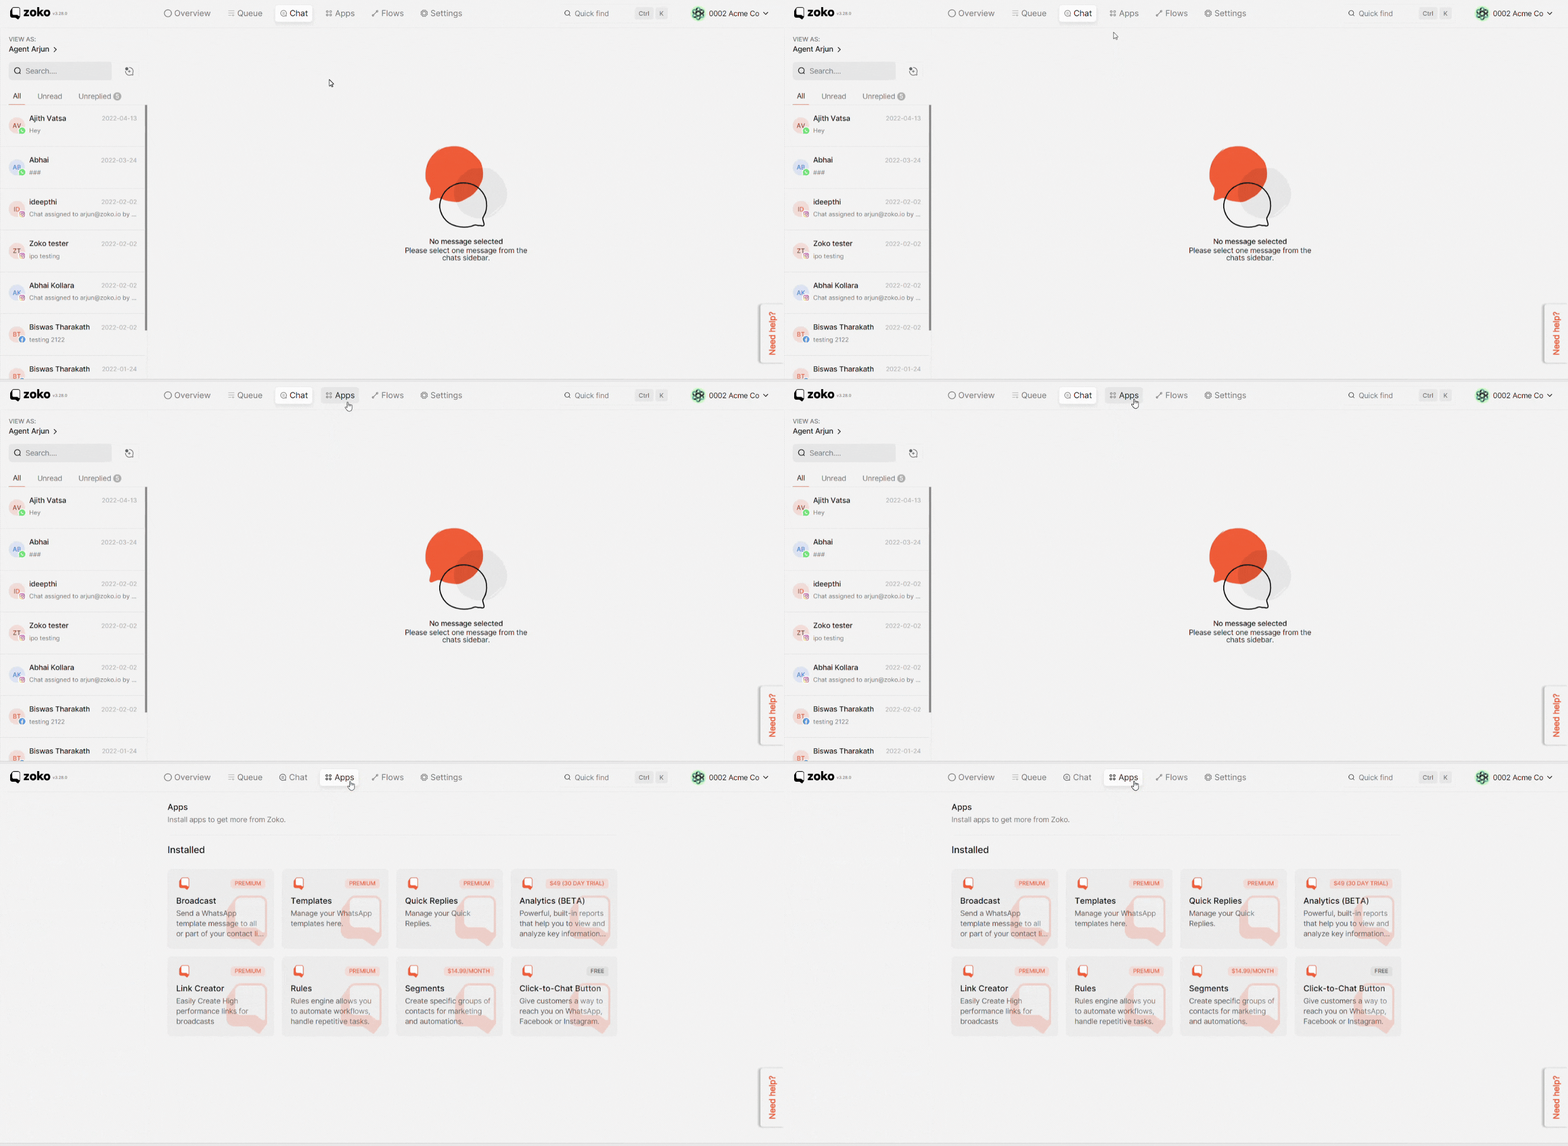
2. Select Rules.
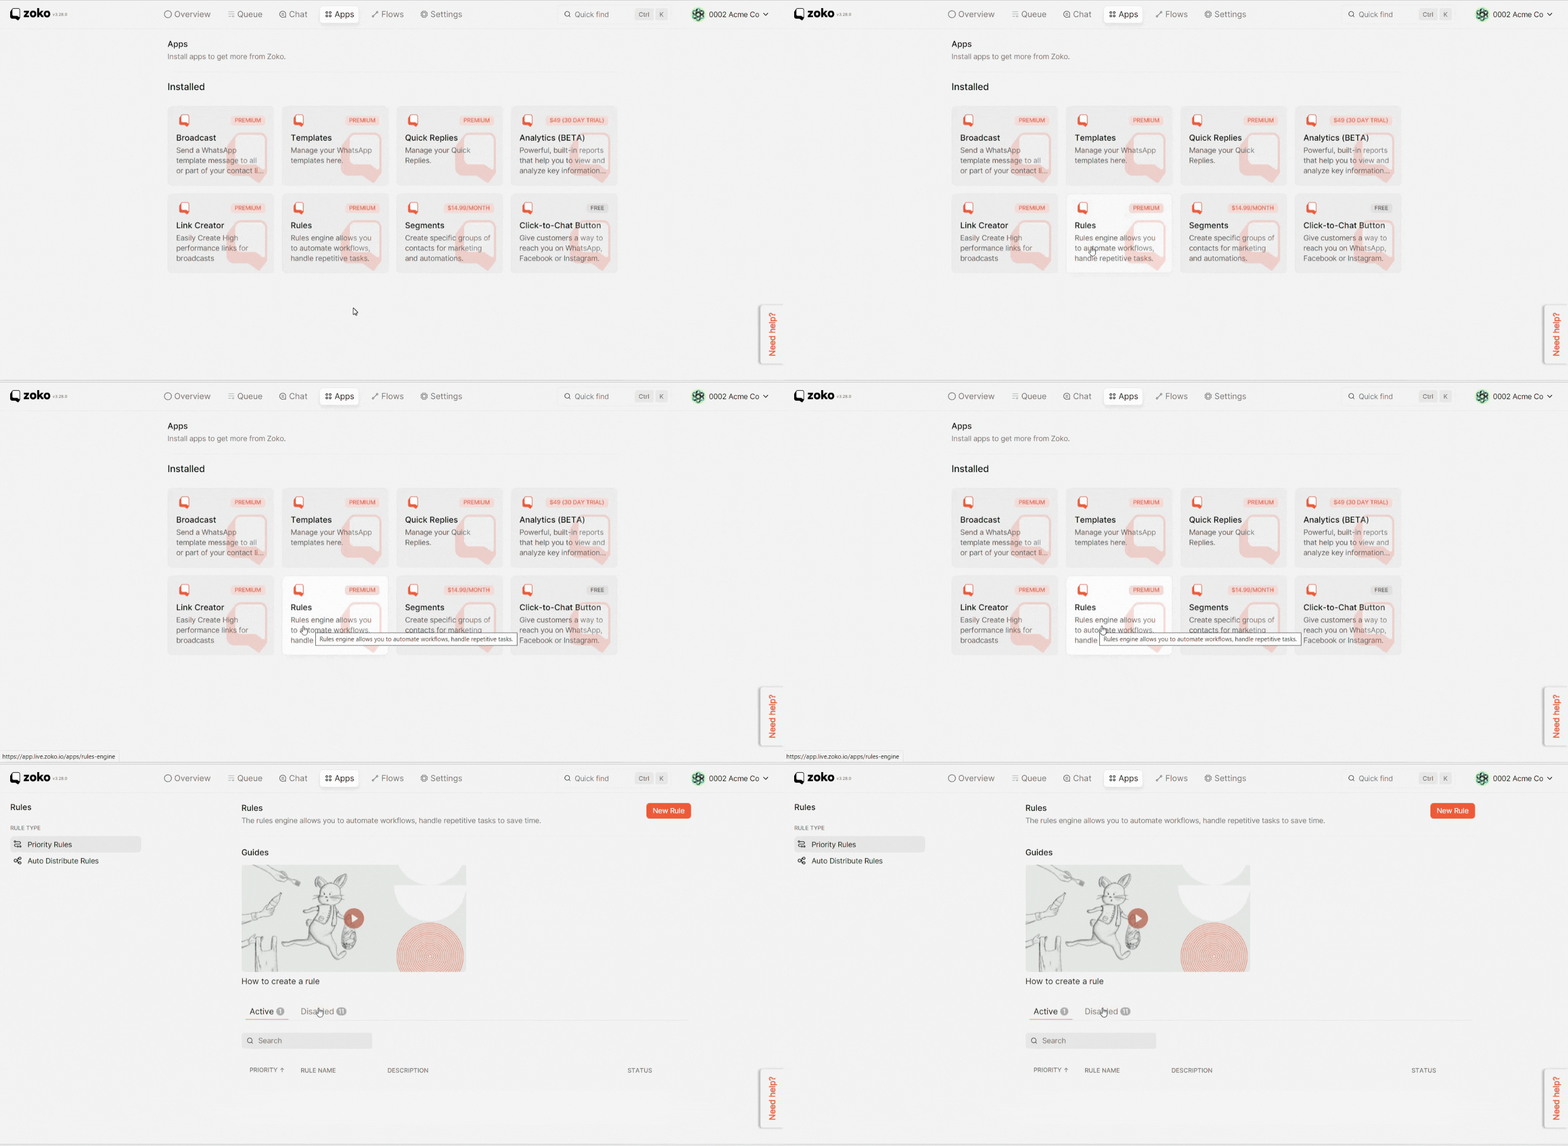
3. Click on New Rule.
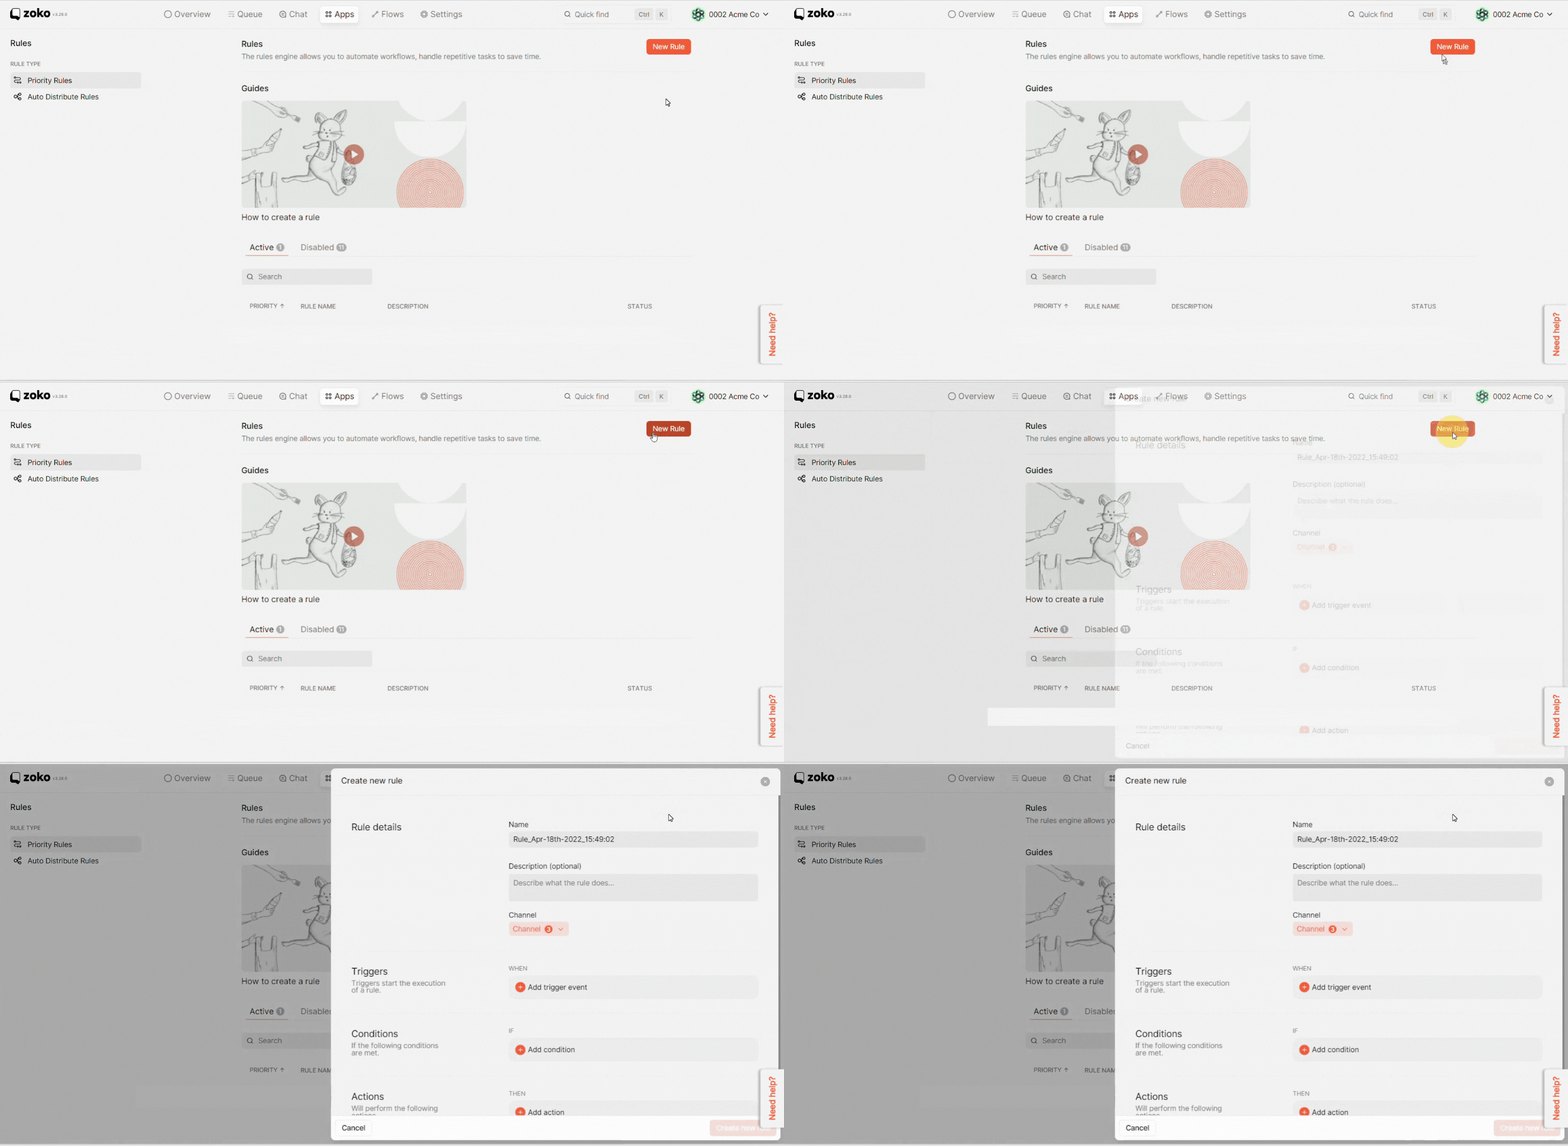
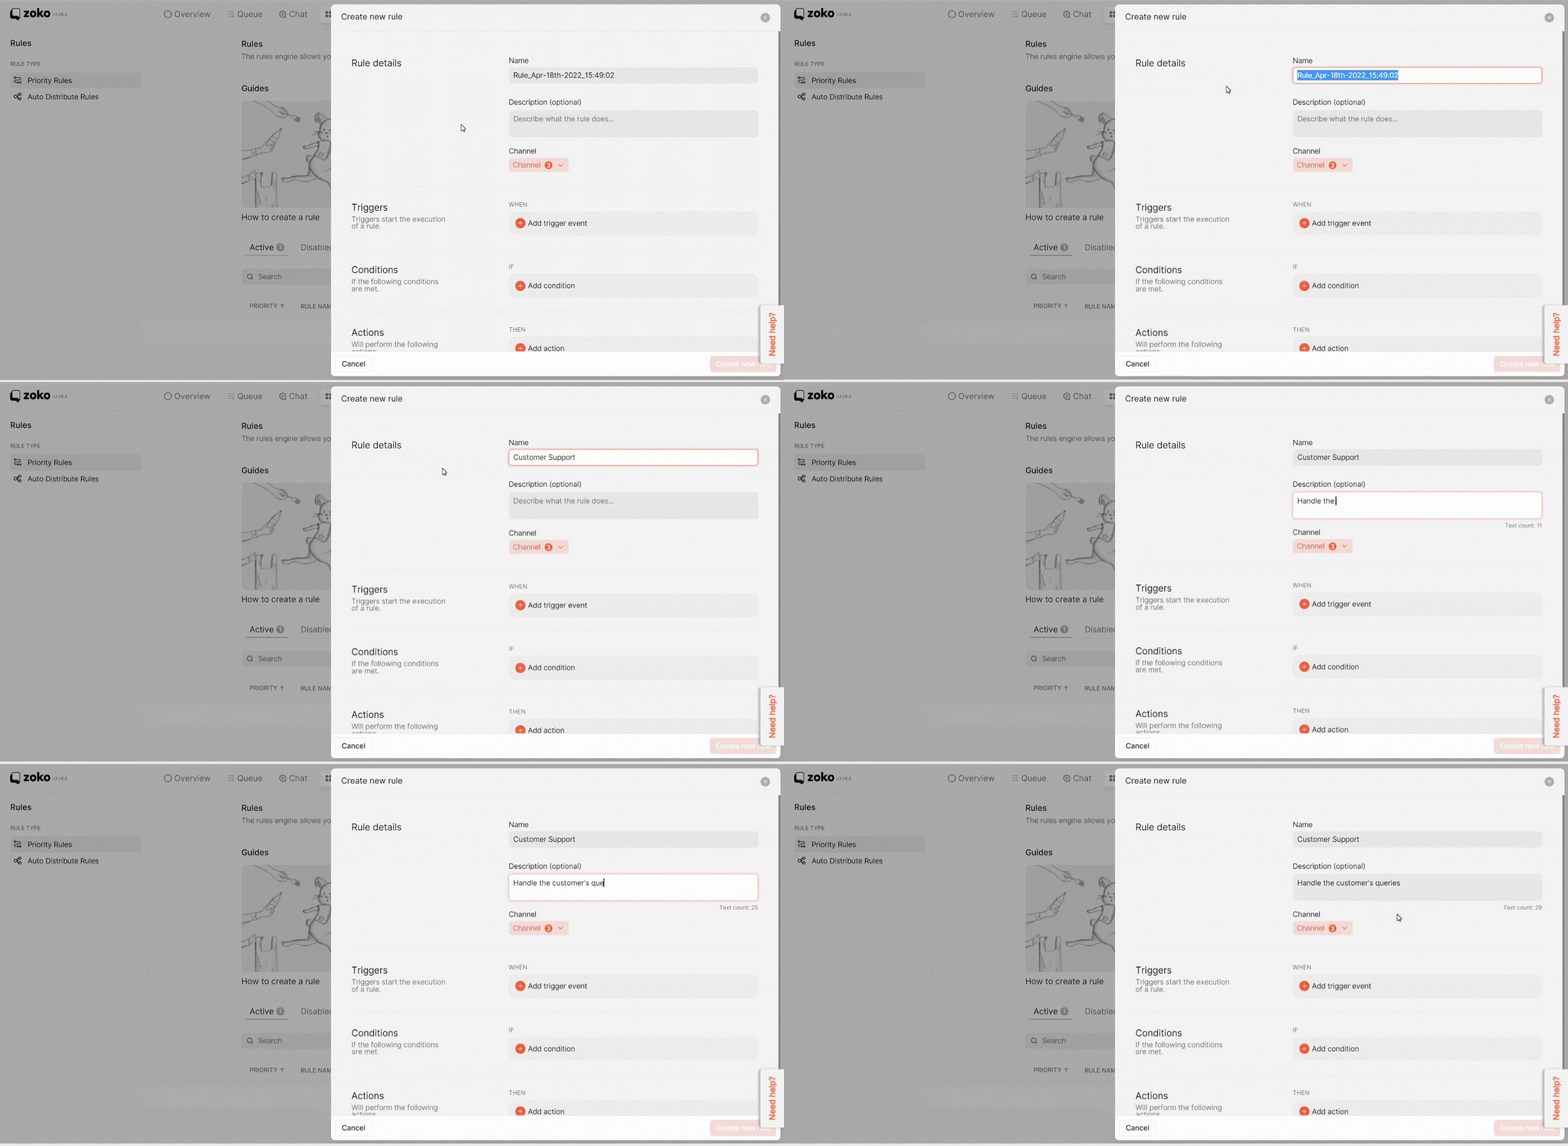
4. Fill in the Rule details and description. In our case, we add the Rule name as “Customer Support” and the description as “Handle the customer’s queries”.
5. Select the Channel by clicking on the dropdown menu. In our case, we choose WhatsApp, Facebook, and Instagram.
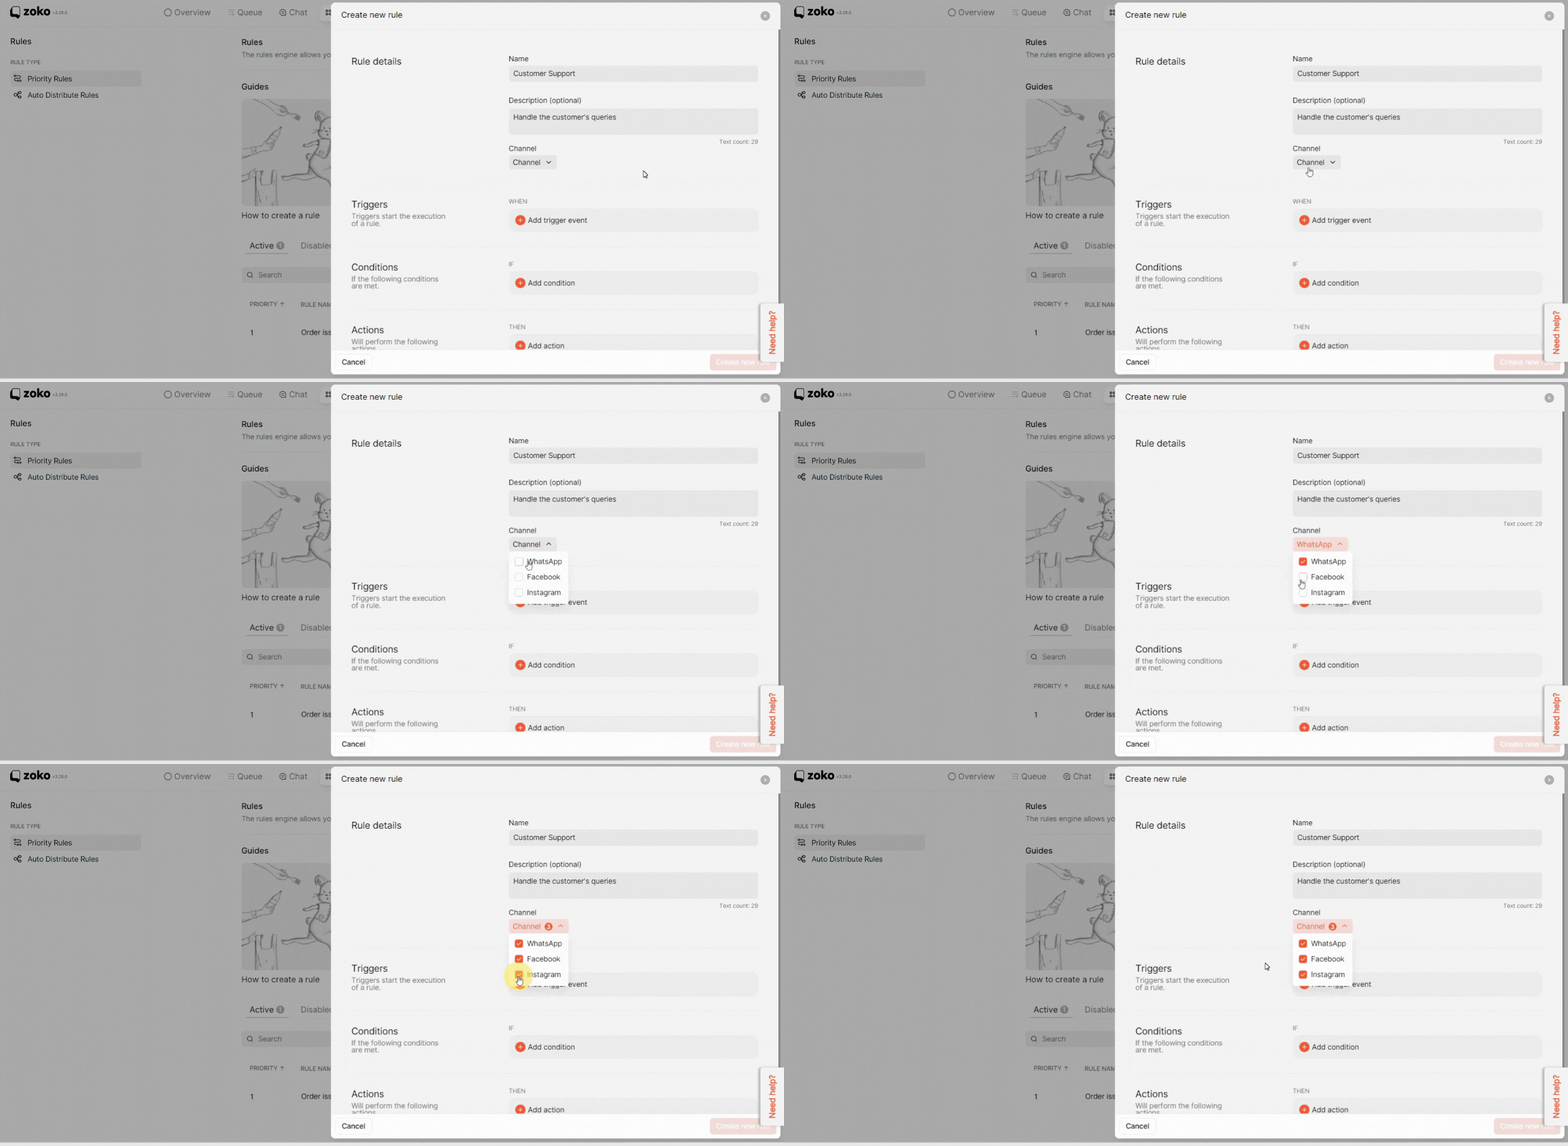
6. Next, click on Add trigger event to select the message options. In our example, we selected "Incoming message".
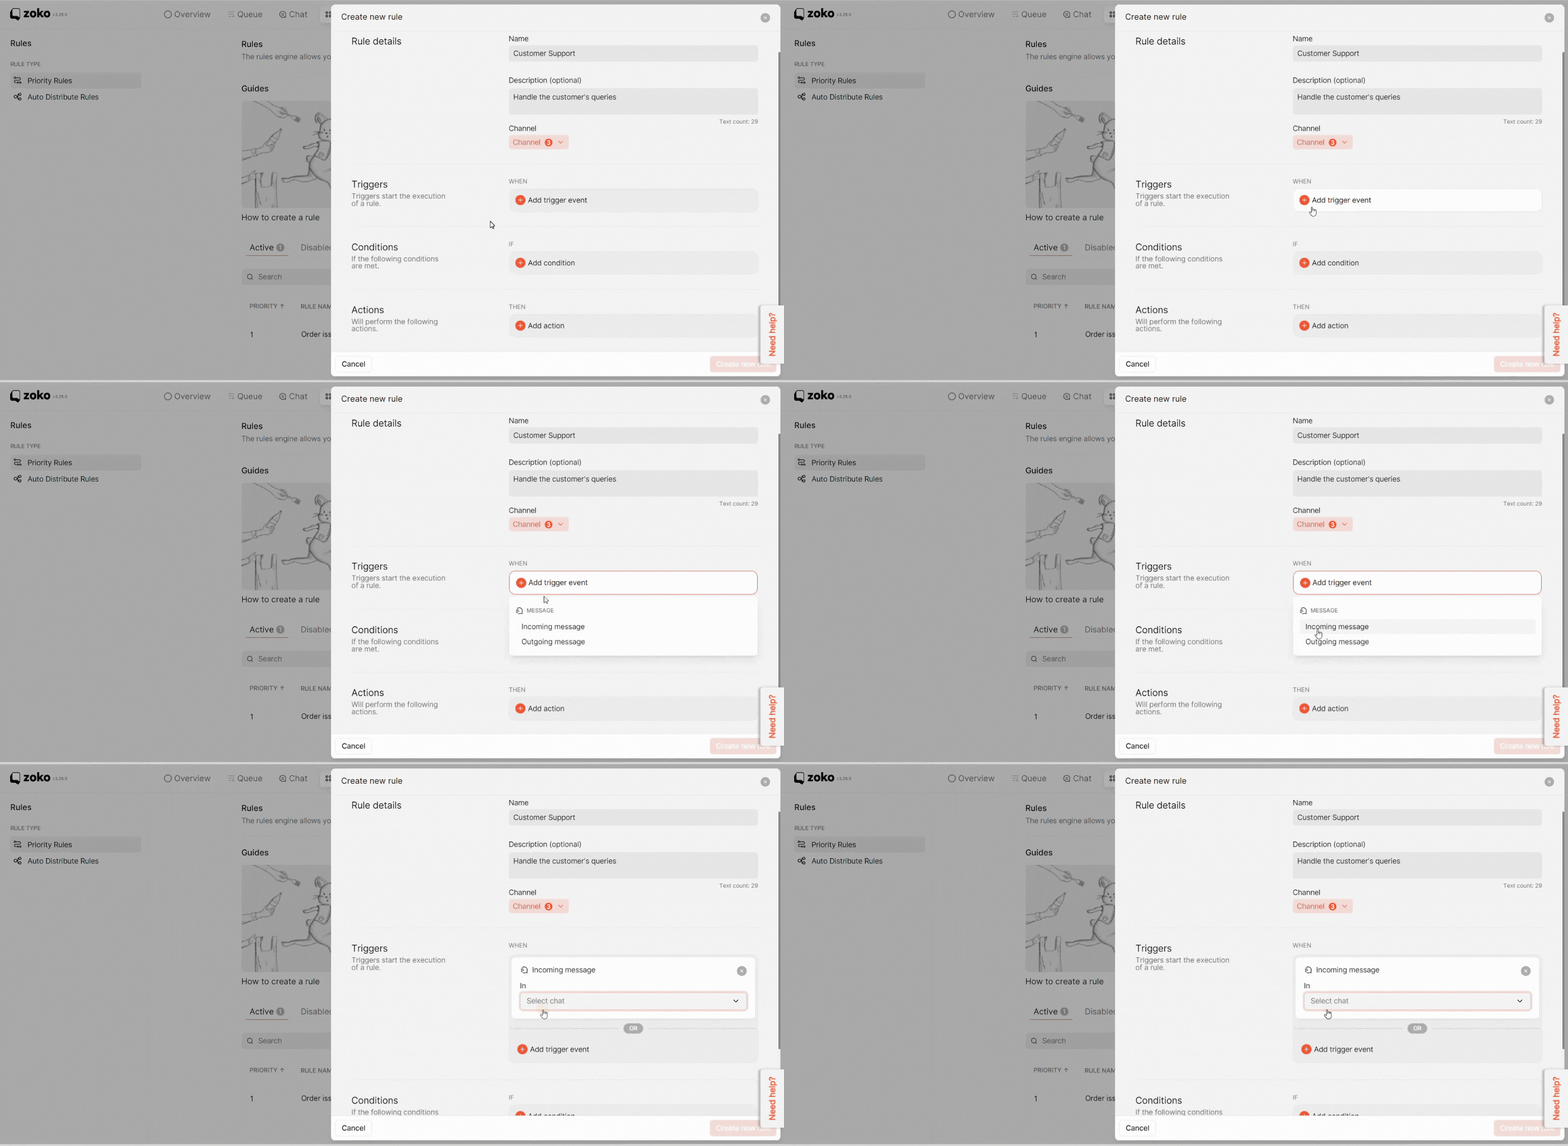
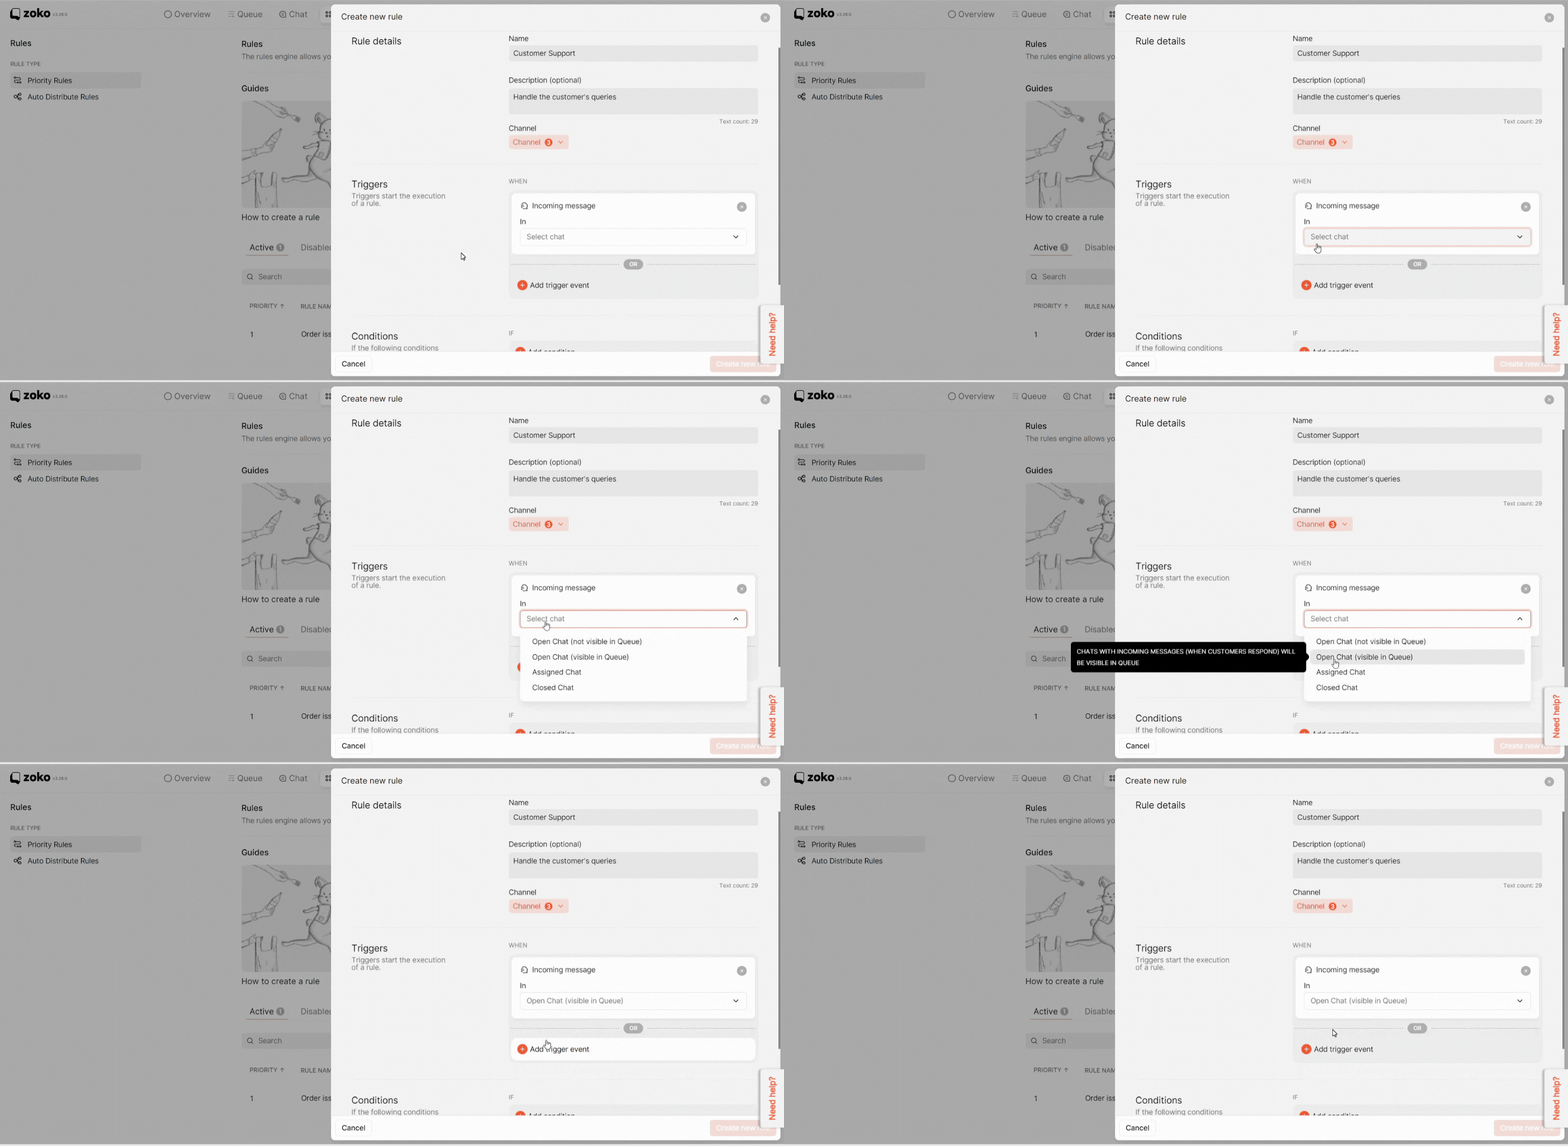
Then, select the incoming message visible options. In our case, we selected "Open chat (visible in queue)".
7. Click on Add condition to select the message conditions that are met. In our case, we select "Text in message".
Note: You can even select the different message condition or customer condition.)
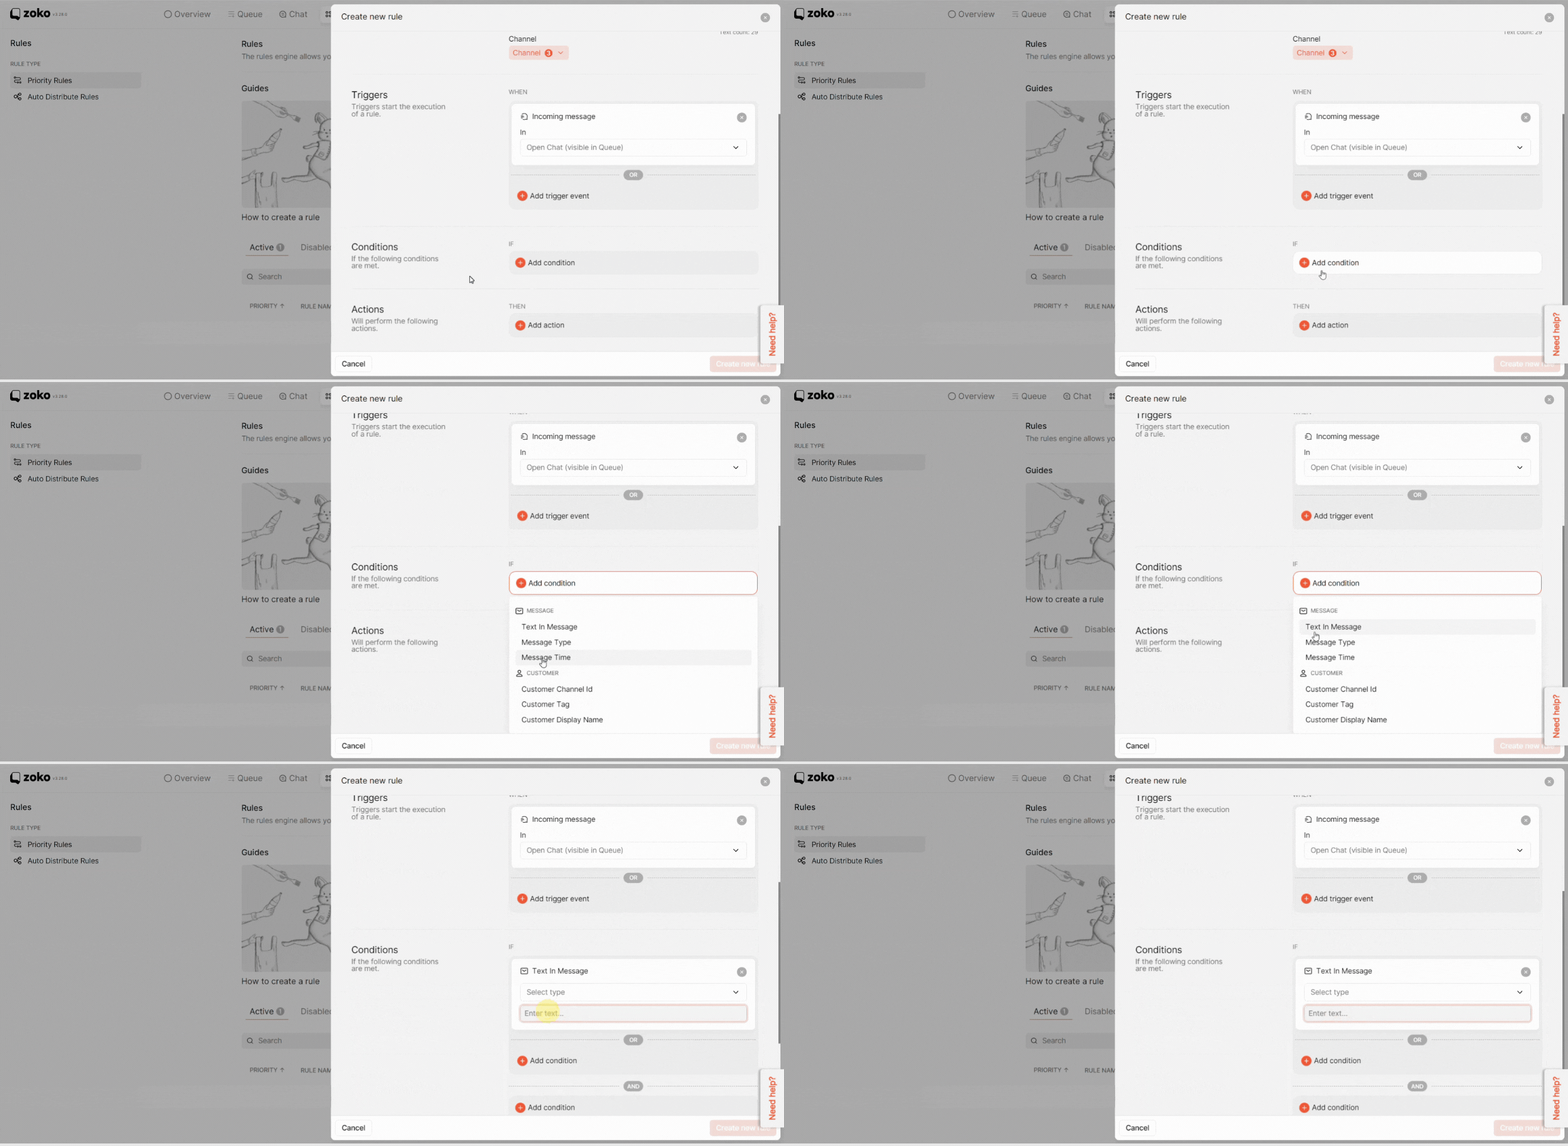
Select the message type from the dropdown menu. (Here, we selected "Equal to (case insensitive)").
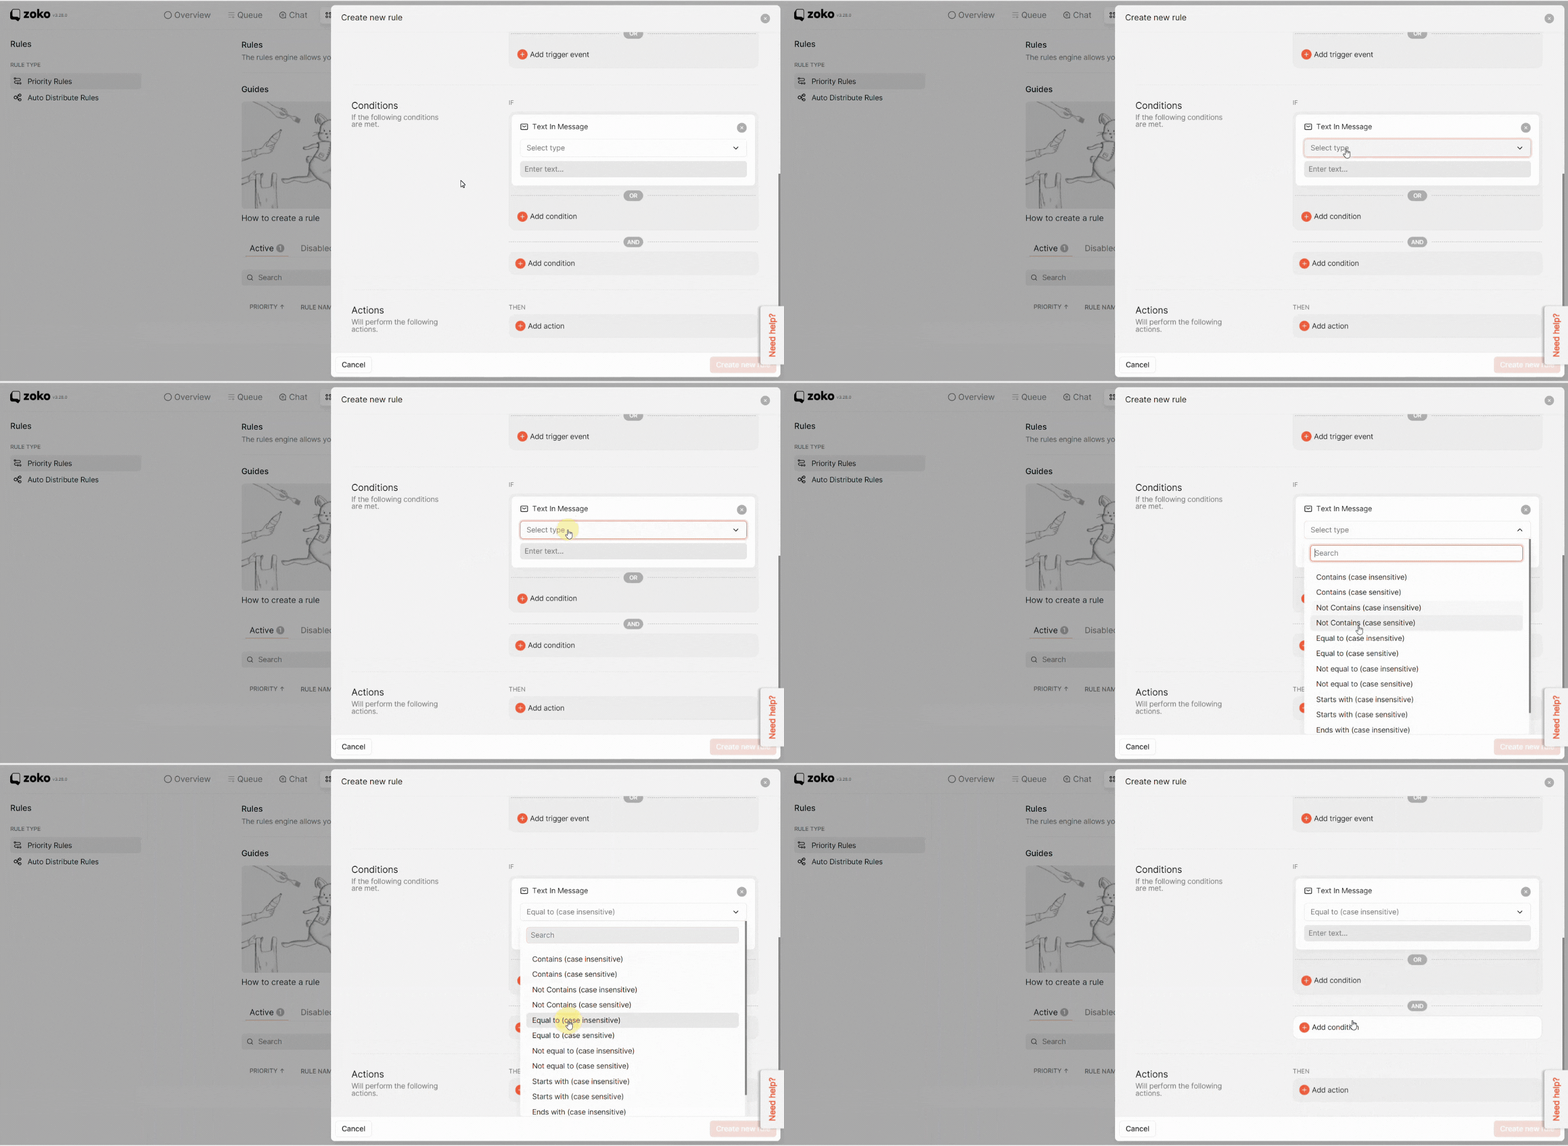
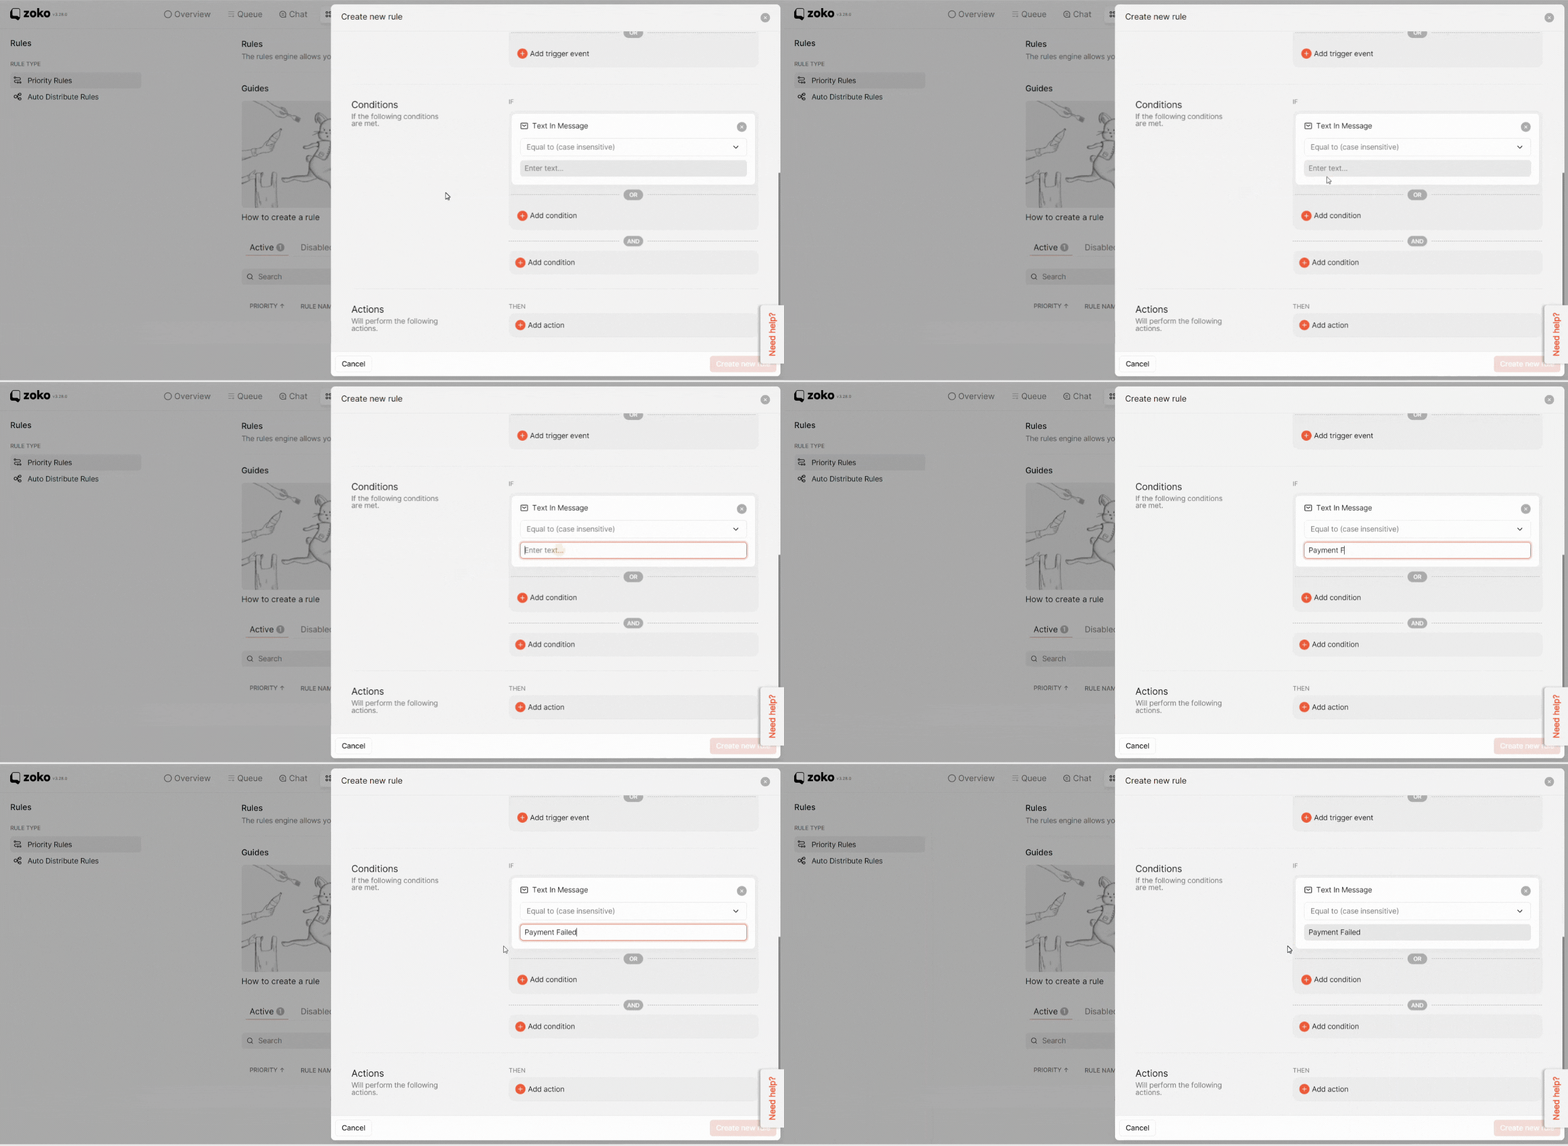
Next, type the message conditions in the text box. In our case, we add “Payment Failed”.
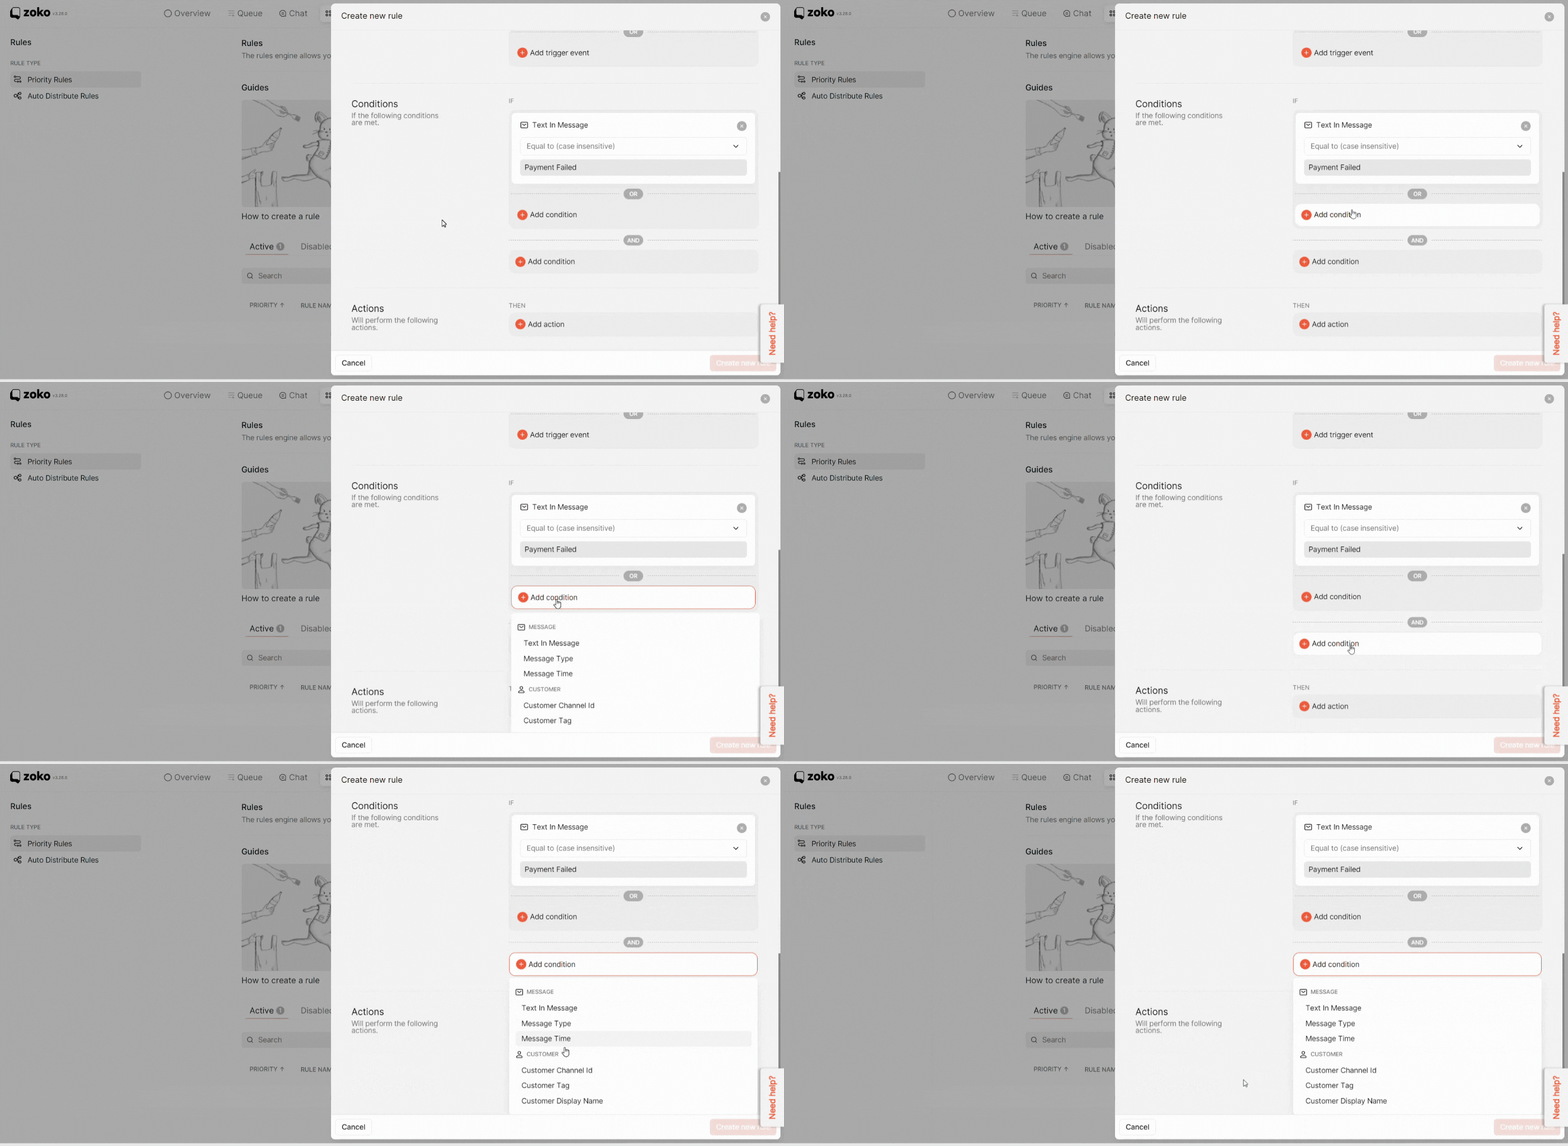
You can also add more condition under “OR” and “AND” by clicking on Add Condition, then select the message conditions, message type and, then write the message condition in the text box.
8. Click on Add action, then click on Assign Chat.
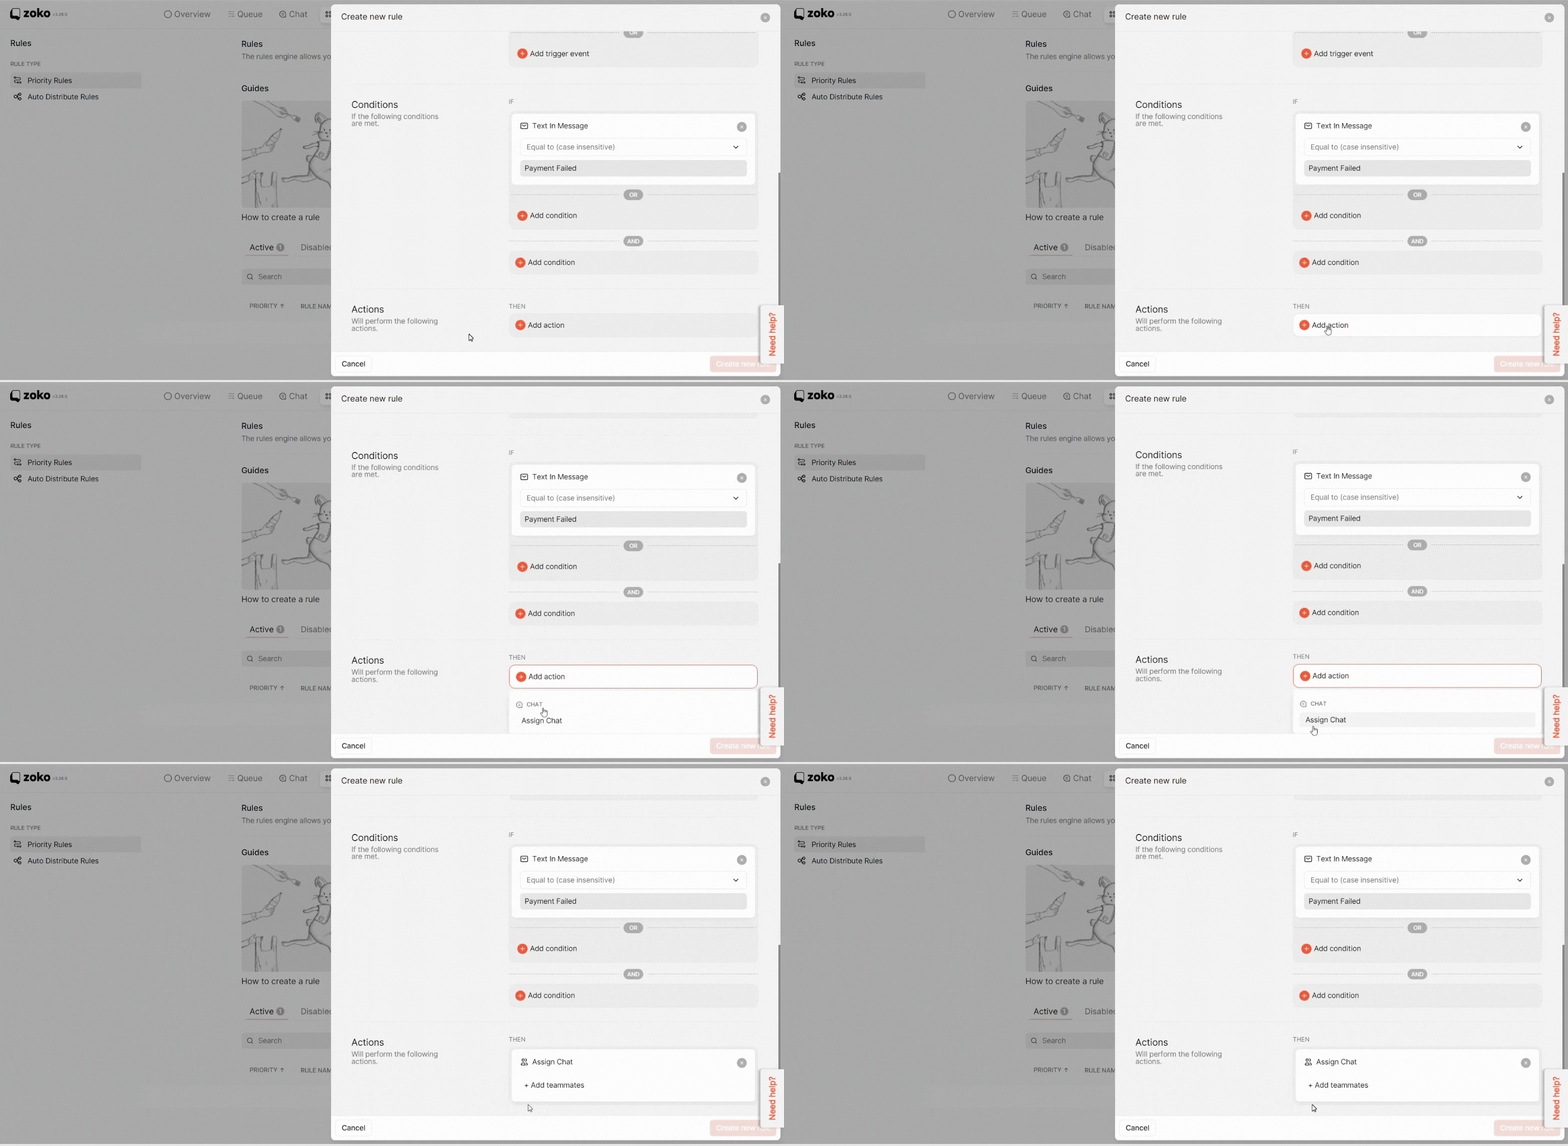
9. Click on Add teammates to select the agent or team.
Note: You can add only 1 agent or team per priority rule.)
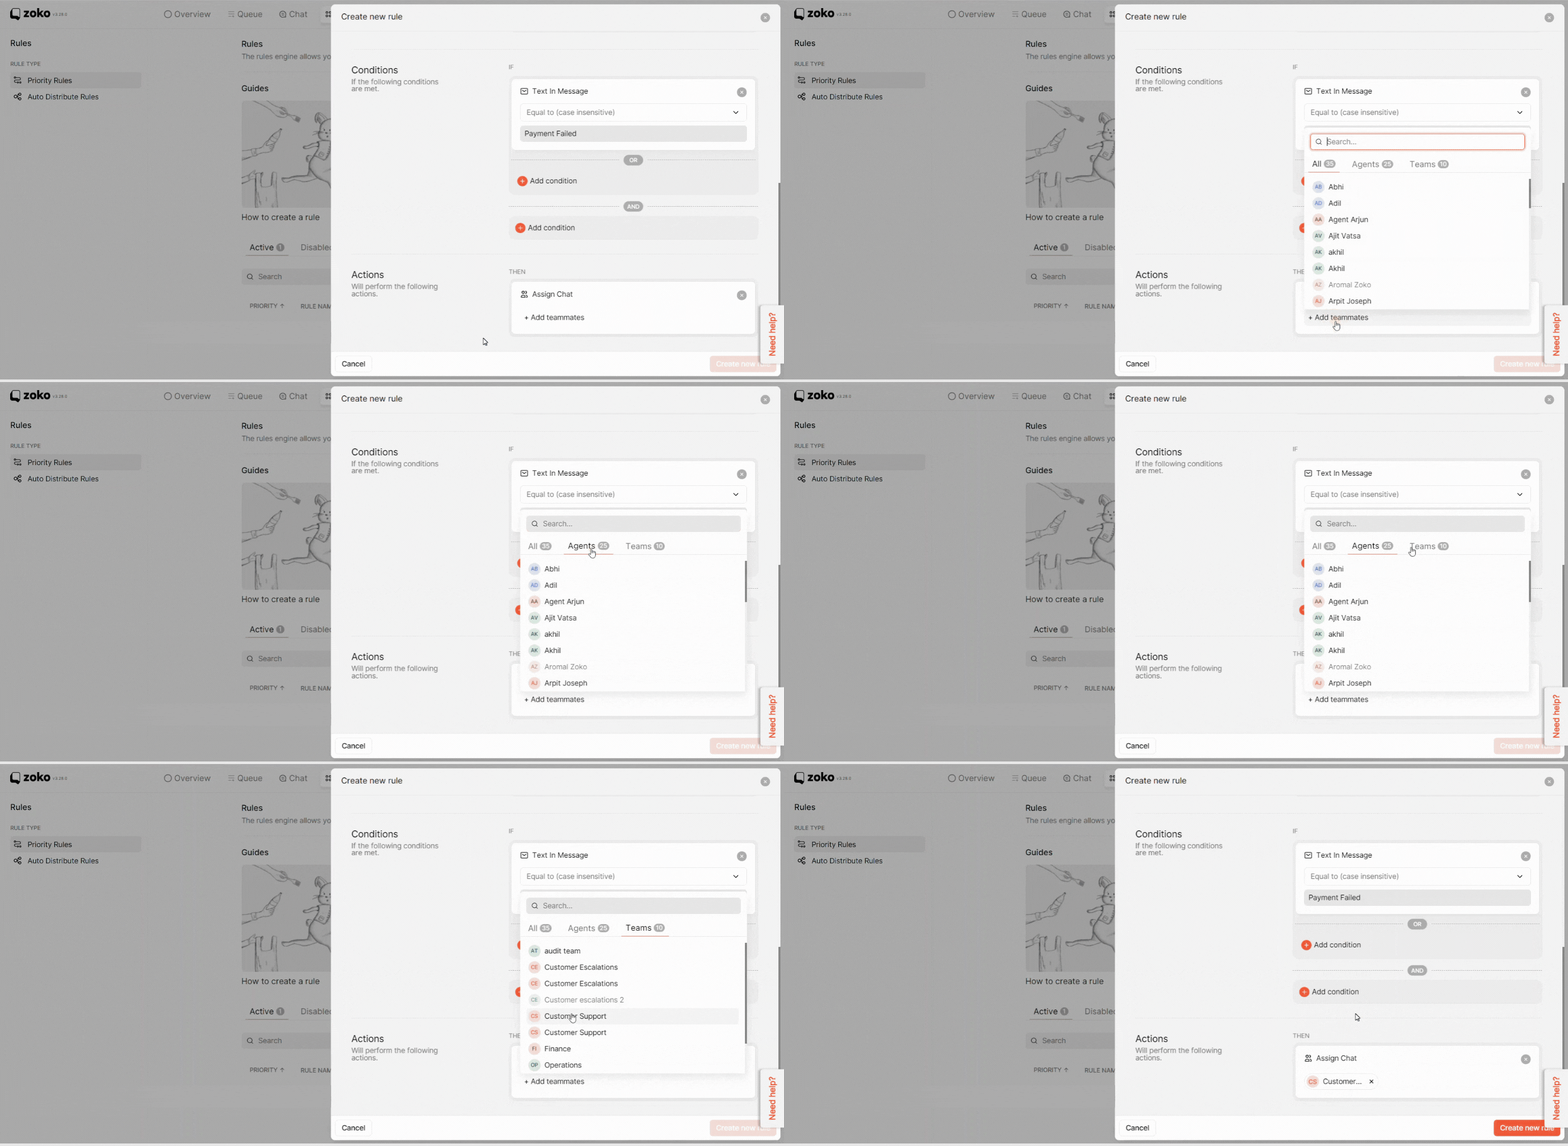
10. Click on Create new rule.
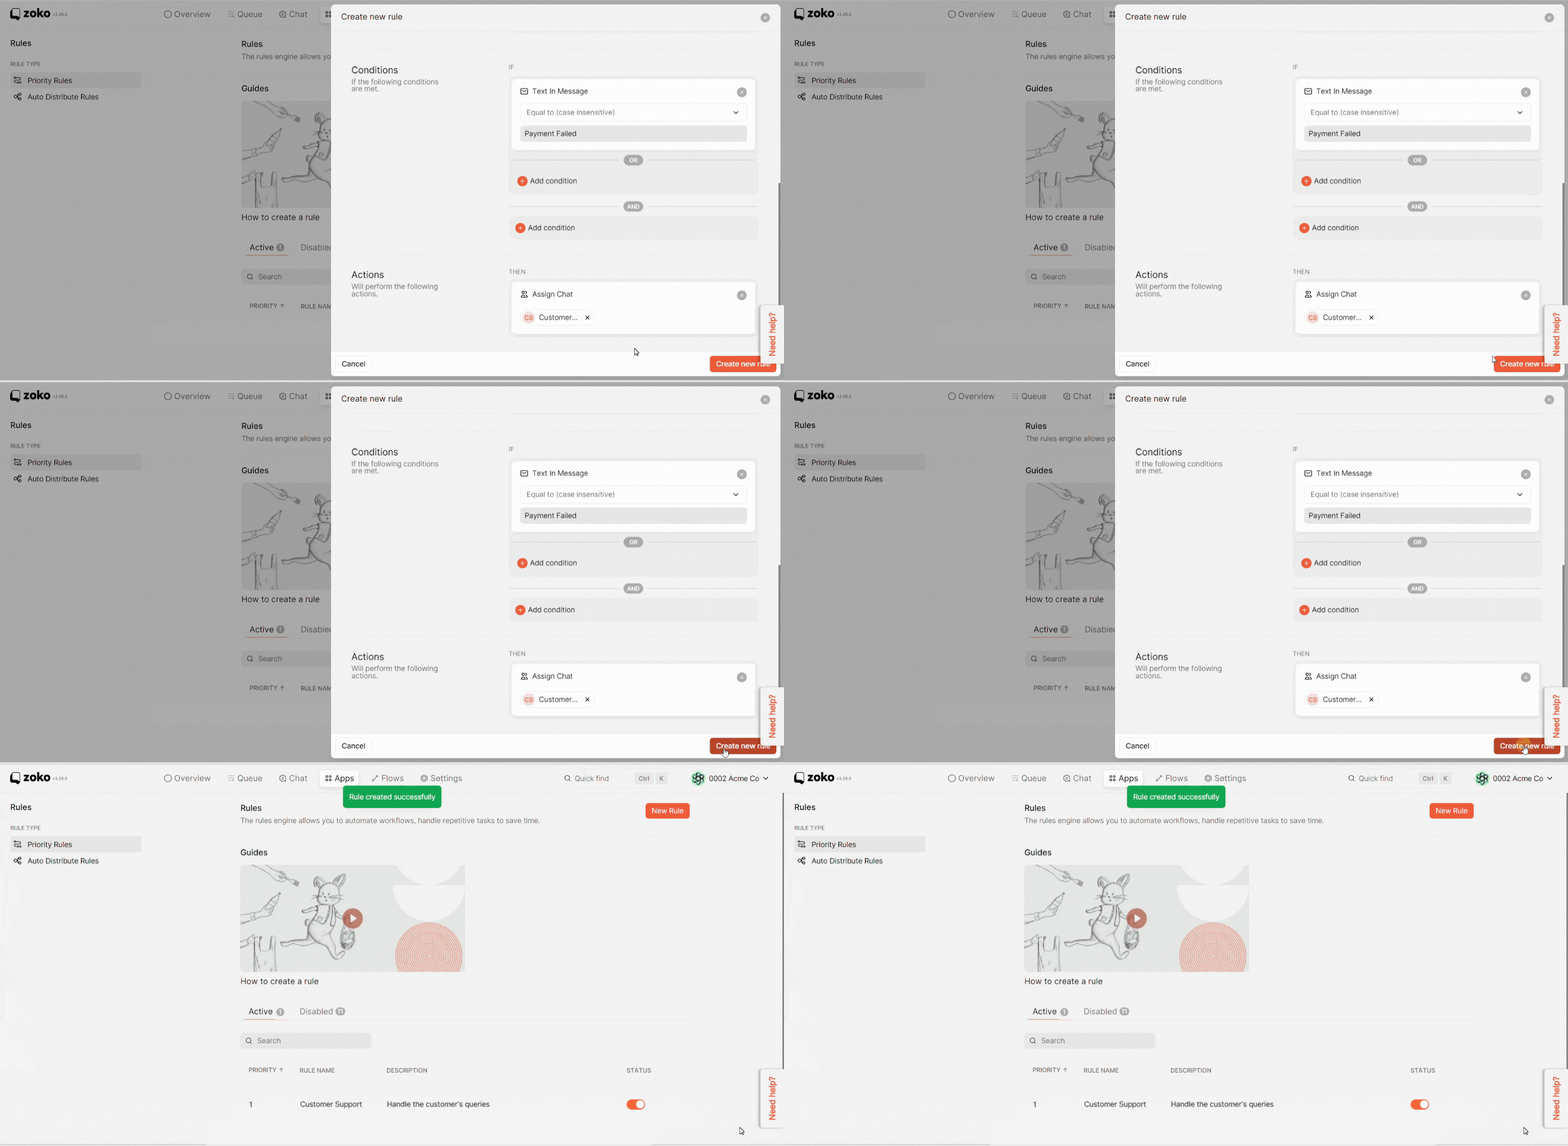
Note: You won't be able to delete the rule after it’s created. You will have the option to disable the rule by clicking on toggle vector.
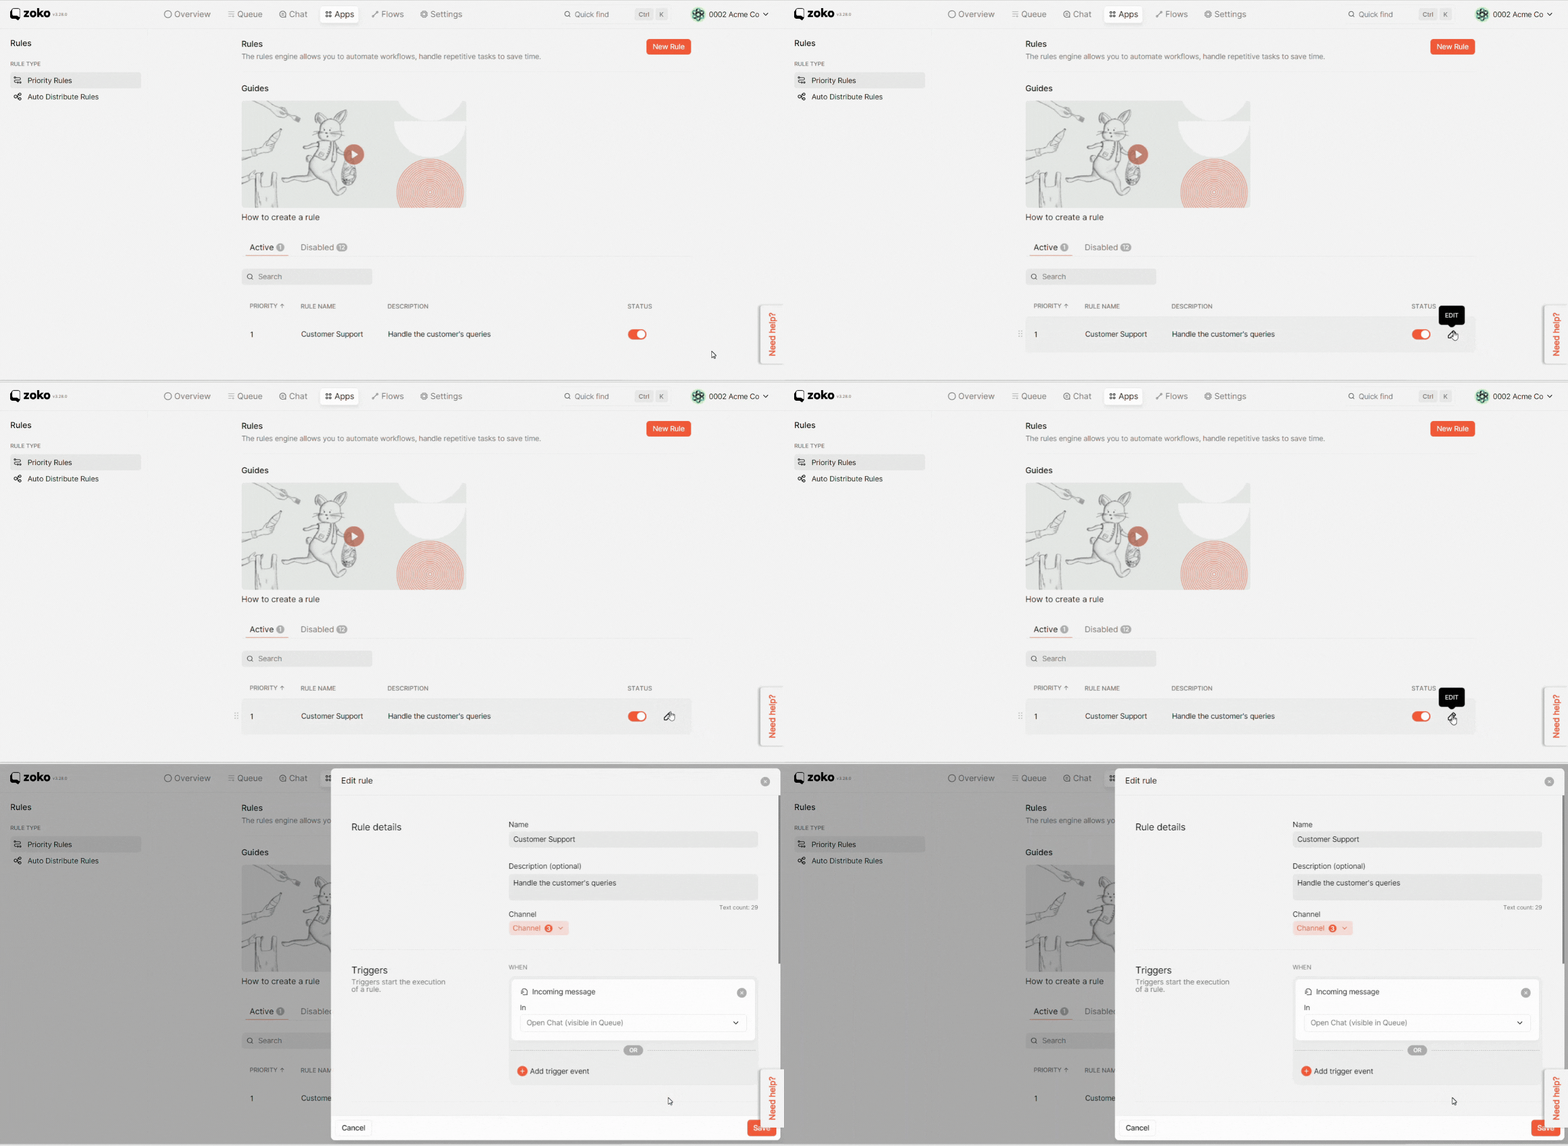
11. You can also edit the rule by hovering over it and clicking the Edit icon.
Keywords: Auto assign chat, Priority rule, Incoming chat, Routing rules, Chat routing.


.png)