

How to Create a Template
Learn how to create and submit a WhatsApp template for approval.
Share on WhatsApp
.png)
Templates are pre-approved messages that can be sent to customers outside the 24-hour customer service window. A template can include text with variables, media attachments, and buttons, making customer interactions more engaging and efficient.
Once created, all templates are reviewed and approved by WhatsApp before they can be used.
To do this:
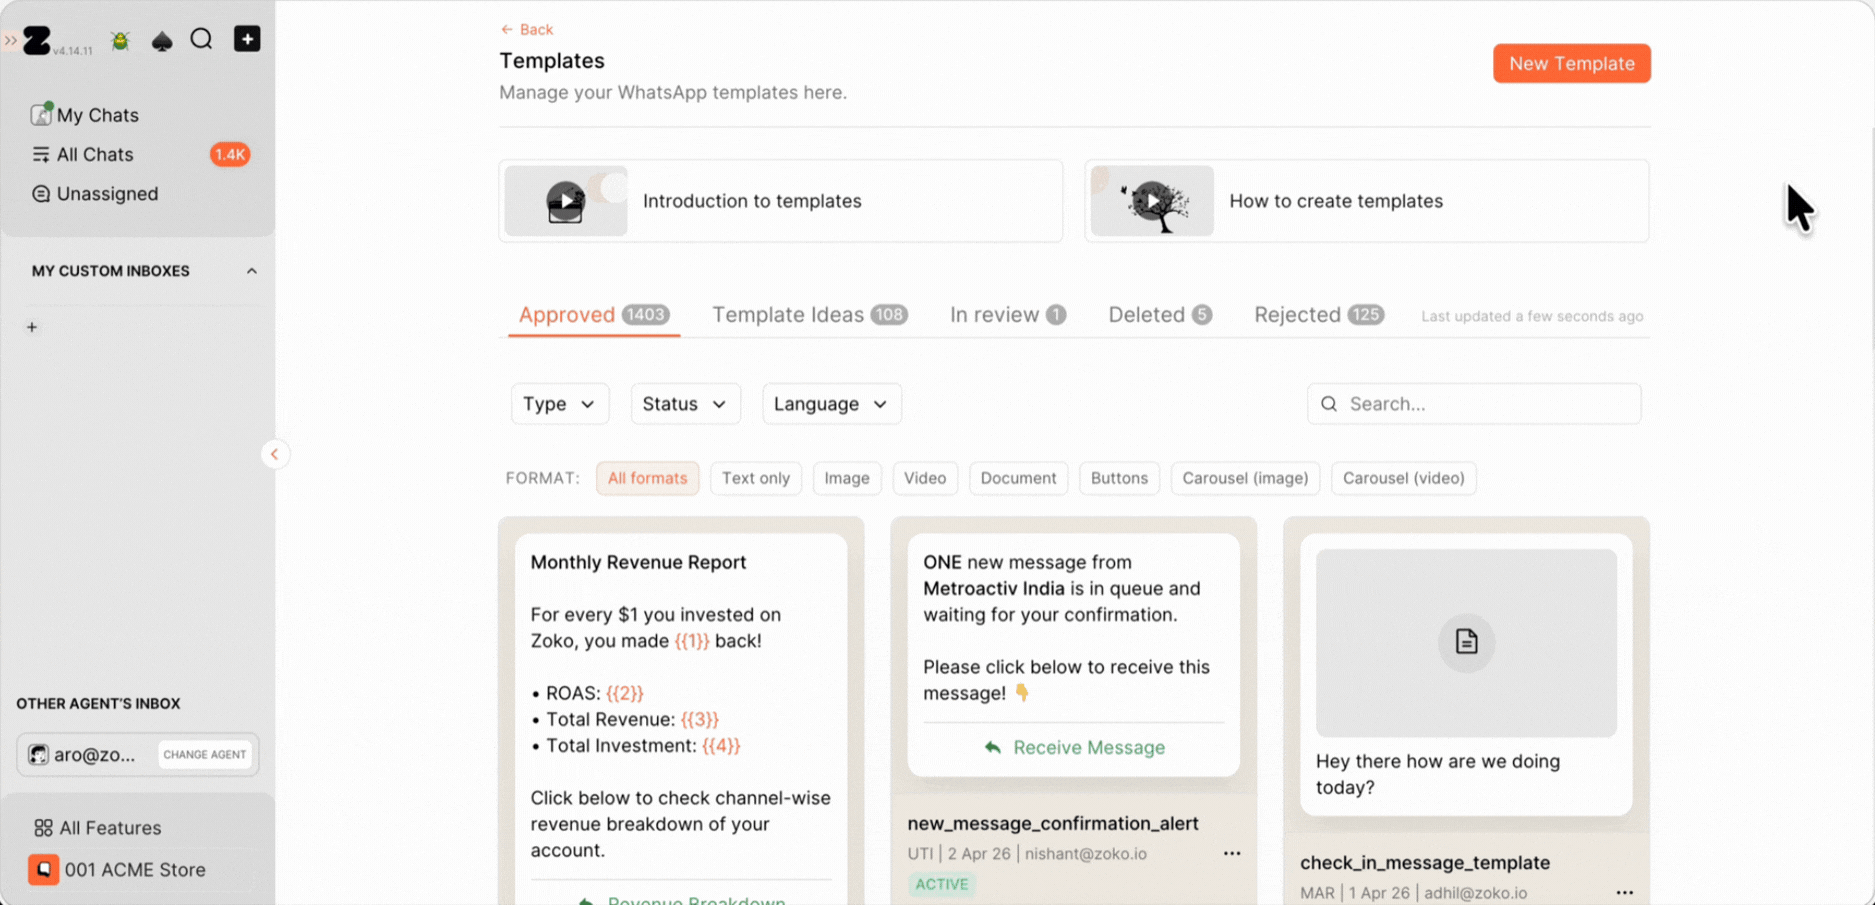
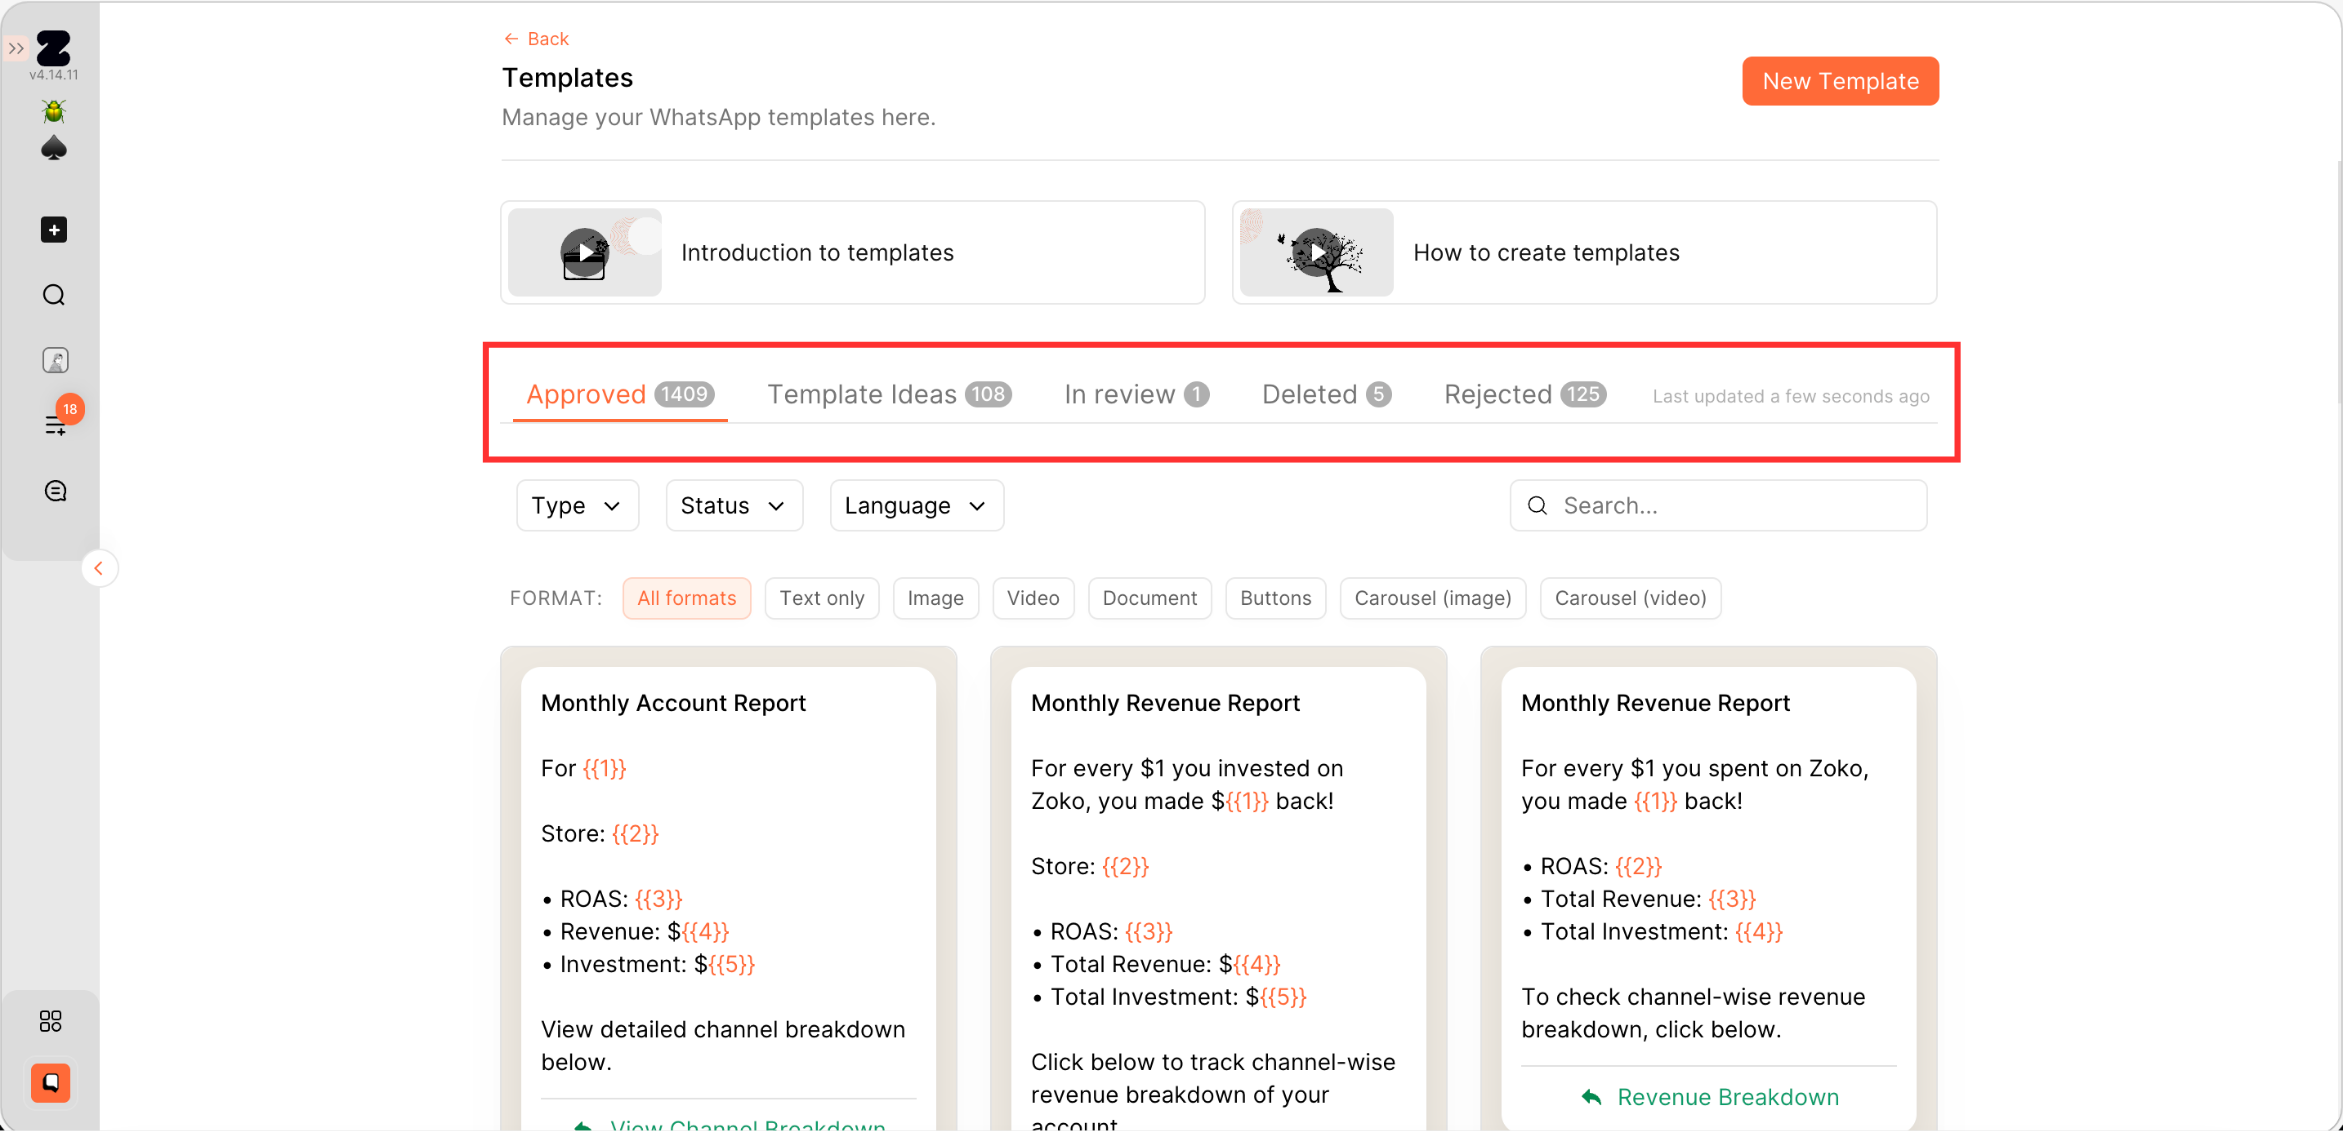
1. Go to All Features and click on Templates.

2. You can use pre-built templates by going to Template Ideas. Choose one based on your use case and modify it if needed.
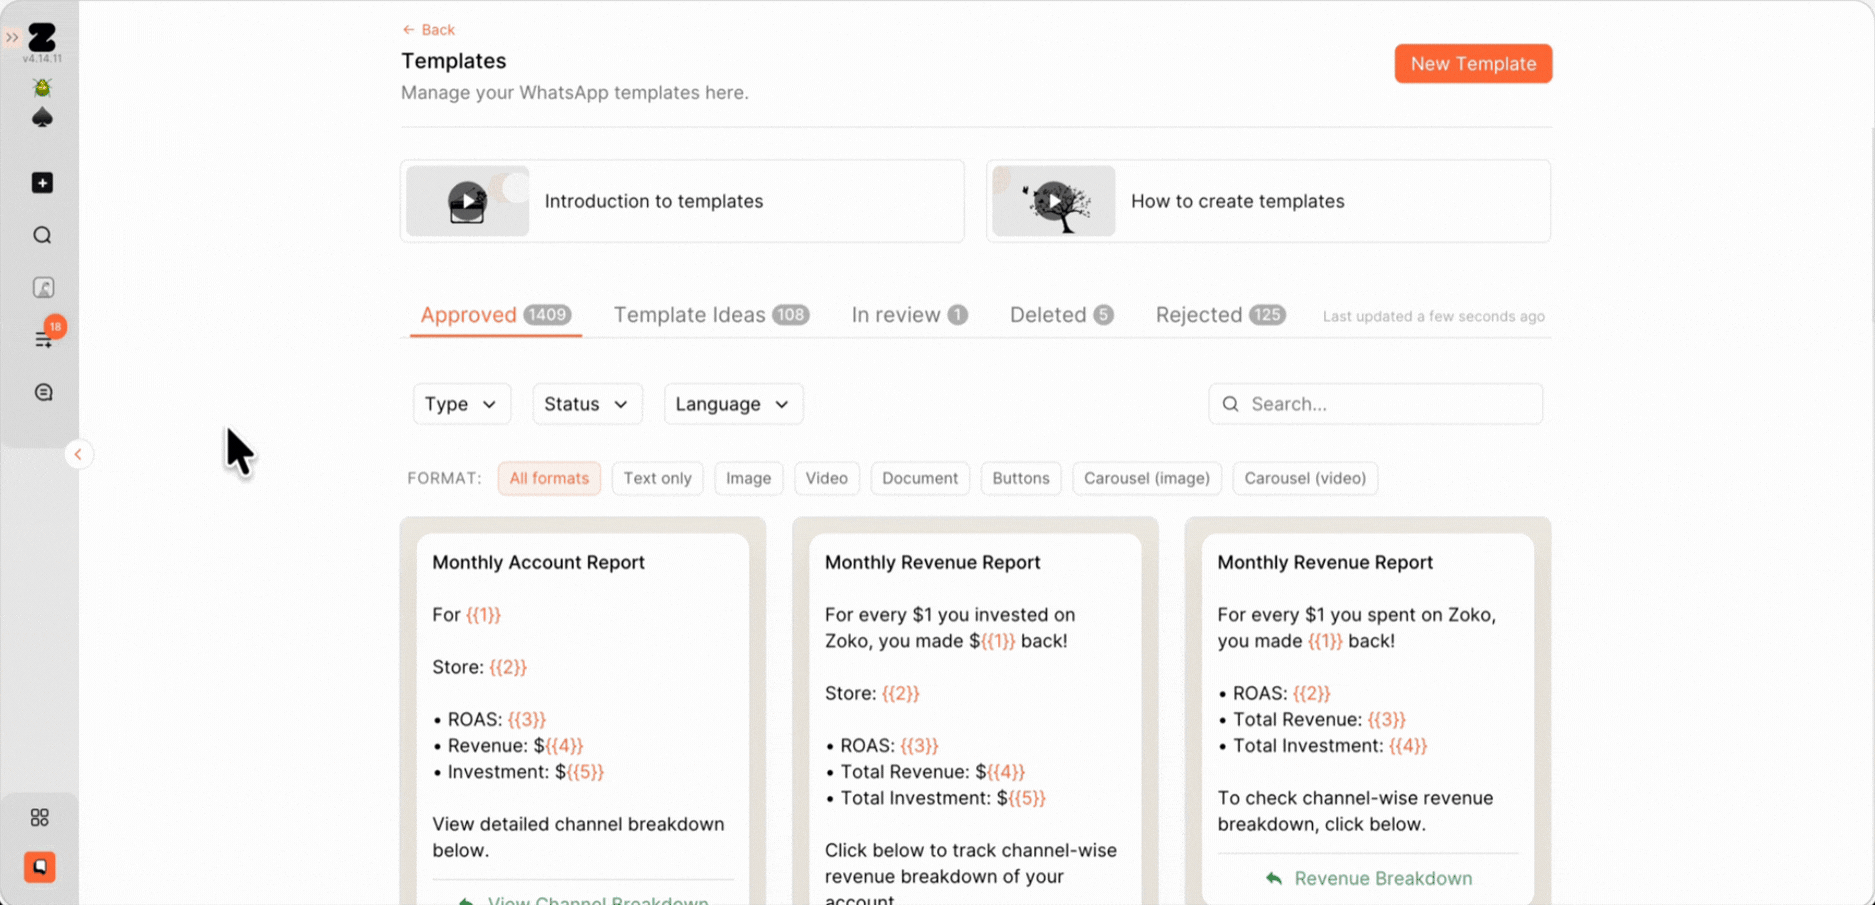
3. If you prefer to create your own, click on New Template.
4. Add Media (Optional): You can enhance your template by adding media such as:
- Image: Use to showcase products or visual content.
- Video: Ideal for demos, tutorials, or promotional content.
- Document: Useful for sharing invoices, receipts, or PDFs.
- Location: Share store locations or event venues.
- Image Carousel: Display multiple images in a single message.
- Video Carousel: Display multiple videos in a single message.
Choose the media type that best fits your use case.
Refer to our article: Aspect Ratio for Images Template.
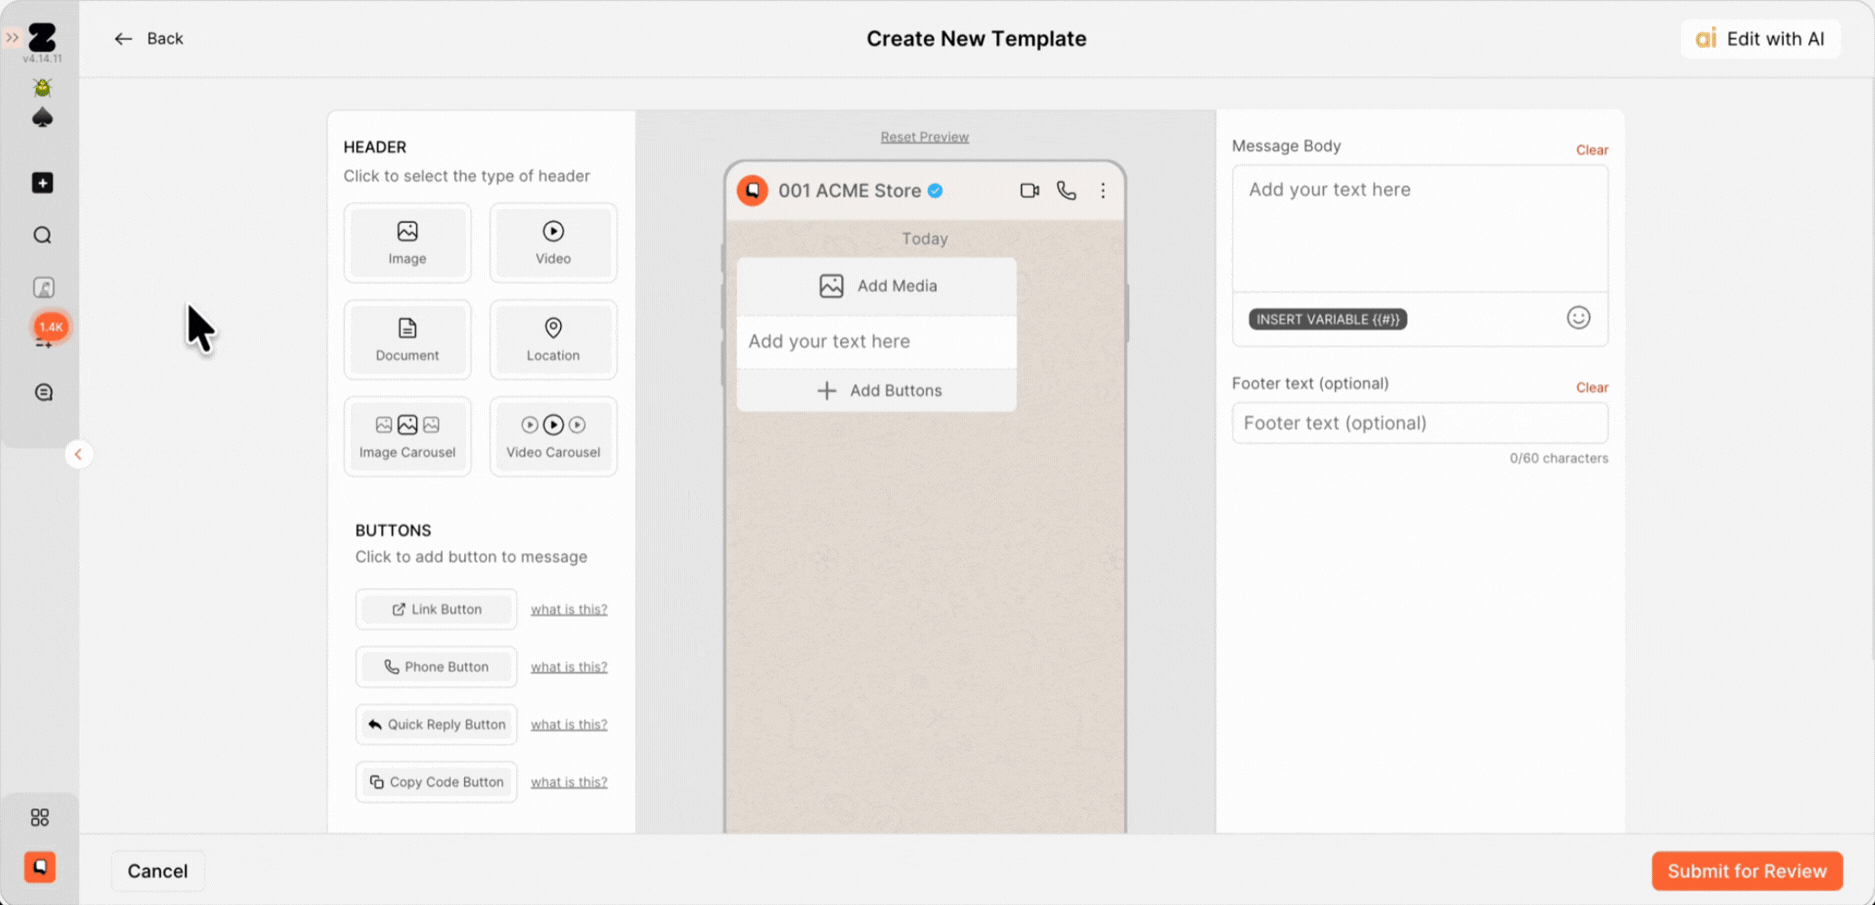
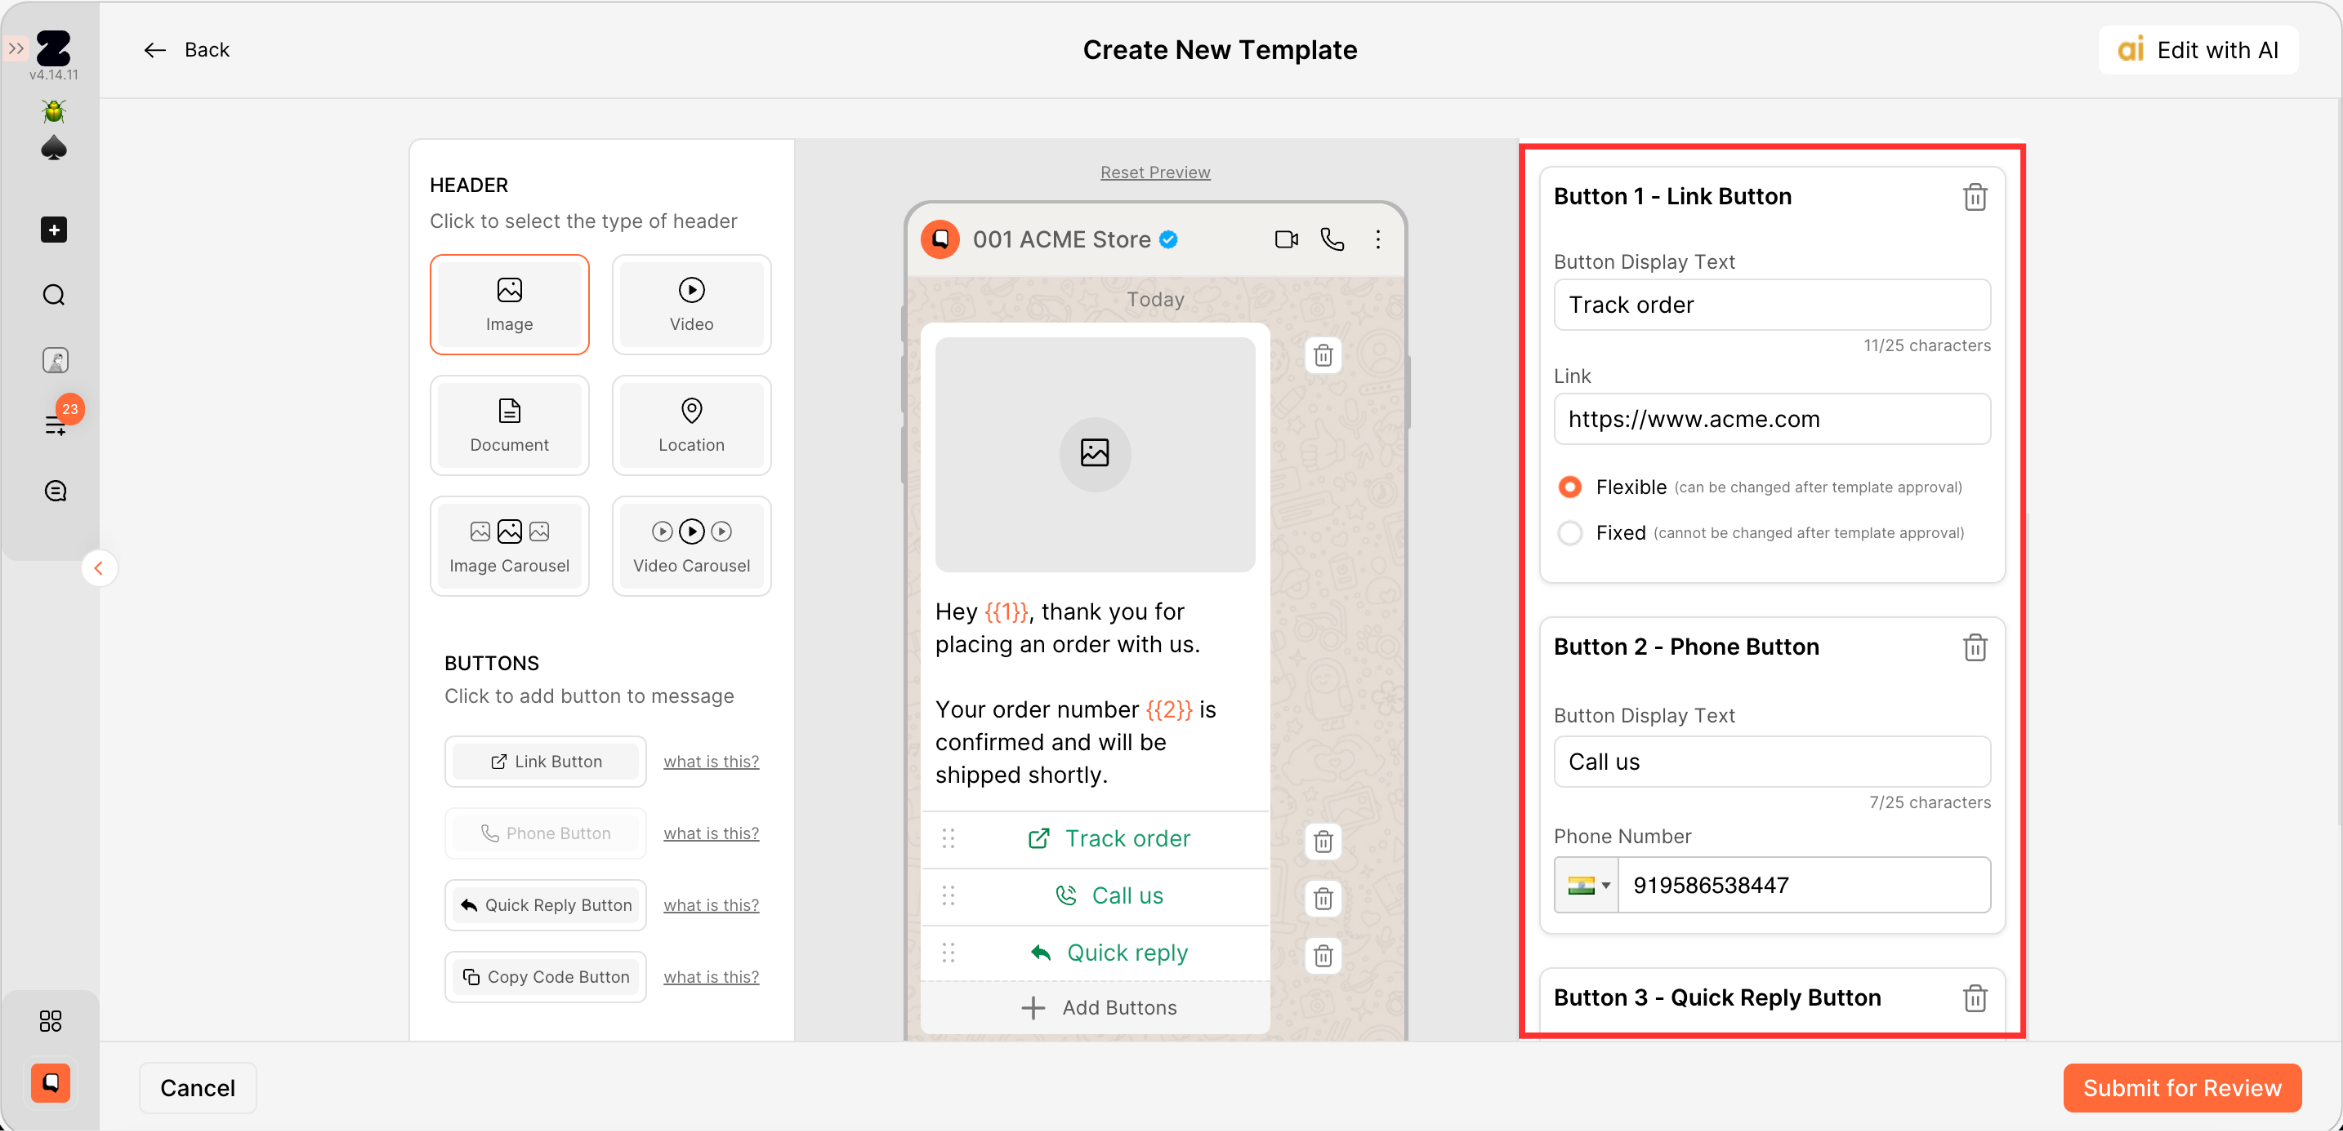
5. Add Buttons (Optional): Enhance your template with buttons:
- Link: Takes users to a specific website or page.
- Phone Number: Allows users to call your business directly.
- Quick Reply: Lets users respond quickly with predefined options like Yes, No, or Interested. If automation is set up, responses can be handled automatically.
- Copy Code: Allows users to copy a code, such as a discount or referral code, with a single tap.

6. You can upload a sample image here for approval.
Pro tip: You can skip this step, as the system will automatically add a sample image. After approval, you can use any image you want
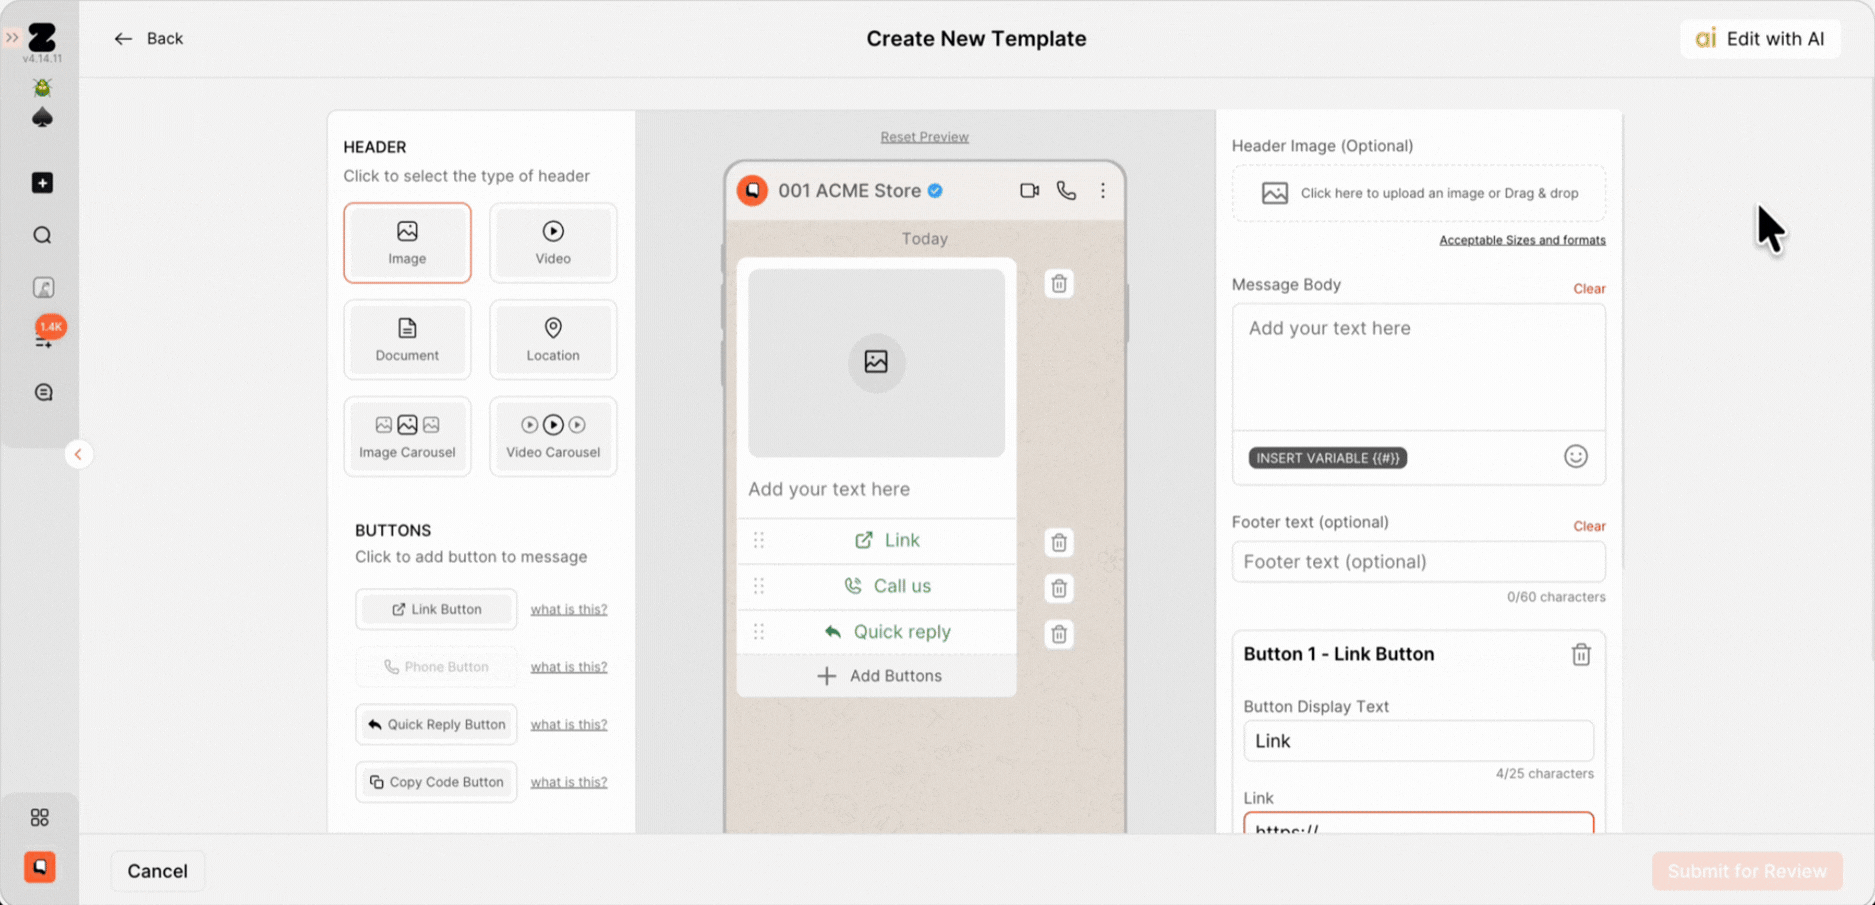
7. Type the details in the Body Text:
- Type your content/message in the field.
- Add variables ({{1}}, {{2}}) to personalize the message.
Pro Tip: Hover over the variable button to quickly insert a variable.
You can also use formatting options like bold, italic, strikethrough, and monospace. Refer to our article on how to add formatting in text for better understand.
Example with Variables: Hey {{1}}, thank you for placing an order with us. Your order number {{2}} is confirmed and will be shipped shortly.
When the message is sent, the variables are replaced with actual values: Hey Sam, thank you for placing an order with us. Your order number 1234 is confirmed and will be shipped shortly.
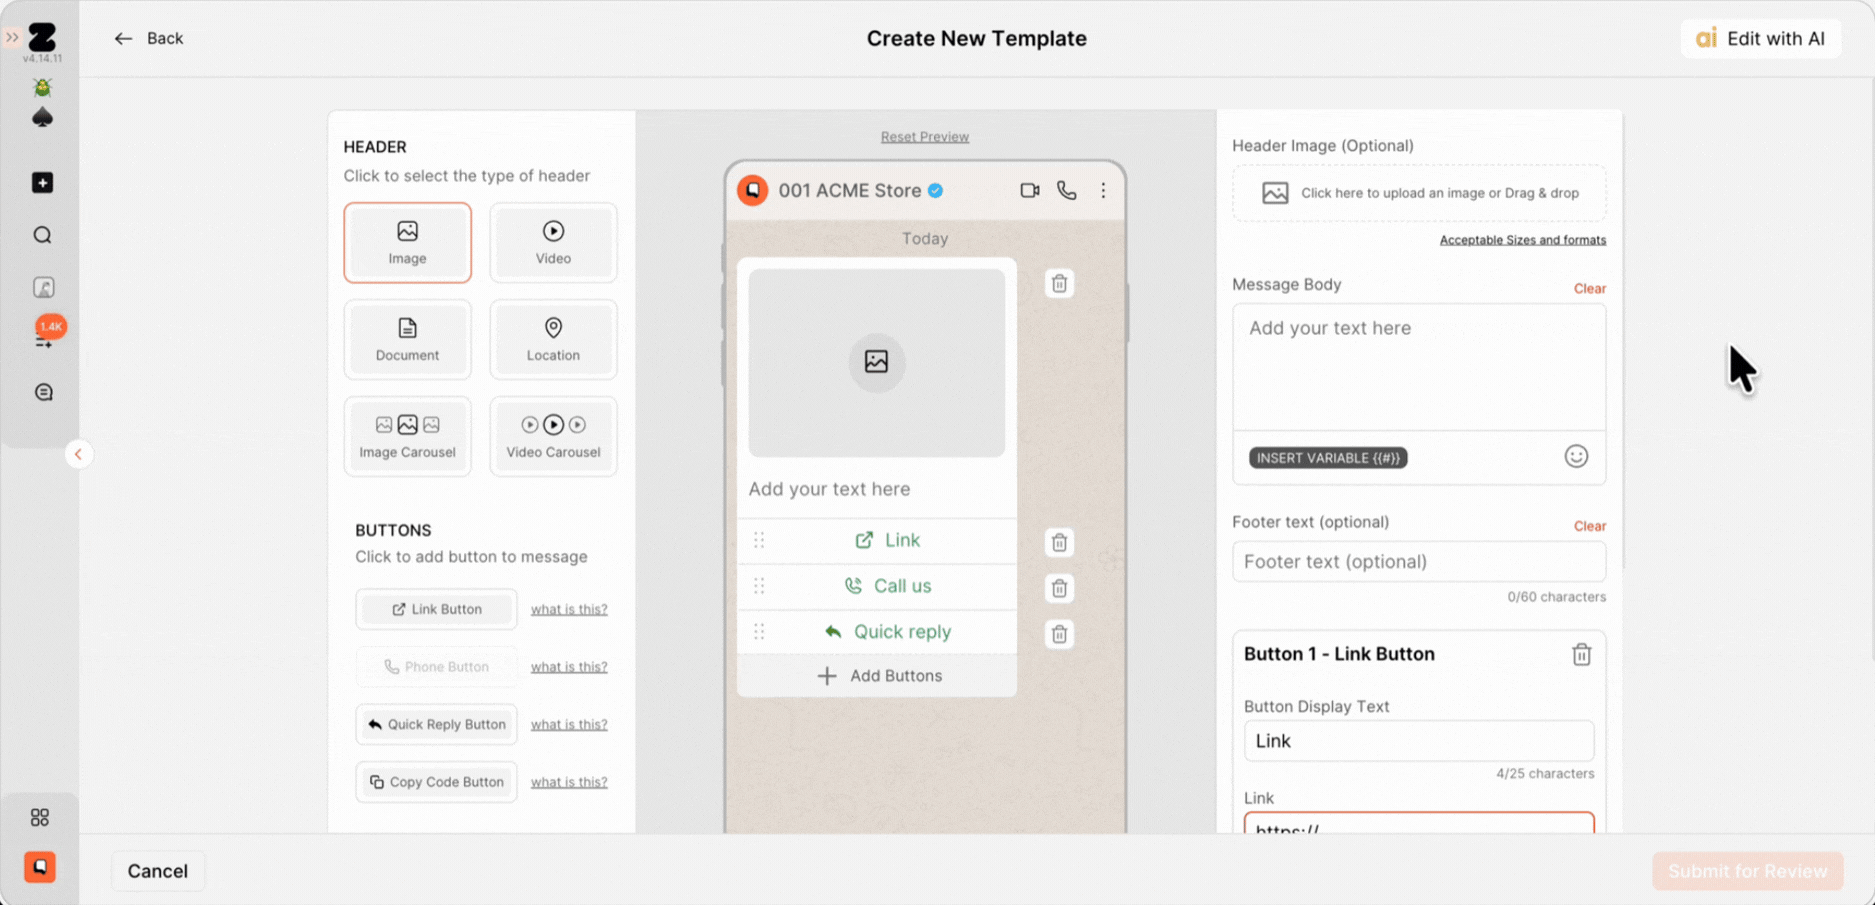
8. You can optionally add footer text to include additional context or a disclaimer.

9. If you add a CTA button, you’ll need to enter details like the button text, link, or phone number.
For link buttons, you’ll see two options: Flexible and Fixed
- Flexible: Allows you to change the link later, so you can send different links to different customers.
- Fixed: Keeps the link the same after approval, so you’ll use the exact link submitted for review.
10. Enter Template Details:
- Category: Choose the right category from the dropdown:
- Utility: Used for transactional messages like order confirmations or subscription updates.
- Marketing: Used for promotional messages like offers, invitations, or welcome messages.
Refer to our article on Guidelines for Utility and Marketing Templates to understand better.
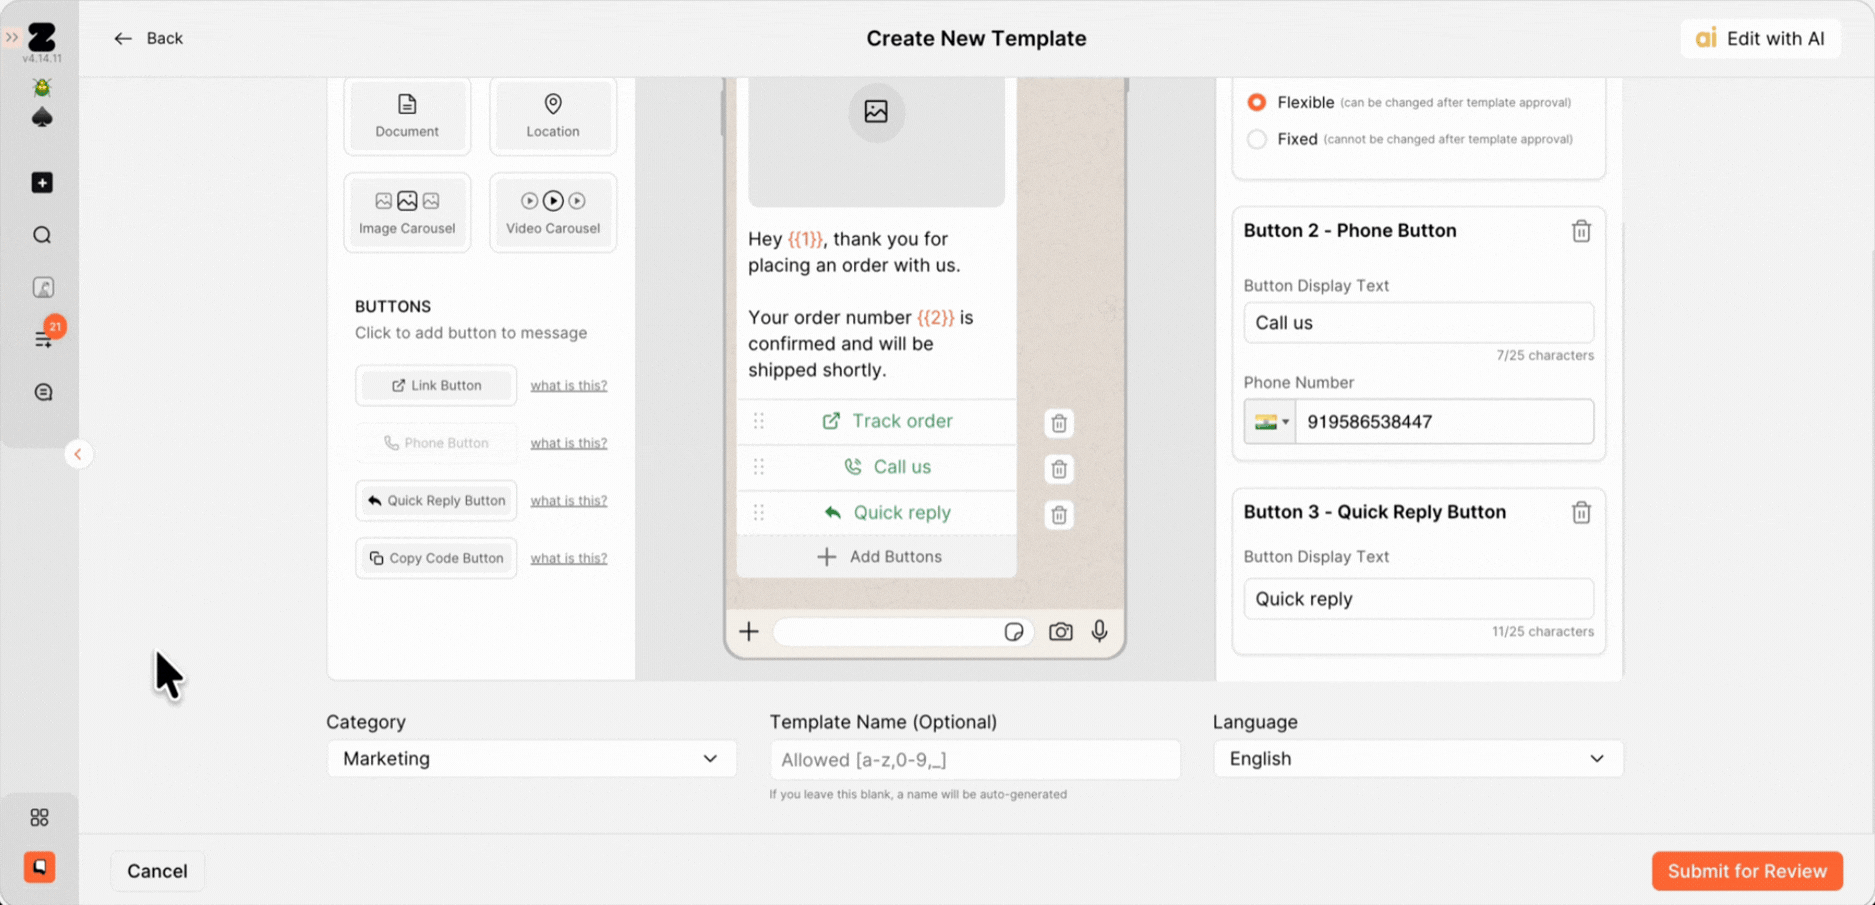
- Template ID: Give your template a clear, descriptive name (e.g., order_confirm_update005) so reviewers understand its purpose.
- Allowed: lowercase letters, numbers, underscores
- Not Allowed: spaces or special characters
Pro tip: You can skip this step, as the system will automatically generate it for you.

- Language: Click on the dropdown to see the list of supported languages, then select the language you want to use for your template. In this case, we will select English (US).
Note - Make sure your template content matches the selected language.

11. Click on Submit for Review.

12. You can find approved, in-review, deleted, and rejected templates here.
Keywords: WhatsApp template, New template, CTA button, Media template, Message template, Personalized messages.